Table of Contents
Advertisement
Quick Links
®
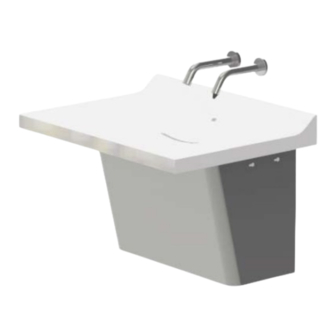
Sundara
Drift Single Basin
Hand Washing System
All goods sold hereunder are warranted to be free from defects in material and factory workmanship for a period of three years from the
date of purchase. Decorative finishes warranted for one year. We will replace at no costs goods that prove defective provided we are
notified in writing of such defect and the goods are returned to us prepaid at Atlanta, GA, with evidence that they have been properly
maintained and used in accordance with instructions. We shall not be responsible for any labor charges or any loss, injury or damages
whatsoever, including incidental or consequential damages. The sole and exclusive remedy shall be limited to the replacement of the
defective goods. Before installation and use, the purchaser shall determine the suitability of the product for his intended use and the
purchaser assumes all risk and liability whatever in connection therewith. Where permitted by law, the implied warranty of merchantability
is expressly excluded. If the products sold hereunder are "consumer products," the implied warranty of merchantability is limited to a
period of three years and shall be limited solely to the replacement of the defective goods. All weights stated in our catalogs and lists are
approximate and are not guaranteed.
WARNING: Cancer and Reproductive Harm -
ADVERTENCIA: Cáncer y daño reproductivo -
AVERTISSEMENT: Cancer et effets néfastes sur la reproduction -
NOTE: The information in this manual is subject to change at any time without notice. Installations may
be performed at different times of construction by different individuals. For this reason, these instructions
should be left on-site with the facility or maintenance manager.
NOTE:
READ ENTIRE MANUAL PRIOR TO INSTALLING PRODUCT.
Zurn Industries, LLC
|
Commercial Brass Operation
511 W. Freshwater Way, Milwaukee, WI U.S.A. 53204 · Ph. 1-855-ONE-ZURN, Fax 919-775-3541
In Canada
|
Zurn Industries Limited
7900 Goreway Drive Unit 10, Brampton, Ontario L6T5W6 · Ph. 905-405-8272, Fax 905-405-1292
www.zurn.com
Z5003.01
Sundara
®
Hand Washing System
Installation, Maintenance,
and Parts Manual
PATENT(S) PENDING
LIMITED WARRANTY
www.P65Warnings.ca.gov
www.P65Warnings.ca.gov
Drift Single Basin
www.P65Warnings.ca.gov
Rev.
-
Date:
1/3/2018
C.N. No.
SAN007500
Form No. FV611
Advertisement
Table of Contents

Related Manuals for ZURN Sundara Z5003.01


Summary of Contents for ZURN Sundara Z5003.01
- Page 1 NOTE: READ ENTIRE MANUAL PRIOR TO INSTALLING PRODUCT. Zurn Industries, LLC Commercial Brass Operation Rev. 511 W. Freshwater Way, Milwaukee, WI U.S.A. 53204 · Ph. 1-855-ONE-ZURN, Fax 919-775-3541 Date: 1/3/2018 In Canada Zurn Industries Limited C.N. No.
-
Page 2: Specifications
Specifications: ® Sundara Drift single basin lavatory system manufactured by Zurn Industries. Lavatory shall be mounted at standard height to conform with ANSI, UFAS, TAS and ADA Accessibility Standards. Counter and integral basin to be constructed of ® Sundara solid surface resin with aluminum trihydrate and other additives conforming to CSAB45.5/Z124 and IGC 156... - Page 3 Z5003.01 Parts List Item Name 1 Basin 2 Shroud Wall Bracket 3 Shroud 4 Mounting (L) Bracket 5 Wall Hanger Bracket Optional (Available only for Retrofit) 6 Grid drain 7 Water Supply Items 8 Drain Adapter Assembly 9 P Trap Assembly 10 Sensor Faucet 11 Soap Dispenser (If Ordered) 12 5/16-18 Screw for Mounting...
- Page 4 Plumbing and Electrical Rough-Ins 5 [124] 1 1 4 [29] 34 [863] 29 1 2 [752] 28 3 4 [733] 29 [735] 1 1 2 [36] 2 1 4 [57] 19 1 2 [493] 7 3 4 [195] 7 3 4 [195] 14 3 4 [378] 16 [404] 2 1 4 [57]...
-
Page 5: Required Tools
L Brackets Installation Drain Adapter Assembly Installation For ease of installation, lay basin on its top surface on a For ease of installation, lay basin on its top surface on a cushioned surface. cushioned surface. Use T25 torx wrench to torque the screws (approximately 4- Use socket wrench to torque the screws (approximately 4-5 5 complete turns and squeeze the gasket, approximately 2- complete turns bottom out approximately 5 ft-lbs of torque). -
Page 6: Installing Mounting Bracket
Wall Stud Retrofitting Hanger Bracket Plywood Installation Hanger Bolt supplied by Bracket installer to attach the plywood to wall studs Recommended for retrofit: • Measure the rough in dimensions on the wall. Top edge of the cutout marked must be 2” below the basin top back edge. -
Page 7: Faucet Installation
Installing with Carrier Option Warning: Must be handled by at least 2 people Avertissement : s’y prendre à deux minimum. Refer to Carrier Rough-in & Installation guide for details. Faucet Installation Refer to faucet installation guide for details. FV611 Rev. - 1/3/2018 Page 7... - Page 8 Soap Dispenser Installation Install the soap spout on right or left as applicable. Refer to soap dispenser installation guide for details. Soap Dispenser Bracket and Bottle Installation Refer to soap dispenser installation guide for details. FV611 Rev. - 1/3/2018 Page 8...
-
Page 9: Shroud Installation
P Trap Installation & Water Supply Connection to Faucet Connect the tail piece to drain adapter (threaded connection) Adjust the tail piece base on drain outlet on the wall. Grid Drain Installation Shroud Installation: Step 1 Use T10 Torx wrench to attach the grid drain to basin. Torque screws until the screw heads are flushed with the screw pocket of grid drain. - Page 10 Shroud Installation: Step 2 Step 3 • Remove the wall bracket and drill 3/4” holes into the center of the holes previously marked. (Note: For installa- tion with carrier, do NOT drill the two outside holes. For retrofit applications, the two outside holes are recom- mended.) Ensure that wall studs are not immediately •...
- Page 11 Repair Instructions: • Zurn recommends that damages should be repaired by certified solid surface fabricator or repair agents. • Blemishes to the basin surface (such as scratches, burnmarks, and minor chipping) can be repaired by sanding with super- fine(800 or 1000 grit) sand paper and/or maroon Scotch-Brite™ pads and then followed with a low-speed (1500-2000 rpm) polisher with a wool pad and a solid surface cleaner or polish to buff the affected area.
Need help?
Do you have a question about the Sundara Z5003.01 and is the answer not in the manual?
Questions and answers