Table of Contents
Advertisement
Quick Links
Advertisement
Table of Contents

Related Manuals for Kogan Z10 PRO


Summary of Contents for Kogan Z10 PRO
- Page 1 Z10 PRO CORDLESS STICK VACUUM CLEANER KAVACSTV10A...
-
Page 3: Safety And Warnings
Do not use with a damaged cord or plug. If the appliance has been dropped, damaged, left outdoors, dropped into water or is not working as it should, contact Kogan.com. • Do not use outdoors or on wet surfaces. Use only on dry surfaces. - Page 4 • Make sure that all filters are thoroughly dry, and all accessories are free of blockages after routine cleaning. • Use only Kogan brand filters and accessories. Using other brands will void the warranty.
-
Page 5: Battery Pack
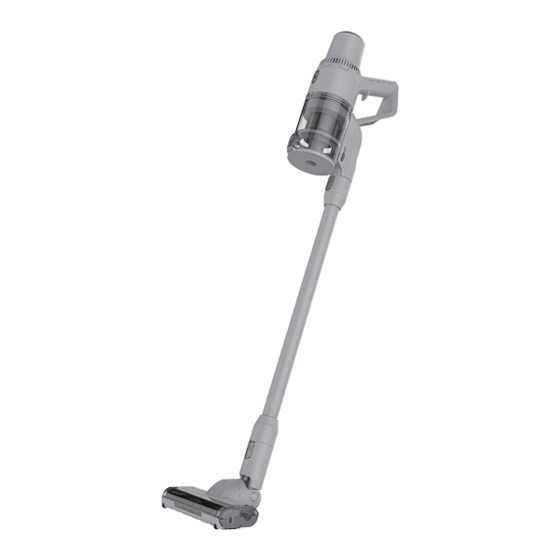
Battery pack • Do not charge the appliance while it is powered on. • Do not charge the power pack at temperatures below 10°C or above 38°C. Charging improperly or at temperatures outside of the specified range may damage the battery and increase the risk of fire. •... - Page 6 OVERVIEW Screen Charging port I Battery pack Wall-mount dock Air outlet Replacement battery Main body (purchased separately) Charging port II Dust cup Dust cup release Dust cup emptying button Accessory dock Wand release button Wand Power switch Mode switch Floor head release Roller release LED lights Floor head...
- Page 7 Battery pack with digital display screen Main body Dust cup Wand Direct-drive LED multi-purpose floor head Crevice tool Dusting brush Wall-mounted dock with screws Power adaptor Upholstery tool...
- Page 8 ASSEMBLY Assembling the main body Accessories will “click” into place when correctly assembled.
- Page 9 Installing and removing the battery pack Battery release button Align with the guide-track groove and then install the battery pack until the “click” sound is heard. To remove the battery pack, press the release button and detach the battery pack. Install the wall-mounted dock Dock mounting height: 85-90cm...
- Page 10 INSTRUCTION Charging the battery Charging mode I Charging mode II The charging dock can charge the vacuum You can also use the adapter to charge the and a second battery (purchased separately) vacuum directly. simultaneously. 4 hours...
- Page 11 Charging with wall-mounted dock Spare battery holder (battery purchased separately) Remove the rubber stopper before first use...
-
Page 12: Operation
OPERATION Filter cleaning alert: Clean the filter when this indicator illuminates. Ignoring this alert may cause loss of suction and fast drainage of the battery. AUTO mode: This sign will illuminate when the vacuum switches to intensive cleaning by detecting heavy dirt. Battery indicator: Shows the remaining capacity of the battery. -
Page 13: Cleaning And Care
CLEANING & CARE WARNING: Hand wash filters with water alone to prevent damage from cleaning chemicals. Allow ALL filters to air-dry completely before replacing them in the vacuum to prevent liquid from being drawn into electric parts. CAUTION: Turn off the power and remove the power pack before servicing. IMPORTANT: Clean the dust screen inside the dust cup as required. - Page 14 Cleaning the dust cup and filters • To clean the dust cup, remove the dust cup from a handheld vacuum and rinse with water. Flush the dirt off as needed. Once dust cup is completely dry, return it to a handheld vacuum. •...
- Page 15 Maintaining the floor head • Release the brush roller by sliding the release button; remove any string, hair or debris that may be wrapped around the brush roller/soft roller by running scissors along with the guide on the roller. • Reinsert the brush roller to the floor head until the release button clicks into place.
- Page 16 Checking for blockages: handheld vacuum, wand, and floor head • Turn off the vacuum and remove the battery. • Remove the wand from the handheld vacuum and check all intake openings. • Remove the floor head from the wand and check the wand for blockages. Disposal This marking indicates that this appliance should not be disposed with other household wastes.
-
Page 17: Troubleshooting
TROUBLESHOOTING WARNING: To reduce the risk of shock and unintended operation, turn off the power and remove the battery before servicing. Problem Possible cause Remedies Charge the battery No power according to the instructions. The appliance does Turn off the appliance, not operate AUTO protection for overheating. -
Page 18: Specifications
SPECIFICATIONS Battery 25.2V 2500mAh Rated power 350W Dust cup capacity 0.5L Charging time 4 hrs Charging output Operating time 15-40 mins Note: The above data has been measured in a controlled environment; the actual performance of the product may vary according to the situation. - Page 19 NOTES...
- Page 20 Need more information? We hope that this user guide has given you the assistance needed for a simple set-up. For the most up-to-date guide for your product, as well as any additional assistance you may require, head online to help.kogan.com...
Need help?
Do you have a question about the Z10 PRO and is the answer not in the manual?
Questions and answers