
Related Manuals for Reolink Duo 4G


Summary of Contents for Reolink Duo 4G
- Page 1 Q S G 1 _ A _ E N Quick Start Guide Apply to: Reolink Duo 4G @ R e o l i n kTe c h h t t p s ://re o l i n k . c o m...
-
Page 2: What's In The Box
Content What's in the Box What's in the Box Camera Introduction Set up the Camera Charge the Camera Camera Antennas Strap Mounting Plate Mounting Hole Install the Camera Template Safety Instructions of Battery Usage Troubleshooting Specifications Notification of Compliance USB Cable Quick Start Guide Surveillance Pack of Screws... -
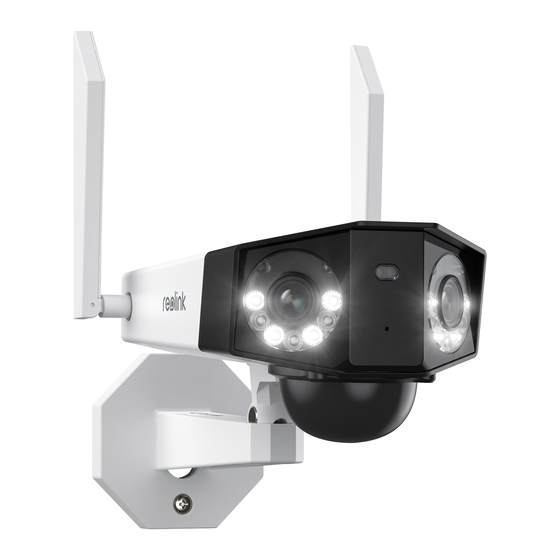
Page 3: Camera Introduction
Camera Introduction Antennas Nano SIM Card Slot * Remove the cover to find the reset hole, SIM card slot and SD card slot. Daylight Sensor Micro SD Card Slot Lens Reset Button * Press the reset button with a PIR Sensor pin to restore factory settings. Infrared Lights Power Switch Spotlights Speaker... -
Page 4: Set Up The Camera
Set up the Camera Activate SIM Card for the Camera • Choose a Nano SIM card that supports WCDMA and FDD LTE. • Some SIM cards have a PIN code. You may use your smartphone to disable the PIN first. NOTE: Do not insert the IoT or M2M SIM into your smartphone. Insert a SIM-eject tool into the hole beside the SIM tray and push it in to pop open the tray. Place the SIM card into the tray, then insert the tray into the camera completely. - Page 5 Then, it will go out. Step 1 Scan to download the Reolink App from the App Store or Google Play store. A blue LED will flash for a few seconds and then go solid before going out. You will hear a voice prompt “Network connection succeeded”, which means the...
- Page 6 The camera will be in Standby failed” to the server. mode and reconnect later. Step 1 Download and install the Reolink Client: Go to https://reolink.com > Support > App&Client. 1. Please check whether the “Data call failed. Please Step 2 Launch the Reolink Client, click the “ ” button, input the UID code of the camera to...
-
Page 7: Charge The Camera
Charge the battery with a power adapter. please always cover the USB charging (not included) port with the rubber plug after charging the battery. θ θ Charge the battery with the Reolink Solar Panel (not included if you only purchase the camera). English English... -
Page 8: Install The Camera
Mount the Camera to the Wall Install the Camera • Install the camera 2-3 meters (7-10 ft) above the ground. This height maximizes the detection range of the PIR motion sensor. • For better motion detection performance, please install the camera angularly. Mounting Height: 2-3 Meters θ... - Page 9 Mount the Camera to Ceiling To get the best field NOTE: The camera can’t be adjusted horizontally when ceiling mounted. Please adjust the camera angle before fixing it. of view, loosen the adjustment screw on security mount and turn the camera. Stiffen the adjustment screw to lock the camera. Drill holes in accordance with the mounting template. Secure the mounting plate to the wall with the upper two screws and hang the camera on it. Then lock the camera in position with the lower screw. English English...
- Page 10 Install the Camera with Loop Strap To get the best field Thread the loop strap through the slots and fasten the strap. It is the most recommended of view, loosen the installation method if you plan to mount the camera to a tree. adjustment screw on security mount and turn the camera.
-
Page 11: Troubleshooting
2. Charge the rechargeable battery with a standard and high-quality DC 5V/9V battery button on. If these won’t work, please contact Reolink charger or Reolink solar panel. Do not charge the battery with solar panels from any other • Charge the battery with a DC 5V/2A brands. -
Page 12: Specifications
Weight (Battery included): 720g (17.1 oz) is connected. against harmful interference in a If these won’t work, please contact Reolink • Consult the dealer or an experienced radio/ residential installation. This equipment Notification of Support https://support.reolink.com TV technician for help. generates uses and can radiate radio frequency energy and, if not installed and Specifications Changes or modifications not expressly used in accordance with the instructions,... - Page 13 Développement économique Canada By using the Product Software that is applicables aux appareils radio exempts embedded on the Reolink product, you Reolink declares that this device is in This product comes with a 2-year limited de licence. L’exploitation est autorisée aux compliance with the essential requirements...
- Page 14 This equipment complies with IC exposure our support team before returning the limits set forth for an uncontrolled environ- products, https://support.reolink.com. ment. The device can be used in portable exposure conditions. This equipment shall be installed and operated with minimum distance 20cm between the radiator &...
Need help?
Do you have a question about the Duo 4G and is the answer not in the manual?
Questions and answers