Table of Contents
Advertisement
Available languages
Available languages
Quick Links
Immer. Sicher. Dicht.
Montageanleitung - MIS40D Membran-Injektionssystem
für Wandstärken 200-900 mm und 900-1200 mm
Installation instructions - MIS40D Membrane injection system
for wall thicknesses 200-900 mm and 900-1200 mm
Instructions de montage - MIS40D Système d'injection à
membrane
brane pour épaisseurs de paroi 200-900 mm et 900-1200 mm
Montagehandleiding - MIS40D Inspuitsysteem met
membranen
voor wanddikten 200-900 mm en 900-1200 mm
Instrukcja montażu - MIS40D Membranowy system iniekcyjny
do ścian o grubości 200-900 mm i 900-1200 mm
Przed rozpoczęciem montażu przeczytaj instrukcję obsługi i przechowuj ją w odpowiednim miejscu!
Vor Beginn der Montage Anleitung lesen und gut aufbewahren!
Read the instructions prior to installation and keep them in a safe place!
Lire les instructions avant le montage et bien les conserver!
Voor het begin van de montage de handleiding lezen en goed bewaren!
www.hauff-technik.de
DE
EN
FR
NL
PL
Advertisement
Chapters
Table of Contents

Subscribe to Our Youtube Channel
Related Manuals for Hauff-Technik MIS40D


Summary of Contents for Hauff-Technik MIS40D
- Page 1 Wandstärken 200-900 mm und 900-1200 mm Installation instructions - MIS40D Membrane injection system for wall thicknesses 200-900 mm and 900-1200 mm Instructions de montage - MIS40D Système d'injection à membrane brane pour épaisseurs de paroi 200-900 mm et 900-1200 mm...
- Page 2 Membran-Injektionssystem MIS40D Art. Nr.: 3030335112 Rev.: 02/2023-07-14...
- Page 3 Membran-Injektionssystem MIS40D Art. Nr.: 3030335112 Rev.: 02/2023-07-14...
- Page 4 Membran-Injektionssystem MIS40D Art. Nr.: 3030335112 Rev.: 02/2023-07-14...
- Page 5 Membran-Injektionssystem MIS40D Art. Nr.: 3030335112 Rev.: 02/2023-07-14...
- Page 6 Verwendung, sofern sie nach Rücksprache mit uns nicht ausdrücklich • Vor dem Einbau der MIS40D müssen vorhandene Ausbrüche ( > 90 mm) der schriftlich bestätigt wurde, übernehmen wir keine Haftung. Die Gewährleistungsbedingungen entnehmen Sie unseren aktuellen AGB (Allge- Wandoberfläche bzw.
- Page 7 • Ausgehärtete Expansionsharzreste nach den geltenden Umweltvorschriften ent- The following instructions are to be observed prior to installa- sorgen (Hausmüll/Gewerbeabfall). tion of the Membrane injection system MIS40D: • Restentleerte Verpackung des Expansionsharzes nach den geltenden Umwelt- vorschriften entsorgen (gelbe Tonne/Sack).
- Page 8 Handheld drills can be used. • 1 x 2-component resin, 150 ml • Before installing the MIS40D, existing breaks (> 90 mm) in the wall surface or The MIS40 1x9-12 for 200-900 mm wall thicknesses includes: paint must be properly restored according to DIN 18533 until an opening dia- •...
- Page 9 à la main est possible. • 1 bande de butyle 290 mm • Avant d'installer le MIS40D les cassures existantes ( > 90 mm) de la surface • 1 flexible de remplissage de résine, 950 mm murale ou la peinture doivent être correctement reconstituées conformément à...
- Page 10 (bijv. Fa. Hilti) leverbaar. Een met de hand geboorde opening is ook mogelijk. de bouwmaterialen overeenkomen met de huidige stand van de techniek. Wij • Voor inbouw van de MIS40D moeten aanwezige beschadigingen ( > 90 mm) aanvaarden geen aansprakelijkheid voor elk andersoortig of verdergaand gebruik, van het wandoppervlak of in de spachtellaag overeenkomstig DIN 18533 weer tenzij dit uitdrukkelijk schriftelijk door ons is bevestigd na overleg.
- Page 11 Wij adviseren de kabel- • 1 2-componentenhars, 150 ml reiniger KRMTX. Tot de leveringsomvang van de MIS40 1x9-12 voor wanddikten 900-1200 mm • Andere toebehoren en informatie vindt u onder www.hauff-technik.nl en in de behoren: technische datasheets. • 1 buitenflens 40 1x9-12 Personeelseisen •...
- Page 12 (np. firmy Hilti). Możliwe jest ręczne wykonanie wiercenia. • 1 szt., łożysko przeciwstawne • Przed montażem MIS40D istniejące wyłomy (> 90 mm) w powierzchni ściany • 1 szt., taśma butylowa, 290 mm lub w powłoce należy odpowiednio naprawić zgodnie z normą DIN 18533, aż...
- Page 13 Membran-Injektionssystem MIS40D • 1 szt., rura, 990 mm • 1 szt., element zaślepiający ścienny wraz z uchwytem promieniowym (składa się z elementu podstawowego i pokrywy), śrubą i kołkiem • 1 szt., żywica 2-składnikowa, 150 ml Zakres dostawy MIS40 1x9-12 do ścian o grubości 200-900 mm obejmuje: •...
-
Page 14: Table Of Contents
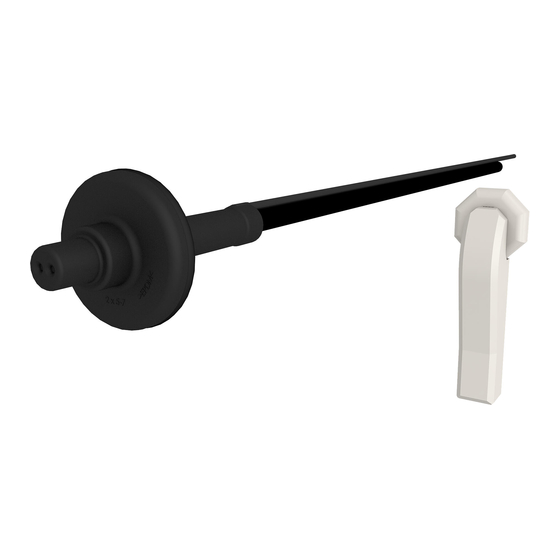
(siehe Abb.: 1). Die Hauff-Schnellverspannvorrichtung MIS40 SVS Hauff-Technik GmbH & Co. KG ist ein wiederverwendbares Montagewerkzeug Abteilung: Technische Redaktion und kann separat über die Fa. Hauff-Technik be- Robert-Bosch-Straße 9 stellt werden (siehe Abb.: 2). 89568 Hermaringen, GERMANY 4 Beschreibung Tel. -
Page 15: Mis40D Montieren
Mischdüse auf die Harzkartusche bis zum Anschlag aufstecken (siehe Abb.: 13). 6 MIS40D montieren Legende zu Abb.: 13 Mischdüse MIS40D von der Gebäudeaußenseite in die Bohrung Harzkartusche einführen. Harzeinfüllschlauch oben anordnen (siehe Abb.: 6). Harzkartusche in die Kartuschenpistole einlegen Legende zu Abb.: 6 (siehe Abb.: 14). -
Page 16: Wandabschlusselement (Zubehör) Montieren
M4x70 in das Rohrende der Medi- enleitungen gesteckt werden (nur bei MIS40 2x5- 11 Abdeckung des Wandabschlusselements einhängen und einrasten (siehe Abb.: 30). MIS40D fertig montiert. 7 Wandabschlusselement (Zubehör) mon- tieren Service-Telefon + 49 7322 1333-0 Das Wandabschlusselement kann nur für Medienleitungen... -
Page 17: Publishing Notes
Create an opening with Ø 40-50 mm (see Fig.: 5). Guidance can either be manual or using a drill stand. For the correct installation of the Membrane injection sys- tem MIS40D the following tools and aids are required in addition to the usual standard tools: Tools: 1 drill with drill bit or drilling tool for opening Ø... -
Page 18: Installing The Mis40D
Key to Fig.: 12 Caps of the resin cartridge Insert the MIS40D into the opening from the outside of the building. Place the resin filler tube above it (see Fit the mixing nozzle onto the resin cartridge as far as Fig.: 6). -
Page 19: Installing The Wall Terminator Element (Accessory)
11 Attach the cover of the wall terminator element and not be guaranteed. snap into place (see Fig.: 30). The MIS40D is fully installed. 18 Guide the media lines through the opening in the seal insert from the outside of the building (see Fig.: 22). -
Page 20: Mentions Légales
Élément de raccordement mural Cette Instructions de montage font partie du produit. Imprimé en République fédérale d’Allemagne. Description : conditions de montage MIS40D (voir fig. : 4) 2 Signification des symboles Légende de la fig. : 4 Côté intérieur du bâtiment Étapes de travail... -
Page 21: Montage Du Mis40D
Bouchons de la cartouche de résine 6 Montage du MIS40D Insérer la buse mélangeuse sur la cartouche de résine MIS40D insertion dans le trou/perçage depuis le côté jusqu’en butée (voir fig. : 13). extérieur du bâtiment. Placer en haut le flexible de remplissage de résine (voir fig. -
Page 22: Montage De L'élément De Raccordement Mural (Accessoires)
être insérée dans l'extrémité des conduites 11 Accrocher et enclencher le couvercle de l'élément de médias (uniq. pour MIS40 2x5-7). raccordement mural (voir fig. : 30). MIS40D monté. 7 Montage de l'élément de raccordement mural (accessoires) Téléphone SAV +49 7322 1333-0 Sous réserve de modifications! -
Page 23: Impressum
3 Benodigd gereedschap en hulpmiddelen harspatroon) Voor de correcte installatie van de Inspuitsysteem met membranen MIS40D hebt u naast het standaardgereed- 5 Montage voorbereiden schap de volgende gereedschappen, hulpmiddelen en ac- cessoires nodig: Opening van Ø 40-50 mm maken (zie afb.5). U kunt... -
Page 24: Mis40D Monteren
De mengkop zo ver mogelijk op de harspatroon ste- ken (zie afb: 13). 6 MIS40D monteren Legenda bij afb.13 Mengkop MIS40D vanaf de buitenkant van het gebouw in de o- Harspatroon pening inbrengen. De harsinvoerslang aan de boven- kant plaatsen (zie afb.6). Harspatroon in het patronenpistool plaatsen (zie Legenda bij afb.6... -
Page 25: Wandrozet (Zubehör) Monteren
11 De afdekking van de wandrozet aanbrengen en vast- klikken (zie afb. 30). 18 De nutsleidingen vanaf de buitenkant van het ge- MIS40D gemonteerd. bouw door de opening van de afdichtinzetstuk steken (zie afb: 22). Servicetelefoon + 49 7322 1333-0 Om het invoeren en stabilseren van de nutsleidin- Wijzigingen voorbehouden. -
Page 26: Stopka Redakcyjna
Rura przepustowa ścienna Instrukcja montażu to integralny element produktu. Element zaślepiający ścienny Wydrukowano w Republice Federalnej Niemiec. 2 Wyjaśnienia dotyczące symboli Opis: Sytuacja montażowa MIS40D (patrz ilustr.: 4) Legenda do ilustr.: 4 Procedura robocza Wewnętrzna strona budynku ► Rezultat czynności roboczej Grubość... -
Page 27: Montaż Mis40D
Legenda do ilustr.: 12 6 Montaż MIS40D Zamknięcia kartuszy z żywicą MIS40D włożyć do otworu od zewnętrznej strony Założyć dyszę mieszającą do oporu na kartusz z budynku. Wąż do napełniania żywicą umieścić u góry żywicą (patrz ilustr.: 13). -
Page 28: Montaż Elementu Zaślepiającego Ściennego (Akcesoria)
11 Zawiesić i zatrzasnąć pokrywę elementu gniazdem sześciokątnym M4x70 do końca rury zaślepiającego ściennego (patrz ilustr.: 30). przewodów medialnych (tylko przy MIS40 2x5-7). MIS40D całkowicie zamontowany. 7 Montaż elementu zaślepiającego ścien- nego (akcesoria) Telefon działu serwisowego + 49 7322 1333-0 Zastrzega się... - Page 29 Notizen / Notes / Remarques / Opmerkingen / Notatki Notizen / N otes / R em arqu es / Opm er king en / Not at ki Art. Nr.: 3030335112 Rev.: 02/2023-07-14...
- Page 30 Notizen / Notes / Remarques / Opmerkingen / Notatki Notizen / N otes / R em arqu es / Opm er king en / Not at ki Art. Nr.: 3030335112 Rev.: 02/2023-07-14...
- Page 31 Notizen / Notes / Remarques / Opmerkingen / Notatki Notizen / N otes / R em arqu es / Opm er king en / Not at ki Art. Nr.: 3030335112 Rev.: 02/2023-07-14...
- Page 32 Hauff-Technik GmbH & Co. KG Robert-Bosch-Straße 9 89568 Hermaringen, GERMANY Tel. +49 7322 1333-0 Fax + 49 7322 1333-999 office@hauff-technik.de www.hauff-technik.de...
Need help?
Do you have a question about the MIS40D and is the answer not in the manual?
Questions and answers