Table of Contents
Advertisement
Quick Links
Unleashed R510 Access Point
Quick Setup Guide
This Quick Setup Guide provides step-by-step instructions
on how to set up your Ruckus Wireless Unleashed R510 Dual
Band 802.11ac Multimedia Wi-Fi Access Point. After
completing the steps described in this Guide, you will be
able to place the Access Point (AP) at your site and provide
wireless network access to users.
T
G
O
L
HIS
UIDE IN
THER
ANGUAGES
请从以下网站获得该指南的简体中文版
•
https://support.ruckuswireless.com.
•
Vous trouverez la version française de ce guide à l'adresse
suivante https://support.ruckuswireless.com.
こ の ガ イ ド の⽇本語版は https://
•
support.ruckuswireless.com
で ご 覧 く だ さ い。
이 가이드의 한국어 버전은 웹 사이트
•
(https://support.ruckuswireless.com) 에서 확인하시기 바
랍니다 .
•
Veja a versão em português (Brasil) deste guia em
https://support.ruckuswireless.com.
•
Puede ver la versión en español (América Latina) de esta
guía en https://support.ruckuswireless.com.
B
Y
B
EFORE
OU
EGIN
Before deploying Ruckus Wireless products, please check for
the latest software and the release documentation.
•
User Guides and Release Notes are available at
http://support.ruckuswireless.com/documents
•
Software Upgrades are available at
http://support.ruckuswireless.com/software
•
Open Source information is available at
http://opensource.ruckuswireless.com
•
Software License and Limited Warranty are available at
http://support.ruckuswireless.com/warranty
Copyright © 2017 Ruckus Wireless, Inc.
Published July 2017, Part Number 800-71384-001 Rev C
P
ACKAGE
•
Unleashed R510 Access Point
•
One wall-mount anchor kit, including two 1" No. 8 steel pan-
head Phillips sheet metal screws, one 5mm M2.5 x 1.06 Torx
security screw, and wall-mount anchors
•
One external T-bar bracket (two unassembled parts)
•
One unit removal pin
•
Regulatory flyer
•
Product warranty statement
•
Declaration of Conformity, if required
•
This Quick Setup Guide
S
1: C
TEP
MENTS
•
A computer running Windows 7 (procedures for other OS's
are similar)
•
Two Cat 5e Ethernet cables
•
No. 2 Phillips screwdriver and T8 Torx driver for wall mount-
ing anchor kit
•
An AC power adapter (sold separately), or
•
an 802.3af or 802.3at -compliant Power over Ethernet (PoE)
switch or PoE injector
•
When mounting the R510 to a truss or pole, two customer-
supplied cable ties
S
2: C
TEP
N
ETWORK
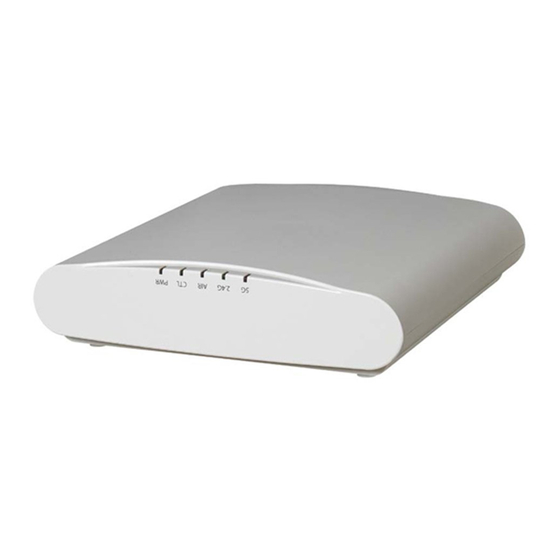
Figure 1: Top view
.
1
After removing your Unleashed AP from its package,
.
connect it to your network switch or router using an
Ethernet cable.
.
2
Using an AC adapter (sold separately), connect the AP
12VDC port to a protected power source.
.
C
ONTENTS
T
S
R
OLLECT
OOLS AND
ETUP
EQUIRE
AP
P
ONNECT THE
TO
OWER AND
•
Alternatively, connect the PoE port to a PoE injector or
PoE switch for both power and network connections.
Note: If you will be using PoE, then you will need a Cat
5e (or better) Ethernet cable to connect the AP to the
PoE injector or switch.
3
Verify that the Power LED on the external enclosure is a
steady green.
Figure 2: Bottom view
-
S
3: C
TEP
ONFIGURE
Unleashed can be deployed using either a Mobile App, available for both iOS and
Android, or using your PC's web browser. Refer to the relevant section depending on
which method you prefer to use:
Step 3a: Setup Using the Unleashed Mobile App
•
•
Y
OUR
Step 3a: Setup Using the Unleashed Mobile App
To perform setup using the Unleashed Mobile App, download the iOS or Android app
from the app store.
1
As soon as the Unleashed AP is powered on and connected
to the local network, it boots up and begins broadcasting a
temporary unencrypted WLAN named "Configure.Me-
[xxxxxx]" from both radios.
2
Using your client's Wi-Fi connection settings, select and
associate to the "Configure.Me-[xxxxxx]" WLAN.
3
Launch the app, and follow the on-screen instructions to
configure your Unleashed network(s).
Y
U
N
OUR
NLEASHED
ETWORK
Page 1 of 4
Advertisement
Table of Contents

Related Manuals for Ruckus Wireless Unleashed R510


Summary of Contents for Ruckus Wireless Unleashed R510
- Page 1 Product warranty statement • Declaration of Conformity, if required • This Quick Setup Guide This Quick Setup Guide provides step-by-step instructions on how to set up your Ruckus Wireless Unleashed R510 Dual 1: C OLLECT OOLS AND ETUP EQUIRE Band 802.11ac Multimedia Wi-Fi Access Point. After...
- Page 2 PTIONAL OUNTING NSTRUCTIONS The Unleashed R510 can be mounted to a T-bar, wall or As soon as the Unleashed AP is powered on and connected to the local network, it boots up and begins broadcasting a ceiling a using the enclosed mounting kits. Refer to the temporary unencrypted WLAN named “Configure.Me-...
- Page 3 Fasten the R510 to the truss or pole using the cable Note: The built-in mounting clips on the bottom of the AP ties. are designed to accommodate 15/16 T-bar widths only. Page 3 of 4 Copyright © 2017 Ruckus Wireless, Inc. Published July 2017, Part Number 800-71384-001 Rev C...
- Page 4 Mounting Template Page 4 of 4 Copyright © 2017 Ruckus Wireless, Inc. Published July 2017, Part Number 800-71384-001 Rev C...
Need help?
Do you have a question about the Unleashed R510 and is the answer not in the manual?
Questions and answers