Advertisement
Available languages
Available languages
MASTER FORGE and logo design are trademarks or
registered trademarks of LF, LLC. All rights reserved.
WARNING
FOR YOUR SAFETY:
DO NOT LEAVE THIS APPLIANCE UNATTENDED
WHILE IN USE, ESPECIALLY COOKING THE FAT-
TY MEAT AND CLOSE THE LID TOO LONG TIME.
WARNING
FOR YOUR SAFETY:
For Outdoor Use Only!
(outside any enclosure)
WARNING
FOR YOUR SAFETY:
Improper installation, adjustment,
alteration, service or maintenance can
cause injury or property damage. Read
this instruction manual thoroughly before
installing or servicing this equipment.
WARNING:
This product can expose
you to chemicals including carbon
monoxide and soot, which are known to
the State of California to cause cancer
and birth defects or other reproductive
harm.For more information go to
www.P65Warnings.ca.gov.
DANGER
Never operate this appliance unattended.
ATTACH YOUR RECEIPT HERE
Serial Number
Questions, problems, missing parts? Before returning to your retailer, call our
customer service department at 800.963.0211, 8 a.m. - 8 p.m., EST, Monday -
Sunday. You could also contact us at partsplus@lowes.com.
AS22431
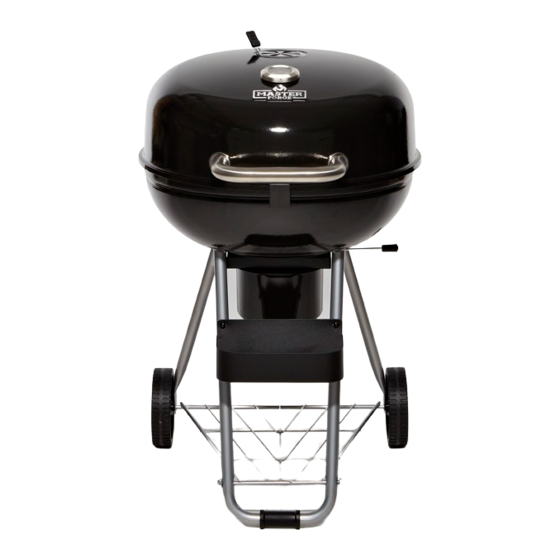
22-IN PORTABLE KETTLE GRILL
•
Do NOT store or use gasoline or other
flammable liquids or vapors in the vicinity
of this or any other appliance.
•
When cooking with oil/grease, do not allow
the oil/grease to exceed 350ºF (176.5ºC).
Do not store or use extra cooking oil in the
vicinity of this or any other appliance.
Purchase Date
MODEL#CBC23043L
WARNING
CBC23043L-RA-ES-OM-F100
ITEM#5139534
Español p.17
Advertisement
Table of Contents

Related Manuals for Master Forge CBC23043L


Summary of Contents for Master Forge CBC23043L
- Page 1 ITEM#5139534 22-IN PORTABLE KETTLE GRILL MODEL#CBC23043L Español p.17 MASTER FORGE and logo design are trademarks or registered trademarks of LF, LLC. All rights reserved. WARNING FOR YOUR SAFETY: DO NOT LEAVE THIS APPLIANCE UNATTENDED WHILE IN USE, ESPECIALLY COOKING THE FAT- TY MEAT AND CLOSE THE LID TOO LONG TIME.
-
Page 2: Table Of Contents
TABLE OF CONTENTS Safety Information ............Page 2 Package Contents . - Page 3 SAFETY INFORMATION W This grill is NOT to be used in or on boats or beneath and around grill to extinguish any recreational vehicles. ashes, coals or embers that may have fallen during the cooking or cleaning process. W Position grill so wind cannot carry ashes to combustible surfaces.
-
Page 4: Package Contents
PACKAGE CONTENTS... -
Page 5: Hardware Contents
PACKAGE CONTENTS Part Description Quantity Part Description Quantity Condiment Holder Lid Handle Lock Left Top Hinge Ash Receiver Slide Right Top Hinge Bottom Air Damper Air Vent Ash Receiver Temperature Gauge Receiver Handle* Bottom Bowl Wheel Leg Left Bottom Hinge Front Leg Right Bottom Hinge Wheel... -
Page 6: Assembly Instructions
ASSEMBLY INSTRUCTIONS Step 1: Attach Lid Handle and Air Vent Attach the lid handle (B) onto the lid (A) with two M6x12 screws (CC), Ø6x22 large washers (GG) and Ø6 lock washers (HH). Attach the air vent (E) onto the lid (A) with one M5x10 step screw (BB), Ø5 washer (EE) and M5 wing nut (II). - Page 7 ASSEMBLY INSTRUCTIONS Step 3: Attach Bottom Hinges and Lock Attach the left bottom hinge (H) and right bottom hinge (I) onto the bottom bowl (G) with four M6x12 screws (CC) and Ø6 washers (FF). Attach the lock (N) onto the bottom bowl (G) with two M5x8 screws (AA) and Ø5 washers (EE).
- Page 8 ASSEMBLY INSTRUCTIONS Step 5: Attach Front Leg Align the holes in one front leg (T) and bottom bowl (G). And then attach it onto the bottom bowl (G) with two M6x12 screws (CC), Ø6 washers (FF) and M6 nuts (KK). Hardware Used M6x12 Screw...
- Page 9 ASSEMBLY INSTRUCTIONS Step 7: Attach Leg Connector and Front Leg Connect the front legs (T) with the leg connector (V). Align the holes in the other front legs (T) and bottom bowl (G). And then attach it onto the bottom bowl (G) with two M6x12 screws (CC), Ø6 washers (FF) and M6 nuts (KK).
- Page 10 ASSEMBLY INSTRUCTIONS Step 9: Attach Bottom Air Damper Remove the handle from the bottom air damper (P). Pass the rod of the bottom air damper (P) through the ash receiver slide (O) and then attach it onto the bottom bowl (G) with one M5x10 step screw (BB), Ø5 washer (EE) and M5 wing nut (II).
- Page 11 ASSEMBLY INSTRUCTIONS Step 11: Place Lid onto Bottom Bowl Align the holes in the left top hinge (C), right top hinge (D), left bottom hinge (H) and right bottom hinge (I). Then insert the Ø5x45 pins (MM) and Ø1.4x38 cotter pins (NN). Hardware Used Ø5x45 Ø1.4x38...
- Page 12 ASSEMBLY INSTRUCTIONS Step 13: Attach Charcoal Grid and Cooking Grid Put the charcoal grid (L) into place. Put the cooking grid (K) into place. Fix the Ø3 rubber stopper(OO) onto the four ends of warming rack. Hardware Used Ø3 Rubber Stopper Step 14: Attach Ash Receiver Slide the ash receiver into the ash receiver slide.
-
Page 13: Operating Instructions
OPERATING INSTRUCTIONS W CAUTION: Never use charcoal that has been pre-treated with lighter fluid. Use only a high grade plain charcoal, charcoal/wood mixture, lump charcoal or cooking wood. First Use 1. Make sure all labels, packaging and protective films have been removed from the grill. 2. -
Page 14: Care And Maintenance
OPERATING INSTRUCTIONS (CONTINUED) Note: If additional briquettes are needed, remove food from cooking grid and, while wearing protective gloves, remove the cooking grid and place additional briquettes without disturbing the hot coals. Carefully replace cooking grid and food. 7. Allow charcoal to burn out by closing lid and all vents. Except in the case of an emergency, do NOT pour water on hot coals. -
Page 15: Limited Warranty
CARE AND MAINTENANCE (CONTINUED) 2. Wipe surfaces clean with a mild dishwashing detergent or baking soda mixed with water. 3. For stubborn stains, use a citrus-based degreaser and a nylon scrubbing brush. 4. Rinse clean with water. 5. Allow to air dry. Before Storing 1. -
Page 16: Replacement Parts List
REPLACEMENT PARTS LIST Part Description Part# Part Description Part# C2304-010 Condiment Holder C2304-040 Lid Handle C2304-020 Lock C2304-050 Left Top Hinge C1843-030 Ash Receiver Slide C2304-060 Right Top Hinge C1843-040 Bottom Air Damper C1943-110 Air Vent B0105-A01 Ash Receiver C1843-130 Temperature Gauge G2369-040 Receiver Handle*... - Page 17 ARTÍCULO #5139534 PARRILLA TIPO TETERA PORTÁTIL DE 55,88 CM MODELO #CBC23043L MASTER FORGE y el diseño del logotipo son marcas comerciales o marcas registradas de LF, LLC. Todos los derechos reservados. ADVERTENCIA PARA SU SEGURIDAD: NO DEJE ESTE ARTEFACTO SIN SUPERVISIÓN MIENTRAS ESTE EN USO,...
- Page 18 ÍNDICE Información de seguridad ..........Página 18 Contenido del paquete .
- Page 19 INFORMACIÓN DE SEGURIDAD W Esta parrilla NO debe usarse en vehículos recreativos W Con una manguera para jardín, moje completamente ni en botes. la superficie debajo y alrededor de la parrilla para extinguir cualquier ceniza, carbón o brasa que pueda W Coloque la parrilla de manera tal que el viento no pueda haber caído durante el proceso de cocción o de soplar las cenizas hacia superficies combustibles.
- Page 20 CONTENIDO DEL PAQUETE...
- Page 21 CONTENIDO DEL PAQUETE Pieza Descripción Cantidad Pieza Descripción Cantidad Tapa Especiero Manija de la tapa Bloqueo Deslizador del recibidor de Bisagra superior izquierda cenizas Bisagra superior derecha Regulador de tiro inferior Ventila Recibidor de cenizas Medidor de temperatura Mango del recibidor* Fuente inferior Pata con ruedas Bisagra inferior izquierda...
- Page 22 INSTRUCCIONES DE ENSAMBLAJE Paso 1: fije la manija de la tapa y la ventila Coloque la manija de la tapa (B) en la tapa (A) con dos tornillos M6x12 (CC), arandelas grandes Ø6X22 (GG) y arandelas de seguridad Ø6 (HH). Fije la ventila (E) en la tapa (A) con un tornillo de paso M5x10 (BB), una arandela Ø5 (EE) y una tuerca mariposa M5 (II)
- Page 23 INSTRUCCIONES DE ENSAMBLAJE Paso 3: fije las bisagras inferiores y el bloqueo Fije la bisagra inferior izquierda (H) y la bisagra inferior derecha (I) en la fuente inferior (G) con cuatro tornillos M6x12 (CC) y arandelas Ø6 (FF). Fije la cerradura (N) en la fuente inferior (G) con dos tornillos M5x8 (AA) y arandelas Ø5 (EE).
- Page 24 INSTRUCCIONES DE ENSAMBLAJE Paso 5: fije las patas delanteras Alinee los orificios de una pata delantera (T) y de la fuente inferior (G). A continuación, fíjela en la fuente inferior (G) con dos tornillos M6x12 (CC), arandelas Ø6 (FF) y tuercas M6 (KK). Aditamentos utilizados Tornillo M6x12...
- Page 25 INSTRUCCIONES DE ENSAMBLAJE Paso 7: fije el conector de patas y las patas delanteras Conecte las patas delanteras (T) con el conector de patas (V). Alinee los orificios de las demás patas delanteras (T) y de la fuente inferior (G). A continuación, fíjela en la fuente inferior (G) con dos tornillos M6x12 (CC), arandelas Ø6 (FF) y tuercas M6 (KK).
- Page 26 INSTRUCCIONES DE ENSAMBLAJE Paso 9: fije el regulador de tiro inferior Retire el mango del regulador de tiro inferior (P). Pase la varilla del regulador de tiro (P) por el deslizador del recibidor de cenizas (O) y fíjela en la fuente inferior (G) con un tornillo de paso M5x10 (BB), una arandela Ø5 (EE) y una tuerca de mariposa M5 (II).
- Page 27 INSTRUCCIONES DE ENSAMBLAJE Paso 11: coloque la tapa en la fuente inferior Alinee los orificios de la bisagra superior izquierda (C), la bisagra superior derecha (D), la bisagra inferior izquierda (H) y la bisagra inferior derecha (I). Luego, inserte los pasadores Ø5x45 (MM) y los pasadores de chaveta Ø1.4x38 (NN).
- Page 28 INSTRUCCIONES DE ENSAMBLAJE Paso 13: fije la rejilla para el carbón y la rejilla de cocción Coloque la rejilla para el carbón (L) en su lugar. Coloque la rejilla de cocción (K) en su lugar. Fije el tapón de goma Ø3 (OO) en los cuatro extremos de la rejilla para calentar.
- Page 29 INSTRUCCIONES DE FUNCIONAMIENTO W PRECAUCIÓN: no utilice carbón que se haya pretratado con líquido encendedor. Use solo carbón puro, mezcla de carbón y madera, carbón de leña o madera para leña de alta calidad. Primer uso Asegúrese de que se hayan retirado todas las etiquetas, láminas protectoras y de embalaje de la parrilla. Antes de cocinar por primera vez en esta parrilla, manténgala encendida durante al menos 15 minutos con la tapa cerrada para eliminar los aceites de fabricación.
- Page 30 INSTRUCCIONES DE FUNCIONAMIENTO (CONTINUACIÓN) Nota: si necesita briquetas adicionales, saque la comida de la rejilla de cocción y, usando guantes de protección, retire la rejilla de cocción. Coloque briquetas adicionales sin mover las cenizas calientes. Con cuidado, vuelva a colocar la rejilla de cocción y los alimentos. Cierre la tapa y todas las ventilas para permitir que el carbón se queme completamente.
- Page 31 CUIDADO Y MANTENIMIENTO (CONTINUACIÓN) Para las manchas difíciles, use un desengrasante cítrico y una escobilla de nailon. Limpie y enjuague con agua. Deje secar al aire. Antes de almacenar Espere a que la parrilla se enfríe por completo. Limpie todas las superficies. Si almacena la parrilla en el interior, cúbrala y almacénela en un lugar fresco y seco.
- Page 32 LISTA DE PIEZAS DE REPUESTO Pieza Descripción Pieza # Pieza Descripción Pieza # Tapa C2304-010 Especiero C2304-040 Manija de la tapa C2304-020 Bloqueo C2304-050 Deslizador del recibidor de Bisagra superior izquierda C1843-030 C2304-060 cenizas Bisagra superior derecha C1843-040 Regulador de tiro inferior C1943-110 Ventila B0105-A01...
Need help?
Do you have a question about the CBC23043L and is the answer not in the manual?
Questions and answers