Table of Contents
Advertisement
Advertisement
Table of Contents

Subscribe to Our Youtube Channel
Related Manuals for Wacker Neuson HI 770XHD


Summary of Contents for Wacker Neuson HI 770XHD
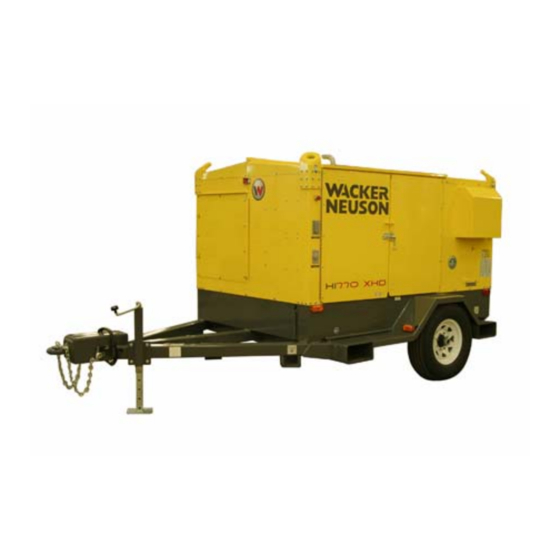
- Page 1 Operator’s Manual IDF Heater HI 770XHD 5200003388 0212...
- Page 2 Copyright notice © Copyright 2012 by Wacker Neuson Production Americas LLC All rights, including copying and distribution rights, are reserved. This publication may be photocopied by the original purchaser of the machine. Any other type of reproduction is prohibited without express written permission from Wacker Neuson Production Americas LLC.
-
Page 3: Foreword
Use the separate Parts Book supplied with the machine to order replacement parts. If you are missing either of these documents, please contact Wacker Neuson to order a replacement or visit www.wackerneuson.com. When ordering parts or requesting service information, be prepared to provide the machine model number, item number, revision number, and serial number. - Page 4 Serious injury hazards to the operator and persons in the work area Permanent damage to the machine which will not be covered under warranty Contact your Wacker Neuson dealer immediately if you have questions about approved or unapproved parts, attachments, or modifications.
-
Page 5: Table Of Contents
HI 770XHD Table of Contents Foreword Safety Information Signal Words Used in this Manual ............9 Machine Description and Intended Use ..........10 Safety Guidelines for Operating the Machine ........11 Safety Guidelines for Operating Combustion Burners ....... 13 Service Safety ..................14 Safety Guidelines for Operating Gensets ........... - Page 6 Table of Contents HI 770XHD 4.14 Installing the Heater Duct ..............49 4.15 Starting the Generator Engine .............50 4.16 Starting and Running the Machine ............51 4.17 Using the Recircul-Air Feature ............53 4.18 Stopping the Machine ................54 4.19 Emergency Stop Procedure ..............56 Accessories Available Accessories .................57...
- Page 7 HI 770XHD Table of Contents Genset Maintenance Periodic Maintenance Schedule ............90 Checking the Engine Oil ..............92 Servicing the Fuel-Water Separator ........... 93 Changing the Engine Oil and Oil Filters ..........94 Replacing the Engine Fuel Filter ............96 Servicing the Radiator ................
- Page 8 Table of Contents HI 770XHD wc_bo5200003388_04TOC.fm...
-
Page 9: Safety Information
HI 770XHD Safety Information Safety Information Signal Words Used in this Manual This manual contains DANGER, WARNING, CAUTION, NOTICE, and NOTE signal words which must be followed to reduce the possibility of personal injury, damage to the equipment, or improper service. -
Page 10: Machine Description And Intended Use
This clean, dry, hot air is then blown into the space to be heated by the centrifugal blower. The HI 770XHD Heaters are intended to provide heat on construction sites and in other rugged applications. -
Page 11: Safety Guidelines For Operating The Machine
To ensure safe operation of the machine: Do not operate the machine if any safety devices or guards are missing or inoperative. Do not modify or defeat the safety devices. Only use accessories or attachments that are approved by Wacker Neuson. wc_si000621gb.fm... - Page 12 Safety Information HI 770XHD Safe When operating this machine: operating Remain aware of the machine’s moving parts. Keep hands, feet, and loose practices clothing away from the machine’s moving parts. When operating this machine: Do not operate a machine in need of repair.
-
Page 13: Safety Guidelines For Operating Combustion Burners
HI 770XHD Safety Information Safety Guidelines for Operating Combustion Burners Burner safety When using the machine: Clean up any spilled fuel immediately. Replace the fuel tank cap after refueling the machine. Refill the fuel tank in a well-ventilated area. DANGER Exhaust gas from the burner contains carbon monoxide, a deadly poison. -
Page 14: Service Safety
Machine When servicing or maintaining the machine: modifications Use only accessories/attachments that are approved by Wacker Neuson. When servicing or maintaining the machine: Do not defeat safety devices. Do not modify the machine without the express written approval of Wacker Neuson. - Page 15 HI 770XHD Safety Information Keep the labels legible. When cleaning the machine: Do not clean the machine while it is running. Never use gasoline or other types of fuels or flammable solvents to clean the machine. Fumes from fuels and solvents can become explosive.
-
Page 16: Safety Guidelines For Operating Gensets
Follow instructions carefully. Should questions arise during operation or service of this equipment, contact your Wacker Neuson dealer. General Keep a multi-class, type ABC or equivalent fire extinguisher at hand when using precautions the genset. - Page 17 HI 770XHD Safety Information Running the Do not start the engine if fuel has spilled or a fuel odor is present. genset Keep the area around the exhaust pipe free of flammable materials. Do not smoke while operating the genset.
-
Page 18: Safety Guidelines For Towing The Machine
Safety Information HI 770XHD Safety Guidelines for Towing the Machine WARNING Risk of severe injury or death. Improper trailer condition and towing technique can lead to an accident. Obey the trailer manufacturer’s instructions and the instructions below to reduce the risk of an accident. -
Page 19: Safety Guidelines For Lifting The Machine
HI 770XHD Safety Information Safety Guidelines for Lifting the Machine When lifting the machine: Make sure slings, chains, hooks, ramps, jacks, forklifts, cranes, hoists, and any other type of lifting device used is attached securely and has enough weight- bearing capacity to lift or hold the machine safely. See section Technical Data for machine weight. -
Page 20: Labels
Labels HI 770XHD Labels Label Locations 140 48 wc_gr008639 wc_si000622gb.fm... -
Page 21: Label Meanings
HI 770XHD Labels Label Meanings For machines powered by For machines powered by the generator: the power utility: Use a 50-50 blend of #2 diesel Use 100% #1 diesel plus and #1 diesel plus additives, additives or 100% K1 kero-... - Page 22 NOTE: If the machine has run out of fuel, the prime pump may 2. Contact your dealer for any additional support required. need pushing after refueling. HI 770XHD OPERATING GUIDE NOTE: These instructions are intended to provide experienced operators quick reminders of starting and shutdown procedures explained in detail in the OPERATOR'S MANUAL.
- Page 23 HI 770XHD Labels STARTING GUIDE SHUTDOWN GUIDE 1. Verify the following: 1. Turn BURNER switch OFF. a. Fuel tank has adequate fuel. b. EMERGENCY STOP button is 2. IMPORTANT: Allow BLOWER to run after pulled OUT. burner has shut down to cool heat exchanger until c.
- Page 24 Labels HI 770XHD Tie-down location marker. Forklift lift point CAUTION CAUTION This machine uses diesel fuel. VORSICHT PRECAUCION PRECAUCION DIESEL NOTICE! Lift point. CAUTION Attach lifting device in this location. VORSICHT PRECAUCION PRECAUTION CAUTION! Hot surface hazard! wc_si000622gb.fm...
- Page 25 HI 770XHD Labels Emergency stop High limit safety shutdown (manual reset). This label informs the user of the location of the high temperature safety shutdown device (snap disc). This component must be manually reset when tripped. Generator auxiliary power output (120VAC, 15A maximum).
- Page 26 Labels HI 770XHD WARNING! Do not engage trailer jack while transporting WARNING the machine. Refer to the Operator’s Manual for further WARNUNG instructions. ADVERTENCIA AVERTISSEMENT 173200 Never operate in an explosive environment WARNING Never operate in an explosive environment or near flammable vapors, fuels or near flammable vapors, fuels or or combustibles.
- Page 27 HI 770XHD Labels WARNING Operation of this equipment may create WARNING Operation of This Equipment May Create Sparks That Can Start Fires Around Dry sparks that can start fires around dry Vegetation. A Spark Arrestor May be Required. The Operator Should Contact Local Fire Agencies For Laws or Regulations Relating to Fire Prevention Requirements.
-
Page 28: Lifting And Transporting
Lifting and Transporting HI 770XHD Lifting and Transporting Lifting the Machine Requirements Lifting equipment (crane, hoist, or fork truck) capable of supporting 3500 kg (7700 lbs.) Lifting hooks, chains, and shackles capable of supporting 3500 kg (7700 lbs.) Machine stopped and cooled. -
Page 29: Preparing The Machine For Transport On A Truck Or Trailer
HI 770XHD Lifting and Transporting Preparing the Machine for Transport on a Truck or Trailer Requirements Machine stopped Flatbed truck or trailer capable of supporting the machine’s weight Chains, hooks, or straps capable of supporting the machine’s weight WARNING Crushing hazard. Improperly securing the machine can lead to a crushing hazard. -
Page 30: Transporting The Machine On A Truck Or Trailer
Lifting and Transporting HI 770XHD Transporting the Machine on a Truck or Trailer Requirements Machine stopped All doors and access covers closed and secured Properly-rated ramps or docks Properly-rated chains or straps Truck or trailer capable of supporting the machine’s weight WARNING Crushing hazard. -
Page 31: Before Towing Checklist
HI 770XHD Lifting and Transporting Before Towing Checklist Before towing the machine, check the licensing requirements for trailers in your area. Also check the following items: Hitch and coupler Check that the towing vehicle and hitch have a rating equal to or greater than the GVWR of the machine. -
Page 32: Towing The Machine
Lifting and Transporting HI 770XHD Towing the Machine WARNING Risk of severe injury or death. Improperly torqued lug nuts can lead to loss of wheels. Loss of wheels can cause an accident, severe injury, or death. Tighten the lug nuts to the proper torque before towing the machine. -
Page 33: Testing The Breakaway System (Electric Brakes)
HI 770XHD Lifting and Transporting Testing the Breakaway System (Electric Brakes) Requirements Voltmeter Battery charger or backup battery (charged) When Test the breakaway system: Before towing Monthly if the machine is not in service Procedure Perform the following procedure to test the breakaway system. - Page 34 Lifting and Transporting HI 770XHD Continued from the previous page. 5. If the brakes did not function, check the voltage of the breakaway battery. To do so: a. Remove the cover of the battery box. b. Remove the wires connected to the breakaway battery (d).
-
Page 35: Operation
HI 770XHD Operation Operation External Components wc_gr008664 Ref. Description Ref. Description Heater exhaust Air output (with duct adapter) Burner access door Emergency stop switch Genset exhaust Generator auxiliary power output Genset compartment access door Auxiliary city power input Fuel tank access door... -
Page 36: Burner Compartment Components
Operation HI 770XHD Burner Compartment Components wc_gr008665 Ref. Description Ref. Description Heat exchanger Burner fuel pump Burner fuel filter (with priming bulb Fuel gauge and water separator) Snap disc switch Burner ignition transformer (210°F, manual reset) Burner fuel pressure gauge... -
Page 37: Generator Compartment Components
HI 770XHD Operation Generator Compartment Components wc_gr008666 Ref. Description Ref. Description 120/208VAC control panel Marathon 3-phase generator 12 VDC control panel Kubota engine oil reservoir Battery shut-off switch Blower Battery Kubota engine Auxiliary 120VAC outlet Light wc_tx001882gb.fm... -
Page 38: 120Vac / 208Vac Control Panel
Operation HI 770XHD 120VAC / 208VAC Control Panel Ref. Description Function Voltmeter Displays the voltage output value of the gen- erator. Frequency meter Displays the frequency output value of the generator. Blower ON-OFF switch Switches electric power ON and OFF to the blower. -
Page 39: Dc Control Panel
HI 770XHD Operation DC Control Panel Description Function Glow plug indicator light Indicates by illumination that power has been applied to the glow plug electrical circuit. Hour meter Measures usage of the machine. Low oil pressure override switch Provides an override for the generator’s low oil pressure safety circuit in order to start the generator. -
Page 40: Temperature Controller
Operation HI 770XHD Temperature Controller Item Description/Function Setpoint value display (SV) Displays desired temperature of the dis- charge air. Process value display (PV) Displays actual temperature of the discharge air. C1 indicator Indicates a call for heat. Temperature unit indicator Indicates °F or °C. -
Page 41: Connecting And Accessing 120Vac Shore Power
HI 770XHD Operation Connecting and Accessing 120VAC Shore Power Background The machine’s 120VAC auxiliary outlet (a) is fed by the 120VAC input point (b) on the outside wall of the machine. wc_gr008668 wc_gr008667 WARNING Fire hazard and electric shock hazard. The use of undersized extension cords can lead to fire and electric shock. -
Page 42: General Sequence Of Operation
Operation HI 770XHD General Sequence of Operation Follow the sequence of operation below. Refer to the specific topic for details. Task See Topic 1. Position the machine. 2. Connect grounding cable (if necessary) 4.10 3. Perform “Pre-Starting” checks. 4.11 a. Refuel the machine. -
Page 43: Positioning The Machine
Do not operate the machine near flammable vapors, fuels, or combustibles. CO Alarms Because this machine produces carbon monoxide (CO), Wacker Neuson recommends that CO alarms be installed in all structures in close proximity to the machine. CO alarms provide an extra measure of protection against this poison that you cannot see or smell. - Page 44 Operation HI 770XHD Continued from the previous page. Requirements Position the machine: So that engine and burner exhaust will not enter nearby structures. So that the machine does not block traffic. So that the machine is not close to any combustible material or flammable vapor.
-
Page 45: Grounding The Machine
HI 770XHD Operation 4.10 Grounding the Machine Location A ground connection (a) is located on the trailer frame. wc_gr008707 Usage This ground connection is used for electrically grounding the machine when necessary to comply with the National Electrical Code and other federal, state, and local regulations. -
Page 46: Pre-Starting Checks
Operation HI 770XHD 4.11 Pre-Starting Checks Requirements Machine properly positioned. See section Positioning the Machine. Checks Before starting the machine, check the following items: 1. Fuel—verify that the tank is filled with the correct type of fuel. See topic Recommended Fuel. -
Page 47: Recommended Fuel
HI 770XHD Operation 4.12 Recommended Fuel Low ambient temperatures cause diesel fuels to gel. Gelled fuels will cause burner ignition failure and/or burner fuel pump damage. Always use the proper fuel for the conditions. Fuel Blend Guide Lowest expected ambient Generator-powered temperature °F (°C) -
Page 48: Refueling The Machine
Operation HI 770XHD 4.13 Refueling the Machine Requirements Machine shut down Machine level with the ground Diesel fuel supply Procedure Perform the procedure below to refuel the machine. 1. Open the fuel tank access panel (a). 2. Remove the fuel cap. -
Page 49: Installing The Heater Duct
HI 770XHD Operation 4.14 Installing the Heater Duct Overview Optional ducts can be connected to the air outlet. This allows warm air to be evenly distributed throughout the heating area. NOTICE: When using ducts, observe the static air pressure limits specified in Technical Data. -
Page 50: Starting The Generator Engine
Operation HI 770XHD 4.15 Starting the Generator Engine Requirements Machine properly positioned Pre-Starting checks completed Procedure Perform the procedure below to start the generator engine. 1. Turn the battery shut-off switch (a) to the ON position. wc_gr008671 2. Turn and hold the ignition switch (b) to the GLOW PLUG position according to the following schedule. -
Page 51: Starting And Running The Machine
HI 770XHD Operation 4.16 Starting and Running the Machine Requirements Machine properly positioned Generator started All control switches and circuit breakers in the OFF position. Procedure Perform the procedure below to start and run the machine. DANGER Burner and engine exhaust CAN KILL YOU IN MINUTES. Burner and engine exhaust contain carbon monoxide. - Page 52 Operation HI 770XHD Continued from the previous page. WARNING Explosion hazard. If the blower is not operating properly, fumes inside the machine may cause an explosion resulting in death, severe injury, or damage to the machine. Do not run the machine/burner unless the blower is operating.
-
Page 53: Using The Recircul-Air Feature
HI 770XHD Operation 4.17 Using the Recircul-Air Feature NOTICE: Do not operate the machine with the inlet port covered. Operating the machine with the inlet port covered may cause the machine to shut down due to overheating. There are two potential sources for input air: Ambient air Running the machine in this mode pressurizes the heated space. -
Page 54: Stopping The Machine
Operation HI 770XHD 4.18 Stopping the Machine NOTICE: Do not use the emergency stop switch to stop the machine in normal operating circumstances. Perform the procedure below to shut down the burner. Burner and blower 1. Move the burner ON-OFF switch (a) to the OFF position. - Page 55 HI 770XHD Operation Continued from the previous page. Generator Perform the procedure below to shut down the generator and the DC circuit. NOTICE: Allow the generator to run approximately 1 minute with no load before shutting it down. 1. Turn the ignition switch (e) to the OFF position.
-
Page 56: Emergency Stop Procedure
Operation HI 770XHD 4.19 Emergency Stop Procedure Background This machine is equipped with an emergency stop push button. When pressed, this push button shuts down the machine and disconnects all power to the machine controls. NOTICE: Do not use the emergency stop push button for normal shutdown. -
Page 57: Accessories
HI 770XHD Accessories Accessories Available Accessories Available The following accessories are available at your local Wacker Neuson distributor: accessories Ref. Item Ref. Item Duct adapter—2 X 12 in. Supply duct—12 in. X 25 ft Duct adapter—16 in. Supply duct—16 in. X 25 ft Duct adapter—20 in. -
Page 58: Removing And Installing A Duct Adapter
Accessories HI 770XHD Removing and Installing a Duct Adapter Requirements Machine shut down and cooled. New duct adapter. See section Available Accessories. CAUTION Hot surface hazard. The duct adapter and associated panels may be very hot immediately after shutting down the machine. -
Page 59: Flex Ducting Options
25 ft. duct length adapter section length Length sections (ft) HI 770XHD 1 X 20 in. 200 ft 1 X 20 in. 200 ft 200 ft 1 X 16 in. 150 ft 150 ft 2 X 12 in. 75 ft 150 ft wc_tx001883gb.fm... -
Page 60: Burner Setup
Burner Setup HI 770XHD Burner Setup Factory Settings Firing rate Fuel pressure Head Nozzle size L/hr (gph) bar (psi) 301CRD 20.8 (5.51) 4.5 45° B 10.3 (150) Setting up the Burner Optimum The optimum output air temperature range is 190–210°F (88–100°C). If the output operating air temperature exceeds 210°F (100°C), the burner will cycle off and restart after a... -
Page 61: Recommended Fuel
HI 770XHD Burner Setup Recommended Fuel Low ambient temperatures cause diesel fuels to gel. Gelled fuels will cause burner ignition failure and/or burner fuel pump damage. Always use the proper fuel for the conditions. Fuel Blend Guide Lowest expected ambient Generator-powered temperature °F (°C) -
Page 62: Burner Components
Burner Setup HI 770XHD Burner Components Background The burner consists of several different components and subsystems. Each of these components or subsystems must be operating correctly for the burner to function properly. Components Ref. Description Ref. Description Burner flange gasket... -
Page 63: Removing And Installing The Combustion Head Assembly
HI 770XHD Burner Setup Removing and Installing the Combustion Head Assembly Requirements Machine shut down. Burner cooled. Allow the machine to cool for a minimum of ten minutes. Removal Perform the procedure below to remove the combustion head. 1. Remove the screw (a) that secures the ignitior cover (b) to the top of the burner and swing open the ignitor cover. - Page 64 Burner Setup HI 770XHD Continued from the previous page. Installation Follow the procedure below to install the combustion head assembly. NOTICE: To avoid damaging the assembly, do not force the combustion head assembly into the flame tube. 1. Carefully insert the combustion head assembly (d) into the flame tube.
-
Page 65: Recommended Burner Nozzles
HI 770XHD Burner Setup Recommended Burner Nozzles Background Burner nozzles come in many different sizes and ratings. The following illustrates the meaning of the common numbers found on burner nozzles. Parameters Parameter Description Flow rating Flow rating is determined at 100 psi using #2 oil. -
Page 66: Replacing The Burner Nozzle
Burner Setup HI 770XHD Replacing the Burner Nozzle Requirements Machine shut down. Burner cooled. Allow the machine to cool for a minimum of ten minutes. Combustion head assembly removed. See section Removing and Installing the Combustion Head Assembly. When to Once per year, if necessary. - Page 67 HI 770XHD Burner Setup Continued from the previous page. 4. Fully tighten the nozzle by placing a wrench on the nozzle adapter (d) and the nozzle (c). 5. Reinstall the flame retention ring (b) and tighten the screw (a). 6. Replace the combustion head assembly. See section Removing and Installing the Combustion Head Assembly.
-
Page 68: Checking And Adjusting The Electrode Position
Burner Setup HI 770XHD Checking and Adjusting the Electrode Position Requirements Machine shut down and cooled. Combustion head assembly removed. See section Removing and Installing the Combustion Head Assembly. When to Once per year, if necessary. adjust When the burner is not firing properly. -
Page 69: Checking/Adjusting The Burner Air Band
HI 770XHD Burner Setup Checking/Adjusting the Burner Air Band Procedure Perform the procedure below to adjust the burner air band. 1. Loosen the air band locking screw (a). 2. Rotate the air band until the desired percentage of opening is attained. -
Page 70: Checking/Adjusting The Burner Head
Burner Setup HI 770XHD 6.10 Checking/Adjusting the Burner Head Procedure Perform the procedure below to adjust the burner head. 1. Turn the head adjustment screw (a) clockwise to decrease the setting and counterclockwise to increase the setting. Result The burner head has been adjusted. -
Page 71: Checking/Setting The Fuel Pressure
HI 770XHD Burner Setup 6.11 Checking/Setting the Fuel Pressure Requirements The procedure below requires that the machine is operational. Read and under- stand the starting instructions in the Operator’s Manual before proceeding. Fuel pressure range: 125-150 psi. Procedure Perform the procedure below to set fuel pressure. -
Page 72: Analyzing The Combustion
Burner Setup HI 770XHD 6.12 Analyzing the Combustion Precaution The procedure below requires that the machine is operational. Read and understand the starting instructions in the Operator’s Manual before proceeding. Smoke spot 1. Follow the smoke spot tester manufacturer’s instructions and the general test guidelines below. -
Page 73: Maintenance
HI 770XHD Maintenance Maintenance Periodic Maintenance Schedule The table below lists basic machine maintenance. Tasks designated with check marks may be performed by the operator. Tasks designated with square bullet points require special training and equipment. Interval Task Daily 6 Months... -
Page 74: Inspecting And Lubricating The Blower Bearings
Maintenance HI 770XHD Inspecting and Lubricating the Blower Bearings Requirements Machine shut down and cooled. Procedure Perform the procedure below to inspect and lubricate the drive bearings. 1. Remove the blower access cover (a). 2. Lubricate the pillow block bearings (b) on both ends of the drive shaft. Use high quality lithium-based grease, NLGI Grade 2 consistency. -
Page 75: Cleaning The Blower Motor
HI 770XHD Maintenance Cleaning the Blower Motor Requirements Machine shut down and cooled. Procedure Perform the procedure below to clean the blower motor. 1. Remove the blower access cover (a). 2. Use a dry cloth to clean the air intake grate (c) on the blower motor. -
Page 76: Inspecting The Blower Drive Belts
Maintenance HI 770XHD Inspecting the Blower Drive Belts Requirements Machine shut down and cooled. Procedure Perform the procedure below to check the belts for wear and proper tension. 1. Remove the blower access cover (a). 2. Inspect the drive belts (e) for wear. Replace if necessary. -
Page 77: Inspecting The Blower Drive Pulleys
HI 770XHD Maintenance Inspecting the Blower Drive Pulleys Requirements Machine shut down and cooled. Procedure Follow the procedure below to check the pulleys for wear. 1. Remove the blower access cover (a). 2. Remove tension from the drive belts using the L-shaped bolts (f). -
Page 78: Servicing The Fuel-Water Separator
Maintenance HI 770XHD Servicing the Fuel-Water Separator Requirements Machine shut down New filter element Procedure Perform the procedure below to service the fuel water separator. Note: In the interests of environmental protection, place a plastic sheet and a con- tainer under the machine to collect any liquid which drains off. Dispose of this liquid in accordance with local environmental protection laws. -
Page 79: Inspecting The Heat Exchanger
HI 770XHD Maintenance Inspecting the Heat Exchanger Introduction The heat exchanger consists of the combustion chamber and an attached series of metal tubes. As intake air flows over the hot combustion chamber and tubes, it collects heat. The heated intake air is then blown out of the supply ducts. - Page 80 Maintenance HI 770XHD Continued from the previous page. Access Perform the procedure below to access the heat exchanger. procedure 1. Remove the burner (p) and position it as shown. wc_gr008772 wc_gr008784 2. Remove the outer exhaust duct (a). 3. Remove the inner exhaust duct (z).
- Page 81 HI 770XHD Maintenance Continued from the previous page. 6. Remove the light bar (e) from the rear of the machine. wc_gr008775 wc_gr008776 7. Disconnect the wiring (f). Tuck the wiring harness back into the machine 8. Remove the fasteners (g) that hold the support staffs to the roof. There are two support staffs—remove the fasteners for both.
- Page 82 Maintenance HI 770XHD Continued from the previous page. 10.Remove the fasteners (j) that hold the exchanger-side roof panel to the machine. Remove the fasteners from both the front and back of the machine. Exchanger side Vent side Back Vent Front wc_gr008779 11.Remove the fasteners (k) that hold the vent-side roof panel to the machine.
- Page 83 HI 770XHD Maintenance Continued from the previous page. CAUTION Cutting hazard. Edges of the sheet metal can cut skin. Wear hand protection when working on the heat exchanger. 15.Remove the top piece of cladding/insulation blanket (q) from the heat exchanger.
- Page 84 Maintenance HI 770XHD Continued from the previous page. 18.Remove the top skin (t) from the heat exchanger. wc_gr008788 wc_gr008789 19.Remove the side skin (u) from the heat exchanger. Inspection Perform the procedure below to inspect the heat exchanger. procedure 1. Inspect the exterior of the tubes and the combustion chamber for cracks or separations.
- Page 85 HI 770XHD Maintenance Continued from the previous page. 2. Use a light and a mirror to examine the interior of the combustion chamber for cracks or separations. Pay particular attention to welded corners. Shine the light into the interior of the heat exchanger and look for light to appear on the exterior of the heat exchanger.
- Page 86 Maintenance HI 770XHD Continued from the previous page. Reassembly Perform the procedure below to reassemble the machine. 1. Use a putty knife (x) or similar tool to scrape the old silicone from all panels. wc_gr008799 wc_gr008800 2. Apply high-temperature silicone (y) to the appropriate areas of the heat exchanger and reinstall the side skin (u) and the top skin (t) to the heat exchanger.
-
Page 87: Storing The Machine
HI 770XHD Maintenance Storing the Machine Short term 1. Shut down the machine. storage 2. Remove and store any accessories. 3. Allow the heater to cool sufficiently. 4. Verify that all control switches are in the Off position. 5. If necessary, fill the fuel tank. -
Page 88: Preparing The Machine For Seasonal Operation
Maintenance HI 770XHD Preparing the Machine for Seasonal Operation Background After removing the machine from long-term storage, it must be prepared for operation. Perform the procedures below before each seasonal use. Before Perform the procedures below before you power up the machine. -
Page 89: Connecting And Maintaining The Battery
HI 770XHD Maintenance 7.10 Connecting and Maintaining the Battery WARNING Explosion hazard. Batteries can emit explosive hydrogen gas. Keep all sparks and flames away from the battery. Do not short-circuit battery posts. WARNING Battery fluid is poisonous and corrosive. In the event of ingestion or contact with skin or eyes, seek medical attention immediately. -
Page 90: Genset Maintenance
Genset Maintenance HI 770XHD Genset Maintenance Periodic Maintenance Schedule Interval Task Hours Years 1500 3000 Daily Conduct a general inspection. Check the engine oil level. Check the engine cool- ant level. Check fuel-water sepa- rator; drain water as needed. Check fuel hoses and clamps. - Page 91 HI 770XHD Genset Maintenance Interval Task Hours Years 1500 3000 Daily Check fuel injection nozzle and pressure Check injection pump. Change radiator cool- ant. Replace battery. Replace radiator hoses and clamps. Replace fuel pipes and clamp bands. Replace air intake hose.
-
Page 92: Checking The Engine Oil
Genset Maintenance HI 770XHD Checking the Engine Oil Requirements Generator shut down Engine cool Machine positioned on a level surface Engine oil API grade CF or higher Determine engine oil type according to the ambient temperature. SAE10W-30 above 25°C (77°F) -
Page 93: Servicing The Fuel-Water Separator
HI 770XHD Genset Maintenance Servicing the Fuel-Water Separator Requirements Machine shut down New filter element Procedure Perform the procedure below to service the fuel water separator. Note: In the interests of environmental protection, place a plastic sheet and a container under the machine to collect any liquid which drains off. Dispose of this liquid in accordance with local environmental protection laws. -
Page 94: Changing The Engine Oil And Oil Filters
Genset Maintenance HI 770XHD Changing the Engine Oil and Oil Filters WARNING Most used oil contains small amounts of materials that can cause cancer and other health problems if inhaled, ingested, or left in contact with skin for prolonged periods of time. - Page 95 HI 770XHD Genset Maintenance Continued from the previous page. 4. Open the drain valve and drain the used engine oil into an appropriate container. Dispose of used oil in accordance with local environmental protection laws. 5. Close the drain valve and reinsert the plug.
-
Page 96: Replacing The Engine Fuel Filter
Genset Maintenance HI 770XHD Replacing the Engine Fuel Filter Requirements Machine shut down New engine fuel filter Procedure Perform the procedure below to replace the engine fuel filter cartridge. Note: In the interests of environmental protection, place a plastic sheet and a container under the machine to collect any liquid which drains off. -
Page 97: Servicing The Radiator
HI 770XHD Genset Maintenance Servicing the Radiator Requirements Machine stopped Machine cool Rubber gloves Coolant: 50/50 mixture of soft water and anti-freeze: 0.8 gal (3.1 L) WARNING Burn hazard. Hot coolant spray can cause severe burns. Allow the engine to cool before opening the radiator. - Page 98 Genset Maintenance HI 770XHD Continued from the previous page. Changing Perform the procedure below to change the coolant. coolant 1. Stop the engine. Allow it to cool at least 30 minutes after stopping. 2. Clean the radiator. Note: In the interests of environmental protection, place a plastic sheet and a container under the machine to collect any liquid which drains off.
-
Page 99: Servicing The Air Cleaner And The Air Filter
HI 770XHD Genset Maintenance Servicing the Air Cleaner and the Air Filter Requirements Machine shut down Source of clean, dry, and low-pressure (less than 207 kpA (30 psi)) compressed New air filter Procedure Perform the procedure below to service the air cleaner and the air filter. -
Page 100: Basic Troubleshooting
Basic Troubleshooting HI 770XHD Basic Troubleshooting Problem / Symptom Reason Remedy The burner does not start. Burner switch in OFF posi- Place switch in ON position. tion. Burner breaker in OFF posi- Place breaker in ON posi- tion. tion. The machine is out of fuel. - Page 101 HI 770XHD Basic Troubleshooting Problem / Symptom Reason Remedy Motor overheating Belt not correctly tightened Adjust belt tension. Over or under voltage Check power supply. Fan inoperative Circuit breaker tripped Reset circuit breaker. Loose or disconnected wiring Check wiring and repair as needed.
-
Page 102: Technical Data
HI 770XHD 10 Technical Data 10.1 Machine Item Number 0620183, 0620676, 5200003814 Model Units Arctic Bear XHD / HI 770XHD Physical Data Length (a) m (in.) 4.75 (187) Width (b) m (in.) 2.39 (94) Height (c) m (in.) 2.24 (88) Ground clearance mm (in.) 330 (13) -
Page 103: Dimensions
HI 770XHD Technical Data Trailer GVWR kg (lb) 3421 (7543) GAWR kg (lb) 3175 (7000) Wheel code 16''X 6'' K Tire code LT 235/85R16 (G) Tire pressure kPa (psi) 758 (110) 10.2 Dimensions wc_td000474gb.fm... -
Page 104: Schematics
Schematics HI 770XHD 11 Schematics 11.1 AC Circuit wc_tx001887gb.fm... -
Page 105: Wire Color Legend
HI 770XHD Schematics 11.2 Wire Color Legend Wire Colors Green Black White Orange Violet Blue Brown Red with a white stripe Black with a white stripe 11.3 AC Circuit—Schematic Legend Description Rating Generator output connection box — Ground bar —... -
Page 106: Dc Circuit
Schematics HI 770XHD 11.4 DC Circuit wc_tx001887gb.fm... -
Page 107: Dc Circuit-Schematic Legend
HI 770XHD Schematics 11.5 DC Circuit—Schematic Legend Description Rating Battery 12VDC Starter motor — Circuit breaker Fuse Interior lights — Ignition switch — Fuse By-pass switch — Emergency stop button — Glow plug indicator light — Glow plugs — Oil pressure switch —... -
Page 108: Trailer Lights And Brakes - Wiring Diagram
Schematics HI 770XHD 11.6 Trailer Lights and Brakes — Wiring Diagram wc_gr008734 wc_tx001887gb.fm... -
Page 109: Trailer Lights And Brakes - Components
HI 770XHD Schematics 11.7 Trailer Lights and Brakes — Components Description Description Right side light, amber a2 Left side light, amber Right side miniature light, amber b2 Left side miniature light, amber Right side fender light, amber c2 Left side fender light, amber... -
Page 110: Trailer Junction Box - Wiring Diagram
Schematics HI 770XHD 11.9 Trailer Junction Box — Wiring Diagram The wires inside the trailer junction box are designated for specific components. The designations are as follows. Note: The colors used on your vehicle’s plug may vary from those used in the trailer junction box. - Page 112 Tel. : (262) 255-0500 Fax: (262) 255-0550 Tel.: (800) 770-0957 Wacker Neuson Limited - Room 1701–03 & 1717–20, 17/F. Tower 1, Grand Century Place, 193 Prince Edward Road West, Mongkok, Kowloon, Hongkong. Tel: (852) 3605 5360, Fax: (852) 2758 0032...
Need help?
Do you have a question about the HI 770XHD and is the answer not in the manual?
Questions and answers