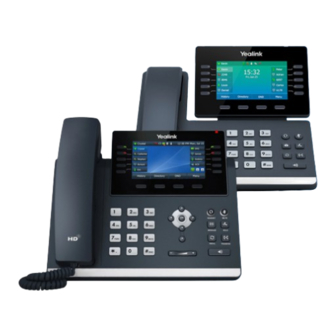
Yealink T4 Series User Manual
Hide thumbs
Also See for T4 Series:
- Quick start manual ,
- User manual (253 pages) ,
- Registering and using (16 pages)
Table of Contents
Advertisement
Quick Links
Advertisement
Table of Contents

Related Manuals for Yealink T4 Series


Summary of Contents for Yealink T4 Series
- Page 1 Deskphone User Guide Yealink T4, T5 Series...
-
Page 2: Table Of Contents
Order of Contents Getting to Know Your Phone Phone Layout page 4 Phone Elements page 5 Logging in and Out pages 6-7 Menu Pages pages 8-9 Basic Features Ways to Call page 11 Hold page 12 Mute page 12 Group Page page 12 page 13 Intercom... -
Page 3: Getting To Know Your Phone
Getting to Know Your Phone... -
Page 4: Phone Layout
Phone Layout HEADSET MUTE MESSAGE HOLD PQRS WXYZ REDIAL TRANSFER SEND Logged in User Line Key Notifications and Status Icons Number Key Busy Lamp Field Indicator Arrow Key Phone Pages Volume Adjustor Soft Key Speaker... -
Page 5: Phone Elements
Phone Elements This is a more in-depth look at the phone layout on page 3, breaking down the various elements and helping you get comfortable with the functions and their terminology used in the rest of this guide. Notifications and Status Icons The notification and status bar displays relevant or helpful information. -
Page 6: Logging In And Out Pages
Logging In and Out - Logging In When you receive your new deskphone, this screen will be presented: Tap the Login line key, enter your extension number and Submit. You will then be logged in, and presented with the following screen:... - Page 7 Logging In and Out (cont.) Logging Out To log out, press the line key to log out. Tap the Yes soft key. You will then be logged out, and presented with the following screen:...
-
Page 8: Menu Pages Pages
Menu Pages Main Menu The Main Menu is accessed through the Menu softkey. Once there, you will see the Main Menu screen as shown below: There are five menus that can be accessed from the Main Menu. The Status, Directory, History, Message and Basic menus. Status The Status menu is primarily used to ensure that the phone has an IP Address and to display some other basic information about the phone. - Page 9 Menu Pages (cont.) History The History menu shows a log of all of your calls - missed, placed, received and forwarded. It contains information such as the date and time of the call, the call contact, the duration of the call and provides ease of use functions such as redial and adding contact details directly from the log.
-
Page 10: Basic Features
Basic Features... -
Page 11: Ways To Call
Calling Ways to Call There are a few ways to call. Let's go through the most common methods. Line Keys The fastest way to call is using the line keys. To initiate a call, tap the line key corresponding to the contact you wish to call. -
Page 12: Hold
Calling (cont.) Hold When on the phone, there is a simple way to put the call on hold. Just press the Hold soft key. The caller will hear your hold music. REDIAL To resume the call, press the Resume soft key. The call will now be active. Mute To mute yourself while on call, press the Mute button. -
Page 13: Intercom
Calling (cont.) Intercom Intercom functions similarly to group page, except that it is a direct message to an individual extension in your organisation. To initiate an intercom, press the intercom line key on the right side of your display. Then press the line key of the colleague you wish to intercom. Speak through the handset or other preferred audio input. -
Page 14: Changing Audio Output
Calling (cont.) Changing Audio Output It is possible to have three different audio outputs when on a call. Handset - The handset is the default option when you pick up a call. If you pick up the handset and then call, the audio will be transmitted to and from the handset itself. -
Page 15: No Not Disturb
System Control Do Not Disturb Do Not Disturb (DND) is a is a function that stops your phone from ringing by appearing as busy. This will likely send calls to your voicemail or to another extension, depending on the nature of the call. To activate your DND, press the DND softkey. -
Page 16: Advanced Features
Advanced Features... -
Page 17: Attended Transfer
Call Transfers Attended Transfer (Recommended) Call transferring is a critical part of managing your organisation's incoming calls and ensuring that they reach the appropriate destination. The most common and effective way of transferring a call is by doing an attended transfer. When you are on a call and you need to redirect the call to another member of your system, press the Transfer soft key. - Page 18 Call Transfers (cont.) Attended Transfer (cont.) From there, navigate using your phone's pages to the relevant page, and tap the line key of the system contact that you wish to transfer the call to: You can also use the number pad to enter the extension number or the phone number of the contact you wish to transfer the call to.
-
Page 19: Blind Transfer
Call Transfers (cont.) Blind Transfer A blind transfer is not the recommended method of transferring a call as there is no confirmation that the transfer has reached it's intended destination - hence the name "blind transfer". However, it can be useful for quick transfers when your system contact has otherwise confirmed that they wish to receive the transfer, such as in the instance where they are expecting a call back from a client. -
Page 20: Conference Calling
Advanced Calling Conference Calling Conference calling follows a similar pathway as call transferring. Your IPC Solutions Communications System can currently manage three parties on any call. To initiate a conference call, press the Conference soft key when on a call. The original caller will now be placed on hold. - Page 21 Advanced Calling (cont.) Conference Calling (cont.) The soft keys are now changed to present some options to manage the callers. If you wish to mute either the original caller or the third party on the call, use the arrow keys to toggle to the correct party and press the Far Mute soft key.
- Page 22 Advanced Calling (cont.) Conference Calling (cont.) Your display will now show both of your lines are in use, as indicated by the flashing green BLFs on the top left of your display: Toggle between the calls by tapping the L1 or L2 line keys. Each call can be transferred, resumed, parked, or ended.
-
Page 23: Faqs And Scenarios
FAQs and Scenarios... -
Page 24: Faqs
FAQs How do I call back a contact from a previous call? Navigate to the History menu. Once there, use the arrow keys to select the call you wish to return. Then press the Send soft key to dial. How do I set and access my voicemail? To open your voicemail, press the Message button. - Page 25 FAQs (cont.) How do I change my ring tone and what tones are available? Changing your ring tone is fun and easy. Navigate to the Basic menu > Sound > Ring Tones. Once there, use the arrow keys to select the ring tone you want to use. What's the best way to call a system contact or a client contact? The best way to call a system contact is by cycling through your phone pages and pressing the corresponding line key to call a system contact.
-
Page 26: Scenario 1: Redirecting A Call
Scenarios Scenario 1 - Redirecting a Customer Call to the Right Destination If you receive a call from a customer and you need to redirect it to the correct person in your organisation to handle the query, what's the best way to do it? The recommended way to handle this is using an attended transfer.
Need help?
Do you have a question about the T4 Series and is the answer not in the manual?
Questions and answers