AVer MD330U Series User Manual
Hide thumbs
Also See for MD330U Series:
- User manual (444 pages) ,
- User manual (369 pages) ,
- User manual (321 pages)
Table of Contents
Advertisement
Quick Links
Advertisement
Table of Contents

Related Manuals for AVer MD330U Series


Summary of Contents for AVer MD330U Series
- Page 1 MD330U Series PTZ Camera User Manual...
- Page 2 How to Clean and Disinfect Warning Do not use cleaning agents containing phenol, as phenol may cause Risk of personal injury skin burns if not rinsed thoroughly and does not contain sufficient cleaning or disinfectant properties. Caution The camera is designed for easy cleaning and disinfection. Before cleaning the camera, disconnect it from the power source.
-
Page 3: Precautions For Use
Precautions for Use AVer does not accept any responsibility for accident or damage during installation if users do not follow the procedures described in this manual. Indications for Use The AVer MD330U Series is a high definition medical grade PTZ camera designed for physicians. - Page 4 - Do not place the camera where the cord can be stepped on as this may result in fraying or damage to the lead or the plug. Power off the unit - This unit does not have a power switch. Disconnect the power plug from the power outlet before proceeding with maintenance, cleaning or any emergency situations.
- Page 5 Symbols on this Product The symbols on this product, including the accessories, represent the following. The WEEE symbol. This symbol indicates that this product must not be disposed of with your other household waste. Instead, you need to dispose of the waste equipment by handing it over to a designated collection point for the recycling of waste electrical and electronic equipment.
- Page 6 Federal Communication Commission Interference Statement This device complies with Part 15 of the FCC Rules. Operation is subject to the following two conditions: (1) This device may not cause harmful interference, and (2) this device must accept any interference received, including interference that may cause undesired operation. This equipment has been tested and found to comply with the limits for a Class B digital device, pursuant to Part 15 of the FCC Rules.
- Page 7 © 2023 AVer Information Inc. All rights reserved. | June 29, 2023 All rights of this object belong to AVer Information Inc. Reproduced or transmitted in any form or by any means without the prior written permission of AVer Information Inc. is prohibited. All information or...
- Page 8 Tel: +81 (0) 3 5989 0290 テクニカル・サポート: https://jp.aver.com/technical-support Vietnam Branch Office Công ty TNHH AVer Information (Việt Nam) Tầng 5, 596 Nguyễn Đình Chiểu, P.3, Quận 3, Thành phố Hồ Chí Minh 700000, Việt Nam Tel: +84 (0)28 22 539 211...
-
Page 9: Table Of Contents
Contents How to Clean and Disinfect ..................2 Precautions for Use ....................... 3 Overview ......................... 1 Package Contents ....................... 1 Optional Accessories ....................1 Connections ........................ 2 LED Indicators ......................3 Dimensions ......................... 4 Pan and Tilt Angle ....................... 4 Mode Switch ....................... - Page 10 Network ........................ 26 System ......................... 28 AVerCamera Setting Tool .................... 30 Specification ........................ 31 Troubleshooting......................34 Appendix ........................36 VISCA RS-232 Command Table ................36 VISCA over IP Settings ..................... 44 CGI Command ......................45...
-
Page 11: Overview
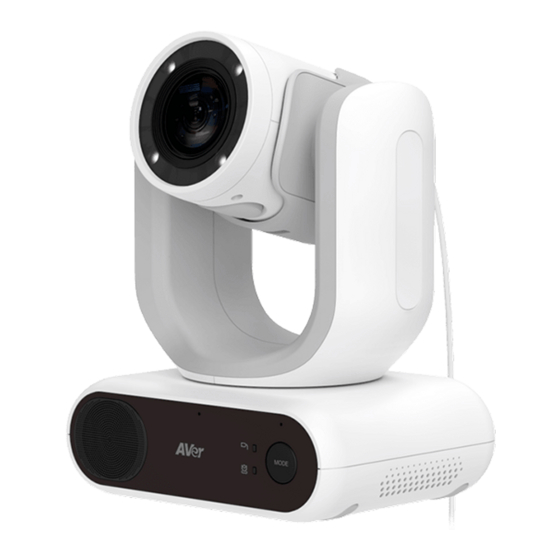
Overview The MD330U Series PTZ Camera is a dual-mode medical grade camera designed with a detachable camera head. It comes in two models: MD330U (fill light) and MD330UI (infrared night vision). Package Contents Power Adapter & Camera Remote Control USB 3.0 Type-B to Power Cord Type-A Cable (1.5m) -
Page 12: Connections
Connections The camera head must be detached or installed in Handheld Mode. Use the mode button to switch to between modes. Connect only the camera head cable to the USB Type-A port. DO NOT connect any USB devices to the USB Type-A port. Doing so may cause electrical damage to your USB devices. MD330UI MD330U MODE... -
Page 13: Led Indicators
LED Indicators The illumination of the indicators confirms the camera mode. Standard Mode (default) Handheld Mode Color Status Pattern Flashing orange Booting up Solid blue Normal Solid orange Standby Flashing orange slowly Muted (1-sec interval) ... -
Page 14: Dimensions
Dimensions 132.75mm 154mm 68mm MODE 168mm 126mm Pan and Tilt Angle... -
Page 15: Mode Switch
Mode Switch The camera head must be detached or installed in Handheld Mode. Use the mode button to switch between modes and the LED indicators to confirm your current mode. Install Camera Head Detach Camera Head Camera Head Camera Head Holder MODE MODE To detach the camera head:... -
Page 16: Installation
Installation Table Mount 1. Hold the camera by its pedestal with both hands. Do not grab the camera head, nor the camera head holder. MODE MODE MODE 2. Place the camera on a flat surface that supports 2kg min. 3. Manage all cables to prevent tip-overs or entanglement. 4. -
Page 17: Device Connection
Device Connection Connect to Camera Head Network Cable Power Adapter (not included) & Power Cord HDMI Cable USB Type-B to (not included) Type-A Cable RS-232 (VISCA) Router microSD Cable (not included) Card Power Outlet Joystick / Laptop TV / Monitor 1. - Page 18 5. microSD Card: Insert a microSD card to store captured images or recordings (Note 1 and 2). Compatible microSD Cards Brand Kingston, SanDisk, Samsung, Lexar Speed Class C10, U1, U3, V10, V30 Capacity 16G, 32G Format FAT32, exFAT 6. RS-232: Connect the camera to a Joystick or laptop to control the camera. You can optionally purchase the RS-232 Adapter.
-
Page 19: Remote Control
Remote Control To open the OSD menu, press and hold Menu for 3 seconds. To disable remote control, open the OSD menu, go to System > Camera Selector > Disable Remote. To resume remote control, press 6 six times (666666) to reset the camera to factory default settings. -
Page 20: Shortcuts
13. Direction Use the Direction Buttons to navigate the live view. 14. Volume +/- Press to adjust the volume up or down. When camera is on: Press Enter to adjust focus once. 15. Enter When accessing the OSD menu: Press Enter to confirm the selection or make a selection. -
Page 21: Set Up The Camera
Set Up the Camera You can configure camera settings using the OSD menu or the web interface of the camera. OSD Menu To access the OSD menu, connect the camera to a monitor or TV using an HDMI cable, and then use the supplied remote control to operate the OSD menu. - Page 22 DHCP 1. Press the menu button on the remote control to bring-up the OSD menu. 2. Select Network > DHCP > On. 3. Press Enter to confirm setting. 4. After turning the DHCP on, you can go to System > Information to view the IP address.
-
Page 23: Osd Menu Tree
OSD Menu Tree Layer Layer Layer Layer Camera Exposure Mode Full Auto Exposure Value Gain Limit Level Slow Shutter Shutter Priority Exposure Value Shutter Speed Gain Limit Level Iris Priority Exposure Value Iris Level Gain Limit Level Slow Shutter Manual Iris Level Shutter Speed Gain Level... - Page 24 Layer Layer Layer Layer High Saturation 0 1 2 3 4 5 6 7 8 9 10 Contrast 0 1 2 3 4 Sharpness 0 1 2 3 Mirror OFF / ON Flip OFF / ON Advanced Control Type RS232 Setting Protocol VISCA...
- Page 25 Layer Layer Layer Layer Audio In Volume Mute / 1~10 Audio Output Output Type Speaker/HDMI/Both Output Volume Mute / 1~10 Network DHCP Static IP IP Address 192.168.1.168 Gateway 192.168.1.254 Mask 255.255.255.0 8.8.8.8 System Trigger OSD Click Menu to open, Press Menu 3 sec Camera Selector 1,2,3,4, All channel, Disable Remote...
-
Page 26: Web Setup
Access the Web Interface of the Camera To access the Web interface of the camera, you have to find the IP address of the camera using AVer IPCam Utility or AVer PTZ Management software. Accessing the Camera via AVer IPCam Utility To find the IP address of your cameras using the IPCam Utility installer, follow the steps below. - Page 27 Accessing the Camera via AVer PTZ Management To find the IP address of your cameras using the AVer PTZ Management, follow the steps below. 1. Download the AVer PTZ Management software from https://www.aver.com/download-center 2. Download the Windows program and install it.
-
Page 28: Live View
Live View Camera Control Item Description Position the camera. Pan and Tilt Controls Drag the slider to adjust Pan Speed and Tilt Speed. Move the camera to the Home position. Home Position Zoom in or zoom out the live view and select Zoom Speed. Zoom ... - Page 29 Preset Item Description Save Preset 1. Position the camera using pan, tilt and zoom controls. 2. Enter a preset number (0~255) in the Save Preset field and click Save. Load Preset 1. Enter a preset number (0~255) in the Load Preset field and click Load.
-
Page 30: Ai Setting
AI Setting Detection and Tracking can’t be turned on at the same time. Detection Click the On/Off toggle to turn on body detection. The camera will frames human bodies in view with blue AI bounding boxes. Use API to report AI bounding box coordinates to third-party software. -
Page 31: Tracking
Tracking Manually adjusting pan, tilt and zoom controls during tracking will turn the function off. 1. Position the camera using pan, tilt and zoom controls and then click Save to save a Tracking Preset. The default is the Home position. 2. -
Page 32: Camera Settings
Camera Settings Exposure Item Description Select an exposure mode. Exposure Mode Turn WDR or BLC on or off. Exposure Value Shutter Speed Adjust exposure, shutter, iris and gain. Iris Level Gain Level Gain Limit Level IR Cut Filter Mode Select Day mode, Night mode to switch infrared night vision on (MD330UI only) or off., Or select Auto mode and adjust IR Cut Sensitivity. - Page 33 Image Process Item Description Select a white balance mode. When Manual is selected, White Balance you can also adjust the R Gain and B Gain. When One Push is selected, place a piece of white paper in front of the camera lens and click Set to calibrate white balance.
-
Page 34: Video & Audio
Video & Audio Video Setting Item Description Power Frequency (Hz) Select 50Hz, 59.94Hz or 60Hz based on your country or region. Video Out Resolution Select a video output resolution. RTSP: Max. 4K/30fps HDMI: Max. 1080p 60Hz Video Mode Select a video mode. ... - Page 35 Might drop a few words *Performance varies due to many factors, including voice to noise ratio, number of speakers, room size, sound source direction, microphone quality, ambient sounds, and so on. Performance was tested under controlled AVer laboratory conditions.
-
Page 36: Network
Network Item Description Hostname The default hostname is AVer. Change the hostname to be displayed on devices such as an IP router. DHCP Set the network to DHCP or Static IP. DHCP: Turn on DHCP and click Confirm to save the setting. - Page 37 username/password: camera’s username/password (web interface login) HTTPS Enable HTTPS to establish a secure connection between your browser and your camera. To enable HTTPS access on your camera: 1. Obtain a SSL certificate for encryption and decryption in base-64 encoded format and use a private key in PKCS#8 format (unencrypted).
-
Page 38: System
Display camera information. Camera Information Upgrade Firmware Follow these steps to upgrade the firmware: 1. Download the latest firmware from the AVer Download Center (https://www.aver.com/download-center/ 2. On the Web page, go to System > Upgrade firmware. 3. Click Browse to select the firmware. - Page 39 Power Off to Preset When enabled, the camera will move to the defined position before powering off. Click the toggle to turn on > enter a preset number > click Save. Make sure the preset number has been defined before enabling this function.
-
Page 40: Avercamera Setting Tool
AVerCamera Setting Tool AVerCamera Setting Tool is an application software that supports the operation of AVer PTZ cameras when you stream to a third-party software. It enables users to configure image, audio and video settings without a remote control, as well as connect the camera via USB. -
Page 41: Specification
Specification Camera Image Sensor 1/2.8" Exmor CMOS Effective Picture Elements 8 Megapixels Output Resolutions 4K/30 (IP/UVC only), 1080p/60, 1080p/59.94, 1080p/50, 1080p/30, 1080p/29.97, 1080p/25, 720p/60, 720p/59.94, 720p/50, 720p/30 Minimum Illumination 0.7 lux (IRE50, F1.6, 30fps) ≥ 50dB S/N Ration Gain Auto, Manual Shutter Speed 1/1 to 1/10,000 sec Exposure Control... - Page 42 Maximum SPL 133 dB SPL at 0.5 meter Interface Video Outputs HDMI, IP, USB Audio Outputs HDMI, IP, USB microSD Card Slot Max. 32GB / SDXC General Power Requirement 100-240V AC~ to 12V DC 3.34A * The included Power Adapter (GSM40A12) is manufactured by MEAN WELL Enterprises Co., Ltd.
- Page 43 Connector USB 3.0 Video Format MJPEG, YUY2 Audio Format USB Video Class (UVC) Video: UVC1.1 Audio: UAC1.0 Software Tools IP Search and Configuration Tool Support Windows® 7 or later Specifications are subject to change without prior notice.
-
Page 44: Troubleshooting
The length of the cable is 180cm. Can I use an extension USB cable to lengthen the camera head cable? No, doing so may damage the camera. Please contact AVer for optional accessories. Can I disinfect the camera by spraying alcohol on it? No, please refer to <How to Clean and... - Page 45 There is no picture on the output screen. 1. Check all the connectors again as shown in this manual. 2. Verify the setting of the display output device. The picture on the output screen is distorted or the image is blurry. 1.
-
Page 46: Appendix
Appendix VISCA RS-232 Command Table Command Set Command Command Packet Comments IF_Clear Broadcast 88 01 00 01 FF I/F Clear (Clear Visca connection & command buffer queue) CommandCancel 8x 2p FF p: Socket No. (=1or2) CAM_Power 8x 01 04 00 02 FF Power OFF to Standby mode Power ON supported in Standby mode only 8x 01 04 00 03 FF... - Page 47 Command Set Command Command Packet Comments 0005: 3m 0006: 6m 0007: 10m CAM_AFMode Normal AF 8x 01 04 57 00 FF Continuous AF ON Zoom Trigger 8x 01 04 57 02 FF Continuous AF OFF, only trigger AF after PTZ done CAM_WB Auto 8x 01 04 35 00 FF...
- Page 48 Command Set Command Command Packet Comments CAM_Iris Reset 8x 01 04 0B 00 FF Iris Setting 8x 01 04 0B 02 FF Down 8x 01 04 0B 03 FF Direct 8x 01 04 4B 00 00 0p pq: Iris Position 0q FF CAM_Gain Reset...
- Page 49 Command Set Command Command Packet Comments CAM_ICR 8x 01 04 01 02 FF Infrared Mode ON (Night) 8x 01 04 01 03 FF Infrared Mode OFF (Day) CAM_AutoICR 8x 01 04 51 02 FF Auto Infrared mode ON/OFF 8x 01 04 51 03 FF Threshold 8x 01 04 21 00 00 0p pq: ICR OFF(Day)->ON(Night) threshold...
- Page 50 Command Set Command Command Packet Comments Stop 8x 01 06 01 VV WW 03 03 FF AbsolutePosition 8x 01 06 02 VV WW 0Y 0Y 0Y 0Y 0Z 0Z 0Z 0Z FF RelativePosition 8x 01 06 03 VV WW 0Y 0Y 0Y 0Y 0Z 0Z 0Z 0Z FF Home 8x 01 06 04 FF...
- Page 51 Inquiry Command Command Packet Inquiry Packet Comments CAM_PowerInq 8x 09 04 00 FF y0 50 02 FF y0 50 02 FF CAM_ZoomPosInq 8x 09 04 47 FF y0 50 0p 0q 0r 0s FF pqrs: Zoom Position CAM_DZoomModeInq 8x 09 04 06 FF y0 50 02 FF D-Zoom On y0 50 03 FF...
- Page 52 50 0p 0q 0r 0s FF pqrs: Camera ID CAM_VersionInq 8x 09 00 02 FF y0 50 ab cd abcd: Vendor Code, AVer: 2574 mn pq rs tu vw FF mnpq: Model Code, MD330U(I): 0559 rstu: Firmware version (ex: 4025 for 1.1.4025.0)
- Page 53 Inquiry Command Command Packet Inquiry Packet Comments y0 50 0C FF 1280x720p/59.94 y0 50 0D FF 1920x1080p/50 y0 50 18 FF 1920x1080p/25 y0 50 26 FF 1280x720p/50 y0 50 27 FF 1280x720p/30 IR_Receive 8x 09 06 08 FF y0 50 02 FF y0 50 03 FF Pan-tiltPosInq 8x 09 06 12 FF...
-
Page 54: Visca Over Ip Settings
VISCA over IP Settings PORT Internet protocol IPv4 Transport protocol UDP Port address 52381 FORMAT byte 0 byte 1 byte 2 byte 3 byte 4 byte 5 byte 6 byte 7 byte 8 ~~~ byte 23 func Payload type Playload Length Sequence number Payload (1 to 16 bytes) 1~16(0x0001~0 VISCA Packet (see page... -
Page 55: Cgi Command
CGI Command CGI List for Video Transmission Comman Parameter Parameter CGI item name Description Name value Get JPEG /snapshot 1280x720 jpg /cgi-bin?OnePush= Step 1: requeset 4k snapshot Get 4K JPEG /snapshot?res=4k Step 2: get 3840x2160 jpg Get RTSP rtsp://ip/live_st1 stream CGI List for Audio CGI item Parameter... - Page 56 down end /cgi-bin?SetPtzf= 1,1,2 left start /cgi-bin?SetPtzf= 0,1,1 left end /cgi-bin?SetPtzf= 0,1,2 right start /cgi-bin?SetPtzf= 0,0,1 right end /cgi-bin?SetPtzf= 0,0,2 zoom_in start /cgi-bin?SetPtzf= 2,0,1 zoom_in end /cgi-bin?SetPtzf= 2,0,2 zoom_out start /cgi-bin?SetPtzf= 2,1,1 zoom_out end /cgi-bin?SetPtzf= 2,1,2 set preset: /cgi-bin?ActPreset= N : position load preset: /cgi-bin?ActPreset= N : position...
- Page 57 /cgi-bin?G http://10.100.105.110/cgi-bi Serial No. get etSerialNu n?GetSerialNumber mber /uploadwa ado_playback_file,3, -1 = OFF, 0 ~ 9 = uploadwav v/uploadw -1~9 (0~9 for customer) index av?Set= N1, N2 = X, Y ptz_oneclick_x,3,N1 coordinates /cgi-bin?Se &ptz_oneclick_y,3,N oneclick ptz_one_click_spd 1~24 (1080P, 0,0 at top 2&ptz_one_click_spd left) ,3,N3...
- Page 58 frame) info (0,0) at top left, X,Y,W,H is the top left of the target frame. focus – “focus:” is followed by the current current target frame trk_detect_zones="trk_num:02 target frame number. - Reply .focus:-1.zone[00]:760,09,222, number. Example: “-1” indicates 300.zone[01]:660,540,16,22." zone[NN]: no target is being tracked. x,y,w,h - If 3 targets are being 1080P...
Need help?
Do you have a question about the MD330U Series and is the answer not in the manual?
Questions and answers