Table of Contents
Advertisement
Quick Links
Advertisement
Table of Contents

Related Manuals for Yaber V2


Summary of Contents for Yaber V2
- Page 1 V2 Projector...
- Page 3 Language ..................01-24 25-46 ....................................47-68 ..................69-91 92-113 ..................................114-137...
-
Page 5: Table Of Contents
CONTENTS YABER Lifetime Professional Support ............TIPS ......................PRODUCT PACKING LIST ............... PRODUCT DESCRIPTION ............... PROJECTOR SPECIFICATION ..............REMOTE CONTROL ................. IMPORTANT SAFEGUGARDS ..............INSTALLATION ..................Adjust the Tiilt Base and Hang celiling ............. SUPPLY ...................... CLEANING ....................FAQ ...................... -
Page 6: Yaber Lifetime Professional Support
●Power Cord * 1 ●Instruction Manual * 1 ●3-in-1 AV Cable * 1 ●HDMI Cable * 1 ●Lens Cleaning * 1 ●Support Base*1 ●Remote Control * 1 (Batteries not included) Some video tutorials please refer to YABER's YouTube channel: https://www.youtube.com/channel/UCcU4wy4vPRQa_uNcolDd2hA... -
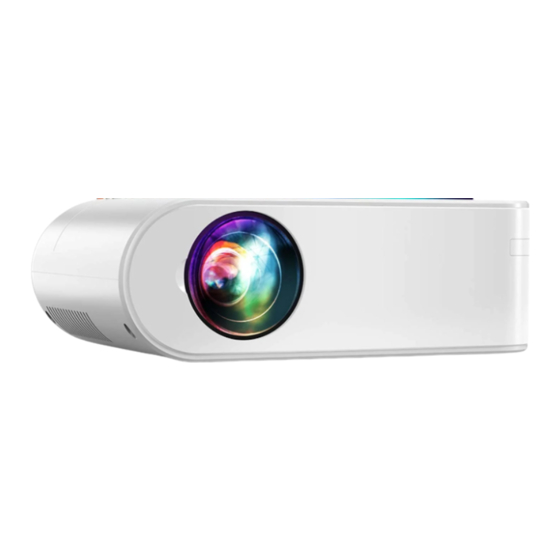
Page 7: Product Description
Product Description 01.Focus Ring 09.Earphone Port 02.Keystone Ring 10.AV Port 03.Power 11.USB-T 04.OK 12.USB 05.Source 13.HDMI 06.Left Move 14.VGA 07.Right Move 15.Power Cable Port 08.Return Name Description Focus Ring Adjust the focus ring to get the clearest image. Keystone Correction Adjust the keystone ring to get a rectangle shape. -
Page 8: Projector Specification
Wired screen mirroring port (With Original USB cable) USB-T USB port HDMI HDMI input VGA input Power Cable Port Plug the power cable Pictures shown are for illustration purpose only.Actual product may vary due to product enhancement. Projector Specification Recommended INative Resolution 1280*720p 7-10 ft... -
Page 9: Remote Control
(+/-) is correctly aligned. Thanks Thank you very much for purchasing the YABER V2 projector. Please read this instruction manual carefully before use. Also, please keep it handy so you can check it at any time. -
Page 10: Important Safegugards
Please Attention: The Mirror display function doesn't support protected videos due to copyright protection. (Netflix, Amazon Prime Video and Hulu etc.) Important safeguards These safety instructions are to ensure the long life of the projector and to prevent fires and shocks. Read them carefully and pay attention to all warnings. -
Page 11: Supply
Supply 1. The projector is designed to operate with a 110-240 V ~ 50/60 Hz AC adapter. Ensure that the power supply meets this requirement before attempting to use the projector. 2. Handle the power cord carefully and avoid bending it too much. A damaged cord can cause electric shock or fire. -
Page 12: Faq
1. At the time of switching on, the indicative light does not work ①. The power supply may not be well connected ②. Check the overheating protection system 2. Pressing the power button on the remote control does not turn on the projector ①. -
Page 13: Starting Projector
STARTING PROJECTOR Turn on the projector 1.Install two AAA batteries in the remote control before using. 2.Press the Power key on the remote or panel, the indicator light will turn red. 3.Remove the lens cover of the projector, the lamp will start working 2 seconds later, when an image is projected on the screen the machine is working smoothly. -
Page 14: Keystone And Focus
Keystone and Focus If the projected image is in a trapezoidal shape, it can be resolved by Keystone correction. ( Do Manual Keystone Correction ) Manual Focus Keystone Correction Note: If the Keystone correction fail to resolve image shape, please reduce the vertical height of the projector in relation to the center of the screen. -
Page 15: Setting Up The Projector
Setting the Main Menu: The projector's normal start up screen is as follows. If the first projection screen is not this one, press the “ ” button on the remote control to select USB source. Select the Input Source When the "No Signal" prompt appears, you need to select the input source: 1. -
Page 16: Wireless Projection Method
Make sure your mobile device is close to the projector when using wireless connection. A distance within 1 meter is recommended. Some mobile devices may not support screen mirroring due to the compatibility. Any questions, please feel free to contact YABER via Support@yabertech.com Press the [OK] button on the remote DEVICE control and connect with WIFI. -
Page 17: For Ios Devices
Method 1: Home Network Connection Mode Step 1 Press the OK button to enter the WIFI list - Select your home WIFI from the list - Connect the V2 projector to your home WIFI Press the [OK] button on the remote DEVICE control and connect with WIFI. - Page 18 Step 2 Select the [Settings] menu on your IOS device - Turn on the [WIFI] function - Connect your IOS device to the same home network as the projector. “My home” “My home” Step 3 Open Control Center- Tap the Screen Mirroring button-Connect [RKcast-xxxxxx] ①...
- Page 19 Method 2: Cellular Network Connection Mode(From your mobile phone card) Step 1 On your iOS device, tap [Settings] -[Wi-Fi] -Turn [Wi-Fi] ON. Available networks are shown. Choose the WiFi name like [RKcast-xxxxxx], Connect it and enter the password [12345678] which is on the Projector’s menu. RKcast-C7AEF9 Note: After connecting, if "No Internet Connection"...
- Page 20 Method 1: Home Network Connection Mode...
- Page 22 Method 2: Cellular Network Connection Mode(From your mobile phone card)
- Page 23 Step 3 Tap [Settings] -[Device connectivity] -Turn [Wireless projection] ON-Select the projector name like [RKcast-xxxxxx]...
-
Page 24: For Android Devices
Wired Screen mirroring (With Original USB cable) For IOS 1. Turn on the projector -- Press the “S” button on the remote -- “Input Source” -- Select “Screen Mirroring” -- Press the “OK” button. Press the [OK] button on the remote DEVICE control and connect with WIFI. -
Page 25: Projector Connections
PROJECTOR CONNECTIONS 1. Connecting to the Computer Using the HDMI or VGA cable to connect with projector. (An HDMI connection is recommended for projecting movies, videos, and other files which need to be HD.) (1)Turn on your computer and the projector; (2)Connect the HDMI/VGA cable to your computer's HDMI/VGA port;... -
Page 26: Connecting To The Dvd Player
(Note: VGA connection can only transmit analog signal of video not audio. An external speaker is required when the device is connected via VGA cable.) 2.Connecting to the DVD player 1. Use the supplied AV cable to connect the DVD player to the projector. 2. -
Page 27: Projector Image Setting
PROJECTOR IMAGE SETTING Picture Menu PICTURE MENU MODE FUNCTION Picture Mode Standard, Soft, User, Vivid Switch among the image mode Switch among the color Color Temperature Medium, Warm, User, Cool temperature mode Aspect Ratio Auto/ 4:3/ 16:9 Set up the aspect ratio of the image. Front/Rear on Desk, Projection Mode Set up the projection mode... -
Page 28: Sound Menu
Sound Menu SOUND MENU MODE FUNCTION Sound Mode User,Standard,Music,Movie,Sports Set up the sound mode Time Menu SOUND MENU MODE FUNCTION Sleep Timer Off/10min/20/min,etc. Shut off the projector after a set amount of time. Option Menu... -
Page 29: Projection Distance And Size
3% deviation among above listed data. Different settings cause various distances. Thank you very much for purchasing the YABER V2 projector. Please read this instruction manual carefully before use. Also, please keep it handy so you can check it at any time. - Page 30 FCC STATEMENT : This device complies with Part 15 of the FCC Rules. Operation is subject to the following two conditions: 1) This device may not cause harmful interference, and 2) This device must accept any interference received, including interference that may cause undesired operation.
Need help?
Do you have a question about the V2 and is the answer not in the manual?
Questions and answers