Table of Contents
Advertisement
Quick Links
Advertisement
Table of Contents

Subscribe to Our Youtube Channel
Related Manuals for Yaber V12


Summary of Contents for Yaber V12
- Page 1 V12 PROJECTOR...
- Page 2 LANGUAGE English 03-36 Deutsch Français Italia 日本語 日本語 한국인 한국인 Polish Spanish...
-
Page 3: Table Of Contents
YABER Lifetime Professional Support · · · · · · · · · · · · · · · · · · ·... -
Page 4: Yaber Lifetime Professional Support
YABER Lifetime Professional Support Dear valued customer Thank you for choosing Yaber V12 projector.This manual will help you navigate through all the features. We understand that there may be many questions and concerns that arise during the use of the projector. We are also eager to hear your feedback. -
Page 5: Package List
Package List V12 Projector HDMI Cable Power Cord Remote Control Projector Base Cleaning Cloth Lens Cover Quick Start Guide... -
Page 6: Projector Specifications
Projector Specifications Model No. V12 Focus Auto/Eletric Keystone Correction Auto/Eletric Light Source Display Technology USB2.0*2/ HDMI1.4*2/ Aspect Ratio 16:9/4:3 Interfaces 3.5mm Audio Out*1, Lan*1 Recommended Projection Ratio 1.36:1 1.3~5.0m Projection Distance 9.8*8.8*7.6 inches Native Resolution 1920*1080P Unit Dimension (25*22.5.*19.3CM) 7.27lbs (3.3KG) -
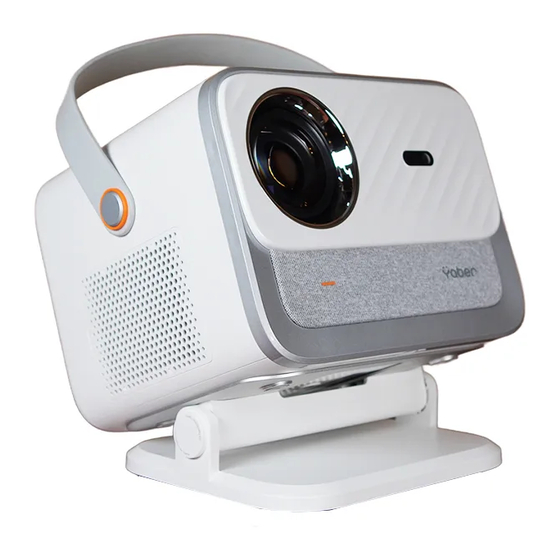
Page 7: Projector Overview
Projector Overview HDMI Ports USB Ports Wired Network Port Headphone Jack Infrared Signal Receiver Lens Power Input Autofocus Infrared Signal Signal Receiver Detachable Dust-Proof Net Air Outlet Screw Hole Screw Hole Bottom Label Power Button... -
Page 8: Remote Control Overview
• Prepare the remote control 1. Open the battery compartment. 2. Insert two AAA batteries with correct polarity indicated. 3. Close the battery compartment. Note: You must use the Yaber remote control to complete the first time setup of the projector. -
Page 9: Base Installation
1. Base Installation 1. Turn the machine over, back side up. 2. Match the holes of the base to the screw holes on the projector. 3. Tighten the screws in the accessory 4. Complete the installation. box. -
Page 10: Install On The Ceiling
2. Install on the Ceiling 1. Prepare a universal projector ceiling mount. (Not included in the package) 2. Remove the four rubber pads on the bottom of the projector to reveal the screw holes. 3. Use M5*10mm screws to securely install the projector on the ceiling using the hanger frame. -
Page 11: Adjustable Base Mount
4. Adjustable base mount Max degree: ±15° You can adjust the projection angle by modifying the bracket's position, with an adjustment range of up to 15 degrees both vertically upwards and downwards. 5. Connect Devices The projector has 5 ports, HDMI port/USB port/USB-C port/Audio out. -
Page 12: Operation
Operation 1. Starting Up the Projector • Power on Take off the protective film. Connect the power cable to an outlet. Press the power button once to Press the power button twice to turn on the projector. turn off the projector. -
Page 13: Image Adjustment
2. Image Adjustment • Auto Focus When the projector is turned on, please wait for a few seconds, it will automatically adjust the focus. (If not, ensure the auto focus function is activated in Settings -> Focus -> Auto Focus ->... - Page 14 • Auto Keystone Correction Please place the projector horizontally face to the wall first, after turn it on, it will automatically adjust the screen to a regular shape. (If not, ensure the auto keystone function is activated in Settings -> Keystone -> Auto Keystone ->...
- Page 15 Tips: When the projector detects shaking or rapid movement, it will automatically initiate autofocus adjustment and keystone correction to ensure optimal image quality. If you encounter unclear images or an imperfectly squared display, please use the remote control's focus button for manual adjustment or utilize the four-point keystone correction to manually correct the image shape.
-
Page 16: Play Content From Officially Licensed Apps
3. Play Content from Officially Licensed Apps like Netflix, Youtube and Prime Video Go to the homepage, select your preferred channel, or access it through the shortcuts on the remote. Log in to your account to play the corresponding content. -
Page 17: Projection Connetion And Input Source
4. Projection Connetion and Input Source Please follow the page 9 instructions to properly connect your devices to the projector, then select the correct input source. • USB Disk Input Mode 1. Insert the USB Disk 2. click on the input source [ ] on the remote control or choose the input source icon on the homepage. - Page 18 Warning: If the projector cannot recognize the USB disk, please refer to the following methods to solve the problem. 1. Please confirm whether your USB disk meets the following formats: (1) FAT32: 8G/16G/32G; (2)NTFS: 64G 2. If the USB disk is not recognized/detected, please format it.Before you format the USB disk, make sure to backup everything.
-
Page 19: Screencast
1 meter is recommended. 3. Some mobile devices may not support screen mirroring due to the compatibility. service@yaber.com 4. Any questions, please feel free to email YABER via iOS Cast (for iOS Devices) • iOS Wi-Fi Mirroring Step1:... - Page 20 Step2: Go to Hompage -> My Apps -> App Assistant and then select and download ScreenShare...
- Page 21 Step3: Go back to My Apps page -> Launch the ScreenShare App and remain on the following page.
- Page 22 Step4: Go to the Control Center of your iOS device. Then tap Screen Mirroring/Air Playing to search for the projector. Step5: Choose [Smart_Projector_XXXX] from the list, and once the connection is successful, .the content on your iOS device will be mirrored onto the projection screen or wall •...
- Page 23 Step2: Press the Screen Mirroring of iOS device and then choose[Smart_Projector_XXXX] Miracast Cast (For Android Device) Warning: To activate this function, your android device must support Multi-Screen/Wireless Display. The name of “Multi-Screen” may vary depending on various brands of Android devices.
- Page 24 Step3: Activate the 'Multi-Screen/Wireless Display' feature on your Android device Step4: Choose [Smart_Projector_XXXX] from the list, and once the connection is successful,the content on your iOS device will be mirrored onto the projection screen or wall...
- Page 25 • DLNA Step1: Connect the projector and your mobile device to the same router's WiFi. Step2: Go to Homepage -> My Apps -> HomeShare and remain on the following page.
- Page 26 Step3: Launch a video player App on your mobile device and select a video to play. Step4: to search for the projector and select [Smart_Projector_XXXX] toconnect. The contents on your device will be cast to the wall/screen. Note: When you cast a video from your mobile device,the video will only be displayed on the projected screen and you can still use your mobile device without interrupting the video or showing any of your other content.
-
Page 27: Bluetooth Setting
6. Bluetooth Setting • Connect to An External Bluetooth Speaker Step1: Turn on your Bluetooth device and make it ready for a Bluetooth connection. Step2: Go to Homepage -> Setting -> Bluetooth to scan available Bluetooth devices, then select your... - Page 28 * You may be able to adjust the latency(Lip Sync)on your device whichis playing the video. The way to adjustthe latency varies with different devices; please consult with the device manufacturer. Due to the compatibility issue between Bluetooth speakers/headphones and the projector, few Bluetooth devices may not be paired with the projector via the Bluetooth connection.
-
Page 29: Other Setting
7. Other Setting • Setup Go to home page -> Select [ Setting ] -> Select the [ Setup ]. Use the arrow keys on the remote control to switch the menu, press the “OK” to confirm and set. - Page 30 • Picture Mode Menu Go to home page -> Select [ Setting ] -> Select the [ Picture Mode ]. Use the arrow keys on the remote control to switch the menu, press the “OK” to confirm and set.
- Page 31 • Audio Setting Go to home page -> Select [ Setting ] -> Select the [ Audio ]. Use the arrow keys on the remote control to switch the menu, press the “OK” to confirm and set. Menu Content...
- Page 32 • About Go to home page -> Select [ Setting ] -> Select the [ About ]. Use the arrow keys on the remote control to switch the menu, press the “OK” to confirm and set. Menu Content Netfix...
-
Page 33: Signal Lines Connection
② Connecting with PC Step1: Connect to the computer and V12 projector with the HDMI cable (Included). Step2: Select the HDMI source to project on the projector; Step3: On your laptop, hold down the key “Win+P”board keys to change your display mode. - Page 34 Computer only: it is the default option – only displays on the main monitor. Duplicate: makes all the monitors display the same thing duplicating the desktop on each monitor. Extend: makes all your monitors act like one big monitor extending the desktop across all of them.
-
Page 35: Power On Mode
④ Connecting with XBOX/PS5 Step1: Use HDMI cable to connect to XBOX/PS5 Step2: Choose the media signal channel : “HDMI” Step3: Succeed ⑤ Connecting with DVD player: Step1: Use HDMI cable to connect to DVD player Step2: Select “HDMI” mode for connection... -
Page 36: Maintainance Tips
Maintainance Tips • Care of Projectors 1. Do not place projector in too warm or too cold room, because the high temperature or low temperature will shorten lifespan of the device. The working environment would be 5 °C-35 °C better. - Page 37 Scan and download the PDF user manual Where to Get More Help service@yaber.com aftersales@yabertch.com www.yaber.com @Yaber @Yaber Entertainment Projector...
Need help?
Do you have a question about the V12 and is the answer not in the manual?
Questions and answers