
Subscribe to Our Youtube Channel
Related Manuals for Insignia NS-BI1ZWC


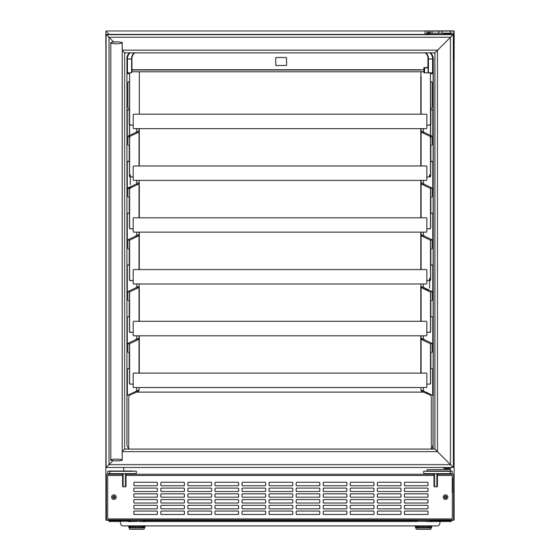
Summary of Contents for Insignia NS-BI1ZWC
- Page 1 USER GUIDE 61-Bottle Built-In Wine Cooler NS-BI1ZWC Before using your new product, please read these instructions to prevent any damage.
-
Page 2: Table Of Contents
Contents IMPORTANT SAFETY INSTRUCTIONS ......3 Features ............5 Package contents . -
Page 3: Important Safety Instructions
61-Bottle Built-In Wine Cooler IMPORTANT SAFETY INSTRUCTIONS CAUTION RISK OF ELECTRIC SHOCK DO NOT OPEN This symbol indicates that dangerous voltage constituting a risk of electric shock is present within your cooler. This symbol indicates that there are important operating and maintenance instructions in the literature accompanying your cooler. - Page 4 WARNING Electric Shock Hazard Failure to follow these instructions can result in electric shock, fire, or death. 1 WARNING–Keep ventilation openings in the appliance enclosure or in the built-in structure clear of obstruction. 2 WARNING–Do not touch the interior of the chiller compartment with wet hands.
-
Page 5: Features
61-Bottle Built-In Wine Cooler 11 This cooler is intended to be used in household and similar environments, such as: • Staff kitchen areas in shops, offices, and other working environments • Farm houses and by clients in hotels, motels, and other residential environments •... -
Page 6: Package Contents
Package contents • 61-bottle built-in wine cooler • Wire shelves (6) • Handle • Hardware Bag, including: • Hex key • Handle screws (2) • M5 x 10 Door pivot bracket screws (2) • Door axis sleeve • M5 x 14 Door frame decorative screws (2) •... -
Page 7: Dimensions
61-Bottle Built-In Wine Cooler Notes: • For your cooler to operate normally, avoid placing it in areas with high magnetic fields or high humidity. • When you put a lot of wine bottles in your cooler at one time, the temperature in your cooler may rise temporarily. -
Page 8: Control And Display Panel
Control and display panel Temperature Power Up and down buttons Power button Light button Display scale indicator indicator On/Off button °C/°F Hold 3 Sec Increase/ Hold 3 Sec decrease buttons Interior light button Display screen BUTTON FUNCTION Press to turn the power on or off. Press to turn the interior light on or off. -
Page 9: Setting Up Your Wine Cooler
61-Bottle Built-In Wine Cooler Setting up your wine cooler CAUTION: This appliance is heavy. We suggest having two people set up or move. Before using your cooler • Remove the exterior and interior packing. • Let your cooler stand upright for approximately six hours before connecting it to power. -
Page 10: Installing The Handle
Installing the handle Notes: • We recommend having two people complete the installation. • To avoid scratching the front panel, place a soft cloth or towel against the panel while installing the door handle. 1 Remove the door handle and hardware bag from your cooler. The hardware bag contains a hex key and two extra screws. -
Page 11: Front Vent
61-Bottle Built-In Wine Cooler 4 Push the door handle tightly against the door. 5 Insert the short end of the hex key into the set screw and tighten until snug (do not overtighten). The set screw is not recessed into the handle. -
Page 12: Building In Your Wine Cooler
Building in your wine cooler Required tools Carpenter square Tape measure Safety goggles Gloves Electric drill with 1.5 Level in. (38 mm) hole bit Flashlight Preparing the enclosure CAUTION: Wear gloves and safety goggles during installation. We do not recommend that you install your cooler into a corner or directly beside a wall. -
Page 13: Leveling Your Cooler
61-Bottle Built-In Wine Cooler If you are installing your cooler between frameless cabinets, a 0.5 in.(1.3 cm) wide filler strip or side panel may be needed on both sides of your cooler. The filler strip provides a space between the appliance case and the adjacent cabinet door swing. - Page 14 4 Pull the bottom of the door out, then move the door down to release it from the top hinge. 5 Place the door on a blanket or carpet to avoid damage. 6 Remove the top and bottom door gaskets by gently pulling the gaskets out of the mounting groove in the door frame with your fingers.
- Page 15 61-Bottle Built-In Wine Cooler 10 Use a thin, flat blade screwdriver or knife blade to remove door pivot sleeve from the top of the door, then take the new door pivot sleeve from the hardware bag and install it on the bottom of the door in the hole provided.
- Page 16 13 Remove three black decorative plugs from the hardware bag and install them in the three top right hinge holes. 14 Use a thin, flat blade screwdriver or knife blade to remove the three black decorative plugs from the top left hinge holes. WARNING: Be extremely careful when using a screwdriver or knife blade so that you don’t cut your hand or fingers, or otherwise injure yourself.
- Page 17 61-Bottle Built-In Wine Cooler 16 Rotate the glass door 180°, making sure that the door axis sleeve is on left top side and the door switch pressure plate is on the bottom side. 17 Hold the door and insert the door pivot sleeve into the hinge pin on the top left hinge.
-
Page 18: Grounding Requirement
Grounding requirement Your cooler must be grounded. Your cooler is equipped with a cord having a grounding wire with a three-prong grounding plug. The plug must be inserted into an outlet that is properly installed and grounded. Consult a qualified electrician or service person if the grounding instructions are not completely understood, or if doubt exists as to whether your cooler is properly grounded. -
Page 19: Using Your Wine Cooler
61-Bottle Built-In Wine Cooler Using your wine cooler Turning on your cooler Your cooler turns on automatically when you plug it in. You do not need to push the button to turn it on. You can manually set your cooler to “Standby” mode by pressing and holding button for approximately three seconds, provided that no other setting is in effect (the display is not blinking). -
Page 20: Storing Wine
Storing wine It is necessary to position the bottles alternately on the upper six shelves. This allows for the storage of nine 750 ml bottles on each of the six shelves and seven bottles on the bottom shelf, for a total storage capacity of 61 wine bottles. -
Page 21: Serving And Storage Tips
61-Bottle Built-In Wine Cooler Serving and storage tips We suggest that you pour wine at a temperature below the ideal serving temperature, because the wine warms up quickly after it’s been poured into a glass. WINE TYPE IDEAL SERVING TEMP Red Bordeaux 64.4°... -
Page 22: Maintaining Your Wine Cooler
Maintaining your wine cooler Your cooler is designed for year-round use with only minimal cleaning and maintenance. When you first receive it, wipe the cabinet with a mild detergent and warm water, then wipe dry with a dry cloth. Do this periodically to keep your cooler looking new. -
Page 23: Storing Your Cooler
61-Bottle Built-In Wine Cooler If the inner cabinet temperature is lower than 32° F (0° C), the error code "LO" shows on the display and an alarm sounds. If the inner cabinet temperature remains at 32° F (0° C) for more than 30 minutes, the error code “CL"... -
Page 24: Disposal
Disposal Your cooler may not be treated as regular household waste. It should be taken to an appropriate waste collection point for recycling of electrical components. For information on local waste collection points, contact your local waste removal agency or government office. Tips on saving energy •... -
Page 25: Specifications
61-Bottle Built-In Wine Cooler PROBLEM SOLUTION Your cooler makes unusual • Level your cooler with the leveling feet. noises or vibrates. • Move your cooler out from the wall. • This is normal. Moisture is building up on the • Make sure that the door is closed properly. interior walls and door of your •... -
Page 26: One-Year Limited Warranty
Product is determined to be defective by an authorized Insignia repair center or store personnel, Insignia will (at its sole option): (1) repair the Product with new or rebuilt parts; or (2) replace the Product at no charge with new or rebuilt comparable products or parts. Products and parts replaced under this warranty become the property of Insignia and are not returned to you. - Page 27 61-Bottle Built-In Wine Cooler • Connection to an incorrect voltage or power supply • Attempted repair by any person not authorized by Insignia to service the Product • Products sold “as is” or “with all faults” • Consumables, including but not limited to batteries (i.e. AA, AAA, C etc.) •...
- Page 28 1-877-467-4289 (U.S. and Canada) INSIGNIA is a trademark of Best Buy and its affiliated companies. Distributed by Best Buy Purchasing, LLC V3 ENGLISH 7601 Penn Ave South, Richfield, MN 55423 U.S.A 22-0886 ©2022 Best Buy. All rights reserved.
Need help?
Do you have a question about the NS-BI1ZWC and is the answer not in the manual?
Questions and answers