Table of Contents
Advertisement
Advertisement
Table of Contents

Related Manuals for Shark ION ROBOT RV700 Series


Summary of Contents for Shark ION ROBOT RV700 Series
- Page 1 ION ROBOT ™ RV700 Series INSTRUCTIONS sharkclean.com 1-800-798-7398...
- Page 2 THANK YOU for purchasing the Shark ION ROBOT ™ REGISTER YOUR PURCHASE registeryourshark.com 1-800-798-7398 Scan QR code using mobile device TIP: You can find the RECORD THIS INFORMATION model and serial numbers Model Number: �������������������������������������� on the QR code label Serial Number: ��������������������������������������...
-
Page 3: Table Of Contents
Setting Your Cleaning Schedule on the Remote ���������������������������� 13 BotBoundary™ Strips ������������������������������������������������������������������������������������ 15 Cleaning Modes ����������������������������������������������������������������������������������������������16 Sending Shark ION ROBOT to Charging Dock �������������������������������16 Maintaining Your Shark ION ROBOT ......... 17 Emptying the Dust Bin ��������������������������������������������������������������������������������� 17 Cleaning the Filters ����������������������������������������������������������������������������������������18 Cleaning the Brushroll ����������������������������������������������������������������������������������19... -
Page 4: Important Safety Instructions
4 DO NOT handle charger, charging dock, and all filters in place. or Shark ION ROBOT™ with wet hands. 13 DO NOT stand or sit on the Shark ION 5 Keep charging dock away from heated ROBOT. surfaces. DO NOT expose unit or battery to fire or excessive temperature. - Page 5 25 Make sure that all filters are thoroughly dry blinds or curtains. Move power cords and after routine cleaning. fragile objects out of the way. DO NOT 26 Use only Shark -brand filters and ® operate unit in areas where there are lit accessories.
- Page 6 39 Before disposing of the Shark ION ROBOT, 36 DO NOT charge at temperatures below the battery must be removed. To remove, 50°F (10°C) or above 104°F (40°C).
- Page 7 SAVE THESE INSTRUCTIONS CONFORMITY INFORMATION This equipment has been tested and found to comply with the limits for a Class B digital device, pursuant to part 15 of the FCC Rules. These limits are designed to provide reasonable protection against harmful interference in a residential installation. This equipment generates, uses, and can radiate radio frequency energy, and if not installed and used in accordance with the instructions, may cause harmful interference to radio communications.
-
Page 8: Getting To Know Your Shark Ion Robot
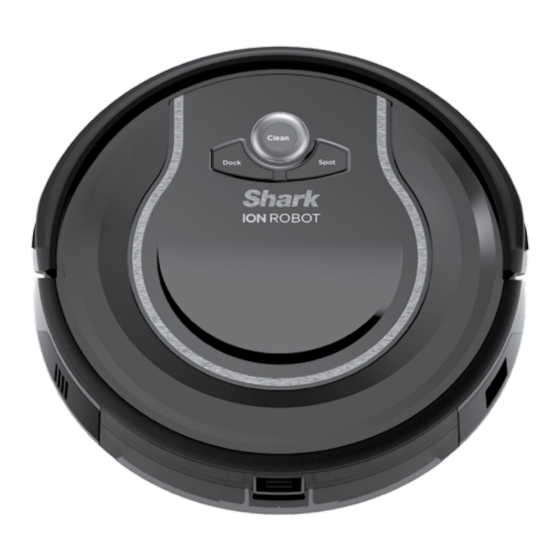
From assembly to use to maintenance, you will find it all in here. NOTE: When using for the first time, fully charge and discharge your Shark ION ROBOT to condition the battery. Failure to do so may cause LED indications to work incorrectly. - Page 9 Clean Dock Spot CLEAN BUTTON “!” ERROR INDICATOR To begin cleaning with your Shark ION When a blockage or a filter problem ROBOT™, press the CLEAN button. Press occurs, the “!” error indicator light will button again to stop. illuminate. Clear any blockages and clean filters.
-
Page 10: Charging Your Shark Ion Robot
ON position in order to charge the battery. When the cleaning cycle is complete or the battery is running low, Shark ION ROBOT will automatically return to the charging dock. If your unit doesn’t return to the dock, the battery charge may have run out. -
Page 11: Battery Charge Indicator Lights
Turn the Full Charge Low Charge cable to the jack on the side of the Shark Power switch to the ON position. If all indicator ION ROBOT. lights remain off, then charge the unit directly, using the charger. -
Page 12: Installing The Side Brushes
SETTING UP YOUR SHARK ION ROBOT™ NOTE: Some carpets may cause the robot to malfunction due to pile height. IMPORTANT: Before cleaning an entire room for the first time, we recommend that you first test your unit on a small section of the floor to ensure there is no scratching. -
Page 13: Using Your Shark Ion Robot
On the screen, the day of the week display With the remote control, you can start and will begin flashing. stop Shark ION ROBOT, select Spot Cleaning 2 Press the UP/DOWN arrows on the mode, send the unit back to the charging... -
Page 14: Setting Your Cleaning Schedule On The Remote
USING YOUR SHARK ION ROBOT™ - continued TIP: Whenever you use the remote control, make sure you point it directly at Shark ION ROBOT, and ensure that Shark ION ROBOT is powered on. Dock Spot Clean Enter SETTING YOUR CLEANING SCHEDULE ON THE REMOTE To schedule a cleaning, the day and time must be set. - Page 15 SCHEDULE button on the remote.) 9 Important: Once all scheduling is complete, the data must be sent to the Shark ION ROBOT™. To send the scheduling data, press and hold the Up arrow on the remote for two full seconds.
-
Page 16: Botboundary™ Strips
BOTBOUNDARY™ STRIPS You may need to keep Shark ION ROBOT away from certain areas, such as pet bowls, fragile objects, power strips, or doorways. Use the BotBoundary strips to quickly and easily create “no-go zones”... -
Page 17: Cleaning Modes
CLEANING MODES Spot Cleaning Manual Start/Stop In Spot mode, Shark ION ROBOT will thoroughly You can manually start and stop Shark ION clean an area in a spiral pattern. Use Spot mode ROBOT™. to clean a concentrated area of dust or debris. -
Page 18: Maintaining Your Shark Ion Robot
MAINTAINING YOUR SHARK ION ROBOT™ WARNING: Wash the dust bin and filter cover STEP 1 with water only. Be sure to air-dry them completely before reassembling. DO NOT wash the HEPA filter with water, as it may damage the filter and reduce suction power. -
Page 19: Cleaning The Filters
Clean the dust bin and filters with a cleaning brush. Replace the filters and the filter cover. Close the dust bin and slide it back into the Shark ION ROBOT™. s h a r kc l e a n . c o m... -
Page 20: Cleaning The Brushroll
MAINTAINING YOUR SHARK ION ROBOT™ - cont’d. CAUTION: Turn off power before performing any STEP 1 maintenance. NOTE: When cleaning brushroll, be sure to not cut anything other than hair, string, fibers, or other debris. STEP 2 STEP 3 CLEANING THE BRUSHROLL Push up on the tabs on the brushroll access door, then lift off the door. -
Page 21: Cleaning The Cliff Sensors And Charging Pads
CLEANING THE CLIFF SENSORS AND REPLACING THE SIDE BRUSHES CHARGING PADS To remove a bent or damaged side brush, pull For best results, clean cliff sensors and it off its post. To install new side brush, align charging pads periodically as needed. With a hole in center of brush over post on bottom of cloth or a cleaning brush, gently dust off the unit. -
Page 22: Cleaning The Removable Front Wheel
MAINTAINING YOUR SHARK ION ROBOT™ - cont’d. CAUTION: Turn off power before performing any maintenance. CLEANING THE REMOVABLE FRONT WHEEL The sensor below the removable rotating front wheel on the bottom of the unit should be cleaned once a week. Pull out the wheel and carefully dust the sensor in the cavity below. -
Page 23: Replacing The Battery
REPLACING THE BATTERY When the battery needs replacement, the red “Replace” light will illuminate. To remove the battery, turn the unit over and unscrew the battery cover with a Phillips-head screwdriver. Unplug the old battery from its connector, then plug in the new battery. Replace battery cover and screw it back into place. -
Page 24: Tips And Tricks
TIPS AND TRICKS FOR GREAT PERFORMANCE Your Shark ION ROBOT™ is designed with Smart Sensor technology so it can clean all areas of your floors and navigate its way out of tight spaces. During your first few cleanings, you may need to make some small adjustments to optimize your robot’s performance. -
Page 25: Botboundary Strips
PREPPING YOUR HOME USING BOTBOUNDARY STRIPS ™ Use the BotBoundary strips to quickly and easily create “no-go zones” to keep your robot out of the areas you would like it to avoid. These may include: • Near power cords that might cause tangles •... -
Page 26: Troubleshooting Guide
TROUBLESHOOTING GUIDE WARNING: Always turn off Power switch before performing any maintenance. If any error lights are illuminated or flashing on your Shark ION ROBOT , see the error ™ code chart below: ERROR CODE SOLUTION Unit is turned off. Cycle power switch. If no response, All LED lights are off plug in to charge unit. -
Page 27: Warranty
ONE (1) YEAR LIMITED WARRANTY The 1-Year Limited Warranty applies to purchases made from authorized retailers of SharkNinja Operating LLC. Warranty coverage applies to the original owner and to the original product only and is not transferable. Power pack is not covered by 1-year warranty. SharkNinja warrants that the unit shall be free from defects in material and workmanship for a period of 1 year from the date of purchase when it is used under normal household conditions and maintained according to the requirements outlined in this instruction manual, subject to the following conditions and exclusions. - Page 28 NOTES 1-800-798-7398...
- Page 29 NOTES s h a r kc l e a n . c o m...
- Page 30 NOTES 1-800-798-7398...
- Page 31 NOTES s h a r kc l e a n . c o m...
- Page 32 SHARK is a registered trademark of SharkNinja Operating LLC. BOTBOUNDARY and SHARK ION ROBOT are trademarks of SharkNinja Operating LLC. For SharkNinja U.S. Patent information, visit sharkninja.com/USPatents © 2017 SharkNinja Operating LLC RV700Series�IB�MP�170720...
Need help?
Do you have a question about the ION ROBOT RV700 Series and is the answer not in the manual?
Questions and answers