Advertisement
Quick Links
Instruction Manual
Remote User Station for Enterprise IP KVM Switch
SV5CONS
DE: Bedienungsanleitung - de.startech.com
FR: Guide de l'utilisateur - fr.startech.com
ES: Guía del usuario - es.startech.com
IT: Guida per l'uso - it.startech.com
NL: Gebruiksaanwijzing - nl.startech.com
PT: Guia do usuário - pt.startech.com
Packaging Contents
• 1x Remote User Station
• 1x Instruction Sheet
• 1x Power Adapter
Installation
1. Connect the user station via CAT5 cable to the KVM-A port on the
rear panel of the SV5CONS. Please note that if the Remote User
Station is only being attached to one KVM switch, the KVM-A port
must be used (the KVM-B port will be inoperable).
2. Connect the remaining end of the CAT5 cable used in step 1 to
the RJ45 port marked USER-1 on the SVxx53DXI.
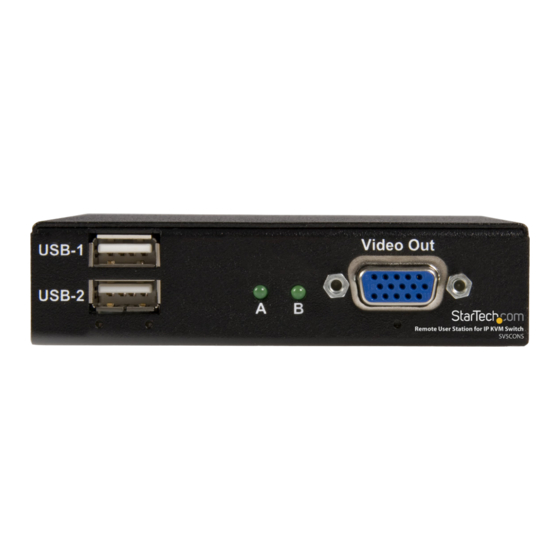
3. Connect a VGA compatible monitor to the VGA port on the front
panel of the SV5CONS.
4. Connect a USB keyboard and mouse device to each of the
available USB ports on the front panel of the SV5CONS.
5. Connect the Power Adapter to the power port on the rear panel
of the SV5CONS, then connect to an
available power outlet.
For the most up-to-date information, please visit: www.startech.com
Rear panel
Front panel
The following commands can be executed on the local machine to
make the following changes:
<CTRL><CTRL><C>
<CTRL><CTRL><A>
<CTRL><CTRL><B>
<CTRL> + <Space>
*actual product may vary from photos
Cause auto calibration to restart
Go to A port
Go to B port
To switch A/B connections at any time
(even if no KVM OSD is shown, or if
current KVM is powered down).
Manual Revision: 02/13/2012
Advertisement

Summary of Contents for StarTech.com SV5CONS
- Page 1 *actual product may vary from photos must be used (the KVM-B port will be inoperable). 2. Connect the remaining end of the CAT5 cable used in step 1 to the RJ45 port marked USER-1 on the SVxx53DXI. The following commands can be executed on the local machine to make the following changes: 3. Connect a VGA compatible monitor to the VGA port on the front panel of the SV5CONS. <CTRL><CTRL><C> Cause auto calibration to restart <CTRL><CTRL><A> Go to A port 4. Connect a USB keyboard and mouse device to each of the <CTRL><CTRL><B> Go to B port available USB ports on the front panel of the SV5CONS. To switch A/B connections at any time 5. Connect the Power Adapter to the power port on the rear panel <CTRL> + <Space> (even if no KVM OSD is shown, or if of the SV5CONS, then connect to an current KVM is powered down). available power outlet. For the most up-to-date information, please visit: www.startech.com Manual Revision: 02/13/2012...
- Page 2 • Consult the dealer or an experienced radio/TV technician for help. Use of Trademarks, Registered Trademarks, and other Protected Names and Symbols This manual may make reference to trademarks, registered trademarks, and other protected names and/or symbols of third-party companies not related in any way to StarTech.com. Where they occur these references are for illustrative purposes only and do not represent an endorsement of a product or service by StarTech.com, or an endorsement of the product(s) to which this manual applies by the third-party company in question. Regardless of any direct acknowledgement elsewhere in the body of this document, StarTech.com hereby acknowledges that all trademarks, registered trademarks, service marks, and other protected names and/or symbols contained in this manual and related documents are the property of their respective holders.


Need help?
Do you have a question about the SV5CONS and is the answer not in the manual?
Questions and answers