
Related Manuals for Lindy 38334


Summary of Contents for Lindy 38334
- Page 1 8x8 HDMI 4K60 Matrix User Manual Eng lis h Benutzerhandbuch Deutsch Manuel Utilisateur Français Manuale Italiano Manual de Usuario Español No. 38334 lindy.com © LINDY Group - FIRST EDITION (March 2023)
- Page 2 User Manual English Safety Instructions ! WARNING ! Please read the following safety information carefully and always keep this document with the product. Failure to follow these precautions can result in serious injuries or death from electric shock, fire or damage to the product. Touching the internal components or a damaged cable may cause electric shock, which may result in death.
- Page 3 Thank you for purchasing the 8x8 HDMI 4K60 Matrix. This product has been designed to provide trouble free, reliable operation. It benefits from both a LINDY 2 year warranty and free lifetime technical support. To ensure correct use, please read this manual carefully and retain it for future reference.
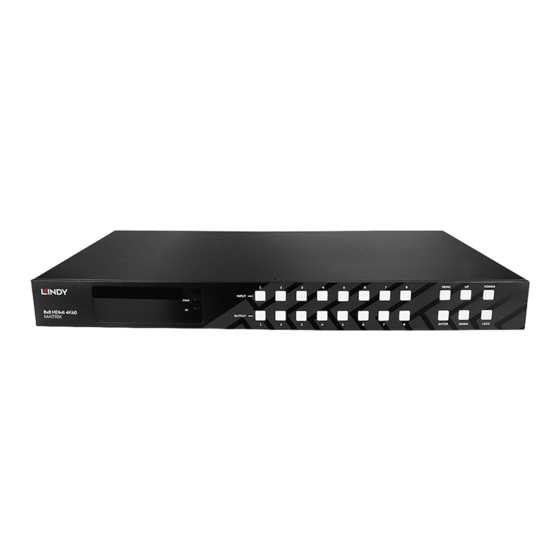
- Page 4 User Manual English Installation Front Panel 1. OLED Screen – Displays the Input and Output status of the matrix. Also displays the EDID management and the matrix’s IP address when required. 2. Power LED – The LED will be illuminated green when the matrix is powered on. The LED will be illuminated red when the matrix is in standby.
- Page 5 User Manual English Operation IR Remote The output must be selected first, then the input port to display the set layout. 1. Power Button – Power on the matrix or press to set the matrix to standby. 2. Input Selection – Press to select the required Input port. <...
- Page 6 User Manual English Input Page: Here you can see which inputs are currently active, rename them and set up the EDID from the table below: Output Page: Here you can see which output are currently active, rename them, turn on the downscaler to downscale video from 4K to 1080p resolutions, turn on/off the ARC function as well turning on/off the output individually.
- Page 7 User Manual English Network Page: Here you can switch the IP settings between static and DHCP as well as the Telnet Port. It also allows the change of the passwords and the reset of the network settings. System Page: Here you can set various settings like locking the front panel, turning on/off the confirmation sound of the push buttons, shut-down time for the front panel and the Baud Rate for the serial control.
- Page 8 User Manual English s reset! Reset to factory defaults Reset to factory defaults System Initializing… Initialization Finished! FW Version x.xx.xx s panel sound z! Enable/Disable buzzer function, beep on z=0~1(z=0 beep off, z=1 beep beep off Get buzzer state beep / beep off r panel sound! s lock z! Lock/Unlock front panel button,...
- Page 9 User Manual English s in x av out y! input 1 -> output 2 Set input x to output y, x=1~8, y=0~8(0=all) input 1 -> output 1 r av out y! Get output y signal status input 2 -> output 2 ……...
- Page 10 User Manual English input 8 EDID: 4K2K60 _444,Stereo Audio 2.0 r edid data hdmi y! Get the EDID data of the hdmi EDID: 00 FF FF FF FF FF FF 00 ……… output y port,y=1~8 hdmi output 1 arc on hdmi Turn on/off ARC of HDMI output output 1 arc off s hdmi y arc z!
- Page 11 User Manual English s cec hdmi out y vol-! set output y volume down by hdmi output 1 volume down CEC, y=0~8(0=all output) s cec hdmi out y vol+! set output y volume up by CEC, hdmi output 1 volume up y=0~8(0=all output) s cec hdmi out y active! set output y active source by...
- Page 12 Benutzerhandbuch Deutsch Sicherheitshinweise ! GEFAHR ! Bitte lesen Sie die folgenden Sicherheitshinweise sorgfältig durch und bewahren Sie dieses Dokument immer zusammen mit dem Produkt auf. Die Nichtbeachtung dieser Vorsichtsmaßnahmen kann zu schweren Verletzungen oder zum Tod durch Stromschlag, Feuer oder Schäden am Produkt führen. Das Berühren der internen Komponenten oder eines beschädigten Kabels kann einen elektrischen Schlag verursachen, der zum Tod führen kann.
- Page 13 Deutsch Einführung Wir freuen uns, dass Ihre Wahl auf ein LINDY-Produkt gefallen ist und danken Ihnen für Ihr Vertrauen. Sie können sich jederzeit auf unsere Produkte und einen guten Service verlassen. Diese 8x8 HDMI 4K60 Matrix unterliegt einer 2-Jahres LINDY Herstellergarantie und lebenslangem kostenlosen technischen Support.
- Page 14 Benutzerhandbuch Deutsch Installation Frontplatte 1. OLED-Bildschirm - Zeigt den Input- und Outputstatus der Matrix an. Zeigt bei Bedarf auch die EDID- Verwaltung und die IP-Adresse der Matrix an. 2. Power LED - Die LED leuchtet grün, wenn die Matrix eingeschaltet ist. Die LED leuchtet rot, wenn sich die Matrix im Standby-Modus befindet.
- Page 15 Benutzerhandbuch Deutsch 9. DC 12V - Schließen Sie das mitgelieferte 12VDC 3A-Netzteil an und schrauben Sie es fest. Stecken Sie den Stecker in eine Steckdose, um die Matrix mit Strom zu versorgen. Betrieb IR Fernbedienung Um das eingestellte Layout anzuzeigen, muss zuerst der Output und dann der Input Port ausgewählt werden.
- Page 16 Benutzerhandbuch Deutsch Input-Seite: Hier können Sie sehen, welche Inputs gerade aktiv sind, sie umbenennen und die EDID aus der Tabelle unten einstellen: Output-Seite: Hier können Sie sehen, welche Outputs gerade aktiv sind, sie umbenennen, den Downscaler einschalten, um Videos von 4K- auf 1080p-Auflösungen herunterzuskalieren, die ARC-Funktion ein- und ausschalten sowie die Outputs einzeln ein- und ausschalten.
- Page 17 Benutzerhandbuch Deutsch Netzwerk-Seite: Hier können Sie die IP-Einstellungen zwischen statisch und DHCP sowie den Telnet-Port umschalten. Außerdem können Sie hier die Passwörter ändern und die Netzwerkeinstellungen zurücksetzen. System-Seite: Hier können Sie verschiedene Einstellungen vornehmen, wie z. B. das Sperren der Frontplatte, das Ein- /Ausschalten des Bestätigungstons für die Tasten, die Abschaltzeit für den Frontscreen und die Baudrate für die serielle Steuerung.
- Page 18 Benutzerhandbuch Deutsch r link in x! Abfrage des Verbindungsstatus HDMI Input 1: connect des x-Eingangsports, x=0~8(0=all) r link out y! Abfrage des Verbindungsstatus HDMI Output 2: connect des y-Ausgangsanschlusses, y=0~8(0=alle) s reset! Zurücksetzen auf Reset to factory defaults System Initializing… Werkseinstellungen Initialization Finished! FW Version x.xx.xx...
- Page 19 Benutzerhandbuch Deutsch maximale Zeichenanzahl beträgt s logo2 logo2 Einstellen des Logonamens, der in der zweiten Zeile des LCD- ****************! Bildschirms angezeigt wird, die maximale Zeichenanzahl beträgt Stellen Sie die Baudrate der s baud rate xxx! Baudrate:115200 seriellen Schnittstelle des RS02-Moduls, z=(115200,57600, 38400,19200,9600,4800) r baud rate! Abfrage der Baudrate der seriellen...
- Page 20 Benutzerhandbuch Deutsch 12, 4K2K30_444,HD Audio 7.1 13, 4K2K60_420,Stereo Audio 14, 4K2K60_420,Dolby/DTS 5.1 15, 4K2K60_420,HD Audio 7.1 16, 4K2K60_444,Stereo Audio 17, 4K2K60_444,Dolby/DTS 5.1 18, 4K2K60_444,HD Audio 7.1 19, 4K2K60_444,Stereo Audio 2.0 HDR 20, 4K2K60_444,Dolby/DTS 5.1 21, 4K2K60_444,HD Audio 7.1 22, User1 23, User2 24~31, copy from hdmi output r edid in x!
- Page 21 Benutzerhandbuch Deutsch s cec in x right! Eingang x Menü rechts über input 1 menu right operation CEC einstellen, x=0~8(0=alle Eingänge) s cec in x enter! iInput 1 menu enter operation Eingang x Menü Enter über CEC einstellen, x=0~8(0=alle Eingänge) s cec in x play! input 1 play operation Eingang x Wiedergabe über...
- Page 22 Benutzerhandbuch Deutsch r mac addr! Netzwerk-MAC-Adresse Mac address: 00:1C:91:03:80:01 abrufen s ip mode z! Stellen Sie den Netzwerk-IP- Set IP mode:Static Modus auf statische IP oder (Please use "s net reboot!" DHCP ein, z=0~1 (z=0 Static, z=1 command or repower device to DHCP ) apply new config!) r ip mode!
-
Page 23: Manuel Utilisateur
Manuel Utilisateur Français Consignes de sécurité ! ATTENTION ! Merci de lire attentivement ces instructions de sécurité et de les conserver avec le produit. Le non-respect de ces précautions peut causer un choc électrique entrainant des blessures graves, voire mortelles, un incendie ou des dommages au produit. Toucher les composants internes ou un câble endommagé... - Page 24 Français Introduction Nous sommes heureux que votre choix se soit porté sur un produit LINDY et vous remercions de votre confiance. Vous pouvez compter à tout moment sur la qualité de nos produits et de notre service. Cette matrice 8x8 HDMI 4K60 est soumise à une durée de garantie LINDY de 2 ans et d’une assistance technique gratuite à...
- Page 25 Manuel Utilisateur Français Installation Panneau avant 1. Afficheur OLED – affiche l’état des entrées et sorties de la matrice. Affiche également la gestion des EDID et l’adresse IP de la matrice si besoin. 2. LED Power – la LED s’allume en vert lorsque la matrice est démarrée, et s’allume en rouge lorsque la matrice et en veille.
- Page 26 Manuel Utilisateur Français Utilisation Télécommande IR La sortie doit être sélectionnée en premier, puis l’entrée pour afficher la sélection choisie. 1. Bouton Power – démarre la matrice ou la met en veille. 2. Sélection Input (entrée) – appuyez pour sélectionner le port d’entrée.
- Page 27 Manuel Utilisateur Français Page Input (entrée): Ici, vous pouvez voir quelles entrées sont actuellement actives, les renommer et configurer l'EDID à partir du tableau ci-dessous : Page Output (sortie) : Ici, vous pouvez voir quelles sorties sont actuellement actives, les renommer, activer le downscaler pour réduire la vidéo de 4K à...
- Page 28 Manuel Utilisateur Français Page Network (reseau): Ici, vous pouvez basculer les paramètres IP entre statique et DHCP ainsi que le port Telnet, permet également de changer les mots de passe et de réinitialiser les paramètres du réseau. System Page : Cette page permet de définir divers paramètres tels que le verrouillage du panneau avant, l'activation ou la désactivation du son de confirmation des boutons, le temps d'arrêt du panneau avant et le débit en bauds de la commande série.
- Page 29 Manuel Utilisateur Français Obtenir l’état de connexion du r link out y! HDMI Output 2: connect port de sortie y, y=0~8(0=all) Reset paramètres d’usine s reset! Reset to factory defaults System Initializing… Initialization Finished! FW Version x.xx.xx s panel sound z! Active/désactive buzzer, beep on z=0~1(z=0 beep off, z=1 beep...
- Page 30 Manuel Utilisateur Français Défini le baud rate du module s baud rate xxx! Baudrate:115200 RS02, z=(115200,57600, 38400,19200,9600,4800) r baud rate! Obtenir le baud rate du module Baudrate:115200 RS02 module s id z! Défini l’ID de contrôle du produit, id 888! z=000~999 Défini l’entrée x sur la sortie y,...
- Page 31 Manuel Utilisateur Français 19, 4K2K60_444,Stereo Audio 2.0 HDR 20, 4K2K60_444,Dolby/DTS 5.1 21, 4K2K60_444,HD Audio 7.1 22, User1 23, User2 24~31, copie de la sortie hdmi Obtenir l’état EDID de l’entrée x r edid in x! input 1 EDID: 4K2K60 , x=0~8(0=all input) _444,Stereo Audio 2.0 ……...
- Page 32 Manuel Utilisateur Français s cec in x ff! set input x fast forward by CEC, input 1 fast forward operation x=0~8(0=all input) s cec in x previous! set input x previous by CEC, input 1 previous operation x=0~8(0=all input) s cec in x next! set input x next by CEC, input 1 next operation x=0~8(0=all input)
- Page 33 Manuel Utilisateur Français s tcp/ip port x! Défini le port TCP/IP Set TCP/IP port:8000 (x=1~65535) r tcp/ip port! Obtenir le port TCP/IP TCP/IP port:8000 s telnet port x! Défini le port telnet (x=1~65535) Set Telnet port:23 r telnet port! Obtenir le port telnet Telnet port:23 Network reboot…...
- Page 34 Manuale Italiano Istruzioni di sicurezza ! ATTENZIONE ! Per favore leggete la seguente informativa e conservate sempre questo documento con il prodotto. La mancata osservanza di queste precauzione può causare seri infortuni o la morte per folgorazione, incendi o danneggiare il prodotto. Toccare i componenti interni o un cavo danneggiato può...
- Page 35 Vi ringraziamo per aver acquistato la Matrice HDMI 4k60, 8x8. Questo prodotto è stato progettato per garantirvi la massima affidabilità e semplicità di utilizzo ed è coperto da 2 anni di garanzia LINDY oltre che da un servizio di supporto tecnico a vita. Per assicurarvi di farne un uso corretto vi invitiamo a leggere attentamente questo manuale e a conservarlo per future consultazioni.
- Page 36 Manuale Italiano Installazione Pannello Frontale 1. Display OLED – Visualizza lo stato degli ingressi e delle uscite della matrice. Visualizza anche la gestione EDID e l'indirizzo IP della matrice, se necessario. 2. LED di alimentazione - Il LED si illumina di verde quando la matrice è accesa. Il LED si illumina di rosso quando la matrice è...
- Page 37 Manuale Italiano Utilizzo Telecomando IR Per visualizzare il layout impostato, è necessario selezionare prima l'uscita e poi la porta di ingresso. 1. Pulsante di accensione - Accende la matrice o la premere per metterla in standby. 2. Selezione ingresso - Premere per selezionare la porta di ingresso desiderata.
- Page 38 Manuale Italiano Input Page: Qui è possibile vedere quali ingressi sono attualmente attivi, rinominarli e impostare l'EDID dalla tabella seguente: Output Page: Qui è possibile vedere quali uscite sono attualmente attive, rinominarle, attivare il downscaler per ridimensionare il video da 4K a 1080p, attivare/disattivare la funzione ARC e attivare/disattivare le uscite singolarmente.
- Page 39 Manuale Italiano Network Page: Qui è possibile cambiare le impostazioni IP tra statiche e DHCP e la porta Telnet. Consente inoltre la modifica delle password e il reset delle impostazioni di rete. System Page: Qui si possono impostare varie settaggi, come il blocco del pannello frontale, l'attivazione/disattivazione del suono di conferma dei pulsanti, il tempo di spegnimento del pannello frontale e la velocità...
- Page 40 Manuale Italiano r fw version! Ottenere la versione Firmare MCU BOOT: Vx.xx.xx MCU APP: Vx.xx.xx WEB GUI: Vx.xx r link in x! Ottenere lo stato di connessione Ingresso HDMI 1: collegamento della porta di ingresso x, x=0~8 (0=tutto) r link out y! Ottenere lo stato di connessione Uscita HDMI 2: collegamento della porta di uscita...
- Page 41 Manuale Italiano r preset z! Ottenere le informazioni z video/audio crosspoint preimpostate, z=1~8 s logo1 Impostare il nome del logo logo1:Inizializzazione... ****************! visualizzato sulla prima riga dello schermo LCD, con un massimo di 16 caratteri s logo2 logo2 Impostare il nome del logo visualizzato sulla seconda riga ****************! dello schermo LCD, con un...
- Page 42 Manuale Italiano 6, 1080i,HD Audio 7.1 7, 3D,Stereo Audio 2.0 8, 3D,Dolby/DTS 5.1 9, 3D,HD Audio 7.1 10, 4K2K30_444,Stereo Audio 11, 4K2K30_444,Dolby/DTS 5.1 12, 4K2K30_444,HD Audio 7.1 13, 4K2K60_420,Stereo Audio 14, 4K2K60_420,Dolby/DTS 5.1 15, 4K2K60_420,HD Audio 7.1 16, 4K2K60_444,Stereo Audio 17, 4K2K60_444,Dolby/DTS 5.1 18, 4K2K60_444,HD Audio 7.1 19, 4K2K60_444,Stereo Audio...
- Page 43 Manuale Italiano s cec in x down! impostare menu-down degli Ingresso 1 menu down ingressi x tramite CEC, x=0~8 (0=tutti gli ingressi) s cec in x left! impostare menu-left degli Ingresso 1 menu left ingressi x tramite CEC, x=0~8 (0=tutti gli ingressi) s cec in x right! impostare menu-right degli Ingresso 1 menu rigth...
- Page 44 Manuale Italiano s cec hdmi out y active! impostare la sorgente attiva Uscita hdmi 1 sorgente attiva dell'uscita y tramite CEC, y=0~8 (0=tutte le uscite) r ipconfig! Ottenere la configurazione IP IP Mode: Static corrente IP: 192.168.1.72 Subnet Mask: 255.255.255.0 Gateway: 192.168.1.1 TCP/IP port=8000 Telnet port=10 Mac address:...
- Page 45 Manuale Italiano r telnet port! Get network telnet port Telnet port:23 Network reboot… s net reboot! Reboot network modules...
- Page 46 Manual de Usuario España Información de seguridad ! ADVERTENCIA ! Lea atentamente la siguiente información de seguridad y guarde siempre este documento junto con el producto. El incumplimiento de estas precauciones puede provocar lesiones graves o la muerte por descarga eléctrica, incendio o daños al producto. Este dispositivo es una fuente de alimentación de tipo de conmutación y puede funcionar con voltajes de suministro en el rango de 100 a 240 VCA.
- Page 47 La Matriz HDMI 4K60 8x8 de Lindy 8x8 admite señales HDMI 2.0b 18G, lo que permite la transmisión de resoluciones claras 4K Ultra HD 60Hz. El soporte adicional para High Dynamic Range garantiza que el contenido de video se muestre con brillo mejorado, mayores contrastes y una gama de colores mucho más amplia, perfecta para pantallas de señalización digital en tiendas minoristas, creación de...
- Page 48 Manual de Usuario España Instalación Panel frontal 1. Pantalla OLED: muestra el estado de entrada y salida de la matriz. También muestra la administración de EDID y la dirección IP de la matriz cuando sea necesario. 2. LED de encendido: el LED se iluminará en verde cuando se encienda la matriz. El LED se iluminará en rojo cuando la matriz esté...
- Page 49 Manual de Usuario España 9. DC 12V: conéctelo a la fuente de alimentación de 12VDC 3A incluida y atornille para asegurar. Conéctelo a una toma de pared de CA para alimentar la matriz. Funcionamiento Control remoto IR La salida debe seleccionarse primero, luego el puerto de entrada para mostrar el diseño establecido.
- Page 50 Manual de Usuario España Página de entrada: Aquí puede ver qué entradas están activas actualmente, cambiarles el nombre y configurar el EDID en la siguiente tabla: Página de salida: Aquí puede ver qué salida está activa actualmente, cambiarle el nombre, encender el escalador para reducir la escala de video de resoluciones 4K a 1080p, activar/desactivar la función ARC y encender/apagar la salida individualmente.
- Page 51 Manual de Usuario España Página de red: Aquí puede cambiar la configuración de IP entre estática y DHCP, así como el puerto Telnet. También permite el cambio de las contraseñas y el restablecimiento de la configuración de red. Página del sistema: Aquí...
- Page 52 Manual de Usuario España r link in x! Obtenga el estado de conexión HDMI Input 1: conectada x = 0 del puerto de entrada x, 8 (0 = todos) r link out y! Obtenga el estado de conexión Salida HDMI 2: conectada puerto salida y = 0...
- Page 53 Manual de Usuario España r preset z! Obtener información Crosspoint de vídeo/audio preestablecida, z = 1 ~ 8 s logo1 Establezca nombre logo1: Inicializando... ****************! logotipo que se muestra en la primera línea de la pantalla LCD, el carácter máximo es 16 s logo2 logo2 Establezca el nombre del...
- Page 54 Manual de Usuario España x=0~8(0=todos),z=1~31 todas las entradas EDID: 1080p, 1, 1080p, audio estéreo 2.0 audio estéreo 2.0 2, 1080p, Dolby/DTS 5.1 3, 1080p, HD Audio 7.1 4, 1080i, audio estéreo 2.0 5, 1080i, Dolby/DTS 5.1 6, 1080i, HD Audio 7.1 7, 3D, audio estéreo 2.0 8, 3D, Dolby/DTS 5.1 9, 3D, HD Audio 7.1...
- Page 55 Manual de Usuario España s cec in x off! establecer entrada x apagado Entrada 1 apagado por CEC, x = 0 ~ 8 (0 = todas las entradas) s cec in x menu! establecer entrada x abrir menu Entrada 1 Abrir menú por CEC, x=0~8(0=all input) s cec in x back! establecer entrada x operación...
- Page 56 Manual de Usuario España CEC, y = 0 ~ 8 (0 = todas las salidas) s cec hdmi out y off establecer salida y apagado por Salida HDMI 1 apagado CEC, y = 0 ~ 8 (0 = todas las salidas) s cec hdmi out y mute! establecer salida y volumen...
- Page 57 Manual de Usuario España r subnet! Obtener máscara de subred de Máscara de subred: 255.255.255.0 s gateway Establecer puerta de enlace de Establecer puerta de enlace: xxx.xxx.xxx.xxx! 192.168.1.1 ¡Utilice el comando "s net reboot!" o reencienda el dispositivo para aplicar una nueva configuración.
-
Page 58: Recycling Information
Recycling Information WEEE (Waste of Electrical and Electronic Equipment), Recycling of Electronic Products Europe, United Kingdom In 2006 the European Union introduced regulations (WEEE) for the collection and recycling of all waste electrical and electronic equipment. It is no longer allowable to simply throw away electrical and electronic equipment. - Page 59 Recycling Information Möglichkeiten der Rückgabe von Altgeräten Besitzer von Altgeräten aus privaten Haushalten können diese bei den Sammelstellen der öffentlich- rechtlichen Entsorgungsträger oder bei den von Herstellern oder Vertreibern im Sinne des ElektroG eingerichteten Rücknahmestellen unentgeltlich abgeben. Rücknahmepflichtig sind Geschäfte mit einer Verkaufsfläche von mindestens 400 m² für Elektro- und Elektronikgeräte sowie diejenigen Lebensmittelgeschäfte mit einer Gesamtverkaufsfläche von mindestens 800 m², die mehrmals pro Jahr oder dauerhaft Elektro- und Elektronikgeräte anbieten und auf dem Markt bereitstellen.
- Page 60 Standard IEC 60950-1 or 60065 or 62368-1. LINDY Herstellergarantie – Hinweis für Kunden in Deutschland LINDY gewährt für dieses Produkt über die gesetzliche Regelung in Deutschland hinaus eine zweijährige Herstellergarantie ab Kaufdatum. Die detaillierten Bedingungen dieser Garantie finden Sie auf der LINDY Website aufgelistet bei den AGBs.
Need help?
Do you have a question about the 38334 and is the answer not in the manual?
Questions and answers