Table of Contents

Related Manuals for MRC SPECTRO-UV600 Series


Summary of Contents for MRC SPECTRO-UV600 Series
- Page 1 User’s Guide SPECTRO-UV600 Series UV-VIS Spectrophotometer PLEASE READ THIS MANUAL CAREFULLY BEFORE OPERATION 11.6.23 3, Hagavish st. Israel 58817 Tel: 972 3 5595252, Fax: 972 3 5594529 mrc@mrclab.com SPECTRO-UV600 SERIES User’s Guide...
-
Page 2: Guaranty And Declaration
We guarantees this product conforms to the national and industrial standards in China as well as the ISO9001:2008 standard. Other international standard conformance certification is in progress. Contact Us If you have any problem or requirement when using our products or this manual, please contact us. SPECTRO-UV600 SERIES User’s Guide... -
Page 3: Safety Requirement
If you suspect damage occurs to the instrument, have it inspected by qualified service personnel before further operations. Any maintenance, adjustment or replacement especially to circuits or accessories must be performed by our authorized personnel. Keep Well Ventilation. Inadequate ventilation may cause increasing of temperature or damages to the SPECTRO-UV600 SERIES User’s Guide... - Page 4 Please use the solvent in compliance with instructions specified in its supplier. If necessary, wear protective clothing, gloves and glasses to avoid any injuries. Handling Safety Please handle with care during transporting to avoid damages to surface, panel and parts resulting from the falling from your hand. SPECTRO-UV600 SERIES User’s Guide...
-
Page 5: Safety Terms And Symbols
CAUTION indicates a potential damage to the instrument or other property might occur. Symbols Used on the Product. These symbols may appear on the product: Hazardous Protective Earth Voltage Terminal SPECTRO-UV600 SERIES User’s Guide... -
Page 6: Spectro-Uv600 Overview
SPECTRO-UV600 Overview SPECTRO-UV600 series is a double-beam UV-VIS spectrophotometer developped by us and consists of three models (SPECTRO-UV690/UV670/UV650). SPECTRO-UV600 which performs qualitative, quantitative or structral analysis of material according to the selected absorption of the light within a certain wavelength range by the molecule or ion of the material, is mainly used in pharmacy, medical health, chemistry, environmental protection, geology and teaching. - Page 7 Besides, the software also supports report template editing, log record function, management and GLP mode. The components of the instrument are independent and can be dissembled separately. SPECTRO-UV600 SERIES User’s Guide...
-
Page 8: Document Overview
Document Overview Chapter 1 Quick Start This chapter provides an overview of SPECTRO-UV600 series UV-VIS spectrophotometer and detailed introductions of the instrument appearance and components. Chapter 2 Installation This chapter introduces the environment and installation place requirements, installation notices and installation procedures of SPECTRO-UV600 series UV-VIS spectrophotometer. -
Page 9: Table Of Contents
Power-on and Self-test ..............2-5 Performance Inspection after Installation ........... 2-7 Chapter 3 Daily Maintenance ..............3-1 Daily Maintenance ................... 3-2 Replaceable Parts ..................3-4 To Replace the Fuse ................3-4 To Replace the Deuterium Lamp ............3-5 SPECTRO-UV600 SERIES User’s Guide... - Page 10 Chapter 5 Specifications ................. 5-1 General Characteristics ............... 5-1 Specifications ..................5-2 Chapter 6 Appendix ................6-1 Appendix A: SPECTRO-UV600 Series Accessories ......... 6-1 Appendix B: Theories Overview ..............6-2 Appendix C: Solvent Knowledge ..............6-5 Appendix D: Warranty ................6-6 Index ......................
-
Page 11: Chapter 1 Quick Start
Chapter 1 Quick Start Chapter 1 Quick Start This chapter guides users to get a quick understanding of the appearance and components of SPECTRO-UV600 series UV-VIS spectrophotometer. Subjects in this chapter: Appearance Components SPECTRO-UV600 User’s Guide... -
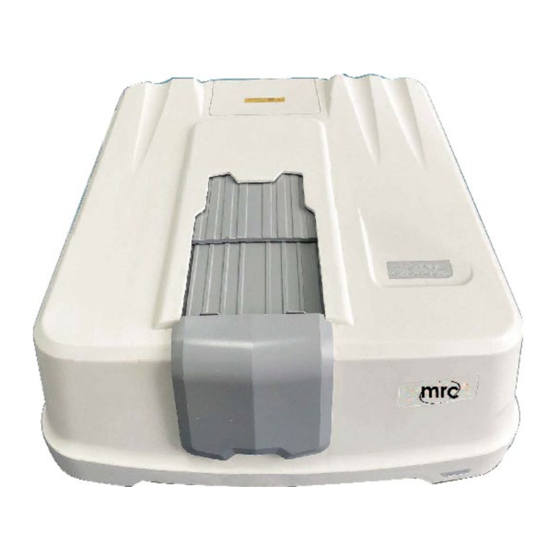
Page 12: Appearance
Red: power is switched on but the instrument has not been started or error occurs; Yellow: the instrument is in normal start-up; Green: the instrument is successfully started and is running. Note: the instrument state indicator is displayed in green and red alternatively during version update. SPECTRO-UV600 SERIES User’s Guide... -
Page 13: Rear Panel
Communication Interfaces: provide RS-232, LAN and USB-Device interfaces. For detailed information of each interface, refer to the introduction in “Main Control Panel”. SPECTRO-UV600 SERIES User’s Guide... -
Page 14: Vertical View
Figure 1-3 Vertical View Keep the sample compartment cover installed during the measurement to avoid affecting the measurement accuracy. If the sample compartment cover is no installed, the beeper will sound and the instrument state indicator will turn red. SPECTRO-UV600 SERIES User’s Guide... -
Page 15: Upward View
As shown in the figure below, there are four round rubber feet at the four corners of the bottom of the case of SPECTRO-UV600 which make the instrument be stably placed on the workbench. Rubber Feet Figure 1-4 Upward View SPECTRO-UV600 SERIES User’s Guide... -
Page 16: Components
The optical system of SPECTRO-UV600 mainly consisits of the light source compartment, optical filter set, monochromator, light splitting compartment and recieving compartment. The working principles of the optical system of SPECTRO-UV600 are as shown in Figure 1-6 and Figure 1-7. SPECTRO-UV600 SERIES User’s Guide... - Page 17 Sample Cell Condenser Lens 2 Condenser Lens 5 Condenser Lens 8 Pre- Reflectoscope 1 Condenser Lens 9 monochromator Grating Condenser Lens 3 Chopper Mirror Reflectoscope 4 Optical Filter Set Reflectoscope 2 Photomultiplier Entrance Slit Condenser Lens 6 SPECTRO-UV600 SERIES User’s Guide...
- Page 18 Reference Cell Light Diaphragm Condenser Lens 4 Sample Cell Condenser Lens 2 Reflectoscope 1 Condenser Lens 7 Optical Filter Set Reflectoscope 2 Reflectoscope 4 Entrance Slit Chopper Mirror Condenser Lens 8 Grating Condenser Lens 5 Photomultiplier SPECTRO-UV600 SERIES User’s Guide...
- Page 19 The filter ranges of the 5 optical filters: Blank: 190nm to 305nm Purple: 305nm to 370nm Blue: 370nm to 550nm Green: 550nm to 700nm Black: 700nm to 900nm SPECTRO-UV600 SERIES User’s Guide...
- Page 20 At the entrance and exit of the monochromator are the entrance slit and exit slit. SPECTRO-UV690 and SPECTRO-UV670 provide 6 bandwidth options (include 0.1nm, 0.2nm, 0.5nm, 1nm, 2nm and 4nm); while the bandwidth of SPECTRO-UV650 is fixed at 2nm. SPECTRO-UV600 SERIES User’s Guide 1-10...
- Page 21 Glass Cuvette: 340nm to 900nm wavelength range Note: you are recommended to use quartz cuvette. SPECTRO-UV600 series is configured with single cell. You can purchase 8-series cell according to your need to measure multiple samples in one measurement. Receiving Compartment The optical receiving set of SPECTRO-UV600 is photomultiplier.
-
Page 22: Power Source
The main control panel is used to control all the components (the preamplifier panel, the step motor and its position detect, the over-temperature detect and beeper as well as the system power source and the lamp power source) of SPECTRO-UV600. SPECTRO-UV600 SERIES User’s Guide 1-12... -
Page 23: Preamplifier Circuit Board
The preamplifier circuit board performs I-V conversion, programming gain amplification and A/D conversion on the current signal output from the photomultiplier and finally transmit the digital signal to the main control panel for data processing. SPECTRO-UV600 SERIES User’s Guide 1-13... -
Page 25: Chapter 2 Installation
Chapter 2 Installation Chapter 2 Installation This chapter introduces the installation environment and place requirements, installation notices and installation procedures of SPECTRO-UV600 series UV-VIS spectrophotometer. Besides, the power-on self-test and performance inspection after instalaltion of the instrument are also introduced. -
Page 26: Installation Preparations
WARNING It is necessary to remove the power cord if you want to cut the power; otherwise the instrument will be still in power-on state, even if the power switch of the instrument is turned off. SPECTRO-UV600 SERIES User’s Guide... - Page 27 80cm depth, more than 200cm width, 10cm clearance at the front and back as well as 5cm clearance on each side of the body for easy operation. SPECTRO-UV600 SERIES User’s Guide...
-
Page 28: Unpacking & General Inspection
2. Check the spare parts Carefully check the spare parts against the packing list. If your contents are incomplete or damaged, please contact the local distributor or the local office of SPECTRO-UV600 SERIES User’s Guide... -
Page 29: Installation Guide
Ultra UV software (for more details, refer to the Ultra UV User’s Guide). 3. If the self-test fails, the beeper will sound and the instrument state indicator at the front panel will turn red. Users can view the detailed self-test results through SPECTRO-UV600 SERIES User’s Guide... - Page 30 4. If the self-test passes, users can perform measurements through the Ultra UV software. Note: perform self-test each time the instrument is restarted after power-off. Make sure that the instrument has been warmed up for more than 30 minutes before performing measurement. SPECTRO-UV600 SERIES User’s Guide...
-
Page 31: Performance Inspection After Installation
Table 2-1 Measure the 656.1nm characteristic spectral line Sweep Parameters Measurement Mode E_S (sample light energy) Sweep Rate Medium/Slow Sampling Interval 0.05nm Energy Conditions Light source: deuterium lamp; PMT voltage: Auto Wavelength Range 670 to 640 nm Instrument Parameter Spectral Bandwidth 2.0nm SPECTRO-UV600 SERIES User’s Guide... - Page 32 2. Baseline Flatness The baseline flatness specification of the instrument is ±0.0008A. Test Method: set the measurement parameters according to Table 2-3 using the spectral measurement function (refer to the Ultra UV User’s Guide). SPECTRO-UV600 SERIES User’s Guide...
- Page 33 Number of Cycles 120s Instrument Parameter Spectral Bandwidth 2.0nm Sweep for 2 minutes and measure the difference (namely the noise when the transmittance of the instrument is 100%) between the maximum and minimum on the measurement spectrum. SPECTRO-UV600 SERIES User’s Guide...
- Page 34 Set the transmittance of the instrument to 100%, sweep for 30 minutes and read the difference (namely the baseline drift when the transmittance of the instrument is 100%) between the maximum and minimum of the center line of the envelop of the sweep spectrum. SPECTRO-UV600 SERIES User’s Guide 2-10...
- Page 35 220nm wavelength. Change the wavelength to 360nm and use the same method (replace the 10g/L Sodium solution with 50g/L Sodium Nitrite solution) to measure and calculate the stray light at 360nm wavelength. SPECTRO-UV600 SERIES User’s Guide 2-11...
-
Page 37: Chapter 3 Daily Maintenance
Chapter 3 Daily Maintenance This chapter provides the operation method of daily maintenance and guides users to replace and clean some of the components. Subjects in this chapter: Daily Maintenance Replaceable Parts Cleaning SPECTRO-UV600 SERIES User’s Guide... -
Page 38: Daily Maintenance
When filling solvent into the cuvette, pour it in slowly along the cuvette wall. Do not touch the transparent surface of the cuvette to avoid affecting the measurement results. When measuring volatile material, cover the cuvette tightly SPECTRO-UV600 SERIES User’s Guide... - Page 39 Turn off the instrument and pull out the power cord before dissembling the instrument. WARNING Make sure the temperature inside the light source compartment is approximate to the environment temperature before opening the light source compartment cover. SPECTRO-UV600 SERIES User’s Guide...
-
Page 40: Replaceable Parts
3. Remove the blown fuse from the seat and place a new one (with the same specifications) in it. 4. Reinstall the seat stably and tightly. 5. Power on the instrument. If the instrument starts normally, the new fuse is in SPECTRO-UV600 SERIES User’s Guide... -
Page 41: To Replace The Deuterium Lamp
2. Remove the light source compartment cover by releasing the screws attached to it using a T15 cross screwdriver (as shown in Figure 3-2). 3. Remove the lamp compartment cover by releasing the screws attached to it using a T10 cross screwdriver (as shown in Figure 3-3). SPECTRO-UV600 SERIES User’s Guide... - Page 42 Figure 3-3 Remove the Lamp Compartment Cover 4. Pull out the three-prong plug from the old lamp, release the two fixing screws on the deuterium lamp seat using a T10 cross screwdriver and remove the old SPECTRO-UV600 SERIES User’s Guide...
- Page 43 50 hours are required for a best working status after a lamp is replaced. To view the working status and capability of the lamp, go to the work station (for details, refer to the Ultra UV User’s Guide). SPECTRO-UV600 SERIES User’s Guide...
-
Page 44: To Replace The Tungsten Lamp
4. Pull out the two-prong plug from the old lamp, release the two fixing screws on the lamp seat using a T10 cross screwdriver and remove the old lamp set in the direction of the arrow (as shown in Figure 3-5) with white cloth gloves worn. SPECTRO-UV600 SERIES User’s Guide... - Page 45 24 hours are required for a best working status after a lamp is replaced. To view the working status and capability of the lamp, go to the work station (for details, refer to the Ultra UV User’s Guide). SPECTRO-UV600 SERIES User’s Guide...
-
Page 46: Cleaning
Do not let the liquid flow into the instrument when wiping it to avoid electric shock and instrument damage. Do not use ethanol or diluents for cleaning to avoid rusting or discoloring the instrument surface. SPECTRO-UV600 SERIES User’s Guide 3-10... -
Page 47: To Clean The Cuvette
Flush the cuvette with the solvent to be tested when changing solvent. CAUTION Do not touch the transparent surface of the cuvette during operation or cleaning to avoid polluting or corroding it and affecting the experiment result. SPECTRO-UV600 SERIES User’s Guide 3-11... -
Page 49: Chapter 4 Troubleshooting
Make sure environment light up temperature is too low temperature is greater than 15℃ Deuterium lamp power Contact us circuit failure tungsten tungsten lamp Replace the tungsten lamp lamp does not filament is blown SPECTRO-UV600 SERIES User’s Guide... - Page 50 Chapter 4 Troubleshooting light up Contact us Circuit failure Blank memory is not performed absorbance The absorbance Perform blank zero sample is lower than value is negative that blank reference solvent Contact us Circuit failure SPECTRO-UV600 SERIES User’s Guide...
-
Page 51: Chapter 5 Specifications
General Characteristics SPECTRO- SPECTRO- SPECTRO- UV690 UV670 UV650 Weight 32kg Dimen. 660mm×570mm×270mm (L×W×H) Power 242VAC Voltage Power 50Hz Frequency Power 160W Operation 15℃ 35℃ (temperature variation less than 2℃/hour) Temp. Operation 20% RH 80% RH Humidity SPECTRO-UV600 SERIES User’s Guide... -
Page 52: Specifications
±0.004Abs (0.5 to lA) Transmittance ±0.3%T (0%T to 100%T) Accuracy Photometric 0.001Abs (0 to 0.5A) Repeatability 0.002Abs (0.5 to 1A) Transmittance ±0.1%T (0 to 100%T) Repeatability Baseline Flatness ±0.0008A Baseline Drift 0.0003Abs/h Photometric Noise ±0.0002 (Abs) SPECTRO-UV600 SERIES User’s Guide... - Page 53 Chapter 6 Appendix SPECTRO-UV600 SERIES User’s Guide...
-
Page 55: Chapter 6 Appendix
Chapter 6 Appendix Chapter 6 Appendix Appendix A: SPECTRO-UV600 Series Accessories Specification Qty. Part Name EU Standard Power Cord Fuse 250V/3A/Slow/5mm*20mm Survey Report Certificate Data Cable Cuvette 10mm, Quartz 10mm, Glass Cuvette SPECTRO-UV600 Hard Copy User’s Guide Ultra UV User’s... -
Page 56: Appendix B: Theories Overview
(absorbances) of the lights with different wavelengthes by the material. In the absorption curve, the maximum absorption wavelength (λmax) is usually used to measure the materail content. SPECTRO-UV600 SERIES User’s Guide... - Page 57 λ λ λ λ In the equation above, can be got from measurement. If you on ③ to obtain the equation below. want to know whether a certain material is contained, perform wavelength sweep ④ λ SPECTRO-UV600 SERIES User’s Guide...
- Page 58 The optical path length is not uniform: the light source is not point light source, the path length of the cuvette is not the same or multiple reflections are caused by defects in the optical parts. All these would cause path length difference. SPECTRO-UV600 SERIES User’s Guide...
-
Page 59: Appendix C: Solvent Knowledge
Absorption Wavelength Lower Limit (nm) Ethylether Cyclopropane n-Butane Water Isopropanol Methanol Methyl cyclohexane 96% Sulfuric Acid Ethanol 2,2,4-Trimethyl Pentane Para-Dioxane n-Hexane Glycerine 1,2-Dichloroethane Dichloromethane Chloroform n-Butyl Acetate Ethyl Acetate Methyl Formate Toluene Pyridine Acetone Carbon Bisulfide Benzene SPECTRO-UV600 SERIES User’s Guide... -
Page 60: Appendix D: Warranty
The warranty items include but not being subjected to the hint guarantee items related to tradable characteristic and any particular purpose. We will not take any responsibility in cases regarding to indirect, particular and ensuing damage. SPECTRO-UV600 SERIES User’s Guide... -
Page 61: Index
Index Index Appearance ......... 1-2 Preamplifier Circuit Board ... 1-13 Baseline Drift ......2-10 Rear Panel ........1-3 Receiving Compartment ..... 1-11 Baseline Flatness ......2-8 chopper mirror ......1-11 reflectoscope ......1-11 Daily Maintenance ......3-2 Relative Humidity ......2-2 Dimensions .........
Need help?
Do you have a question about the SPECTRO-UV600 Series and is the answer not in the manual?
Questions and answers