Stanley PB2500 Service Manual
Smart blind rivet tool
Hide thumbs
Also See for PB2500:
- Instruction manual (78 pages) ,
- Accessories manual (12 pages) ,
- Instruction manual (76 pages)
Table of Contents
Advertisement
Quick Links
Advertisement
Table of Contents

Related Manuals for Stanley PB2500


Summary of Contents for Stanley PB2500
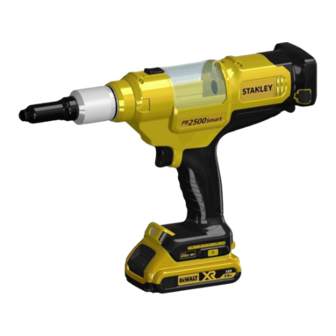
- Page 1 Service Manual PB2500 Smart Blind rivet tool Battery Power Tool...
- Page 2 PB2500 Smart (Ref. Section2.4) Figure 1 3.2 [1/8] 4.0 [5/32] Model no. / Serial no. Figure 2 Figure 3...
- Page 3 PB2500 Smart (Ref. Section2.4) Figure 5 Figure 4 Figure 6 Figure 7 Figure 9 Figure 8 Figure 10...
-
Page 5: Table Of Contents
The information provided may not be reproduced and/or made public in any way and through any means (electronically or mechanically) without prior explicit and written permission from STANLEY Engineered Fastening. The information provided is based on the data known at the moment of the introduction of this product. -
Page 6: Safety Definitions
The term “power tool” in the warnings refers to your mains-operated (corded) power tool or battery-operated (cordless) power tool. Do not use outside the design intent of Placing STANLEY Engineered Fastening Blind Fasteners. • Use only parts, fasteners, and accessories recommended by the manufacturer. -
Page 7: Important Safety Instructions For All Battery Chargers
ENGLISH Dress properly. Do not wear loose clothing or jewelry. Keep your hair, clothing and gloves away from moving • parts. Loose clothes, jewelry or long hair can be caught in moving parts. Adopt a firm footing or a stable position before operating the tool. •... -
Page 8: Important Safety Instructions For All Battery Packs
ENGLISH Do not place any object on top of charger or place the charger on a soft surface that might block the ventilation • slots and result in excessive internal heat. Place the charger in a position away from any heat source. The charger is ventilated through slots in the top and the bottom of the housing. -
Page 9: Specific Safety Instructions For Lithium-Ion (Li-Ion)
ENGLISH 1.5 SPECIFIC SAFETY INSTRUCTIONS FOR LITHIUM-ION (LI-ION) Do not incinerate the battery pack even if it is severely damaged or is completely worn out. The battery pack can explode in a fire. Toxic fumes and materials are created when lithium-ion battery packs are burned. -
Page 10: Specifications
ENGLISH STANLEY Engineered Fastening policy is one of continuous product development and improvement and we reserve the right to change the specification of any product without prior notice. 2. SPECIFICATIONS UNDER NO CIRCUMSTANCES SHOULD ANY MAINTENANCE OR SERVICING BE CONDUCTED APART FROM NOSE EQUIPMENT CHANGE. - Page 11 [in] ø 2,4 [3/32] 1,600(1,200) 3,200(2,400) ø 3,2 [1/8] 1,500(1,100) 3,000(2,200) PB2500 Smart ø 4,0 [5/32] 1,300(1,000) 2,600(2,000) ø 4,8 [3/16] 1,100(800) 2,200(1,600) Note: These values are listed as a guide only and are estimates based on a fully charged battery. Results may vary depending on rivet material, tool/battery condition and work environment.
-
Page 12: Placing Specifications
Note: For details on the nose equipment please refer to the accessories manual. This tool has the capability to verify measurements. STANLEY Engineered Fastening does not assure the value and accuracy of Break-load and Stroke displayed. In addition, STANLEY Engineered Fastening cannot provide the range of Break-load and Stroke for each rivet. -
Page 13: Main Components List
ENGLISH 2.4 MAIN COMPONENTS LIST (for complete tool explosion and Bill of Material please see service manual) PB2500 Smart drawing can be found inside the front cover Nose pieces Changer lamp Nose housing Charger Nose housing nut Battery charger connection... -
Page 14: Tool Use & Set Up
ENGLISH 3. TOOL USE & SET UP The PB Series of tools are designed for installation of STANLEY Engineered Fastening Blind Fasteners. DO NOT use under wet conditions or in presence of flammable liquids or gases. READ ALL SAFETY WARNINGS AND INSTRUCTIONS BEFORE PUTTING TOOL INTO SERVICE. -
Page 15: Chargers
Lithium-Ion Battery Packs STANLEY Engineered Fastening PB Series Li-Ion tools are designed with an Electronic Protection System that will protect the battery against overloading, overheating or deep discharge. -
Page 16: Battery Packs
ENGLISH 4.3 BATTERY PACKS Your tool is designed to work specifically with DEWALT® 18V/20V max Li-Ion battery packs. Inserting and Removing the Battery Pack from the Tool (fig. 3) NOTE: For best results, make sure your battery pack is fully charged. The tool will shut off without warning when the battery is fully discharged. -
Page 17: Tool Operation
The mandrel collector is used to collect the waste mandrels. The mandrel collector must be emptied depending on the size of the blind rivets used. Nom. Rivet Dia. Approx. Capacity (PB2500 Smart) 2.4 mm [3/32”] 3.2 mm [1/8”] 4.0 mm [5/32”] 4.8 mm [3/16”]... -
Page 18: Servicing The Tool
ENGLISH 6. SERVICING THE TOOL 6.1 MAINTENANCE FREQUENCY Item Frequency General Tool Inspection Daily Clean & lubricate Nose Equipment 5,000 rivets Clean & grease Ball Screw and Thrust Bearing 50,000 rivets* *Recommend contacting authorized service centre 6.2 CLEANING ALWAYS wear approved eye protection at all times when cleaning equipment Tool Exterior Keep the brushless motor exhaust vent openings (H) free from dust and dirt. -
Page 19: Spare Parts - Tools
You can check the location of your nearest authorised repair agent by contacting your local STANLEY Engineered Fastening office at the address indicated in this manual. Alternatively, a list of authorised STANLEY Engineered Fastening repair agents and full details of our after-sales service and contacts are available on the Internet at: www.StanleyEngineeredFastening.com... -
Page 20: Jaws, Jaw Guide, Jaw Pusher And Jaw Pusher Spring
ENGLISH 7. Jaws, Jaw Guide, Jaw Pusher and Jaw Pusher Spring SA Jaw pusher assembly, 5 SA Jaw pusher assembly, 4 SA Jaw pusher, 6 Jaw guide Jaw pusher spring Jaws BOM for Main Unit Assembly Remarks Model Others JAWS 13300 71210-15001 JAW GUIDE... - Page 21 ENGLISH Jaw guide Jaws (3pcs) Put Jaws into Jaw guide as shown, so that the teeth of Jaws are inside. Jaw guide Jaws (3pcs) After putting Jaws, check that they are set correctly as shown. Jaw pusher spring Jaw pusher Press insert Jaw pusher into Jaw pusher spring by Hand.
- Page 22 ENGLISH Pulling head Jaw pusher with spring Put Jaw pusher with Jaw pusher spring into Pulling head. Jaw guide Front clutch Tighten Jaw guide with Jaws to Pulling head while Front clutch is pulled by hand until it stops. Pulling head Front clutch Turn back a little until the rotation is locked by the boss of Front clutch.
- Page 23 ENGLISH Set a battery onto Tool to check the operation. Battery Check if the tool operates correctly by pulling and releasing the trigger. Check for: Pulling operation Return operation Reset operation Full stroke → Stroke end clutch operation →...
-
Page 24: Sa Nose Housing And Sa Nose Piece
ENGLISH 8. SA Nose Housing and SA Nose Piece SA Nose housing SA Nosepiece, 614 SA Nosepiece, 514 SA Nosepiece, 414 SA NOSE HOUSING TP133-570 On Tool SA NOSEPIECE, 614 TRM00825 In Kit box SA NOSEPIECE, 514 TRM00824 In Kit box SA NOSEPIECE, 414 TRM00823 SA Nose housing... - Page 25 ENGLISH SA Nose housing SA Nosepiece Tighten up SA Nosepiece securely with spanners as shown. Width across flats : 12mm and 21mm Set Torque: 13Nm Spanner 21mm Spanner 12mm Nose housing nut Apply grease to inside of Nose housing nut. Apply grease Mast housing SA Nose housing...
-
Page 26: Operation Test And Appearance Check
ENGLISH Mast housing SA Nose housing Tighten SA Nose housing onto the thread of Mast housing by hand. 9. Operation Test and Appearance check Operation Check Set 20 rivets of 4.8mm (3/16”) Stainless rivet and 10 Aluminum rivet to check followings: ... -
Page 27: Restoring To Factory Settings
Touch 1. Upper left, 2. Upper right, 3. Lower left in the screen in order during showing Logo of Stanley Engineered Fastening for a few seconds. It is rebooted with the settings restored to factory settings. If it fails, try again. -
Page 28: Default Settigs
ENGLISH 11. Default settigs Default factory settings are as follows. Functions On/Off Counters On/Off Setting value Smart function Poka-Yoke Assessment Free setting Service1 Force range(kN) 1.0~8.0 Service2 Stroke range(mm) 2.0~15.0 Service3 Stroke range(Average mode)% Mandrel Force range(Average mode)% 3000 Auto return Overhaul 50000 Password... - Page 29 ENGLISH QW (EUROPE) PB2500S-QW1832 Model number PB2500S-QW1831 BATTERY PACK DCB183-XJ ←(2PCS) CHARGER DCB115-QW ← SA NOSEPIECE, 4 TRM00823 ← SA NOSEPIECE, 5 TRM00824 ← JAW PUSHER ASSEMBLY, 4 TP154-502 ← JAW PUSHER ASSEMBLY, 5 TP154-505 ← FOAM SPACER TRM00194(1PC) ←(2PCS) INSTRUCTION MANUAL TRM00991 ←...
- Page 30 ENGLISH XD (MALAYSIA)---TBD PB2500-XD1831 PB2500S-XD1832 Model number BATTERY PACK DCB183-XJ ←(2PCS) CHARGER DCB115-XD ← SA NOSEPIECE, 4 TRM00823 ← TRM00824 ← SA NOSEPIECE, 5 ← JAW PUSHER ASSEMBLY, 4 TP154-502 JAW PUSHER ASSEMBLY, 5 TP154-505 ← ←(2PCS) FOAM SPACER TRM00194(1PC) ←...
-
Page 31: Exploded View
ENGLISH 13. Exploded View... -
Page 32: Bom
ENGLISH 14. BOM PB2500S-JP... - Page 33 ENGLISH PB2500S-NA...
- Page 34 ENGLISH PB2500S-QW...
- Page 35 ENGLISH PB2500S-GB...
- Page 36 ENGLISH PB2500S-XE...
- Page 37 ENGLISH PB2500S-XD...
- Page 38 ENGLISH PB2500S-KR...
-
Page 39: Troubleshooting Guide
ENGLISH 15. Troubleshooting Guide Tool Symptom Cause Remedy Tool does not operate when switch Battery is defective Replace battery is pressed. Battery is not fully charged Charge battery Battery is not fully seated Remove battery and re-insert. Reset tool to home. Battery pack has reached operating Remove battery &... - Page 40 ENGLISH Stem retention/removal feature Inspect Nose Piece and replace O- worn out on Nose Piece ring and ball/pin as required Cannot insert rivet Incorrect Nose Piece for rivet. Refer to Accessories Manual. Select and install correct nose piece Broken rivet stems jammed in Nose Service and clean Nose Assembly.
- Page 41 Remove battery & allow to cool. operating temperature limit through Mount battery and reset tool to continuous use or defect home. Screen freezes in Stanley Engineered 1. Data reading fails Remove battery and re-insert. Press Fastening Logo. trigger to turn on.
- Page 42 ENGLISH 4. There is a problem in tool. Remove cause of issue or contact local service center 5. Trigger module is defective. Replace motor & module assembly or contact local service center 6. Smart function is turned off. No NOK judgement if smart function is turned off.
- Page 43 Avdel®, Avex®, Avibulb®, Avinox®, Bulbex®, Hemlok®, Interlock®, Klamp-Tite®, Monobolt®, POP®, ProSet®, Stavex® and T-Lok® are registered trademarks of Stanley Black & Decker, Inc. and its affiliates. The names and logos of other companies mentioned herein may be trademarks of their respective owners.
Need help?
Do you have a question about the PB2500 and is the answer not in the manual?
Questions and answers