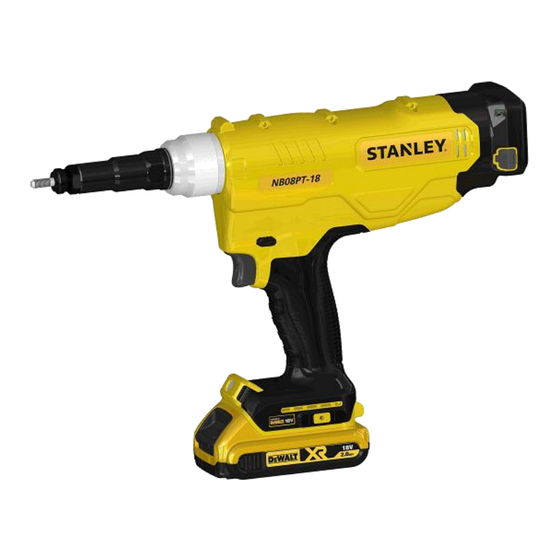
Stanley NB08PT-18 Service Manual
Blind nut tool, battery power tool
Hide thumbs
Also See for NB08PT-18:
- Instruction manual (626 pages) ,
- Accessories manual (10 pages) ,
- Accessories manual (22 pages)
Table of Contents
Advertisement
Quick Links
Advertisement
Table of Contents

Related Manuals for Stanley NB08PT-18


Summary of Contents for Stanley NB08PT-18
- Page 1 Service Aid NB08PT-18 Blind nut tool Battery Power Tool...
-
Page 2: Table Of Contents
The information provided may not be reproduced and/or made public in any way and through any means (electronically or mechanically) without prior explicit and written permission from STANLEY Engineered Fastening. The information provided is based on the data known at the moment of the introduction of this product. -
Page 3: Main Components List
1. MAIN COMPONENTS LIST 1.1 NB08PT-18 MAIN COMPONENTS FIGURES... -
Page 5: Main Components List
ENGLISH 1.2 MAIN COMPONENTS LIST Mandrel Charger Lamp Nosepiece Charger Lock Nut Battery Charger Connection Nose Housing Mandrel Lock Nose Housing Nut Spin Pull Head Case Hook Accessory attachment Spin Pull Head Motor Housing FR Lever Exhaust Vent Mast Housing Handle Switch Battery Pack... -
Page 6: Spare Parts - Tools
Separate collection. This product must not be disposed of with normal household waste. Should you find one day that your STANLEY Engineered Fastening product needs replacement, or if it is of no further use to you, do not dispose of it with household waste. Make this product available for separate collection. -
Page 7: Change Spare Part
ENGLISH CHANGE SPARE PART SA SPIN PULL HEAD Spin Pull Head Case Lock Pin Snap Ring Lock Pin Pusher Spring Circlip Lock Pin Pusher Spin Pull Head Thrust Washer Lock Pin Holder BOM for SA Nose Housing (TNM00155) SA SPIN PULL HEAD TNM00155 TNM00041 CIRCLIP... - Page 8 ENGLISH Insert Snap Ring into Spin Pull Head’s Snap Ring Ring slot ring slot using a snap ring pliers. Spin Pull Head Case Spin Pull Head Insert Lock Pin Pusher Spring inside Spin Pull Head. Lock Pin Pusher Spring Spin Pull Head Put Lock Pin Pusher on top of the spring.
- Page 9 ENGLISH Screw a mandrel into Spin Pull Head to Mandrel, 6 guide for next step. Insert Lock Pin Holder. The Lock Pin Holder’s hole should align with Spin Pull Head’s hole. Lock Pin Holder ALIGN! Lock Pin Holder’s hole Spin Pull Head’s hole Insert the Lock Pin inside Lock Pin Holder’s hole wholly.
- Page 10 ENGLISH Screw the SA Spin Pull Head into Front Unit Assembly. Tighten it using a wrench. Set torque to 30Nm. Front Unit Assembly SA Spin Pull Head Insert desired size Mandrel into SA Spin Mandrel Pull Head. Screw tightly with hand. When feel tighten, return a little bit until the lock pin locked the mandrel.
-
Page 11: Sa Nosepiece
ENGLISH SA NOSEPIECE SA Nose housing Nosepiece Lock Nut BOM for SA Nose Housing and SA Nosepiece SA NOSE HOUSING TNM00154 LOCK NUT PNT-600-03 NOSEPIECE PNT600-02-6 CONSUMABLE PNT600-02-4 PNT600-02-5 PNT600-02-8 Screw the Lock Nut onto the desired Nosepiece. Nosepiece Lock Nut Screw the Nosepiece into SA Nose Housing. - Page 12 ENGLISH Insert the SA Nose Housing into the SA Spin Pull Head Front Unit and screw it by hand. Front Unit SA Nose Housing Insert nut to check the adjustment of Mandrel’s head the Nosepiece and Lock Nut. The mandrel should a little bit outside of the nut.
-
Page 13: Touch Screen Module
ENGLISH TOUCH SCREEN MODULE Below is the instruction for changing touch screen module ① ② ③ ⑥ ④ ⑤ ⑦ ⑧ ⑨ Instructions: ① Open housing clamshells ② Pull out connectors and take out touch screen ③ Unscrew a cross-recessed screw ④... - Page 14 ENGLISH ⑩ ⑪ ⑫ ⑬ ⑮ ⑭ ⑱ ⑯ ⑰ ⑲ ⑩ Peel double-sided tape on new screen ⑪⑫ Insert screen cable into it connector and lock it ⑬⑭ Place screen aligning with the line on the board. ⑮ Connect two boards aligning 2 connectors ⑯...
-
Page 15: Restoring To Factory Setting
It will reboot to the restored setting to factory settings. If it fails, try again. If the Stanley screen freezes and does not start, do the same before the Stanley screen is fully displayed. Remove the battery to turn OFF the power. -
Page 16: Accessories
ENGLISH ACCESSORIES JP (JAPAN) Model number NB08PT-18-JP1831 NB08PT-18-JP1832 BATTERY PACK DCB183-JP(1PC) ←(2PCS) CHARGER DCB115-JP ← NOSEPIECE, M4 PNT600-02-4 ← NOSEPIECE, M5 PNT600-02-5 ← NOSEPIECE, M8 PNT600-02-8 ← MANDREL, M4 PNT600-01-4 ← MANDREL, M5 PNT600-01-5 ← MANDREL, M8 PNT600-01-8M ← SMART SCREEN INSTRUCTION MANUAL TNM00341 ←... - Page 17 ENGLISH GB (GREAT BRITAIN) Model number NB08PT-18-GB1831 NB08PT-18-GB1832 BATTERY PACK DCB183-GB(1PC) ←(2PCS) CHARGER DCB115-GB ← NOSEPIECE, M4 PNT600-02-4 ← NOSEPIECE, M5 PNT600-02-5 ← NOSEPIECE, M8 PNT600-02-8 ← MANDREL, M4 PNT600-01-4 ← MANDREL, M5 PNT600-01-5P ← MANDREL, M8 PNT600-01-8 ← INSTRUCTION MANUAL TNM00340 ←...
- Page 18 ENGLISH KR (KOREA) Model number NB08PT-18-KR1831 NB08PT-18-KR1832 BATTERY PACK DCB183-KR(1PC) ←(2PCS) CHARGER DCB115-KR ← NOSEPIECE, M4 PNT600-02-4 ← NOSEPIECE, M5 PNT600-02-5 ← NOSEPIECE, M8 PNT600-02-8 ← MANDREL, M4 PNT600-01-4 ← MANDREL, M5 PNT600-01-5P ← MANDREL, M8 PNT600-01-8M ← INSTRUCTION MANUAL TNM00339 ←...
-
Page 19: Exploded View
ENGLISH EXPLODED VIEW... -
Page 20: Bom For Spare Parts
*Consumable **The quantity and type of Li-Ion Battery Packs depends on Model Number and region sold. NB08PT-18-JP1831 : Battery Pack(2.0Ah) 1pc NB08PT-18-JP1832 : Battery Pack(2.0Ah) 2pcs ***If TRM00162 is needed to replace, contact your local reseller or SEF service centers. - Page 21 Cross recessed pan head tapping screws(2-12) **The quantity and type of Li-Ion Battery Packs depends on Model Number and region sold. NB08PT-18-NA2031 : Battery Pack(2.0Ah) 1pc NB08PT-18-NA2032 : Battery Pack(2.0Ah) 2pcs ***If TRM00162 is needed to replace, contact your local reseller or...
- Page 22 Cross recessed pan head tapping screws(2-12) **The quantity and type of Li-Ion Battery Packs depends on Model Number and region sold. NB08PT-18-XJ1831 : Battery Pack(2.0Ah) 1pc NB08PT-18-XJ1832 : Battery Pack(2.0Ah) 2pcs ***If TRM00162 is needed to replace, contact your local reseller or...
- Page 23 Cross recessed pan head tapping screws(2-12) **The quantity and type of Li-Ion Battery Packs depends on Model Number and region sold. NB08PT-18-XJ1831 : Battery Pack(2.0Ah) 1pc NB08PT-18-XJ1832 : Battery Pack(2.0Ah) 2pcs ***If TRM00162 is needed to replace, contact your local reseller or...
- Page 24 **The quantity and type of Li-Ion Battery Packs depends on Model TNM00311 Cross recessed pan head tapping screws(2-12) Number and region sold. NB08PT-18-XE1831 : Battery Pack(2.0Ah) 1pc NB08PT-18-XE1832 : Battery Pack(2.0Ah) 2pcs ***If TRM00162 is needed to replace, contact your local reseller or SEF service centers.
- Page 25 **The quantity and type of Li-Ion Battery Packs depends on Model TNM00311 Cross recessed pan head tapping screws(2-12) Number and region sold. NB08PT-18-XJ1831 : Battery Pack(2.0Ah) 1pc NB08PT-18-XJ1832 : Battery Pack(2.0Ah) 2pcs ***If TRM00162 is needed to replace, contact your local reseller or SEF service centers.
- Page 26 **The quantity and type of Li-Ion Battery Packs depends on Model TNM00311 Cross recessed pan head tapping screws(2-12) Number and region sold. NB08PT-18-KR1831 : Battery Pack(2.0Ah) 1pc NB08PT-18-KR1832 : Battery Pack(2.0Ah) 2pcs ***If TRM00162 is needed to replace, contact your local reseller or SEF service centers.
- Page 27 **The quantity and type of Li-Ion Battery Packs depends on Model TNM00311 Cross recessed pan head tapping screws(2-12) Number and region sold. NB08PT-18-A91831 : Battery Pack(2.0Ah) 1pc NB08PT-18-A91832 : Battery Pack(2.0Ah) 2pcs ***If TRM00162 is needed to replace, contact your local reseller or SEF service centers.
-
Page 28: Troubleshooting
ENGLISH TROUBLESHOOTING (Tool) Faulty Causes Solutions Tool does not operate Battery is not fully charged. Charge battery. when trigger is pulled. Battery is not set correctly. Remove battery and reinsert. Reset tool to home. Battery pack reached operating Remove battery and allow it to cool. Mount temperature limit through continuous use or battery and reset tool to home. - Page 29 4. Trigger module malfunction. Contact a local service centre. Screen freezes 1. Data reading error. Remove battery and reinsert. Press trigger Stanley Engineered to turn ON. Fastening Logo 2. Smart screen malfunction. Contact a local service centre. 3. Trigger module malfunction.
- Page 30 No power. Screen do not show 1. Screen is malfunction Contact a local service centre. anything (Tool operate but screen is all white) WARNING: Contact Stanley Engineered Fastening local service centre, if you cannot recover troubles from troubleshooting above.
- Page 31 Avdel®, Avex®, Avibulb®, Avinox®, Bulbex®, Hemlok®, Interlock®, Klamp-Tite®, Monobolt®, POP®, ProSet®, Stavex® and T-Lok® are registered trademarks of Stanley Black & Decker, Inc. and its affiliates. The names and logos of other companies mentioned herein may be trademarks of their respective owners.
Need help?
Do you have a question about the NB08PT-18 and is the answer not in the manual?
Questions and answers