Nohrd SlimBeam Monitor Owner's Manual
Hide thumbs
Also See for SlimBeam Monitor:
- Manual (40 pages) ,
- Assembly manual (40 pages) ,
- Assembly (20 pages)

Related Manuals for Nohrd SlimBeam Monitor


Summary of Contents for Nohrd SlimBeam Monitor
- Page 1 SlimBeam Monitor Bedienungsanleitung Owner’s Manual Video-Anleitung Instruction Video www.nohrd.com/videos...
-
Page 2: Table Of Contents
Inhalt Seite/n Contents Pages Produktdetails / Hinweise Production details / General Information Sicherheitshinweise Safety Instructions Handhabung Handling Instructions Montagehinweise Assembly Instructions Service Customer Service Teileliste Parts Aufbauanleitung 9-20 Assembly Video-Anleitung Video tutorial Anwendung / App Usage / Application... -
Page 3: Produktdetails / Hinweise
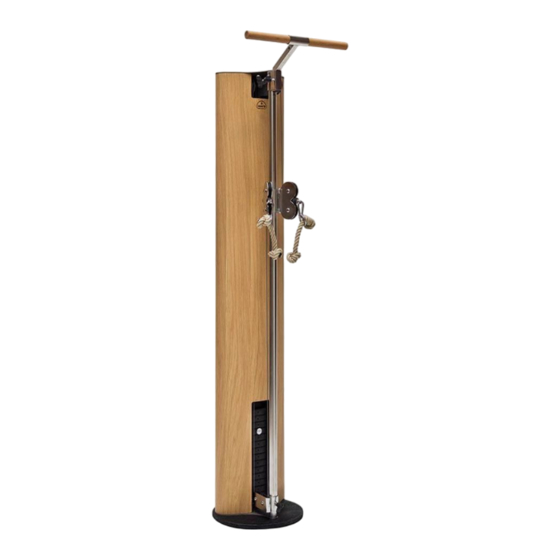
Modellbezeichnung: Model: SlimBeam Monitor SlimBeam Monitor Maße (ohne Halterungs-Stange): Dimensions (without mounting rod): Breite: 11,4 cm Width: 11,4 cm Höhe: 19,6 cm Height: 19,6 cm Tiefe: 4,8 cm Depth: 4,8 cm Materialien: Materials: Kunststoff, Metall, Glas Synthetic material, Metal, Glass... -
Page 4: Sicherheitshinweise
Sicherheitshinweise Safety instructions Bitte lesen und beachten Sie die fol- Please read and observe the following instructions for handling, working genden Hinweise zur Handhabung, with and maintaining the device. zum Umgang mit dem Gerät sowie zur Wartung des Gerätes. Bitte Please keep them in a suitable place bewahren Sie diese an geeigneter so that you can refer to them if neces-... -
Page 5: Handhabung
Handhabung Handling and Use Please read these handling instruc- Bitte lesen Sie diese Handhabungs- tions carefully! The information given hinweise sorgfältig durch! here will help you to use and maintain Die hier genannten Informationen the device correctly. helfen Ihnen, das Gerät richtig zu verwenden und zu warten. -
Page 6: Montagehinweise
Montagehinweise Assembly Information Unpack your equipment carefully and Packen Sie das Gerät zuerst kom- check for transportation damages. plett aus und überprüfen Sie, ob Keep the packaging material until Transportschäden vorliegen. Das the machine is fully assembled and Verpackungsmaterial sollte erst satisfactory use has been established. -
Page 7: Service
For service inquiries please contact: sich bitte an: Serviceadresse: Customer Service Address: WaterRower GmbH WaterRower GmbH Otto-Hahn-Straße 75 Otto-Hahn-Straße 75 48529 Nordhorn 48529 Nordhorn Telefon 0 59 21 - 17 98 400 Telefon 0 59 21 - 17 98 400 info@nohrd.de info@nohrd.de www.nohrd.com www.nohrd.de... -
Page 8: Teileliste
Innensechskant-Schlüssel Netzkabel Allen key Power adapter Anschlusskabel mit Rundstecker 2x Steckdübel Connector cable with round plug 2x Plug-in dowel Anschlusskabel benötigt bis einschl. Seriennummer SB12073. 1x Schraube 1x Schraube Connection cable required up to (and in- cluding) serial numbers SB12073. Hauptplatine Kabelhalter Main electronic board... -
Page 9: Aufbauanleitung
Führen Sie das Flachbandkabel mit dem 4-poligen Stecker voraus durch die Metallverbindungsplatte, wie auf dem Bild 1 zu sehen. First guide the flat ribbon cable with the 4-pin plug through the metal connection plate holes as shown in pic 1 - pic 3. Befestigen Sie den 4-poligen Stecker auf der rechten Platine und den 6-poligen Stecker an der linken Platine. - Page 10 Entfernen Sie den Plastikstopfen aus dem Korpus. Drücken Sie diesen von innen heraus. Remove the plastic plug from the SlimBeam’s wooden casing by pushing it out from the inside. Führen Sie nun die Halterungs-Stange samt USB-Kabel so ein, dass sich die Stange durch das Loch im Korpus verschrauben lässt.
- Page 11 Lösen Sie nun die Abdeckplatte, die sich innerhalb des SlimBeams befindet. Now loosen the cover plate, which is located inside the SlimBeam. Schließen Sie das breite Kabel (1) an den 8-poligen Stecker und dann das schmale Kabel (2) an den 6-poligen Stecker an. Anschließend befes- tigen Sie das USB Kabel (3).
- Page 12 Befestigen Sie nun die Platine (mit den Steckern nach innen) mit den zwei mitgelieferten schwarzen Steckdübeln. Now fasten the main electronic board (with the plugs facing inwards) using the two black push pins (included in delivery). Wenn Sie einen SlimBeam mit einer Seriennummer ab SB12074 haben, befolgen Sie die Schritte in dieser Anleitung bitte erst ab Schritt 15 weiter.
- Page 13 Befestigen Sie die Monitorhalterung am Korpus, indem Sie die Schraube festziehen. Fasten by screwing the monitor mount tight to the wooden casing. Führen Sie das Anschlusskabel mit Rundstecker voraus durch die Öffnung in die Halterungs-Stange. Lead the connection cable by round plug first through the opening into the mounting rod.
- Page 14 180° Drehen Sie den Monitor so, dass Sie an die Vorderseite der Halterungs- Stange gelangen und das Kabel durch die Öffnung herausziehen können. Turn the monitor around so that you can reach the front of the mounting rod and pull the cable out through the opening. Ziehen Sie das Kabel weiter heraus (außerhalb der Schraube), drehen Sie den Monitor ein Stück zurück und führen Sie das Kabel durch die Öffnung zwischen Monitor und Halterungs-Stange.
- Page 15 Drehen Sie den Monitor zurück, ziehen Sie das Kabel heraus und wenden es so, dass Sie den Rundstecker am Monitor anschließen können. Turn the monitor back, pull out the cable and turn it around so that you can connect the round plug to the tablet more easily. Bringen Sie die mitgelieferten Kabelhalter am SlimBeam an, um das Kabel ordentlich zu verlegen.
- Page 16 Anschließend verbinden Sie das Anschlusskabel mit dem Netzteil. Der Monitor startet automatisch, sobald Sie am Seilzug ziehen oder Sie auf das Display tippen. Then connect the connection cable to the power adapter. The monitor starts automatically as soon as you pull the cable. Ab hier gelten die Schritte für Seriennummer ab SB12074.
- Page 17 Führen Sie das Kabel, welches bereits in Ihrem SlimBeam verbaut ist, mit dem Rundstecker voraus, durch die Öffnung des SlimBeams und der Halterungs-Stange. Insert the cable, which is already installed in your SlimBeam, with the round plug first through the opening of the SlimBeam and the mounting rod. 180°...
- Page 18 Ziehen Sie das Kabel weiter heraus (außerhalb der Schraube), drehen Sie den Monitor ein Stück zurück und führen Sie das Kabel durch die Öffnung zwischen Monitor und Halterungs-Stange. Pull the cable out (outside the screw), turn the monitor back a bit, and feed it through the opening between the monitor and the tablet support bar.
- Page 19 Drehen Sie den Monitor zurück und ziehen Sie das Kabel bis zum An- schlag heraus, um den Rundstecker am Monitor anzuschließen. Wichtig: Das Kabel muss zwingend bis zum Anschlag herausgezogen und in der Halterungs-Stange verstaut werden. Das überschüssige Kabel darf nicht im Korpus verbleiben, da es durch die Gewichte beschä- digt werden kann.
- Page 20 Befestigen Sie die Halterungs-Stange am Korpus, indem Sie die Schraube festziehen. Fasten by screwing the monitor rod tight to the wooden casing. Anschließend verbinden Sie das Anschlusskabel mit dem Netzteil. Der Monitor startet automatisch, sobald Sie am Seilzug ziehen. Then connect the connection cable to the power adapter. The monitor starts automatically as soon as you pull the cable.
-
Page 21: Video-Anleitung
Zur Videoanleitung: To the instruction video: www.nohrd.com/videos... - Page 22 Nähere Infos zur App: More info about the app: www.nohrd.com/de/apps-nohrd/slimbeam/ www.nohrd.com/apps-nohrd/slimbeam/...
- Page 24 WaterRower GmbH · Otto-Hahn-Straße 75 · 48529 Nordhorn · Germany Phone +49 (0) 59 21 - 17 98 400 · Fax +49 (0) 59 21 - 17 98 411 info@nohrd.de · www.nohrd.com...
Need help?
Do you have a question about the SlimBeam Monitor and is the answer not in the manual?
Questions and answers