Table of Contents
Advertisement
Quick Links
Advertisement
Table of Contents
Troubleshooting

Related Manuals for Westinghouse WWT1284M7WA


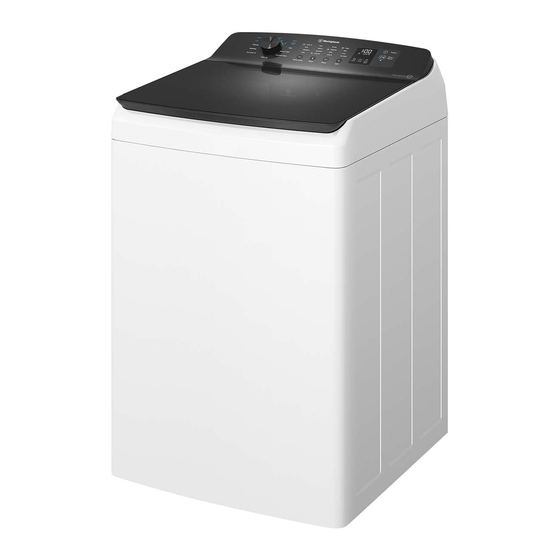
Summary of Contents for Westinghouse WWT1284M7WA
- Page 1 TOP-LOAD WASHING MACHINE WWT1284M7WA...
- Page 2 Failure to strictly adhere to the requirements in this manual may result in personal injury, property damage and affect your ability to make a claim under the Westinghouse manufacturer’s warranty provided with your product. Products must be used, installed and operated in accordance with this manual.
-
Page 3: Table Of Contents
CONTENTS SAFETY INFORMATION ..4 7. CARE AND CLEANING ....25 1.1 Conditions Of Use ..... 4 7.1 What To Do After You Have 1.2 Child Safety ....... 5 Finished Your Washing.... 25 1.3 General Safety ......6 7.2 Cleaning The Lint Filter ... 25 1.4 Installation ......... -
Page 4: Safety Information
/ www.westinghouse.co.nz SAFETY INFORMATION 1.1 Conditions Of Use This appliance is intended to be used in household and similar applications such as: staff kitchen areas in shops, offices and other working environment; farm houses; by clients in hotels, motels, and other residential type environment;... -
Page 5: Child Safety
Save these instructions and make sure that they remain with the appliance if it is moved or sold, so that everyone using it through its life will be properly informed on appliance use and safety. 1.2 Child Safety This appliance is not intended for use by young children or infirm persons without supervision. -
Page 6: General Safety
/ www.westinghouse.co.nz 1.3 General Safety It is dangerous to alter the specifica- tions or attempt to modify this product in anyway. Do not use your washing machine to wash articles with whale bones, material without hems or torn material. -
Page 7: Use
Make sure that the drainage is working Never pull the power supply cable to properly. remove the plug from the socket, always take hold of the plug itself. May cause electric shock! if the machine is not connected to an earthed/ground system. -
Page 8: Product Description
/ www.westinghouse.co.nz 2. PRODUCT DESCRIPTION 2.1 Parts Control Panel Cabinet Front Feet Levelling Adjustable : Right & Left Water Inlet Hose Old inlet hose should be discharged if any and use the inlet hose provided with machine. Mains Cable... - Page 9 Detergent / Bleach Dispenser (see page 17) Softener Dispenser (see page 18) Bleach Dispenser (option) Lint Filter (see page 25) Low Profile Agitator...
-
Page 10: Product Features
/ www.westinghouse.co.nz 2.2 Product Features Auto sensing water level Power Failure Recovery Auto sensing is a feature where the When there is power failure while the machine washer fills automatically with water to is washing or rinsing or spinning. The machine just the right level for your clothes load. -
Page 11: Control Panel
3. CONTROL PANEL 3.1 Control Panel Description Program selector knob Soak touchpad Water Level touchpad Delay End touchpad Temp touchpad Start/Pause touchpad Rinse touchpad Display Spin touchpad Power touchpad Child safety lock option (press and hold touchpad about 2 seconds) Press the touch buttons with your finger in the area with the symbol. -
Page 12: Program Chart
Clothes Load depends on the Water level selected. For the best washing result, do not exceed the load weight over the suggestion as in the table above. Maximum capacity depended on the model of the Washing Machine. Model : WWT1284M7WA 12 kg The energy label specification has been determined by using the following program according to AS/NZS 2040. -
Page 13: Program Options Compatibility
3.3 Program Options Compatibility Option Water Level Temp Rinse Spin Soak Delay Program Extra Dirty 120 Dirty 90 Full Load 60 Daily 45 Fast 20 Delicate Bedding Eco Save Stain Machine Clean Rinse & Spin Spin Remark Default option Available select option... -
Page 14: Options
/ www.westinghouse.co.nz 3.4 Options Water Temperature Mixed water temperatures in table below Water Level Touchpad are based on hot water supply of 60 ºC and cold water supply of 20 ºC Choose the water level by pressing the Hot & Cold water usage propertion “Water Level”... - Page 15 Delay End Touchpad Note: Compare this with Regular rinse Before you start the program, this option where much more water is used. makes it possible to define the end of the washing program from minimum of 1 hour Regular rinse, water enters the to maximum of 20 hours.
-
Page 16: Settings
/ www.westinghouse.co.nz Start/Pause Touchpad To start the selected program, press the “Start/Pause” touchpad. If you have started your wash and you wish to stop it for some reason, press the “Start/Pause” touchpad to enter PAUSE mode To restart the program from the point at which it was interrupted, press the “Start/Pause”... -
Page 17: Daily Use
4. DAILY USE 4.1 Starting Your Washing 4.3 Add The Detergent/Bleach Machine Powder / Liquid Detergent / Connect the mains plug to the mains Bleach socket. 1. Pull the dispenser drawer forward out 2. Turn the water tap on. from its position. 4.2 Load The Washing Powder Machine... -
Page 18: Add Fabric Softener
/ www.westinghouse.co.nz 2. Mix detergent in one litre of water. 4.5 Adding Bleach (Option) 3. Add the pre-mixed detergent to the Bleaching of clothes can help to remove wash load. stains, heavy soiling and to kill bacteria. NOTE: When you use the... -
Page 19: Setting A Program
4.6 Setting a Program This delay is a drain out period to ensure the bowl is empty of water, which is Press Power ( ) touchpad, turn necessary before spin commences. Even though you may have only put wet clothes the program selector to the required program. -
Page 20: At The End Of The Program
/ www.westinghouse.co.nz 4.11 At The End Of The Program The appliance stops automatically. NOTE The display will show “ ” and When indicator “ ” appears and blinks flashing with 3 consecutive long after the appropriate number of wash beeps. -
Page 21: Washing Hints
5. WASHING HINTS These Washing Instructions are of a Never wash whites and coloureds general nature and you should get good together. Whites may lose their wash results by following them. “whiteness” in the wash. However, due to the variables of fabric New coloured items may run in the first wash;... -
Page 22: Pre-Treatment Sprays And Stain Removers
/ www.westinghouse.co.nz 5.2 Pre-treatment Sprays And Quantity of detergent to be Stain Removers used The type and quantity of detergent will WARNING! depend on the type of fabric, load size, degree of soiling and hardness of the Pre-treatment sprays and stain remover water used. - Page 23 Chocolate: soak in warm water with the Tar stains: first treat with stain remover, pre-soak product, and wash in lukewarm methylated spirits, or benzine, then rub water. Use dry cleaning quid (white with detergent paste. spirits) to remove any grease spots. (*) do not use acetone on artificial silk.
-
Page 24: International Wash Code Symbols
/ www.westinghouse.co.nz ENGLISH 6. INTERNATIONAL WASH CODE SYMBOLS These symbols appear on fabric labels, in order to help you choose the best way to treat your laundry. Energetic Max. wash Max. wash Max. wash Max. wash DO NOT temperature... -
Page 25: Care And Cleaning
7. CARE AND CLEANING Unclip the filter as the picture. Your washing machine will give you long and trouble-free service, if you follow the instructions in this section. These instructions show you how to care for your washing machine. 7.1 What To Do After You Have Finished Your Washing. -
Page 26: Cleaning The Dispenser
/ www.westinghouse.co.nz 7.3 Cleaning The Dispenser 7.4 Cleaning The Drawer Recess The dispenser needs to be cleaned regularly, preferably after each wash. Having removed the drawer, use a small Inspect the dispenser after each wash to brush to clean the recess, ensuring that see if there is any residue of detergent. -
Page 27: Cleaning Your Washing Machine
Important: Remove the inlet hose behind the appliance. Never use solvents, alcohol, aerosol cleaners, spray pack cleaners, glass cleaners, metal polishes, caustic materials, scourers or general household cleaners on or near the top panel and lid, control panel or other parts of your washing machine. -
Page 28: Troubleshooting
/ www.westinghouse.co.nz ENGLISH 8. TROUBLESHOOTING 8.1 Possible Failures You will have to pay even when your washing machine is under warranty. DO NOT call for service until you have Before you call for service, check the checked the points listed below. - Page 29 Problem Display Possible Causes What to do Code Check detergent use and Not enough or no detergent. rewash clothes. Clothes still dirty Remove some clothes and Too many clothes on load. after wash rewash. program. Incorrect wash program. Reselect program and rewash.
-
Page 30: Troubleshooting Fault Displays
/ www.westinghouse.co.nz 8.2 Troubleshooting Fault Displays When the washing machine detects a problem that requires your attention, you will be alerted. The machine will warn you of this problem by displaying a fault code in the digital display, accompanied by “Beeping”. - Page 31 Display Description Possible fault Code Motor system - Motor defective problems - Motor Wiring or Motor Control board defective - Overload condition UI -MB communication - Wiring defective, or UI, MB board defective error Power supply frequency - Wrong or disturbed Power Supply line. E E H H 0 0 out of limits - Main board defective...
-
Page 32: Yellowing Or Greying Clothes
/ www.westinghouse.co.nz 8.3 Yellowing Or Greying Clothes Problem Possible causes What to do Incorrect wash times and ONLY use low sudsing, using insufficient detergent front load washer which can cause redeposit- detergent in this machine, ing of detergent on clothes. -
Page 33: Technical Data
9. TECHNICAL DATA Dimensions (Height / Width / Depth) 1092 x 670 x 720 mm Power supply (Voltage / Frequency) 220 - 240 V~ / 50 Hz Total power absorbed 550 W Water supply pressure (Maximum / Minimum) 0.8 MPa / 0.08 MPa Extra Dirty 120 Dirty 90 Full Load 60... -
Page 34: Installation
/ www.westinghouse.co.nz 10. INSTALLATION 10.1 Unpacking Use gloves. Remove the external film. 3. Put one of the polystyrene packaging If necessary, use a cutter. elements on the floor behind the appliance. Carefully put down the appliance with the rear side on it. - Page 35 4. Cut and remove straps as shown. 5. Remove the polystyrene base. Open the lid. Remove the polystyrene piece from the top panel and all the items from the washing tub.
-
Page 36: Positioning
/ www.westinghouse.co.nz 10.2 Positioning Install the machine on a flat hard floor. Make sure that air circulation around the It is important that your washing machine machine is not impeded by carpets, rugs stands firm and level on the floor to etc. -
Page 37: Water Drainage
If you only have a cold water tap, you Positioning of drain hose. must remove the inlet hose with the RED Adjust the free length of hose to suit ends from the washing machine and fit a your installation. blank cap with a sealing washer to the It is important that the top of the HOT water inlet valve, otherwise water drain hose is above the joint... -
Page 38: Electrical Connection
/ www.westinghouse.co.nz 10.5 Electrical Connection This machine is designed to operate on a CAUTION! 220 - 240 V, single-phase, 50 Hz supply. Connect the machine to an “An incorrect power supply may void earthed socket outlet. your warranty.” The manufacturer declines any... -
Page 39: Environment Concerns
11. ENVIRONMENT CONCERNS 11.1 Packaging Materials For more detailed information about recycling of this product, please contact The materials marked with the your local city office, your household symbol are recyclable. waste disposal service or the shop where >PE<=polyethylene you purchased the product. >PS<=polystyrene >PP<=polypropylene 11.3 Ecological Hints... - Page 40 / www.westinghouse.co.nz NOTE...
- Page 41 NOTE...
- Page 42 / www.westinghouse.co.nz...
-
Page 43: Warranty
This document sets out the terms and conditions of the product damage to the Appliance caused by: warranties for Westinghouse Appliances. It is an important document. (i) negligence or accident; Please keep it with your proof of purchase documents in a safe place (ii) misuse or abuse, including failure to properly maintain or service;... - Page 44 www.westinghouse.co.nz...
Need help?
Do you have a question about the WWT1284M7WA and is the answer not in the manual?
Questions and answers