Advertisement
Quick Links
Advertisement

Subscribe to Our Youtube Channel
Related Manuals for Westinghouse WWT7055LMWA


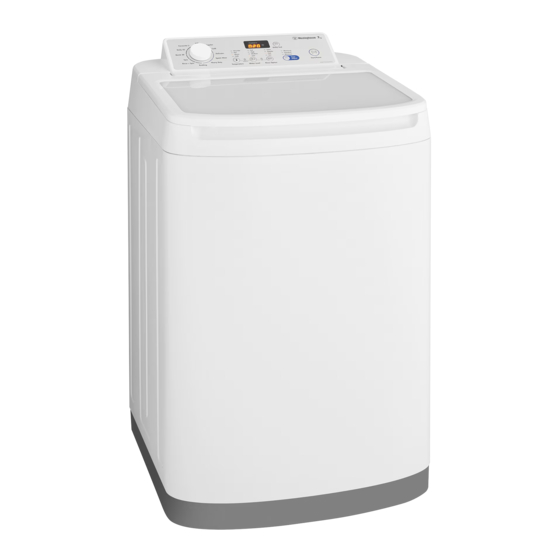
Summary of Contents for Westinghouse WWT7055LMWA
- Page 1 Washing Machine Model: WWT7055LMWA WWT6055TMWA...
- Page 2 CONTENTS SAFETY INFORMATION ................. 2 PRODUCT DESCRIPTION ................5 CONTROL PANEL ..................7 WASHING INSTRUCTIONS ................14 DAILY USE ....................16 CARING FOR YOUR WASHING MACHINE ........... 20 HELPFUL HINTS IN DEALING WITH WASHING PROBLEMS ....... 23 A GUIDE TO STAIN REMOVAL ..............
- Page 3 1.1 GENERAL SAFETY It is dangerous to alter the specifica- tions or attempt to modify this product in anyway. Do not use your washing machine to wash articles with whale bones, material without hems or torn material. Always unplug the appliance and turn off the water supply after use, clean and maintenance.
- Page 4 Never pull the power supply cable Any plumbing work required to to remove the plug from the socket, install this appliance should be always take hold of the plug itself. carried out by a qualified plumber. Any electrical work required to install this appliance should be carried out by a qualified electrician.
- Page 5 PRODUCT DESCRIPTION WASHING MACHINE PARTS FRONT VIEW BACK VIEW PARTS LIST INSIDE VIEW : WWT6055TMWA INSIDE VIEW : WWT7055LMWA Control Panel Cabinet Levelling Adjustable Front Feet Water Inlet Hose - RED fittings (Hot Water) - BLUE fittings (Cold Water) Mains Cable...
- Page 6 PRODUCT FEATURES After the machine has started, the entire The Simpson wash system wash option button will be disabled and 1) Wash operation the display will show “ ” and flashing with three short beeps to indicate the The agitator & bowl rotates while it is filled button is disabled (except Start/Pause with water to immerse the clothes.
- Page 7 CONTROL PANEL Very Hot Extra Regular Warm Fast Cold Sports Wear...
- Page 8 You can adjust the flow rate of the 3.1 PROGRAM SELECTOR water supplies to adjust the Warm KNOB temperature. All rinse water Turn the Program Selector knob to temperatures are cold. choose the wash program you Always check your label for the want.
- Page 9 3 to 4.5 3 to 5 Medium 1.5 to 3 1.5 to 3 0 to 1.5 0 to 1.5 1) Model WWT6055TMWA Maximum mass of dry cloth is 6.0 kg. 2) Model WWT7055LMWA Maximum mass of dry cloth is 7.0 kg.
- Page 10 3.4 RINSE OPTION BUTTON The machine will go through a series of maximum six pulses spray and Pressing the Rinse Option button to short spin cycles in this manner, choose the rinse type for your wash depending on program selection, load.
- Page 11 3.5 TIME ADJUST, FAVOURITE , CHILD LOCK TIME ADJUST This option allows you to increase/decrease washing time from 3 available options. (Default is “Standard”) : Standard > Minimum > Maximum Time adjust is only applicate to : Regular, Cold, Delicates, Hand Wash, Heavy Duty, Bedding FAVOURITE The favourite function is the ability to tailor individual wash features and save them as a custom programme until the next time.
- Page 12 3.6 DISPLAY If an option is not compatible with selected program, display will flash The display shows the following "---" with 3 consecutive short information: beeps. Machine In Pause Mode Blink 3.7 START/PAUSE BUTTON Blink To start the selected program, Time digits and colon LEDs at rate press the “Start/Pause”...
- Page 13 YOUR PROGRAM GUIDE Recommended Program Select this program Water Rinse Temp Spin Level Option For normally soiled cotton load at rated load Regular Regular * Full Warm High capacity. /Eco* For synthetic or mixed fabrics, underwear, Regular Cold coloured garments, non-shirnk shirts, Full Cold High...
- Page 14 WASHING INSTRUCTIONS These Washing Instructions are of a Lint collectors Lint producers general nature and you should get good wash results by following them. - Corduroy - Towels - Synthetics - Nappies However, due to the variables of fabric - Permanent - Chenille/ types, soil levels, detergent types and press fabrics...
- Page 15 Wash bras, pantyhose and other Don’t use the wrong type of detergent. You must use a low sudsing detergent delicates in a mesh laundry bag, which you can purchase from designed for front load washing machines or high efficiency top your supermarket.
- Page 16 DAILY USE STARTING YOUR WASH- The load should contain only three or four large items, for ING MACHINE example sheets. The rest of the load should be small items. A Connect the mains plug to the mains socket. mixed load of large and small items will wash cleaner than a Turn the water tap on.
- Page 17 ADD FABRIC SOFTENER FOR WWT6055TMWA FOR WWT7055LMWA Before adding softener to the dispenser, make sure the siphon cap is pushed firmly down onto the spigot in the drawer. The softener will not siphon out if the cap is incorrectly fitted, is missing or blocked with residue.
- Page 18 ADDING BLEACH SETTING A PROGRAM Bleaching of clothes can help to Turn the program selector to remove stains, heavy soiling and to the required program. kill bacteria. Your washing machine is Oxygen Type now in STAND-BY-MODE This is generally a powder type and ready to wash your bleach.
- Page 19 INTERRUPTION OF A STARTING A PROGRAM PROGRAM To start a program, press the Start/Pause button, a default If you have started your wash and program duration will be displayed you wish to stop it for some reason, on the screen. press the Start/Pause button to enter PAUSE mode.
- Page 20 CARING FOR YOUR WASHING MACHINE Your washing machine will give you long Unclip the filter bag from the and trouble-free service, if you follow column. the instructions in this section. These instructions show you how to care for your washing machine. WHAT TO DO AFTER YOU HAVE FINISHED YOUR Squeeze tabs...
- Page 21 6.3 CLEANING THE DISPENSER (WWT7055LMWA) The dispenser needs to be cleaned regularly, preferably after each wash. Inspect the dispenser after each wash to see if there is any residue of detergent. To do this proceed as follows: Pull the dispenser drawer forward until it stops.
- Page 22 CLEANING STAINS IN AVOIDING BUILD UP OF THE WASHBOWL UNDISSOLVED DETERGENTS Stains in the wash bowl can be caused by: If you only wash with cold water, metal objects such as bobby undissolved detergent and body pins, dressmaking pins and nails; oils will build up in the washing machine.
- Page 23 HELPFUL HINTS IN DEALING WITH WASHING PROBLEMS RESIDUES ON WASHED Use another program as below, which has been designed to ITEMS minimise residual particles (they Some detergents have ingredients are in order of increasing benefit which do not fully dissolve and as a and will help you choose the best consequence, may leave white program for your wash load.)
- Page 24 WARNING! CAUTION! Pre-treatment sprays and stain Do no use dry cleaning fluids or removers can damage plastic solvents near your washing components on your washing machine. These fluids will damage machine. your washing machine and may cause an explosion. YELLOWING OR GREYING CLOTHES Problem Possible causes What to do...
- Page 25 A GUIDE TO STAIN REMOVAL Stain White Cottons And Linens Washable Coloured Fabrics Ball Point Spong with methylated spirit. Same as for whites - use oxygen type Pen Ink Bleach if required. bleach. Rinse as soon as possible under Same as for whites - use oxygen type Beetroot cold water.
- Page 26 Stain White Cottons And Linens Washable Coloured Fabrics Soak/rinse in lukewarm water Same as for whites. Check for colour until a majority of the colour is fastness before applying solvent. removed. Sponge with solvent to Curries break down any remaining fats and oils then wash.
- Page 27 TROUBLE SHOOTING DO NOT call for service until you have checked the points listed below. If you call for service and there is nothing wrong with your washing machine, you will have to pay for the service call. You will have to pay even when your washing machine is under warranty. Before you call for service, check the points in the table below.
- Page 28 Problem Display Possible Causes What to do Code Check detergent use and Not enough or no detergent. rewash clothes. Clothes still Remove some clothes and dirty after maximum load exceeded. rewash. wash delete. Incorrect wash program or Reselect program or temperature selected.
- Page 29 TROUBLESHOOTING FAULT DISPLAYS If you have a problem with your washing machine and before you call service, make sure you have followed ALL of the instructions that may remedy the problem. You will find instructions in the ‘Troubleshooting’ section and in the table below. When the washing machine detects a problem that requires your attention, you will be alerted.
- Page 30 ENVIRONMENT CONCERNS Ecological hints Packaging materials The materials marked with the To save water, energy and to help protect the environment, we symbol are recyclable. recommend that you follow these tips: >PE<=polyethylene Normally soiled laundry may be >PS<=polystyrene washed without prewashing in order >PP<=polypropylene to save detergent, water and time (the environment is protected too!).
- Page 31 (viii) insect or vermin infestation; (b) ‘ASC’ means Electrolux’ authorised serviced centres; (c) Westinghouse’ means Electrolux Home Products Pty Ltd of 163 (ix) failure to comply with any additional instructions supplied with O’Riordan Street, Mascot NSW 2020, ABN 51 004 762 341 in the Appliance.
Need help?
Do you have a question about the WWT7055LMWA and is the answer not in the manual?
Questions and answers
There is a small clear pipe/tube (approx 8mm diameter) that has come loose at the bottom end & caused flooding. Where does it fit onto, as it has a squeeze clip around it to hold it in position ? I can't see it in the manual ?
The same pipe/tube is connected at the top and is about 20cm long & is now hanging down as it is not connected to any outlet pipe & has caused flooding. It has 3 pieces of foam blocks on it to protect it from something. I need to see a workshop manual, not a customer user manual.