Table of Contents
Advertisement
Available languages
Available languages
Owner's Manual
Bedienungsanleitung
Mode d'emploi
Manuale d'uso
Manual del usuario
Before using this unit, carefully read the sections entitled: "USING
THE UNIT SAFELY" (p. 2–3) and "IMPORTANT NOTES" (p. 4).
These sections provide important information concerning the proper
operation of the unit. Additionally, in order to feel assured that you
have gained a good grasp of every feature provided by your new unit,
Getting Started should be read in its entirety. The manual should be
saved and kept on hand as a convenient reference.
Copyright © 2003 ROLAND CORPORATION
All rights reserved. No part of this publication may be reproduced in any
form without the written permission of ROLAND CORPORATION.
Advertisement
Table of Contents

Related Manuals for Edirol UA-1X


Summary of Contents for Edirol UA-1X
- Page 1 Getting Started should be read in its entirety. The manual should be saved and kept on hand as a convenient reference. Copyright © 2003 ROLAND CORPORATION All rights reserved. No part of this publication may be reproduced in any form without the written permission of ROLAND CORPORATION.
- Page 2 (except when this manual provides specific instruc- tions directing you to do so). Refer all servicing to your retailer, the nearest EDIROL/Roland Service Center, or an authorized EDIROL/Roland distributor, as listed on the “Information” page. • Never use or store the unit in places that are: •...
- Page 3 012d • Immediately turn the power off, and request servicing by your retailer, the nearest Roland Service Center, or an authorized Roland distributor, as listed on the “Information” page when: • If smoke or unusual odor occurs • Objects have fallen into, or liquid has been spilled onto the unit;...
-
Page 4: Additional Precautions
(including padding) that it came in, if possible. Otherwise, you will need to use equivalent packaging materials. • Use a cable from Roland to make the connection. If using some other make of connection cable, please note the following precautions. -
Page 5: Table Of Contents
Conexiones e instalación del controlador (Windows) ... 91 Conexiones e instalación del controlador (Macintosh) ... 103 Troubleshooting ... 111 Problems related to the USB driver... 111 Problems when using the UA-1X ... 113 Deleting the USB Audio Device Driver (Windows) ... 119 Specifications ... 120... -
Page 6: Features Of The Ua-1X
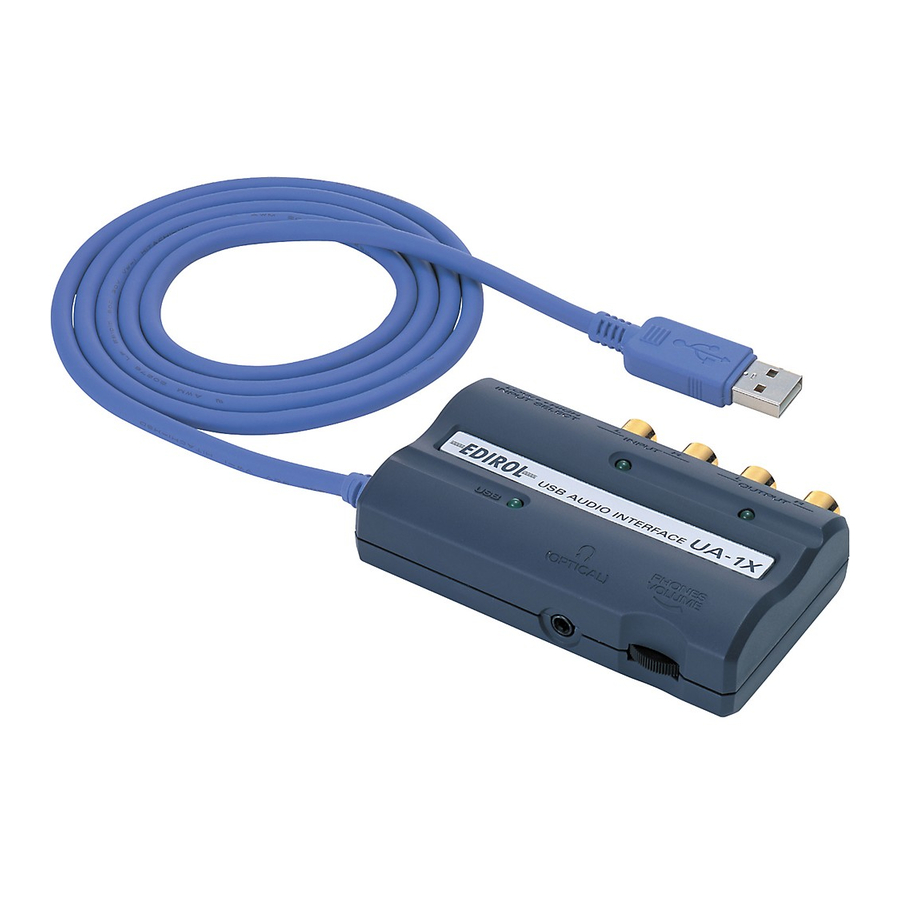
The UA-1X can be connected to your computer via a USB cable. It is bus-powered, meaning that the power is supplied from your computer. Since an AC adaptor is not necessary, the UA-1X is an ideal choice for use with a notebook computer. -
Page 7: Check The Contents Of The Package
UA-1X. You will need to provide these items yourself. * As soon as you connect the UA-1X to your computer, sound will no longer be output from the speakers of your computer. You will need to provide an external monitor system or headphones. -
Page 8: Panel Descriptions
These are digital I/O jacks for connecting optical cables. Digital I/O jacks for connecting coaxial cables are labeled Coaxial. USB indicator This will light when the UA-1X is connected and recognized to the computer. USB cable Connect this cable to the USB connector of your... -
Page 9: Using The Ua-1X
Signal flow * The same jack serves as both the headphone jack and digital output jack. As soon as you connect the UA-1X to your computer, sound will no longer be output from the speakers of your computer. • Connect an external monitor system or headphones to the UA-1X. -
Page 10: Listening To Sound From Your Computer
Listening to Sound from Your Computer As shown in the diagram, you can connect headphones or monitor speakers, and monitor the playback sound from your application or the sound from the instrument or audio device to which the UA-1X is connected. fig.07-01 Computer... -
Page 11: Digitally Recording To Md
Digitally Recording to MD fig.07-02 Computer connector Audio amplifier / MIDI Sound module ( Cassette, Record players) External Input jacks (LINE IN, AUX IN) Audio Cable OPTICAL Signal flow Using the UA-1X OUTPUT Optical Digital cable DIGITAL INPUT... -
Page 12: Recording From The Aux Input
UA-1X If you connect the UA-1X as shown in the above diagram with another device that passes the input audio back to the output (e.g., a MD/DAT in recording mode), the sound will loop between the UA-1X and the other device, causing oscillation and producing an unexpected high volume. -
Page 13: Connections And Driver Installation (Windows)
* Exit all other applications of the Windows before you install the UA-1X driver. * If you intend to connect the UA-1X and other USB devices to your computer and use them simultaneously, disconnect all USB devices other than the UA-1X from the USB connector before you install the driver. -
Page 14: Making Connections And Installing The Driver
USB cable. It is not necessary to turn off the power of your computer. Use a USB cable to connect the UA-1X to your computer before turning on the power of your audio equipment. - Page 15 With the UA-1X disconnected from your computer, turn on your computer and start up Windows. Disconnect all USB cables except for a USB keyboard and USB mouse (if used). Use a USB cable to connect the UA-1X to your computer. fig.02-03.e Windows will detect the UA-1X, and the “Add New...
-
Page 16: Windows 98 Users
USB Audio Device driver. Use the following procedure to perform the installation. With the UA-1X disconnected from your computer, turn on your computer and start up Windows. Disconnect all USB cables except for a USB keyboard and USB mouse (if used). - Page 17 fig.02-07.e Check CD-ROM drive, and click [Next]. fig.02-08.e Click [Next]. * Depending on your system, the Location of driver may differ from the above illustration, but this is not a problem. Copying of the file (Driver) will begin. fig.02-09.e If the Windows CD-ROM is not inserted in the CD-ROM drive, a “Insert Disc”...
- Page 18 Connections and Driver Installation (Windows) fig.02-12.e When installation of the USB Human Interface Device driver is finished, the following dialog box will appear. Click [Finish]. fig.02-13.e Next, the USB Audio Device will be detected automatically, and the “Add New Hardware Wizard”...
-
Page 19: Settings And Checking
Settings and Checking ■ Specifying the Audio Input/Output Device Click the Windows Start button, and select Settings - Control Panel. (In Windows XP, click the Start button and then click Control Panel.) Access “Sound and Multimedia Properties” (for Windows 98, “Multimedia Properties”). If using Windows XP/2000/Me: In Control Panel, double-click the Sounds and Multimedia icon to open the “Sounds and Multimedia Properties”... - Page 20 Connections and Driver Installation (Windows) Volume Control Settings The output volume of the UA-1X can be controlled by the Windows Volume Control. Click the Windows Start button, and select Programs (In Windows XP, All Programs) Entertainment – Volume Control to start it up.
- Page 21 You can raise or lower the slider to adjust the volume of the UA-1X. The following items can be set. USB Audio Adjust the volume of the analog outputs (Speaker) (line output and headphone output). The digital output will not change (*1).
- Page 22 Connections and Driver Installation (Windows) When using your computer’s CD-ROM drive to play an audio CD, or when playing background music for games with the UA-1X Windows XP/2000 users: Open the System Properties dialog box. Select Start | Settings | Control Panel, and in the Control Panel, double-click the System icon.
-
Page 23: Connections And Driver Installation (Macintosh)
UA-1X, and connect the UA-1X after start-up. Before Installing the Driver In order to use the UA-1X, you must first install a driver. UA-1X uses a driver included with Mac OS. You do not need to use the CD-ROM that is included with the UA-1X. - Page 24 USB cable. It is not necessary to turn off the power of your computer. Use a USB cable to connect the UA-1X to your computer before turning on the power of your audio equipment.
- Page 25 Wait for approximately five seconds. UA-1X uses a driver included with Mac OS. While you are waiting, the screen display will not change, but the UA-1X is being detected. Do not touch the mouse or keyboard. fig.03-04.e In order to check that...
- Page 26 Connections and Driver Installation (Macintosh) fig.03-06.e Turn down the volume on the UA-1X, and on your audio equipment, then click [Start Test]. fig.03-07.e Use the [Main Volume] bar to adjust the volume. When you are finished, click [Stop Test]. Test sounds are output from left to right, along with what appears on the screen.
- Page 27 When you are finished making settings, close the “Sound” dialog box. Select Quit from the File menu. Known issues: UA-1X • While the audio application is recording or playing, do not connect/disconnect the USB cable. Doing so may cause the application to freeze.
- Page 28 Connections and Driver Installation (Macintosh) Connections and Driver Installation (OS X) * The UA-1X and Mac OS 10.2 are used for this explanation. ■ Make Connections and System Sound Input/Output Settings Use a USB cable to connect the UA-1X to your Macintosh.
- Page 29 Caution Please check the following before you use your software. • Use a USB cable to connect the UA-1X to your computer before you start up your software. • Do not disconnect the UA-1X's USB cable while your software is running.
- Page 30 MEMO...
-
Page 31: Anschlüsse Und Treiberinstallation (Windows)
Ein Treiber ist Software, die es einem Anwendungsprogramm auf Ihrem Computer ermöglicht, Daten zum/vom UA-1X zu übertragen, wenn das Gerät an Ihren Computer via USB-Kabel angeschlossen ist. Der Treiber überträgt die Daten der Anwendung an das UA-1X sowie die Daten vom UA-1X an die Anwendung. fig.05-01.e... - Page 32 Lautstärke und schalten alle Geräte ab, bevor Sie das USB-Kabel ausstecken. Es ist nicht erforderlich, den Computer auszuschalten. Verwenden Sie ein USB-Kabel, um das UA-1X an Ihren Computer anzuschließen, bevor Sie Ihre Audiogeräte einschalten. ■ Windows XP/2000-Anwender Trennen Sie das UA-1X von Ihrem Computer, schalten Sie Ihren Computer ein und starten Sie Windows.
- Page 33 Sie Ihren Computer ein und starten Sie Windows. Stecken Sie alle USB-Kabel außer der USB-Tastatur und der USB Maus aus (falls vorhanden). Schließen Sie das UA-1X an Ihsren Computer mit einem USB-Kabel an. fig.02-03.e Windows erkennt anschließend das UA-1X und das Dialogfeld “Hardware-...
- Page 34 USB Human Interface Device und USB-Audiogerät erfolgen. Gehen Sie bei der Installation wie anschließend beschrieben vor. Trennen Sie das UA-1X von Ihrem Computer, schalten Sie Ihren Computer ein und starten Sie Windows. Stecken Sie alle USB-Kabel außer der USB-Tastatur und der USB Maus aus (falls vorhanden).
- Page 35 fig.02-07.e Wählen Sie CD-ROM-Gerät und klicken Sie auf [Next] (Weiter). fig.02-08.e Klicken Sie auf [Next]. * Abhängig von Ihrem System kann sich die Position des Treibers von der obigen Abbildung unterscheiden, aber das ist kein Problem. Das Kopieren der Datei (Treiber) beginnt. fig.02-09.e Wenn die Microsoft Windows CD-ROM nicht in das CD-ROM-...
- Page 36 Anschlüsse und Treiberinstallation (Windows) fig.02-10.e Sobald die Installation des Treibers USB-Verbundgerät beendet ist, wird folgendes Dialogfeld angezeigt. Klicken Sie auf [Finish]. fig.02-11.e Nun wird das USB Human Interface-Gerät automatisch erkannt, und das Dialogfeld “Hardware-Assistent” wird angezeigt. Klicken Sie auf [Next] (Weiter) und setzen Sie die Installation wie in den Schritten 4-7 beschrieben fort (S.
- Page 37 fig.02-13.e Nun wird das USB- Audiogerät automatisch erkannt, und das Dialogfeld “Hardware-Assistent” wird angezeigt. Klicken Sie auf [Next] (Weiter) und setzen Sie die Installation wie in den Schritten 4-7 beschrieben fort (S. 34-35). fig.02-14.e Sobald die Installation des Treibers USB-Audiogerät beendet ist, wird ein Dialogfeld ähnlich wie hier angezeigt.
-
Page 38: Einstellungen Und Überprüfung
Anschlüsse und Treiberinstallation (Windows) Einstellungen und Überprüfung ■ Angabe des Audioeingabe/Ausgabegeräts Klicken Sie auf die Windows-Schaltfläche Start und wählen Sie Einstellungen - Systemsteuerung. (In Windows XP klicken Sie auf die Schaltfläche Start und anschließend auf Systemsteuerung.) Öffnen Sie die “Eigenschaften von Sounds und Multimedia”... - Page 39 Klicken Sie auf die Registerkarte Audio. Wählen Sie als Bevorzugtes Gerät für Wiedergabe und Bevorzugtes Gerät für Aufnahme USB Audio CODEC oder USB-Audiogerät. Klicken Sie auf und klicken Sie in der angezeigten Liste auf USB Audio CODEC oder USB-Audiogerät, um dieses Gerät auszuwählen.
- Page 40 Anschlüsse und Treiberinstallation (Windows) Einstellung der Lautstärkeregelung Die Ausgabelautstärke des UA-1X kann mit der Lautstärkeregelung von Windows gesteuert werden. Klicken Sie auf die Windows Start-Schaltfläche und wählen Sie Programme – Zubehör – Unterhaltungsmedien – Programme) Lautstärkeregelung, um sie zu starten.
- Page 41 Sie können den Regler nach oben oder nach unten verschieben, um die Lautstärke des UA-1X anzupassen. Folgende Optionen können eingestellt werden. Passt die Lautstärke der analogen USB-Audio (Lautsprecher) Ausgänge an (Line Output und Kopfhörer-Ausgang). Die Digitalausgabe wird hiermit nicht verändert (*1).
- Page 42 Anschlüsse und Treiberinstallation (Windows) Wenn Sie das CD-ROM-Gerät Ihres Computer’s für das Abspielen einer Audio-CD verwenden oder wenn Sie Hintergrundmusik für Spiele mit dem UA-1X abspielen Windows XP/2000-Anwender: Öffnen Sie das Dialogfeld “Systemeigenschaften...” Wählen Sie Start | Einstellungen | Systemsteuerung und doppelklicken Sie in der Systemsteuerung auf das Symbol System.
-
Page 43: Anschlüsse Und Treiberinstallation (Macintosh)
Vor der Installation des Treibers Bevor Sie das UA-1X verwenden können, müssen Sie einen Treiber installieren. UA-1X benutzt einen Treiber, der im Mac OS enthalten ist. Die mit dem UA-1X mitgelieferte CD-ROM ist für die Treiberinstallation nicht erforderlich. Was ist ein Treiber? Ein Treiber ist Software, die es einem Anwendungsprogramm auf Ihrem Computer ermöglicht, Daten zum/vom UA-1X zu übertragen, wenn das Gerät an Ihren... - Page 44 Lautstärke und schalten alle Geräte ab, bevor Sie das USB-Kabel ausstecken. Es ist nicht erforderlich, den Computer auszuschalten. Verwenden Sie ein USB-Kabel, um das UA-1X an Ihren Computer anzuschließen, bevor Sie Ihre Audiogeräte einschalten. Starten Sie den Macintosh, wobei das UA-1X ausgesteckt ist.
- Page 45 Warten Sie ungefähr fünf Sekunden lang. UA-1X benutzt einen Treiber, der im Mac OS enthalten ist. Während Sie noch warten, verändert sich die Bildschirmanzeige nicht, während das UA-1X vom Computer erkannt wird. Arbeiten Sie währenddessen nicht mit der Maus oder mit der Tastatur.
- Page 46 Verwenden Sie in diesem Fall die Leiste [Volume] (Lautstärke) in [Output] (Ausgang), um die Lautstärke anzupassen. Wenn USB Audio nicht angezeigt wird, schließen Sie das Dialogfeld “Sound” und trennen das USB-Kabel des UA-1X vom Macintosh.’ Installieren Sie den Treiber erneut.(S. 44)
- Page 47 Sie das Dialogfeld “Sound.” Wählen Sie die Option Quit im Menü File. Bekannte Probleme: UA-1X • Während die Audioanwendung aufnimmt oder Daten abspielt, schließen Sie das USB-Kabel nicht an und trennen Sie es nicht vom Gerät. Dies kann dazu führen, dass die Anwendung abstürzt.
- Page 48 Anschlüsse und Treiberinstallation (Macintosh) Anschlüsse und Treiberinstallation (OS X) * Für diese Beschreibung werden das UA-1X und Mac OS 10.2 verwendet. ■ Anschlüsse und Einstellungen für System Sound Input/Output Schließen Sie das UA-1X an Ihren Macintosh mit einem USB-Kabel an.
- Page 49 Vorsicht Bitte prüfen Sie vor der Verwendung Ihres Programms Folgendes. • Schließen Sie das UA-1X an Ihren Computer mit einem USB-Kabel an, bevor Sie Ihr Programm starten. • Während das Programm ausgeführt wird, sollten Sie das USB-Kabel des UA-1X nicht vom Gerät trennen.
- Page 50 Anschlüsse und Treiberinstallation (Macintosh) ■ Audio-Softwareeinstellungen Schließen Sie das UA-1X an Ihren Computer mit einem USB-Kabel an, bevor Sie Ihr Programm starten. Wenn in Ihrem Programm die Einstellungen für die Audioeingabe/Ausgabe vorgenommen werden, wählen Sie USB Audio CODEC. * Einzelheiten hierzu finden Sie im Handbuch des Programms, das Sie verwenden.
-
Page 51: Connexions Et Installation Des Pilotes (Windows)
* Quittez toutes les applications Windows ouvertes avant d’installer le pilote de l’UA-1X. * Si vous avez l’intention de raccorder l’UA-1X et d’autres appareils USB à votre ordinateur et de les utiliser simultanément, débranchez tous les appareils USB autres que l’UA-1X du connecteur USB avant d’installer le pilote. - Page 52 USB. Il n'est pas nécessaire d'éteindre votre ordinateur. Utilisez un câble USB pour connecter l'UA-1X à votre ordinateur avant d'allumer votre équipement audio. ■ Utilisateurs de Windows XP/2000 L’UA-1X étant déconnecté, mettez votre ordinateur...
- Page 53 L’UA-1X étant déconnecté, mettez votre ordinateur sous tension ; Windows démarre. Débranchez tous les câbles USB, à l’exception de ceux du clavier et de la souris (le cas échéant). Utilisez un câble USB pour connecter l'UA-1X à votre ordinateur. fig.02-03.e Windows détecte l’UA-1X, puis la boîte de dialogue...
- Page 54 Composite Device driver, USB Human Interface Device driver, USB Audio Device driver. Procédez comme suit pour effectuer l'installation. L’UA-1X étant déconnecté, mettez votre ordinateur sous tension ; Windows démarre. Débranchez tous les câbles USB, à l’exception de ceux du clavier et de la souris (le cas échéant).
- Page 55 fig.02-07.e Cochez “Lecteur de CD-ROM” et cliquez sur [Suivant]. fig.02-08.e Cliquez sur [Suivant]. * Selon votre système, l'emplacement du pilote peut différer de celui de la figure ci-dessus, mais ceci ne constitue pas un problème. La copie du fichier (pilote) démarre. fig.02-09.e Si le CD-ROM Windows n'est pas inséré...
- Page 56 Connexions et installation des pilotes (Windows) fig.02-10.e Une fois l'installation du pilote Périphérique USB Composite terminée, la boîte de dialogue suivante s'affiche. Cliquez sur [Terminer]. fig.02-11.e Ensuite, le Périphérique d'interface utilisateur USB est détecté automatiquement et la boîte de dialogue “Assistant Ajout de nouveau matériel”...
- Page 57 fig.02-13.e Ensuite,USB Audio Device sera détecté automatiquement et la boîte de dialogue “Assistant Ajout de nouveau matériel” s’affichera. Cliquez sur [Suivant], puis procédez à l’installation comme aux étapes 4–7 (p. 54-55). fig.02-14.e Une fois terminée l’installation du pilote USB Audio Device, une boîte de dialogue similaire à...
-
Page 58: Configuration Et Contrôle
Connexions et installation des pilotes (Windows) Configuration et contrôle ■ Spécification du périphérique d'entrée/ sortie audio Cliquez sur le bouton [Démarrer] de Windows, puis sélectionnez Paramètres – Panneau de configuration. (Sous Windows XP, cliquez sur le bouton Démarrer, puis sur Panneau de configuration.) Affichez “Sons et Propriétés multimédia”... - Page 59 Cliquez sur l'onglet Audio. Pour Périphérique par défaut sous Lecture et Périphérique par défaut sous Enregistrement, sélectionnez CODEC audio USB ou Périphérique audio USB. Cliquez sur puis, dans la liste qui s’affiche, cliquez sur CODEC audio USB ou Périphérique audio USB pour le sélectionner.
- Page 60 Connexions et installation des pilotes (Windows) Réglages du contrôle du volume Le volume de sortie de l'UA-1X peut être contrôlé par l’utilitaire “Contrôle du volume” de Windows. Cliquez sur le bouton Démarrer de Windows, puis sélectionnez Programmes – Accessoires – Divertissement –...
- Page 61 Vous pouvez monter ou baisser le curseur pour régler le volume de l'UA-1X. Les options suivantes peuvent être réglées. Règle le volume des sorties analogiques USB Audio (Speaker) (sortie ligne et sortie casque). Ce réglage n'affecte pas les sorties numériques (*1).
- Page 62 Connexions et installation des pilotes (Windows) Lorsque vous utilisez le lecteur de CD-ROM de votre ordinateur pour lire un CD audio ou pour lire la musique de fond des jeux avec l’UA-1X : Windows XP/2000/XP : Ouvrez la boîte de dialogue Propriétés Système.
-
Page 63: Connexions Et Installation Des Pilotes (Macintosh)
Qu'est-ce qu'un pilote ? Un pilote est un logiciel qui permet à un programme s'exécutant sur votre ordinateur de transférer des données de et vers un périphérique (comme l'UA-1X) lorsque celui-ci est connecté à votre ordinateur à l'aide d'un câble USB. - Page 64 USB. Il n'est pas nécessaire d'éteindre votre ordinateur. Utilisez un câble USB pour connecter l'UA-1X à votre ordinateur avant d'allumer votre équipement audio. L’UA-1X étant éteint, mettez le Macintosh sous tension.
- Page 65 Attendez environ cinq secondes. L'UA-1X utilise un pilote inclus dans le système Mac OS. Pendant que vous patientez, l’affichage ne change pas, mais l’UA-1X est bien en cours de détection. Ne touchez ni à la souris, ni au clavier. fig.03-04.e Pour vérifier que la...
- Page 66 Connexions et installation des pilotes (Macintosh) fig.03-06.e Baissez le volume sur l'UA-1X et sur votre appareil audio, puis cliquez sur [Démarrer le test]. fig.03-07.e Utilisez la barre [Volume principal] pour régler le volume. Lorsque vous avez terminé, cliquez sur [Arrêter le test].
- Page 67 “Son.” Dans le menu Fichier, sélectionnez Quitter. Problèmes connus : UA-1X • Lorsque l’applicaton audio est en cours d’enregistrement ou de lecture, veillez à ne pas brancher, ni débrancher, le câble USB. Le logiciel risquerait de se bloquer.
- Page 68 Connexions et installation des pilotes (Macintosh) Connexions et installation des pilotes (OS X) * L’UA-1X et le Mac OS 10.2 ont été employés à titre d’exemple dans cette explication. ■ Effectuer les branchements et les réglages système d’entrée/sortie du son Utilisez un câble USB pour connecter l’UA-1X à...
- Page 69 • Utilisez un câble USB pour brancher l'UA-1X à votre ordinateur avant de lancer votre logiciel. • Ne débranchez pas le câble USB de l'UA-1X lorsque votre logiciel est en cours d'utilisation. • Quittez votre logiciel avant de débrancher le câble USB de l'UA-1X.
- Page 70 MEMO...
-
Page 71: Collegamenti E Installazione Del Driver (Windows)
* Chiudere tutte le applicazioni eventualmente attive in Windows prima di installare il driver UA-1X. * Se si prevede di collegare l’UA-1X e altri dispositivi USB al computer e di utilizzarli contemporaneamente, scollegare tutti i dispositivi USB, eccetto l’UA-1X, dal connettore USB prima di installare il driver. - Page 72 USB. Non è necessario spegnere il computer. Utilizzare un cavo USB per collegare l’UA-1X al computer prima di accendere gli apparecchi audio. ■ Utenti Windows XP/2000 Accendere il computer e avviare Windows senza collegare l’UA-1X.
- Page 73 Accendere il computer e avviare Windows senza collegare l’UA-1X. Scollegare tutti i cavi USB, ad eccezione della tastiera e del mouse USB, se utilizzati. Utilizzare un cavo USB per collegare l’UA-1X al computer. fig.02-03.e Windows rileva l’UA-1X e appare la finestra di dialogo “Installazione...
- Page 74 USB, se utilizzati. Inserire il CD-ROM di Microsoft Windows nell’unità corrispondente e utilizzare un cavo USB per collegare l’UA-1X al computer. Poiché alcuni computer sono venduti con il contenuto del CD-ROM di Microsoft Windows già installato sul disco rigido, il CD in questione potrebbe non essere stato fornito.
- Page 75 fig.02-07.e Selezionare la casella Unità CD-ROM e fare clic su [Avanti]. fig.02-08.e Fare clic su [Avanti]. * A seconda del sistema utilizzato, la finestra Percorso del driver potrebbe essere diversa da quella di seguito illustrata, ma non è un problema. A questo punto comincerà...
- Page 76 Collegamenti e installazione del driver (Windows) fig.02-11.e Nella tappa successiva, il dispositivo Periferica USB Human Interface viene rilevato automaticamente e appare la finestra di dialogo “Installazione guidata nuovo hardware.” Fare clic su [Avanti] e continuare l’installazione seguendo la stessa procedura fino ai passi 4-7 (pag.
- Page 77 fig.02-13.e Nella tappa successiva, il dispositivo Periferica audio USB viene rilevato automaticamente e appare la finestra di dialogo “Installazione guidata nuovo hardware.” Fare clic su [Avanti] e continuare l’installazione seguendo la stessa procedura fino ai passi 4-7 (pag. 74-75). fig.02-14.e Alla fine dell’installazione del driver Periferica audio USB, verrà...
-
Page 78: Configurazione E Verifica
Collegamenti e installazione del driver (Windows) Configurazione e verifica ■ Indicazione del dispositivo audio d’ingresso/uscita In Windows, fare clic sul pulsante Start e selezionare Impostazioni - Pannello di controllo. fare clic sul pulsante Start e sul Pannello di controllo.) Aprire la finestra di dialogo “Suoni e periferiche audio”... - Page 79 Fare clic sulla scheda Audio. Come Periferica preferenziale per Riproduzione suoni e Periferica preferenziale per Registrazione suoni, selezionare USB Audio CODEC o Periferica audio USB. Fare clic su e nell’elenco visualizzato fare clic su USB Audio CODEC o Periferica audio USB per selezionarla. Fare clic su [OK] per completare le impostazioni.
- Page 80 Collegamenti e installazione del driver (Windows) Impostazioni Controllo volume Il volume dell’UA-1X può essere regolato tramite il Controllo volume di Windows. Fare clic sul pulsante Start in Windows e selezionare Programmi (In Windows XP, Tutti i programmi) Accessori – Svago – Controllo volume per avviarlo.
- Page 81 Spostare lo slider verso l’alto o verso il basso per regolare il volume dell’UA-1X. È possibile regolare i seguenti elementi. Regola il volume delle uscite Audio USB (altoparlanti) analogiche (uscita linea e uscita cuffie). L’uscita digitale non cambia (*1). Regola il volume “CD Musica”...
- Page 82 Collegamenti e installazione del driver (Windows) Se si utilizza l’unità CD-ROM del computer per riprodurre un CD audio o se si riproduce musica di sottofondo per i giochi con l’UA-1X. Utenti Windows XP/2000: Aprire la finestra di dialogo Proprietà del sistema.
-
Page 83: Collegamenti E Installazione Del Driver (Macintosh)
Definizione di un driver Un driver è un programma informatico che permette di eseguire un’applicazione sul computer per trasferire i dati da e verso l’UA-1X quando l’apparecchio è collegato al computer tramite un cavo USB. Il driver trasmette i dati dall’applicazione all’UA-1X e viceversa. - Page 84 USB. Non è necessario spegnere il computer. Utilizzare un cavo USB per collegare l’UA-1X al computer prima di accendere gli apparecchi audio. Dopo essersi accertati che l’UA-1X è scollegato, avviare il Macintosh.
- Page 85 Attendere circa cinque secondi. L'UA-1X utilizza un driver fornito con Mac OS. Durante l’operazione, l’UA-1X verrà rilevato anche se non viene visualizzato alcun messaggio in questo senso. Evitare di toccare il mouse o la tastiera. fig.03-04.e Per accertarsi che l’apparecchio sia stato...
- Page 86 Collegamenti e installazione del driver (Macintosh) fig.03-06.e Abbassare al minimo il volume dell’UA-1X e degli apparecchi audio e fare clic su [Start Test]. fig.03-07.e Utilizzare lo slider [Main Volume] per regolare il volume. Alla fine, fare clic su [Stop Test].
- Page 87 Alla fine delle impostazioni, chiudere la finestra di dialogo “Sound.” Selezionare Quit nel menu File. Problemi noti: UA-1X • Se l’applicazione audio sta eseguendo una registrazione o riproduzione, non collegare/scollegare il cavo USB. L’applicazione potrebbe bloccarsi. • L’audio potrebbe essere irregolare e/o disturbato se la registrazione e la riproduzione avvengono contemporaneamente con un conseguente sovraccarico per la CPU.
- Page 88 Collegamenti e installazione del driver (Macintosh) Collegamenti e installazione del driver (OS X) * Nella spiegazione che segue si fa riferimento all'UA-1X e a Mac OS 10.2. ■ Collegamenti e impostazioni di ingresso/ uscita audio del sistema Utilizzare un cavo USB per collegare l’UA-1X al Macintosh.
- Page 89 Prima di utilizzare il software, controllare quanto segue. • Collegare l’UA-1X al computer mediante un cavo USB prima di avviare il software. • Non scollegare il cavo USB dall'UA-1X mentre il software è in esecuzione. • Chiudere il software prima di scollegare il cavo USB dall'UA-1X.
- Page 90 MEMO...
-
Page 91: Conexiones E Instalación Del Controlador (Windows)
* Antes de instalar el controlador de la unidad UA-1X, salga de cualquier otra aplicación que se esté ejecutando. * Si pretende conectar la unidad UA-1X y otros aparatos USB a su sistema y utilizarlos simultáneamente, desconecte todos los aparatos USB que no sean el UA-1X del conector USB antes de instalar el controlador. - Page 92 USB. No es necesario que apague el sistema. Conecte la unidad UA-1X al sistema con un cable USB antes de encender el equipo de audio. ■ Usuarios de Windows XP/2000 Con la unidad UA-1X desconectada de su sistema, encienda el sistema e inicie Windows.
- Page 93 Con la unidad UA-1X desconectada de su sistema, encienda el sistema e inicie Windows. Desconecte todos los cables USB excepto el del teclado USB y el ratón USB (si se utilizan). Utilice un cable USB para conectar la unidad UA-1X al sistema. fig.02-03.e Windows detectará la unidad UA-1X y aparecerá...
- Page 94 último, el controlador Dispositivo de audio USB. Realice el siguiente procedimiento para llevar a cabo la instalación. Con la unidad UA-1X desconectada de su sistema, encienda el sistema e inicie Windows. Desconecte todos los cables USB excepto el del teclado USB y el ratón USB (si se utilizan).
- Page 95 fig.02-07.e Active Unidad de CD-ROM y haga clic en [Siguiente]. fig.02-08.e Haga clic en [Siguiente]. * Dependiendo del sistema, la ubicación del controlador puede ser diferente de la que se muestra en la ilustración, pero esto no supone ningún problema. El archivo (Controlador) se empezará...
- Page 96 Conexiones e instalación del controlador (Windows) fig.02-10.e Cuando haya finalizado la instalación del controlador Dispositivo USB Composite, aparecerá el siguiente cuadro de diálogo. Haga clic en [Finalizar]. fig.02-11.e A continuación, el sistema detectará automáticamente el Dispositivo de interfaz humana USB y aparecerá el cuadro de diálogo “Asistente para agregar nuevo hardware.”...
- Page 97 fig.02-13.e A continuación, se detectará automáticamente el contro- lador Dispositivo de audio USB y aparecerá el cuadro de diálogo “Asistente para agregar nuevo hardware.” Haga clic en [Siguiente] y prosiga con la instalación tal como se describe en los pasos del 4 al 7 (pág. 94-95). fig.02-1 Cuando la instalación del controlador Dispositivo de...
-
Page 98: Configuración Y Comprobación
Conexiones e instalación del controlador (Windows) Configuración y comprobación ■ Especificación del aparato de entrada/ salida de audio Haga clic en el botón Inicio de Windows y seleccione Configuración - Panel de control. haga clic en el botón Inicio y, a continuación, en Panel de control). - Page 99 Haga clic en la ficha Sonido. Como Dispositivo preferido para la Reproducción de sonido y para la Grabación de sonido, seleccione USB Audio CODEC o Dispositivo de audio USB. Haga clic en y, en la lista que aparece, haga clic en USB Audio CODEC o en Dispositivo de audio USB para seleccionarlo.
- Page 100 Conexiones e instalación del controlador (Windows) Configuración del control de volumen El volumen de salida del UA-1X se puede regular mediante el Control de volumen de Windows. Haga clic en el botón Inicio de Windows y seleccione Programas - Accesorios - Entretenimiento - Control de volumen para iniciarlo.
- Page 101 Para ajustar el volumen del UA-1X, suba o baje el deslizador. Puede ajustar los siguientes elementos. Audio USB Ajusta el volumen de las salidas (Altavoz) analógicas (salida de línea y salida de auriculares). No afecta a la salida digital (*1).
- Page 102 Conexiones e instalación del controlador (Windows) Cuando utilice la unidad de CD-ROM del sistema para escuchar un CD de audio o cuando reproduzca música de fondo de juegos con la unidad UA-1X, Usuarios de Windows XP o 2000: Abra el cuadro de diálogo Propiedades del sistema.
-
Page 103: Conexiones E Instalación Del Controlador (Macintosh)
UA-1X y viceversa cuando está conectada al equipo mediante un cable USB. El controlador transfiere los datos de la aplicación a la unidad UA-1X y de la unidad UA-1X a la aplicación. - Page 104 USB. No es necesario que apague el sistema. Conecte la unidad UA-1X al sistema con un cable USB antes de encender el equipo de audio. Con la unidad UA-1X desconectada, inicie el Macintosh.
- Page 105 Espere unos cinco segundos. La unidad UA-1X utiliza un controlador que se proporciona con el sistema operativo Mac. Mientras espera, el contenido de la pantalla no cambiará, pero el sistema estará detectando la unidad UA-1X. No toque ni el ratón ni el teclado.
- Page 106 Volume, que se encuentra en Output, para ajustar el volumen. Si no aparece USB audio, cierre el cuadro de diálogo “Sound” y desconecte el cable USB de la unidad UA-1X del Macintosh. Vuelva a instalar el controlador (pág. 104).
- Page 107 Cuando haya acabado con la configuración, cierre el cuadro de diálogo “Sound.” Seleccione Quit en el menú File. Problemas conocidos: UA-1X • No conecte o desconecte el cable USB mientras la aplicación de audio esté grabando o reproduciendo. Si lo hace, puede que la aplicación se quede inmovilizada.
- Page 108 UA-1X y Mac OS 10.2 ■ Establecimiento de conexiones y configuración de la entada/salida de sonido del sistema Utilice un cable USB para conectar la unidad UA-1X a su Macintosh. Abra el cuadro de diálogo System Preference y haga clic en Sound.
- Page 109 UA-1X. • Desactive el valor de modo de suspensión (Sleep) del Macintosh. • La unidad UA-1X no funcionará en el entorno Classic de Mac OS X. No se puede utilizar si se está ejecutando el entorno Classic. ■ Configuración del software de sonido Utilice un cable USB para conectar la unidad UA-1X al sistema antes de iniciar el software.
- Page 110 MEMO...
-
Page 111: Troubleshooting
Troubleshooting If an unexpected problem occurs while using the UA-1X, please read this chapter first. It provides numerous hints that will help you solve problems. The problems covered in the troubleshooting section are organized according to the operating system on which the problem might be encountered. - Page 112 The UA-1X cannot be connected if insufficient power is supplied to it. Check whether one of the following cases apply. If you are using the UA-1X with a notebook computer that is running on its battery, operation may be unreliable with some models of computer. If this is the case, connect the AC adaptor to your notebook computer.
-
Page 113: Problems When Using The Ua-1X
If this occurs, start up the computer with the UA-1X disconnected, and then connect the UA-1X. On a computer that uses a USB keyboard, starting up the computer with the UA-1X already connected may cause operation to become unstable. -
Page 114: Sound Is Distorted
• Have the drivers been installed correctly? In order to playback audio data using the UA-1X, the USB Audio Device driver must be installed. For details on installation and settings, refer to Connections and driver installation (Windows p. 13, Macintosh p. 23). -
Page 115: Sound Is Interrupted During Audio Playback
MIDI sound module are connected to the line input jacks of the UA-1X, noise from your computer may be heard via the MIDI sound module from the UA-1X, depending on the computer you are using. - Page 116 Troubleshooting fig.winmacac • Are many applications running on your computer? If you use numerous applications during playback, or start up another application, the playback may be interrupted depending on your computer system. Exit all unneeded applications, and try again. If this does not resolve the problem, try restarting your computer.
- Page 117 “Chooser.”) • In the “Memory” Control Panel, set Virtual Memory to “Off.” • Depending on the way in which you connect to the Internet, use the UA-1X with the following settings. If you connect to the Internet via a LAN cable Use while the LAN cable is connected.
- Page 118 If the game uses an audio CD for background music, refer to When using your computer’s CD-ROM drive to play an audio CD, or when playing background music for games with the UA-1X (p. 22). The volume changed when you resumed from Suspend or Hibernation status •...
-
Page 119: Deleting The Usb Audio Device Driver (Windows)
Use the following procedure to delete the driver that is already installed. Depending on your computer, some of the folder names may be different. Use a USB cable to connect the UA-1X to your computer. Delete the USB Audio Device driver. Click the Windows Start button, and select Settings - Control Panel. -
Page 120: Specifications
Specifications UA-1X: USB Audio Interface ●Number of Audio Record/Playback Channels Record: 1 pair of stereo Playback: 1 pair of stereo ●Signal Processing PC interface: 16 bits ●Sampling Frequency Digital output: 32/44.1/48 kHz ●Nominal Input Level Line input jacks: -10 dBu (LOW)/+4 dBu (HIGH) ●Nominal Output Level... - Page 121 MEMO...
- Page 122 MEMO...
-
Page 123: Federal Communications Commission
Compliance Information Statement Model Name : Type of Equipment : Responsible Party : Telephone : NOTICE AVIS UA-1X USB Audio Interface Edirol Corporation North America 425 Sequoia Drive, Suite 114, Bellingham, WA 98226 Address : (360) 594-4276 For EU Countries... - Page 124 Information When you need repair service, call your nearest EDIROL/Roland Service Center or authorized EDIROL/Roland distributor in your country as shown below. HONG KONG EUROPE Parsons Music Ltd. EDIROL (Europe) Ltd. 8th Floor, Railway Plaza, 39 Studio 3.4 114 Power Road Chatham Road South, T.S.T,...
Need help?
Do you have a question about the UA-1X and is the answer not in the manual?
Questions and answers