Table of Contents
Advertisement
Quick Links
Advertisement
Table of Contents

Related Manuals for Cata EH60SS


Summary of Contents for Cata EH60SS
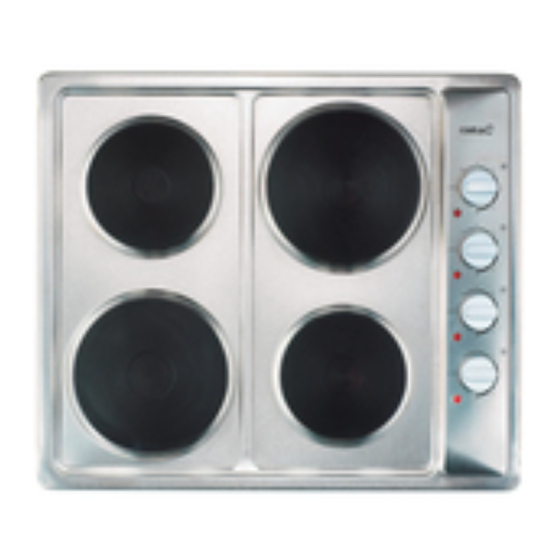
- Page 1 EH60SS 60cm 4x Burner Electric Hob Barcode 5052931055692...
- Page 2 [01] x 1 [03] x 3 [02] x 3 [05] x 1 Template 4-R20 [04] x 1...
- Page 3 EH60SS 60cm 4x Burner Electric Hob 60 cm 4 Solid Plate Electric Hob Table de cuisson gaz encastrable Installation Installation...
-
Page 4: Table Of Contents
Let's get started... Getting started... Before you start Safety more detail... Product functions Operation Care and maintenance Troubleshooting Recycling and disposal Technical and legal information Guarantee CE Declaration of conformity Appendix Installation... -
Page 5: Getting Started
Getting Started... Before you start Safety... - Page 6 Before you start Before you start To avoid the risks that are always present when you use an electrical appliance it is important that this appliance is installed correctly and that you read the safety instructions carefully to avoid misuse and hazards. Please keep this instruction booklet for future reference and pass it on to any future owners.
- Page 7 Safety These instructions are for your safety. Please read through them thoroughly prior to installation and retain them for future reference. • All installation work must be carried out by a • The installation must comply with local electrical regulations, building regulations and local bylaws.
- Page 8 Safety We also recommend that great care be taken during use and cleaning. Read the cleaning and maintenance sections for this appliance carefully. A steam cleaner is not to be used. The appliance is not intended to be operated by means of external timer or separated remote-control system.
-
Page 9: In More Detail
more detail... Product functions Operation Care and maintenance Troubleshooting Recycling and disposal Technical and legal information Guarantee CE Declaration of conformity... -
Page 10: Product Functions
Operation Product functions > 2 x 1.50 kW thermostatic plates (diameter 180 mm). Rapid hot plates. > 2 x 1.00 kW thermostatic plates (diameter 145 mm). Semi-rapid hot plates. > Side control operation. 6 power levels. Control elements Reference Description Semi-rapid hotplate Auxiliar hotplate Panel... -
Page 11: Operation
Operation Before first use Caution Any film or stickers that are present on the hob surface when it is delivered should be removed before use. Care should be used when utilizing the appliance, otherwise there is a risk of burns being caused. If fat and oil overheats, then it can ignite extremely quickly. - Page 12 Operation Turning on a zone and setting a power level Control panel (fig.4) > Turn the control knob of the zone that you wish to cook on, clockwise or anticlockwise until it reaches the power level that you desire. (see fig.4) >...
- Page 13 Operation > When cold, the bottom of the pans should be slightly concave, as they expand when hot and lie flat on the surface of the hob. This will allow the heat to transfer more easily. > The best thickness for the bottom of the pans is 2 – 3 mm of enameled steel and 4 –...
-
Page 14: Care And Maintenance
Care and maintenance Care Damaged power cables should be replaced by a For domestic use only. When a cooking zone has been on for a long time, the surface remains hot for some time afterwards so do not touch the ceramic surface. Do not leave metal objects, such as knives, forks, spoons and lids on the hob as they may get hot. - Page 15 Care and maintenance Caution • Use soapy water and a cloth for cleaning. Never use abrasive powders. • Avoid banging pots and pans down on the hob. • Cleaning and maintenance operations must only be carried out when the hob is cool. >...
-
Page 16: Troubleshooting
Care and maintenance > NOTE: If the solid plates are not maintained regularly with olive oil or a hotplate conditioner, then they may rust. Troubleshooting The following circumstances may not be a problem. Do not contact the customer services until the problem has been confirmed. If your appliance is still not functioning properly after making the below checks, please contact customer services. -
Page 17: Recycling And Disposal
Care and maintenance Recycling and Disposal Environmental Protection Waste electrical products should not be disposed of with household waste. Please recycle where facilities exist. Check with your Local Authority or retailer for recycling advice. The symbol on the product or its packaging indicates that this product cannot be treated as normal household waste. -
Page 18: Technical And Legal Information
Technical and legal information Technical data Power supply V / Hz 220-240 V~/ 50Hz 5Kw Max. Rated Inputs 5.00 Supply connection 32 * Mains supply lead 3 x 2.5 External dimensions 590 x 510 x 90 (WxHxD) Net weight 10.5 *Double pole switched fused outlet with 3 mm contact gap. - Page 19 Technical and legal information All installation work must be carried out by a Before connecting the mains supply ensure that the mains voltage corresponds to the voltage on the rating plate inside the cooker hood. Warning: THIS APPLIANCE MUST BE EARTHED. Mains Supply could be connected to the Mains Voltage by Direct Connection USE A 3AMP FUSE...
- Page 20 Technical and legal information Electrical Requirements Any permanent electrical installation must comply with the latest I.E.E. Regulations and local electricity company regulations. For roll of the National Inspection Council for Electrical Installation Contracting (NICEIC) should undertake the electrical installation. Electrical Connection Before connecting the mains supply ensure that the mains voltage corresponds to the voltage on the rating plate inside the appliance.
- Page 21 Installation Electrical connection Connect the appliance to the power supply (220 to 240 V~/ 50 Hz). wiring regulations. > The hob must be connected to the electrical supply via a double pole mains switch, which must have a minimum contact clearance of 3mm.
-
Page 22: Guarantee
Guarantee Manufacturer's Guarantee This appliance is covered by a full manufacturer’s 24 month parts and labour guarantee and covers all parts and labour costs associated with the repair of the appliance in a domestic environment. We will repair any defect that arises due to faulty materials or workmanship and use genuine manufacturers parts. - Page 23 Guarantee Exclusions to the guarantee (continued) Claims arising from non-domestic use or commercial environment. Any gas appliance not fitted by a gas safe qualified installer. If no fault is found then GAA reserves the right to charge for the call out at the going rate of £55.00 plus VAT.
-
Page 24: Ce Declaration Of Conformity
Technical and legal information CE Declaration of Conformity EH60SS The Manufacturer has a policy of continuous product improvement, it reserves the right to adapt and carry out any modification considered necessary without prior warning. B&Q plc Chandlers Ford, Hants SO53 3LE United Kingdom www.diy.com... -
Page 25: Appendix
Appendix... Installation... - Page 26 Installation Clearance Warning Good ventilation is required around the appliance for easier dissipation of heat and low power consumption. Sufficient clearance is required around the appliance. The gap between the hob and any cupboard above it should be at least 750mm. 750mm 750mm At least...
- Page 27 Installation Installation [04] x 1 Cut out worktop to the template dimensions with suitable equipment and seal the cut edge with appropriate sealant. [05] x 1 [06] Stretch out the supplied seal along the underside edge of the hob, ensuring the ends overlap.
- Page 28 Installation 30mm 40mm [07] x 3 [10] [07] [10] [07] [10] x 4 Note: For electrical connection see Technical and legal information section...
- Page 29 Notes...
- Page 30 Notes...
- Page 31 Notes...
- Page 32 B&Q plc Chandlers Ford, Hants SO53 3LE United Kingdom www.diy.com Castorama Parc d'Activités B.P.101 59175 Templemars - France 0 810 104 104 www.castorama.fr IM EH60SS 2013.04.19...
Need help?
Do you have a question about the EH60SS and is the answer not in the manual?
Questions and answers