
Related Manuals for Primes FocusMonitor-W


Summary of Contents for Primes FocusMonitor-W
- Page 1 PRIMES Short Start Guide Translation of the Original Instructions FocusMonitor-W FM-W Additional Documentation to the Operating Manual FocusMonitor/BeamMonitor Revision 02/2016 EN...
-
Page 3: Table Of Contents
PRIMES FocusMonitor-W Contents ABOUT THIS DOCUMENTATION DISTINGUISHING FEATURES IN COMPARISON WITH THE STANDARD DEVICE CONNECTIONS DISPLAYS ADAPT DEVICE INFORMATION ON THE OPERATION OF THE ABSORBER MOUNTING/DISMOUNTING Inserting/Exchanging the Measuring Tip ..................6 Exchanging the Detector ......................8 Setting the Measurement Sensitivity of the Detect ..............11 Installation Position ........................11... -
Page 4: About This Documentation
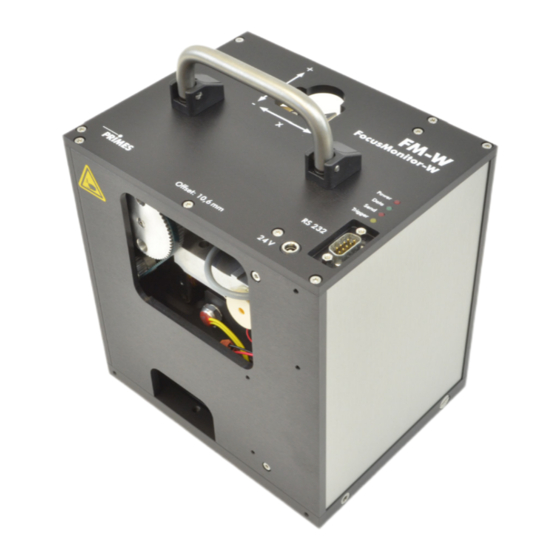
Distinguishing Features in Comparison with the Standard Device • The FocusMonitor-W does not have an integrated z-axis. For the measurement the focus is moved along the axis by the system. Information regarding the z-position can either be entered manually via the set- tings dialogue (measurement >>... -
Page 5: Displays
PRIMES FocusMonitor-W Displays Designation Color Meaning Power Voltage (24 V) Data Green Devices send data on the bus Send PC sends data on the bus Trigger Yellow Trigger signal (only for maintenance purposes) Adapt Device Depending on the laser type the corresponding measuring tip and a suitable detector have to be used. The NIR detector is included ex works;... -
Page 6: Mounting/Dismounting
PRIMES FocusMonitor-W Mounting/Dismounting Inserting/Exchanging the Measuring Tip There are different measurement tips available for different wavelengths (see „Tab. 5.1: Variety of measure- ment tips and detectors“ on page 5). NOTICE Danger of damaging the measuring tip The small drill hole in the measuring tip can be blocked easily by dirt particles or by touching it with bare hands. - Page 7 PRIMES FocusMonitor-W Entrance Aperture Fig. 7.2: Entrance aperture (pinhole) in the measuring tip. Fig. 7.3: Inserting the measuring tip 6. Insert the retaining plate in the disc with the guidance groove pointing upwards and an angle of 45 degrees and press it downwards into the opening (see Fig. 7.4).
-
Page 8: Exchanging The Detector
When turning the supply voltage back on, the measuring head automatically moves back into its standby position. Exchanging the Detector The NIR detector is the standard detector of the FocusMonitor-W. For measurements with a CO laser the detector has to be replaced by a CO detector. - Page 9 PRIMES FocusMonitor-W Carefully remove the two plugs from the detec- tor, for example by means of long nose pliers. 4. Remove the fastening screws on both sides of the bottom plate (please mind that the screws have different lengths). Tilt the housing backwards.
- Page 10 PRIMES FocusMonitor-W Opened FMW Remove the plastic retaining screws of the detector with the short screw driver (included in the scope of delivery) and carefully take the detector out of the housing. Build in the new detector in reversed order.
-
Page 11: Setting The Measurement Sensitivity Of The Detect
PRIMES FocusMonitor-W Setting the Measurement Sensitivity of the Detect Depending on the laser power, the sensitivity of the detector has to be set. Detector Switch position Max. Laser Power with Focused Beam in Watt High 5 ... 50 -Laser DFWCM-2 50 ... -
Page 12: Basic Settings Of The Laserdiagnosticssoftware (Lds)
PRIMES FocusMonitor-W Basic Settings of the LaserDiagnosticsSoftware (LDS) In the following, basic LDS settings are described which are required for a successful measurement. Saved settings can be reloaded via the menu File>>Load measurement preferences. The standard extension for such a setting file of the FocusMonitor is “.ptx“. -
Page 13: Beamfind Settings
PRIMES FocusMonitor-W Beamfind Settings Select the menu Measurement >> Beamfind Settings... Pixel X/Y (factory setting=64) In order to find the laser beam more easily, higher resolutions have to be set for lower powers. Trigger Set lower values for smaller beam diameters. -
Page 14: Measuring
PRIMES FocusMonitor-W Measuring WARNING Danger of injuries due to laser radiation Scattered radiation may develop during the measurement (laser class 4). Please always wear laser safety goggles which are adapted to the laser wavelength used. Please ensure an adequate shielding of the scattered radiation and the complete absorption of the radiation passing the device. - Page 15 PRIMES FocusMonitor-W 10. Click the Start button. 11. Turn off the laser after a successful measure- ment. In case the measurement was not suc- cessful, go back to step 8 and correct the window adaption. 12. Move the system to the next measuring position.
-
Page 16: Caustic Display
PRIMES FocusMonitor-W Caustic Display The results of the caustic measurement can be displayed by means of the menu item Presentation>>Caustic. On the left Fig. 9.1 shows the measured beam parameter either on the basis of the 86%-radii or the mo- ment evaluation according to ISO 11146. -
Page 17: Technical Data
PRIMES FocusMonitor-W Technical Data Measurement Parameters Power range up to 1000 W Max. energy per measurement 90 kJ Wavelength range 0.4 – 12 µm Beam dimensions, typ. 150 – 3000 µm (optionaly up to 5000 µm) Function of the Measuring System Measurement window sizes 0.08 x 0.08 up to 8 x 8 mm... -
Page 18: Dimensions
PRIMES FocusMonitor-W Dimensions All measures are given in mm Revision 02/2016 EN...
Need help?
Do you have a question about the FocusMonitor-W and is the answer not in the manual?
Questions and answers