
Related Manuals for Primes MicroSpotMonitor-Compact MSM-C


Summary of Contents for Primes MicroSpotMonitor-Compact MSM-C
- Page 1 Operating Manual Translation of the Original Instructions MicroSpotMonitor-Compact MSM-C LaserDiagnosticsSoftware Revision 01 EN - 06/2022 (Revision 01/2019 DE)
- Page 2 LeerseiteLEERSEITE...
- Page 3 MicroSpotMonitor-Compact IMPORTANT! READ CAREFULLY BEFORE USE. KEEP FOR FUTURE USE. Revision 01 EN - 06/2022...
-
Page 4: Table Of Contents
MicroSpotMonitor-Compact Contents Basic Safety Instructions Symbol Explanations Conditions at the installation site Introduction Laser Beam Measurement ......................10 System Description Measuring Principle .........................12 Device Assembly ........................12 Short Overview Installation Transport Installation Mounting Position and Attachment..................15 Adjustment ..........................16 Electrical Connection Analogue Out ..........................18 Trigger In ..........................18 Trigger Out ..........................18 Power .............................18... - Page 5 MicroSpotMonitor-Compact 13.2.3 Saving the Initial Configuration ..................38 13.2.4 Carrying out the First Measurement ................39 13.3 Displaying a Measurement Result with the LDS ...............40 13.4 Displaying a Measurement Result in a Browser (OPTION) ............42 13.5 Caustic Measurement (OPTION PROFIBUS) ................43 System Control 14.1 Measurement Procedure Focus Measurement (untriggered) ............44 14.2 Measurement Procedure Focus Measurement (triggered) ............44 14.3 Timing-Diagram of the Focus Measurement ................45...
- Page 6 The diffraction index M Both the development and the production of the measuring devices are effected by PRIMES. This is how we ensure an optimal quality, excellent service and a short reaction time which is the basis to meet our custo- mers’...
-
Page 7: Basic Safety Instructions
MicroSpotMonitor-Compact Basic Safety Instructions Intended Use The MicroSpotMonitor-Compact is exclusively intended for measurements which are carried out in or nearby the optical path of lasers with a power range between 10 mW and 1 kW. Please mind and adhere to the specifications and limit values given in chapter 19 „Technical Data“ on page 56. Other forms of usage are improper. - Page 8 MicroSpotMonitor-Compact • Install safety switches and/or emergency safety mechanisms that enable immediate closure of the laser shutter. • Ensure that the device is mounted securely to prevent any movement of the device relative to the beam axis and thus reduce the risk of scattered radiation. This in the only way to ensure optimum performance during the measurement.
-
Page 9: Symbol Explanations
MicroSpotMonitor-Compact Symbol Explanations The following symbols and signal words indicate possible residual risks: DANGER Means that death or serious physical injuries will occur if necessary safety precautions are not taken. WARNING Means that death or serious physical injuries may occur if necessary safety precautions are not taken. -
Page 10: Conditions At The Installation Site
This is where PRIMES beam diagnostics devices for measuring beam quality, focusability and laser power come in. Process monitoring in production with laser beam diagnostics devices by PRIMES enables consis- tent quality assurance and allows the timely detection and elimination of malfunctions of laser beams. -
Page 11: System Description
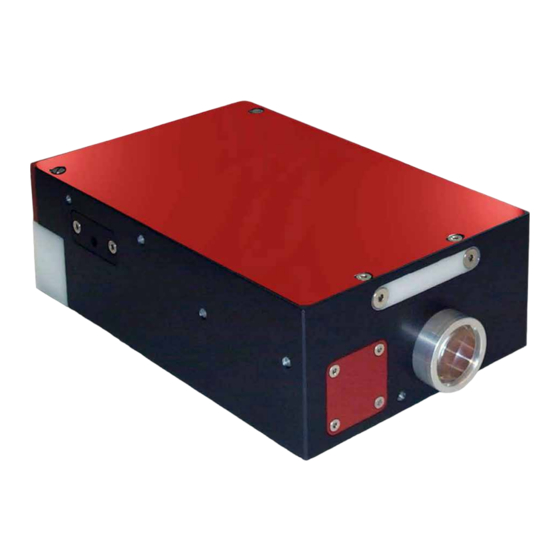
MicroSpotMonitor-Compact System Description The MicroSpotMonitor-Compact (MSM-C) extends the product family of camera-based focus analysis systems by a modular configurable measuring system which was optimized for the limited installation space available in micro-production plants. The following parameters are measured: • Beam diameter •... -
Page 12: Measuring Principle
MicroSpotMonitor-Compact Measuring Principle The beam geometry and the power density distribution are measured with the camera-based measuring system via a CCD sensor. The measuring data are transmitted to the computer via Ethernet or, OPTIONally, via a Profibus-Interface of the system control. MicroSpotMonitor-Compact Communication Board System Control... -
Page 13: Short Overview Installation
MicroSpotMonitor-Compact Short Overview Installation This short overview provides you with information on necessary safety measures, necessary media for the operation as well as required connection elements. 1. Taking Necessary Safety Measures Please mind special safety instructions WARNING Danger of injuries due to scattered radiation The numerical aperture (NA) of the laser beam has to be smaller than 0.2 in order to ensure that no scattered radiation occurs at the edge of the objective. -
Page 14: Transport
X Handle the device carefully when transporting or installing it. X To avoid contamination, cover the apertures with the provided lid or optical tape. X Only transport the device in the original PRIMES transport box. NOTICE Damage/destruction of the device caused by leaking or freezing cooling water Leaking cooling water can damage the device. -
Page 15: Installation
MicroSpotMonitor-Compact Installation Mounting Position and Attachment WARNING Danger of injuries due to scattered radiation If the measuring device is moved from the measured position, this can lead to scattered radiation during the measuring operation. When mounting the device please ensure that it cannot be moved by unintended pushes or by pulling the cables. -
Page 16: Adjustment
MicroSpotMonitor-Compact Adjustment Due to the depiction features of the objective it is necessary to position the laser beam focus in a certain distance above the objective. The higher the focus lies above the objective the shorter it is later depicted behind the objective. -
Page 17: Electrical Connection
MicroSpotMonitor-Compact Electrical Connection Analogue Input Exter- Output Inter- Output nal Trigger nal Trigger Supply Voltage ON-/OFF Switch Ethernet Socket Safety Circuit, (RJ45) customer-specific Fig. 9.1: Electrical connections MSM-C (standard) LED-Display Profibus Run/Stop Supply Voltage (loop through for the next bus sharing unit) Profibus In/Out Identical to Fig. -
Page 18: Analogue Out
MicroSpotMonitor-Compact Analogue Out Function Inner Conductor Analogue trigger signal −7,5 V ... +15 V Housing Shield Trigger In Pin Diagram Plug (view: connector side) Function Trigger LVTTL (3.3 V) Not assigned Trigger Out Pin Diagram Socket (view: connector side) Function Trigger out Not assigned Power Pin Diagram Plug (view: connector side) -
Page 19: Profibus-Data (Option)
MicroSpotMonitor-Compact PROFIBUS-Data (OPTION) Pin Diagram Socket In (view: connector side) Function +5 V Signal A ISOGND Signal B Not assigned Socket Designation Sensor-/actuator-socket, 5-pole, M12-SPEEDCON, B-coded, front panel-/Vorderwand-/screw mounting with M16-thread, positionable, with 0.5 m TPE-strand, 5 x 0.34 mm² (Phoenix Contact 1519998) Fig. -
Page 20: Ethernet Connection (Rj-45)
MicroSpotMonitor-Compact Plug Power Out (view connector side) Function +24 V (actuator) +24 V (sensor) Plug Designation Sensor-/actuator connector M12, screw cap, straight (Binder Serie 763, order no. 09-3442-578-05; Conrad order no.: 734325 - 62) Suitable Connector Cable Binder series 763, L=5 m, order no.: 78 3440 35 05 Fig. -
Page 21: Custom Connector
MicroSpotMonitor-Compact Custom Connector This safety circuit protects the measuring device from damages caused by switching of the laser in case of an error. The device can be damaged, if • the voltage supply is not connected, switched off or interrupted •... -
Page 22: Mechanical Connections
MicroSpotMonitor-Compact Mechanical Connections 10.1 Cooling Circuit System NOTICE Danger of damage due to overheating If there is no water cooling or a water flow rate which is insufficient, there is a danger of overheating which can damage the device. Do not operate the device without a connected water cooling. Ensure a sufficient water flow rate. -
Page 23: Connection
MicroSpotMonitor-Compact NOTICE Danger of damage due to overpressure The maximum water inlet pressure must not exceed 2 bar. NOTICE Danger of damage due to foreign particles If you work with sealing tape when installing the cooling circuit (e.g. Teflon or hemp), you need to make sure that no particles get into the turbine! They could inhibit the operation or could stop the flow completely. -
Page 24: Compressed Air For Cyclone (Option)
MicroSpotMonitor-Compact 10.2 Compressed Air for Cyclone (OPTION) NOTICE Danger of damage for the optical components due to dirt particles Contaminated compressed air can damage optical components of a measuring device per- manently. Compressed air has to be clean, dry and oil-free. We recommend an additional prefilter (typ. -
Page 25: Software
MicroSpotMonitor-Compact Software For the configuration and the setting of the control parameters of the measuring device it is necessary to install the PRIMES-LaserDiagnosticsSoftware (LDS), which is included in the scope of delivery. 12.1 System Requirements Operating System: Windows Vista/7 /10 ®... - Page 26 MicroSpotMonitor-Compact Fig. 12.2: The most important dialogue windows It is possible to open different measuring and dialogue windows simultaneously. In this case, windows that are basically important (for the measurement or the communication) remain in the foreground. All other dia- logue windows are overwritten as soon as a new window is opened.
- Page 27 MicroSpotMonitor-Compact The Menu Bar In the menu bar, all main and sub-menus offered by the program can be opened. Revision 01 EN - 06/2022...
-
Page 28: Menu Overview
MicroSpotMonitor-Compact The Tool Bar By clicking the symbols in the tool bar, the following program menus can be reached immediately. File Administration Notation File Selection Plane Selection - Create a new data record - Open an existing data record - Save the current data record - Open the isometric view of the selected data record - Open the variable section view... - Page 29 MicroSpotMonitor-Compact Measurement Environment Here, different system parameters can be set, e.g.: - The reference value for the laser power - The focal length - The wave length - Remarks Sensor Parameters The following device parameters can be set here for example: - The spatial resolution - The mechanical movement limits in z-direction - The selection of one of the measuring devices connected with the bus...
- Page 30 Communication Rescan Bus The system searches the bus for the different device addresses. This is necessary whenever the device configuration at the PRIMES bus was changed after starting the software. Free Communication Display of the communication on the PRIMES bus.
-
Page 31: Main Settings In The Dialogue Windows
MicroSpotMonitor-Compact 12.4 Main Settings in the Dialogue Windows Due to the fact that the PRIMES LaserDiagnosticsSoftware is intended for different devices, the following chapter only refers to functions which are relevant for the MSM-C. 12.4.1 Sensor Parameters The spatial resolution of the measurement is set from 32 x 32 pixels to 512 x 512 pixels. The resolution in y-direction stipulates the number of lines, and the resolution in x-direction stipulates the number of scan- ning points per line. -
Page 32: Measurement Settings
MicroSpotMonitor-Compact 12.4.2 Measurement Settings Fig. 12.5: Settings in the dialogue window Measurement Settings 12.4.3 CCD-Settings Measuring Data Fig. 12.6: Dialogue window CCD-Settings Further hints with regard to the settings can be found in chapter 13.2.2 on page 37. Revision 01 EN - 06/2022... -
Page 33: Measurement Settings Profibus (Option )
MicroSpotMonitor-Compact Measurement Settings PROFIBUS (OPTION 13.1 Changing the PROFIBUS Address A PROFIBUS address is set ex works. This address is stated on the device. If necessary, it can be changed as follows: 1. Please install the LaserDiagnosticsSoftware (LDS) on your computer, which is connected with the device via the network connection. -
Page 34: Preparing A Setup
(address 256.5 to 276, see chapter 15.2 on page 49). A setup is prepared by means of the PRIMES LaserDiagnosticsSoftware (LDS). Therefore, there has to be an Ethernet-connection between the MSM-C and the computer (or the network) and the software has to be installed on a Windows®-based computer (see chapter 12.2 on page 25). - Page 35 MicroSpotMonitor-Compact 3. Select the menu Communication>>Free Communication 4. Activate the OPTION TCP in the field Mode, type in the IP address of the device (label on the device) and click the button Connect. 5. Activate the check box Write bus protocol (right hand lower corner in the dialogue window). With the function Write bus protocol the bus communication is displayed in the field Bus monitor.
- Page 36 MicroSpotMonitor-Compact 6. Click the button Find Primes Devices in the upper range of the window in order to include the MSM-C in the LDS session. Now several dialogue windows appear on the graphical interface of the LDS. Revision 01 EN - 06/2022...
-
Page 37: Setting Of The Initial Configuration
MicroSpotMonitor-Compact 13.2.2 Setting of the Initial Configuration. 1. In the dialogue window Sensor parameters the resolution has to be set to 512 x 512. 2. The following settings have to be made in the dialogue window Measurement settings: • Adjust the biggest window in x- and y-direction and drag it to the centre of the measurement range. •... -
Page 38: Saving The Initial Configuration
MicroSpotMonitor-Compact • Select the OPTION Measuring Data in the dialogue window CCD settings. Measuring Data 13.2.3 Saving the Initial Configuration 1. Select the menu Communication>>Free Communication. 2. Enter the following command in the command bar (please make sure that the blank space is entered correctly): svSetup010T2BF020030 3. -
Page 39: Carrying Out The First Measurement
MicroSpotMonitor-Compact 13.2.4 Carrying out the First Measurement 1. Enter the following command in the command bar: profiMeas101 2. Click the button Send. Now you can measure a single plane in the measurement mode Single measurement. 3. Procedure: Click the button Start and trigger a laser pulse (300 – 500 ms) within 1 second. The measuring result is now displayed. -
Page 40: Displaying A Measurement Result With The Lds
MicroSpotMonitor-Compact 13.3 Displaying a Measurement Result with the LDS The MSM-C offers the possibility to evaluate the last measurement initiated by the PROFIBUS by means of the LDS. The device must not be turned off after the measurement! 1. Connect the device with your computer via Ethernet. 2. - Page 41 MicroSpotMonitor-Compact 5. Enter the following command in the menu Communication>>Free Communication: profiMeas20 then click Send. ProfiMeas 2 ProfiMeas 2 Due to the profiMeas-command no new measurement is triggered but the last measurement is recalled from the device. Afterwards a measurement can be carried out in the dialogue window Measurement settings. Then the measurement carried out last is displayed: This measurement can now be further processed in the LDS.
-
Page 42: Displaying A Measurement Result In A Browser (Option)
MicroSpotMonitor-Compact 13.4 Displaying a Measurement Result in a Browser (OPTION) As an OPTION, the MSM-C gives the possibility to display the last measurement in an arbitrary browser (Please note that the measuring results are deleted after a new start-up!). The measurement can be triggered via the software (LDS) or by the plant via the PROFIBUS. -
Page 43: Caustic Measurement (Option Profibus)
MicroSpotMonitor-Compact 13.5 Caustic Measurement (OPTION PROFIBUS) With the command „moveZ“ a caustic can be measured manually from the dialogue window Free Commu- nication of the LDS in case of partially automated processes by the system control. 1. Select the menu Communication>>Free Communication. 2. -
Page 44: System Control
MicroSpotMonitor-Compact System Control A PROFIBUS interface is OPTIONally available for an integration into a system control. Hence, the deter- mined beam parameters are directly available for a further processing for the machine control. 14.1 Measurement Procedure Focus Measurement (untriggered) System MicroSpotMonitor-Compact Sets parameters for measurement Sets command.start... -
Page 45: Timing-Diagram Of The Focus Measurement
MicroSpotMonitor-Compact 14.3 Timing-Diagram of the Focus Measurement untriggered triggered Measurement Cycle Command.start Command.measuring parameters Laser On status.ready status.measurement running status.measurement finished status.measurement failure status.idle status.irradiation failure status.start acknowledge status.max. value+overflow Beam Parameters Error/Warning Identification Fig. 14.1: Timing-Diagram untriggered and triggered measurement •... - Page 46 MicroSpotMonitor-Compact of the status word. Possibly, the flag “irradiation failure“ is set; in this case, a non-fatal error has occurred (measurement over- or understeered, beam is located at the edge of the measuring window). The reason is coded in the register “warning identification“. However, beam parameters were determined, which are available in the result registers.
-
Page 47: Profibus-Parameter Set
MicroSpotMonitor-Compact Profibus-Parameter Set 15.1 Inputs Address RegAdr Unit/Rep.Rate Length Type Block Size Version Device-/Softwarerevi- Info on device 2 byte word 20 byte (read only) sion Status (read 258.0 1 high Ready for Measure- > 1Hz Ready for measurement after 1 byte bool only) ment... - Page 48 MicroSpotMonitor-Compact Address RegAdr Unit/Rep.Rate Length Type Block Size Error identification per measure- Error detection of the hard- 2 byte word hardware ment cycle ware Error identification per measure- Error detection parameter of 2 byte word parameter ment cycle the measurement require- ments Error identification per measure-...
-
Page 49: Outputs
MicroSpotMonitor-Compact 15.2 Outputs Address Unit/Rep. Length Type Block rate Size Command 256.0 0 high Automatic mea- Requirements of an already config- bool 4 byte (set by surement left / ured, saved setup; Regarding the ProfiBus) setup 1 handling please see the respective instructions;... - Page 50 MicroSpotMonitor-Compact Address Unit/Rep. Length Type Block rate Size 258.7 bool 259.0 1 low bool 259.1 bool 259.2 bool 259.3 bool 259.4 bool 259.5 bool 259.6 bool 259.7 bool Single plane BeamFind counts counts Setting for BeamFind: ADC-values 2 byte word 32 byte global set- above zero level for beam detection;...
-
Page 51: Setup Storage
MicroSpotMonitor-Compact 15.3 Setup Storage In order to prevent an accidental writing of a setup, 2 Bits and a Handshake procedure are used to effect the svSetup. 1. The system sets the parameters which are to be stored in the Out-range as well as the setup-number and the flag “read setup params“; ... -
Page 52: Warnings
MicroSpotMonitor-Compact 15.4.3 Error Detection Single Plane Measurement Group reporting ”Error Single Plane Measurement” is set ”Measurement Failure” is set Error Identification Trigger-Timeout occurred 0x0001 Upstream Measurement Error 0x0002 Raw Data Measurement Error 0x0004 Underground Measurement Error 0x0008 Measurement Timeout 0x0010 0x0020 0x0040 0x0080... -
Page 53: Maintenance And Inspection
The operator is responsible for determining the maintenance intervals for the measuring device. PRIMES recommends a maintenance interval of 12 months for inspection and validation or calibration. If the device is used only sporadically, the maintenance interval can also be extended up to 24 months. -
Page 54: Replacing The Protective Window
MicroSpotMonitor-Compact 16.1.2 Replacing the protective window 1. Follow the safety instructions in chapter „16.1.1 Safety instructions“ page 53. 2. Push the retaining ring down against the protective window holder, turn it counterclockwise until it stops and lift the retaining ring up and off. 3. -
Page 55: Storage
PRIMES gives you the opportunity to return your PRIMES measuring device for free disposal within the scope of the Waste of Electrical and Electronic Equipment (WEEE Directive). This service does not include shipping costs. You can send PRIMES measuring devices to be disposed of within the EU to our address: PRIMES GmbH Max-Planck-Str. -
Page 56: Technical Data
Protection Category IP40 Protection Class Please contact PRIMES in advance in case you intend not to work within this specification. Max. 10 mW up to 1 kW average power multi-mode (up to 100 W average power single-mode). Max. Energy Density = 3 J/cm ·... -
Page 57: Declaration Of Conformity
MicroSpotMonitor-Compact Declaration of Conformity Revision 01 EN - 06/2022... - Page 58 MicroSpotMonitor-Compact Revision 01 EN - 06/2022...
-
Page 59: Dimensions
MicroSpotMonitor-Compact Dimensions 21.1 MSM-C Standard depending on the objective depending on the objective (All dimensions in mm) Revision 01 EN - 06/2022... - Page 60 MicroSpotMonitor-Compact 21.2 MSM-C Standard with Beam Deflection Measuring range 15x magnification objective (All dimensions in mm) Revision 01 EN - 06/2022...
-
Page 61: Msm-C Standard With Beam Deflection
MicroSpotMonitor-Compact MSM-C Standard with Beam Deflection (Continuation) View X (All dimensions in mm) Revision 01 EN - 06/2022... - Page 62 MicroSpotMonitor-Compact 21.3 MSM-C PROFIBUS depending on the objective depending on the objective (All dimensions in mm) Revision 01 EN - 06/2022...
-
Page 63: Msm-C Profibus
MicroSpotMonitor-Compact MSM-C PROFIBUS (Continuation) View X (All dimensions in mm) Revision 01 EN - 06/2022... - Page 64 MicroSpotMonitor-Compact 21.4 MSM-C PROFIBUS with Beam Deflection Measuring range 15x magnification objective (All dimensions in mm) Revision 01 EN - 06/2022...
-
Page 65: Msm-C Profibus With Beam Deflection
MicroSpotMonitor-Compact MSM-C PROFIBUS with Beam Deflection (Continuation) View X (All dimensions in mm) Revision 01 EN - 06/2022... -
Page 66: Msm-C Overhead
MicroSpotMonitor-Compact 21.5 MSM-C Overhead (All dimensions in mm) Revision 01 EN - 06/2022... - Page 67 MicroSpotMonitor-Compact 21.6 MSM-C Periscope (All dimensions in mm) Revision 01 EN - 06/2022...
-
Page 68: Msm-C Periscope
MicroSpotMonitor-Compact MSM-C Periscope (Continuation) View Z (All dimensions in mm) Revision 01 EN - 06/2022... -
Page 69: Accessories
MicroSpotMonitor-Compact Accessories 22.1 Neutral density filters In the scope of delivery of the MSM-C, a dummy insert without a neutral glass filter is installed in the filter slot OPTIONally neutral density filter inserts with different filter densities are available (see Tab. 22.1 on page 69). -
Page 70: Neutral Density Filters
MicroSpotMonitor-Compact 1. Push the neutral density filter insert up to the stop into the slot. 2. Screw in the fastening screws and tighten them. Neutral Density Filter Insert Handling The neutral density filter can be positioned inside or outside the beam path via the integrated slide, without dismounting the insert (see Fig. - Page 71 MicroSpotMonitor-Compact Revision 01 EN - 06/2022...
Need help?
Do you have a question about the MicroSpotMonitor-Compact MSM-C and is the answer not in the manual?
Questions and answers