Table of Contents
Advertisement
Quick Links
INSTALLATION INSTRUCTIONS
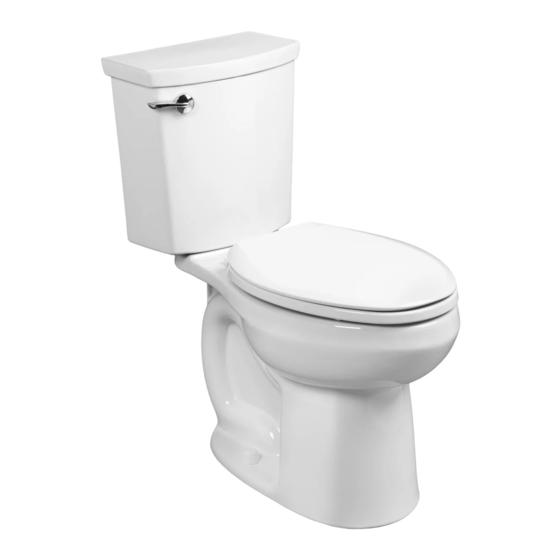
Siphonic Ultra-High Efficiency Two-Piece Toilets
H2Optimum
Single Flush Models 288AA / 288CA / 288DA
™
H2Option
Dual Flush Models 2886 / 2887 / 2889
®
Thank you for selecting American Standard – the benchmark of fine quality for over 100 years. To ensure
this product is installed properly, please read these instructions carefully before you begin. (Certain
installations may require professional help.) Also be sure your installation conforms to local codes.
CAUTION: PRODUCT IS FRAGILE. TO AVOID BREAKAGE AND POSSIBLE INJURY HANDLE WITH CARE!
!
NOTE: Pictures may not exactly define contour of china and components.
RECOMMENDED TOOLS AND MATERIALS
Putty Knife
Regular Screwdriver
Hacksaw
Wax Ring/Gasket
1
REMOVE OLD TOILET
a. Close toilet supply valve and flush tank completely. Towel or sponge remaining water from tank and bowl.
b. Disconnect and remove supply line. NOTE: If replacing valve, first shut off main water supply!
c. Remove old mounting hardware, remove toilet and plug floor waste opening to prevent escaping sewer gases.
d. Remove closet bolts from flange and clean away old wax, putty, etc. from base area.
NOTE: Mounting surface must be clean and level before new toilet is installed!
2
ROUGHING-IN DIMENSIONS:
NOTE: Distance from wall to closet flange centerline must be as listed below:
A = 12" (305mm)
FINISHED WALL
A
FINISHED FLOOR
4
SEALANT
INSTALL WAX SEAL
Invert toilet on floor (cushion to prevent damage),
and install wax ring evenly around waste flange
(horn), with tapered end of ring facing toilet. Apply
a thin bead of sealant around toilet base.
Product names listed herein are trademarks of AS America Inc.
© AS America Inc. 2016
Adjustable Wrench
Flexible Supply Tube
SUPPLY
AS
REQ'D.
5
WAX RING
POSITION TOILET ON FLANGE
a. Unplug floor waste opening and install toilet on closet flange so bolts project
through mounting holes.
b. Loosely install retainer washers and nuts. Side of washers marked "THIS
SIDE UP" must face up!
Sealant
Closet Bolts
3
CLOSET
FLANGE
CLOSET
BOLTS
INSTALL CLOSET BOLTS
Install closet bolts in flange channel
and slide into place parallel to wall.
CLOSET
BOLT
FLANGE
Certified by
IAPMO R&T
Tape Measure
Carpenters Level
A
NUT
TAPERED
WASHER
7301416-100 Rev. L 1 /16
Advertisement
Table of Contents

Related Manuals for American Standard H2Optimum 288AA


Summary of Contents for American Standard H2Optimum 288AA
- Page 1 Dual Flush Models 2886 / 2887 / 2889 ® Certified by Thank you for selecting American Standard – the benchmark of fine quality for over 100 years. To ensure IAPMO R&T this product is installed properly, please read these instructions carefully before you begin. (Certain installations may require professional help.) Also be sure your installation conforms to local codes.
- Page 2 RUBBER GROMMET RUBBER TANK MTG. GASKET BOLTS BOLT CAP CLOSET FLANGE WASHER/NUT INSTALL TANK CLOSET BOLT WASHER Insert rubber grommets through holes in the tank then insert bolts through holes in the grommets. INSTALL TOILET Install large rubber gasket over threaded outlet on bottom Position toilet squarely to wall and, with a rocking motion, press bowl of tank and lower tank onto bowl so that tapered end of down fully on wax ring and flange.
- Page 3 DUAL FLUSH MODELS ONLY FOR SINGLE FLUSH MODELS GO TO STEP 11 PUSH BUTTON ADJUSTMENTS Adjust water level. Water level should be adjusted to level indicated on tank by adjusting as follows: WATER LINE 1. Major water level adjustment - see Page 4 2.
- Page 4 WATER LEVEL ADJUSTMENT (DUAL FLUSH TANK ONLY) MAJOR WATER ADJUSTMENT BODY CLIP BODY CLIP Unscrew the fill valve body counterclockwise, push the INLET PIPE body up or down to the desired INLET PIPE height and refasten valve body by turning clockwise. Remove the clip as per the drawing.
- Page 5 Do not use in-tank cleaners. Products containing chlorine (calcium hypochlorite) can seriously damage fittings in the tank. This damage can cause leakage and property damage. American Standard shall not be responsible or liable for any tank fitting damage caused by the use of cleaners containing chlorine (calcium hypochlorite).
- Page 6 CHAMPION ® SLOW CLOSE TOILET SEAT ASIENTO “CHAMPION SLOW CLOSE” SIÈGE DE TOILETTE CHAMPION ® SLOW CLOSE To ensure that your installation proceeds smoothly, please read these instructions carefully MODELS 5330.010, 5325.010 before you begin. MODELOS 5330.010, 5325.010 Para asegurarse de una instalación sin MODÈLE 5330.010, 5325.010 ANSI Z124.5 problemas, favor de leer estas instrucciones...
- Page 7 This warranty shall be void if the product has been moved from its initial place of installation; if it has been subjected to faulty maintenance, abuse, misuse, accident or other damage; if it was not installed in accordance with American Standard’s instructions; or if it has been modified in a manner inconsistent with the product as shipped by American Standard.
Need help?
Do you have a question about the H2Optimum 288AA and is the answer not in the manual?
Questions and answers
Looking for the Fluidmaster maintenance guide mentioned in the installation manual for H2Optimum 288AA Dual Flush and info about replacement Fluidmaster parts for H2Optimum 288AA Dual Flush.