
Related Manuals for Emerson Rosemount 3818


Summary of Contents for Emerson Rosemount 3818
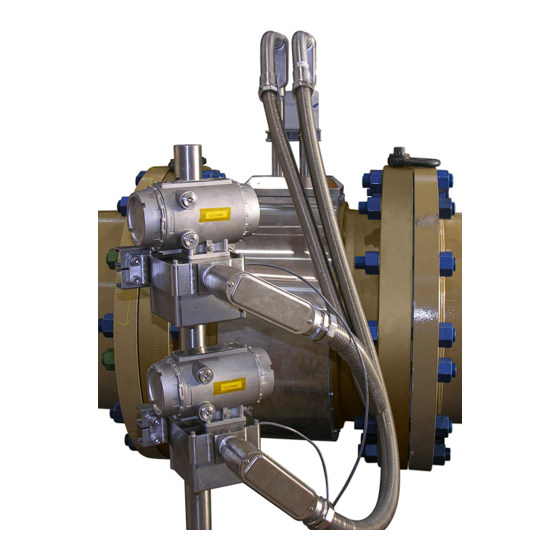
- Page 1 Maintenance and Troubleshooting Manual 00809-0100-3818, Rev AA April 2022 ™ Rosemount 3818 LNG Liquid Ultrasonic Meter for Cryogenic Liquefied Natural Gas Applications...
- Page 2 Emerson employees. Emerson will not accept your returned equipment if you fail to follow Emerson procedures. Return procedures and forms are available on our web support site at www.emerson.com, or by phoning the Emerson Customer Service department.
- Page 4 Contents Maintenance and Troubleshooting Manual 00809-0100-3818 April 2022 Contents Section 1: Routine maintenance Meter maintenance ..................1 Routine Maintenance ................... 3 1.2.1 Maintenance logs and reports ................3 Section 2: Troubleshooting Meter status alarms ..................7 2.1.1 Check status ..................... 8 2.1.2 System alarm ....................
- Page 5 Contents Maintenance and Troubleshooting Manual April 2022 00809-0100-3818 Section 3: Meter maintenance Removing the shrouds ................38 3.1.1 Removing the band shrouds ................39 Re-wetting the transducers ............... 44 Replacing the transducer assembly ............. 51 Replacing the meter electronics ..............55 3.4.1 Transmitter electronics maintenance ..............56 3.4.2...
- Page 6 Maintenance and Troubleshooting Manual List of Tables 00809-0100-3818 April 2022 List of Tables Table 2-1 Troubleshooting......................12 Table 2-2 Maintenance ........................ 21 Table 3-1 Contents-Transducer maintenance ................35 Table 3-2 Shroud removal tool list ....................39 Table 3-3 Transducer maintenance tools and shop supplies list ........... 45 Table 3-4 Electronics maintenance tools list ................
- Page 7 List of Tables Maintenance and Troubleshooting Manual April 2022 00809-0100-3818 List of Tables...
- Page 8 Maintenance and Troubleshooting Manual List of Figures 00809-0100-3818 April 2022 List of Figures Figure 1-2 Maintenance log collection parameters ................ 3 Figure 1-3 Trend log collection ...................... 4 Figure 1-4 Archive log collection parameters................. 5 Figure 2-1 Meter Monitor status alarms..................7 Figure 2-2 Meter Monitor (Detailed) view ..................
- Page 9 List of Figures Maintenance and Troubleshooting Manual April 2022 00809-0100-3818 Figure 3-22 Bracket/Cover plate removal..................67 Figure 3-23 Acquisition Module cable and transducer wiring ............68 Figure 3-24 Acquisition Module cable or Synchronization cable ............ 70 Figure 3-25 Band shroud hem bend joint ..................72 Figure 3-26 Band shroud assembly ....................
- Page 10 Section 1: Routine maintenance 00809-0100-3818 April 2022 Section 1: Routine maintenance Meter maintenance This section includes discussion of the maintenance of Rosemount 3818 LNG Liquid Ultrasonic Flow Meters. For reference, you may download the MeterLink Quick Start Manual from: Emersonprocess.com/en-US/brands/Flow/ultrasonics/Pages/MeterLink.aspx SURFACE TEMPERATURE HAZARD The meter body and piping may be extremely cold.
- Page 11 Section 1: Routine maintenance Maintenance and Troubleshooting Manual April 2022 00809-0100-3818 CRUSHING HAZARD Do not remove flange stabilizers. Attempting to do so may allow the meter to roll, resulting in serious injury or equipment damage. A. Flange stabilizers ESCAPING FLUIDS HAZARD The purchaser of the meter is responsible for the selection of Rosemount components/seals and materials compatible with the chemical properties of the measurement fluid.
- Page 12 Maintenance and Troubleshooting Manual Section 1: Routine maintenance April 2022 00809-0100-3818 Routine Maintenance Routine maintenance operations requires adherence to all applicable regulations and laws and safety training for personnel to perform the maintenance operations. Review your organization’s best practices procedures before performing routine maintenance. 1.2.1 Maintenance logs and reports To monitor the performance health of the meter, and ensure it is operating within acceptable...
- Page 13 Section 1: Routine maintenance Maintenance and Troubleshooting Manual April 2022 00809-0100-3818 Trend maintenance log collection Merging the results of two or more Maintenance logs into a single file, allows you to build a historical database of the meter’s performance. Trending the logs indicates changes from the original installation of the meter over time.
- Page 14 Maintenance and Troubleshooting Manual Section 1: Routine maintenance 00809-0100-3818 April 2022 Archive log collection Archive logs may be collected and the options include: • Daily log - generated every 24 hours on the Contract Hour. • Hourly log - generated every hour at the top of the hour. •...
- Page 15 Section 1: Routine maintenance Maintenance and Troubleshooting Manual April 2022 00809-0100-3818 Maintenance logs and reports...
- Page 16 Maintenance and Troubleshooting Manual Section 2: Troubleshooting 00809-0100-3818 April 2022 Section 2: Troubleshooting METERLINK Meter status alarms Run MeterLink and open the Meter Monitor (Summary) view to perform a diagnostics health check. Figure 2-1 Meter Monitor status alarms If the meter is measuring flow and operating within the established parameters the Meter Status LED is green.
- Page 17 Section 2: Troubleshooting Maintenance and Troubleshooting Manual April 2022 00809-0100-3818 2.1.1 Check status The Status Summary page displays existing alarm conditions for the meter. If all statuses are good, the Status Summary alarms list is empty. Figure 2-3 Monitor page Check status and Status Summary A.
- Page 18 Maintenance and Troubleshooting Manual Section 2: Troubleshooting 00809-0100-3818 April 2022 Click the button and MeterLink opens the Status Summary dialog box that gives Check Status a short description of all alarms present. Figure 2-4 Monitor page Check status and Status Summary A.
- Page 19 Reports various field I/O devices that are in alarm. Click the button for more Check Status details on specific alarms. The field is grayed out if the Rosemount 3818 LNG Liquid Ultrasonic Flow Meter does not support this alarm. 2.1.5 Validity alarm This alarm indicates that the meter may not be measuring accurately.
- Page 20 MeterLink and the connected meter. For troubleshooting communications with the 475 Field Communicator for the HART® Protocol, refer to Section 5 of the Emerson 475 Field Communicator User’s Manual, Rev D. This manual may be downloaded from the following location: http://www2.emersonprocess.com/en-US/brands/Field-Communicator/Pages/Support.aspx...
- Page 21 Replace the Acquisition Module. — If the Acquisition Module cannot be reprogrammed, collect a complete Archive log and contact your local area Emerson Flow service representative. • Acquisition Module is not compati- Upgrade the firmware in the meter to the latest version using MeterLink ble with firmware (Tools|Program Download).
- Page 22 Maintenance and Troubleshooting Manual Section 2: Troubleshooting 00809-0100-3818 April 2022 Table 2-1 Troubleshooting Error Recommended action(s) • CPU Module LINK LED is on but I If you are connecting for the first time, refer to Section 3.5 for instructions on initial can't communicate with the meter communication (via Ethernet) setup using Ethernet...
- Page 23 If this is a case, a message stating “Error reading database config file dbconfig<databaseversion>.xml from the meter.” will be displayed. Contact Emerson Customer Support to obtain the database file and assistance in installing the file. If the If the network if blocking the port, a direct cable connection via Ethernet or serial will possibly allow MeterLink to collect the file —...
- Page 24 April 2022 Table 2-1 Troubleshooting Error Recommended action(s) • Cannot communicate with 475 Field Refer to the Emerson 475 Field Communication User’s Manual, Rev F. This manual may Communicator be downloaded from the following location: http://www2.emersonprocess.com/en-US/brands/Field-Communicator/Pages/ Documentation.aspx — Note: The 375 Field Communicator is no longer available for purchase since the release of the 475 Field Communicator.
- Page 25 Section 2: Troubleshooting Maintenance and Troubleshooting Manual April 2022 00809-0100-3818 Table 2-1 Troubleshooting Error Recommended action(s) Flow pressure is outside the alarm • Startup Issues: limits — Verify that there is voltage to the pressure sensor from either the meter's power supply board or from an external power supply.
- Page 26 Maintenance and Troubleshooting Manual Section 2: Troubleshooting 00809-0100-3818 April 2022 Table 2-1 Troubleshooting Error Recommended action(s) • Program download failed during If the meter power fails during a firmware upgrade process, perform a backup firmware upgrade upgrade in an attempt to connect to the meter and download the program again. —...
- Page 27 (settings can be 1 (none) 2, 4, 8, or 16). If increasing the StackSize amount of noise is not successful, try turning on the filter or consult with Emerson Customer Support if you are unsure of how stacking a signal can affect the meter's operation.
- Page 28 Maintenance and Troubleshooting Manual Section 2: Troubleshooting 00809-0100-3818 April 2022 2.2.1 Meter maintenance The Monitor (Summary) includes the direction of flow measurement, velocity rate, units of measurement, uncorrected or corrected flow (if applicable for your meter) and a bar graph for a visual comparison between the velocities for each chord.
- Page 29 Section 2: Troubleshooting Maintenance and Troubleshooting Manual April 2022 00809-0100-3818 Run MeterLink and open the Meter Monitor (Detailed) view to perform a diagnostics health check and or adjust parameters for your site requirements. If you wish to use the Monitor (Detailed) dialog as the default view, click the checkbox in the lower portion of the dialog box Figure 2-6 Meter Monitor (Detailed) view The following details the information displayed in this dialog box.
- Page 30 Maintenance and Troubleshooting Manual Section 2: Troubleshooting April 2022 00809-0100-3818 Refer to for error resolutions and for meter maintenance hardware diagnostics. Table 2-1 Table 2-2 Table 2-2 Maintenance MeterLink utility Diagnostics Action(s) • • Meter Monitor (Summary) view Check Status for active alarms Meter Status LED is green if there are no active alarms.
- Page 31 Section 2: Troubleshooting Maintenance and Troubleshooting Manual April 2022 00809-0100-3818 Table 2-2 Maintenance MeterLink utility Diagnostics Action(s) • • Meter Monitor (Detailed) view Flow Profile Flow profile ratios can be viewed by clicking on the arrows in the upper left of the chart. •...
- Page 32 (failed transducer, cabling or debris buildup on the transducer face, or path length configured incorrectly). • If SOS is out of range and all checks were positive, adjust SSMin or SSMax (consult with an Emerson repre- sentative before making these adjustments). Meter maintenance...
- Page 33 Section 2: Troubleshooting Maintenance and Troubleshooting Manual April 2022 00809-0100-3818 Table 2-2 Maintenance MeterLink utility Diagnostics Action(s) • • Meter Monitor (Detailed) view Electronics Temperature out of Temperature of the electronics is out Meter Data List range of nominal operating range below -40 °C or above 100 °C (-40 °F or above 212 °F).
- Page 34 Maintenance and Troubleshooting Manual Section 2: Troubleshooting 00809-0100-3818 April 2022 Table 2-2 Maintenance MeterLink utility Diagnostics Action(s) MeterLink Tools Menu • • Analog outputs Run Analog Outputs test and verify outputs are within 4mA -20mA range — 0% = 4mA —...
- Page 35 Section 2: Troubleshooting Maintenance and Troubleshooting Manual April 2022 00809-0100-3818 Meter Hardware Diagnostics Action(s) Meter Electronics • • Acquisition Module communications error Check firmware revision and upgrade if necessary using MeterLink Tools>Pro-gram Download. • If the CPU Module LED 5 is not flashing green, check interconnect cable between acquisition Module and the CPU Module.
- Page 36 Maintenance and Troubleshooting Manual Section 2: Troubleshooting 00809-0100-3818 April 2022 Meter Hardware Diagnostics Action(s) MeterLink Tools>Edit/ • • Meter performed a Cold Start The meter configuration has reset to default Compare Configura- values and the meter is not configured tion Menu correctly to measure flow.
- Page 37 Section 2: Troubleshooting Maintenance and Troubleshooting Manual April 2022 00809-0100-3818 Meter Hardware Diagnostics Action(s) • • MeterLink Meter Chord Failure MeterLink Meter The meter is unable to obtain measurement Monitor Monitor (Detailed) view data from a pair of transducers. (Detailed) view •...
- Page 38 COM port on the PC at a time. Refer to the MeterLink Quick Start Manual (00809-0100-7630) for phone and modem details. The manual may also be downloaded from the Emerson website. Emersonprocess.com/en-US/brands/Flow/ultrasonics/Pages/MeterLink.aspx 2.2.3...
- Page 39 Section 2: Troubleshooting Maintenance and Troubleshooting Manual April 2022 00809-0100-3818 Troubleshoot Maintenance log files and trend files 2.3.1 Files do not appear in workbook Maintenance Log files and Trend files that exist on the PC do not appear in the Microsoft® Excel®...
- Page 40 Maintenance and Troubleshooting Manual Section 2: Troubleshooting 00809-0100-3818 April 2022 2.3.3 Maintenance Logs or Trend files are not created When using Excel® XP or later, some of the worksheets in the Maintenance Logs or Trend files are not created. If the Inspection sheet of the Maintenance Log file or the Charts sheet of a Trend file is not generated, it is probably because Excel®...
- Page 41 Section 2: Troubleshooting Maintenance and Troubleshooting Manual April 2022 00809-0100-3818 Click the radio button and click to apply your Trust access to Visual Basic Project OKAY selections. Figure 2-8 Excel® Trusted Access Setting To enable Excel® 2007 to work with MeterLink customize the Ribbon to include the Developer tab, Figure 2-9 Excel®...
- Page 42 Maintenance and Troubleshooting Manual Section 2: Troubleshooting 00809-0100-3818 April 2022 Select Macro Security to access the Trust Center. Figure 2-10 Excel® 2007 Developer tab - Macro Security Select Macro Settings from the left panel, then click the Enable all macros (not recommended;...
- Page 43 Section 2: Troubleshooting Maintenance and Troubleshooting Manual April 2022 00809-0100-3818 2.3.4 Windows® XP with Security Update The Security Update for Windows® XP (823980) has a problem that causes the Show only maintenance log and trend workbooks check box in MeterLink to be ineffective. http://www.microsoft.com/downloads/en/details.aspx?FamilyID=2354406c-c5b6-44ac- 9532-3de40f69c074 Additionally, it may take longer to validate a workbook when you attempt to add it to the...
- Page 44 00809-0100-3818 April 2022 Section 3: Meter maintenance Rosemount 3818 LNG Liquid Ultrasonic Flow Meters require minimal maintenance. The Meter Maintenance section discusses procedures to re-wet the transducers, replacing the transducer housings or transducers, and the Transmitter Electronics. Table 3-1 Contents-Transducer maintenance...
- Page 45 Clear all obstacles or obstructions from the work area when transporting, installing or removing the meter. Failure to clear the work area may cause injury to personnel. Prior to lifting the unit, refer to the Rosemount 3818 LNG Liquid Ultrasonic Flow Meter nameplate or outline dimensional (general arrangement) drawing for the assembled weight.
- Page 46 Maintenance and Troubleshooting Manual Section 3: Meter maintenance 00809-0100-3818 April 2022 FLUID CONTENTS MAY BE UNDER PRESSURE When the meter is under pressure, DO NOT attempt to remove the transducer housings while in the field. The housings are welded into the meter body for cryogenic applications. Attempting to do so may release pressurized fluid, resulting in serious injury or equipment damage.
- Page 47 Removing the shrouds Important safety information - insulation handling The Rosemount 3818 LNG Ultrasonic Flow Meter body, LB conduit bodies and flexible conduit may have customer-installed thermal insulation. When handling the customer- installed thermal insulation, use industry best practices procedures, read and understand the manufacturer’s Material Safety Data Sheet supplied with the thermal insulation.
- Page 48 Section 3: Meter maintenance April 2022 00809-0100-3818 When handling the Emerson supplied thermal insulation, refer to the manufacturer’s product Material Safety Data Sheet from the Cabot Corporation. THERMAL INSULATION HANDLING CARE Follow the hyperlink (above) for the manufacturer’s thermal insulation safety precautions and handling instructions.
- Page 49 Section 3: Meter maintenance Maintenance and Troubleshooting Manual April 2022 00809-0100-3818 Figure 3-3 Top shroud disassembly A. Top shroud B. Top shroud support C. Top shroud support spacer D. Top shroud end Procedure Remove the customer-installed external thermal insulation from the meter body, the rigid and flexible conduit, the LB conduit, and pipe standoffs (see Figure 3-2 Important: Be sure you follow the manufacturer’s safety instructions when handling...
- Page 50 Maintenance and Troubleshooting Manual Section 3: Meter maintenance 00809-0100-3818 April 2022 Using a flat blade screw driver or 5/16 nut driver, loosen both worm screw clamp assemblies. Alternate between the two worm screw clamp screws, turning each a few turns at a time counterclockwise. Repeat as needed to fully disengage the threaded part of the worm screw clamp from the screw part of the worm screw clamp and remove them from the shroud.
- Page 51 Section 3: Meter maintenance Maintenance and Troubleshooting Manual April 2022 00809-0100-3818 While holding the shroud end engaged with the guide pins against the body OD, raise the other shroud end edge enough to unlock the threaded part of the worm screw clamp from the shroud.
- Page 52 Maintenance and Troubleshooting Manual Section 3: Meter maintenance April 2022 00809-0100-3818 With the band shroud assembly on its side edge on a flat surface, locate the hem bend joint of the band shroud assembly half way from each end. Move each part of the assembly away from each other, freeing the sheet metal hem bend joint.
- Page 53 NOTE: This procedure should be performed by a qualified Emerson representative. Refer to the contact information on the back of this manual for field service assistance.
- Page 54 Maintenance and Troubleshooting Manual Section 3: Meter maintenance 00809-0100-3818 April 2022 Table 3-3 Transducer maintenance tools and shop supplies list Tools required 1/8 inch Allen wrench 7/16 inch wrench 3/16 inch (#1 standard) flathead screwdriver Shop supplies and other equipment MeterLink, or AMS Device Manager or a Field Communicator cotton swabs...
- Page 55 Section 3: Meter maintenance Maintenance and Troubleshooting Manual April 2022 00809-0100-3818 Procedure Remove the shrouds. See for important safety information and Section 3.1 Section 3.1.1 for disassembly instructions. Carefully remove the thermal wrap layers covering the transducer assemblies and transducer cables. Place the thermal wrap in a safe zone away from the immediate work area.
- Page 56 Maintenance and Troubleshooting Manual Section 3: Meter maintenance 00809-0100-3818 April 2022 Use a 7/16 inch wrench to loosen the lock nut on the set screw. Hold the set screw using a 1/8 inch Allen wrench as the lock nut is loosened a few turns. Use a 1/8 inch to loosen, but do not remove, the half dog set screw.
- Page 57 Section 3: Meter maintenance Maintenance and Troubleshooting Manual April 2022 00809-0100-3818 Remove all of the old grease from the transducer face. Clean the face with a cotton swab with isopropyl alcohol. Use a cotton swab and apply cryogenic SLC-400 lubricant to the face of the transducer. Make sure the grease is evenly distributed across the transducer face.
- Page 58 Maintenance and Troubleshooting Manual Section 3: Meter maintenance 00809-0100-3818 April 2022 Prepare to reinstall the thermal wrap into the transducer ports, between the shroud center supports and the end shroud supports. Important: Be sure you follow the manufacturer’s safety instructions when handling the insulation. You can reuse the insulation removed in Step 2.
- Page 59 Section 3: Meter maintenance Maintenance and Troubleshooting Manual April 2022 00809-0100-3818 Connect to the meter with MeterLink and run the Zero Flow Calibration Wizard for the primary (_H1) transmitter. Then, collect and save a Maintenance log to show the “as left”...
- Page 60 Replacing the transducer assembly NOTE: This procedure should be performed by a qualified Emerson representative. Refer to the contact information on the back of this manual for field service assistance. The transducers are installed in matched pairs. Always replace the transducer pair of equal path lengths (A1 and A2, B1 and B2 etc...).
- Page 61 Section 3: Meter maintenance Maintenance and Troubleshooting Manual April 2022 00809-0100-3818 Use a 3/16 inch screwdriver and loosen the transducer cover screws enough to remove the cover and gasket. Figure 3-14 LT-07 Transducer assembly removed from transducer housing A. Transducer cable B.
- Page 62 Maintenance and Troubleshooting Manual Section 3: Meter maintenance 00809-0100-3818 April 2022 Attach the transducer cable wires to the terminal block as shown in Figure 3-15 Figure 3-15 LT-07 transducer and transducer cable wiring A. Transducer cable entry B. Terminal block black wire C.
- Page 63 Section 3: Meter maintenance Maintenance and Troubleshooting Manual April 2022 00809-0100-3818 Connect to the meter with MeterLink and run the Zero Flow Calibration Wizard for the primary (_H1) transmitter. Then, collect and save a Maintenance log to show the “as left”...
- Page 64 April 2022 Replacing the meter electronics The following procedures should be performed by a qualified Emerson representative. The 3818 LNG Liquid Ultrasonic Flow Meter is equipped with co-located Transmitter Electronics Enclosures. The Primary electronics enclosure is designated on the serial number tag followed by _H1.
- Page 65 Section 3: Meter maintenance Maintenance and Troubleshooting Manual April 2022 00809-0100-3818 3.4.1 Transmitter electronics maintenance Should the meter require disassembly in the field (i.e., check boards, change switch settings, or replace boards), to prevent electrostatic damage to the electronic boards, always use a Ground Strap while handling the circuit boards.
- Page 66 Maintenance and Troubleshooting Manual Section 3: Meter maintenance 00809-0100-3818 April 2022 3.4.2 Replacing the CPU Module Procedure Disable electrical power to the meter. Refer to for the tools required to complete this procedure. Table 3-4 Disconnect security seals on the Transmitter Electronics Enclosure (if installed), loosen the end cap security latches using a 3 mm Allen wrench and remove both end caps from the Transmitter Electronics Enclosure.
- Page 67 Section 3.4.5 Section 3.4.6 Section 3.4.7 enclosure. If you encounter problems replacing the electronics, see the Emerson Customer Support contact information on the back cover of this manual. This completes the CPU Module replacement procedure. Replacing the CPU Module...
- Page 68 Maintenance and Troubleshooting Manual Section 3: Meter maintenance 00809-0100-3818 April 2022 3.4.3 Replacing the fuse Procedure Disable electrical power to the meter. Refer to for the tools required to complete this procedure. Table 3-4 Disconnect the Transmitter Electronics Enclosure security seals, loosen the end cap security latch (requires a 3 mm Allen wrench) on the terminal end of the enclosure ( ) and remove the end cap.
- Page 69 Section 3: Meter maintenance Maintenance and Troubleshooting Manual April 2022 00809-0100-3818 Close your application connection (MeterLink, AMS Device Manager or HART® Field Communicator). If replacing other electronics, continue with Section 3.4.4 Section 3.4.5 Section 3.4.6 before installing the end caps and sealing the enclosure If you are not Section 3.4.7 replacing other electronics, replace the end caps and security latches (3 mm Allen wrench required).
- Page 70 Maintenance and Troubleshooting Manual Section 3: Meter maintenance April 2022 00809-0100-3818 Pull the Backplane board out of the enclosure. This disconnects the I.S. Barrier Board. Lay the Backplane board down with the Acquisition Cable still attached (the Power Supply board may remain attached to the Backplane when you remove it from the enclosure).
- Page 71 Reinstall the thermal insulation wrap around the meter body, rigid and flexible conduit, pipe standoffs and the LB conduit assemblies. This completes the Backplane board replacement procedure. If you encounter problems with this procedure, see the Emerson Customer Support contact information on the back cover of this manual. Replacing the Backplane...
- Page 72 Maintenance and Troubleshooting Manual Section 3: Meter maintenance 00809-0100-3818 April 2022 3.4.5 Replacing the I.S. Barrier board Procedure If replacing the I.S. Barrier board, remove power to the meter. Refer to for the tools required to complete this procedure. Table 3-4 Disconnect the Transmitter Electronics Enclosure security seals, loosen the end cap security latches with a 3mm Allen wrench and remove both end caps ( see Figure 3-16...
- Page 73 Section 3.6 Apply power to the meter. This completes the I.S. Barrier Board replacement procedure. If you encounter problems with this procedure, see the Emerson Customer Support contact information on the back cover of this manual. Replacing the I.S. Barrier board...
- Page 74 Maintenance and Troubleshooting Manual Section 3: Meter maintenance 00809-0100-3818 April 2022 3.4.6 Replacing the Power Supply Board Procedure If replacing the Power Supply board, disable electrical power to the meter. Refer to for the tools required to complete this procedure. Table 3-4 Disconnect the Transmitter Electronics Enclosure security seals, loosen the end cap security latches with a 3mm Allen wrench and remove both end caps.
- Page 75 Section 3.6.2 Apply power to the meter. This completes the Power Supply Board replacement procedure. If you encounter problems with this procedure, see the Emerson Customer Support contact information on the back cover of this manual. Replacing the Power Supply Board...
- Page 76 Maintenance and Troubleshooting Manual Section 3: Meter maintenance 00809-0100-3818 April 2022 3.4.7 Replacing the Acquisition Module Procedure Disable electrical power to the meter. Refer to for the tools required to complete this procedure. Table 3-4 Attach a plate to the remote mount pipe or rigid structure to support the Base Enclosure.
- Page 77 Section 3: Meter maintenance Maintenance and Troubleshooting Manual April 2022 00809-0100-3818 Use a 1/8 inch (3 mm) flat head screw driver and disconnect the Acquisition cable terminal block, synchronization cable terminal block and the transducer wire terminal blocks from the Acquisition Module. Figure 3-23 Acquisition Module cable and transducer wiring A.
- Page 78 Maintenance and Troubleshooting Manual Section 3: Meter maintenance 00809-0100-3818 April 2022 Reattach the Bracket/Cover to the Base Enclosure with the four hex head bolts and lock washers. Tighten bolts with a 7/16 inch (11mm) wrench. Reapply power and connect to the meter with MeterLink. Open the Meter Monitor (Detailed) view and verify the meter is acquiring data, the transducers have good signals and the chords flow profiles are good.
- Page 79 C. Secondary (_H2) Transmitter Electronics Enclosure D. Synchronization cable and gland Emerson recommends that you contact Emerson Customer Support (see contact information on the back cover of this manual) if you need to replace the Acquisition cable or the Synchronization cable.
- Page 80 Maintenance and Troubleshooting Manual Section 3: Meter maintenance 00809-0100-3818 April 2022 Installing the shrouds CUTTING HAZARD Sharp edges may be present on the shrouds. Wear appropriate personal protective equipment when working on the meter. Failure to do so may cause serious injury. Table 3-5 Shroud removal tool list Tools required Flat blade screw driver or 5/16 inch nut driver...
- Page 81 Section 3: Meter maintenance Maintenance and Troubleshooting Manual April 2022 00809-0100-3818 Procedure Place each half of the band shroud assembly on a flat surface. Position the parts so they are circular with the ends with bent edges near each other. Guide the bent edges to fit within each other completing the engagement of the sheet metal hem bend.
- Page 82 Maintenance and Troubleshooting Manual Section 3: Meter maintenance 00809-0100-3818 April 2022 One end of the clamped band shroud assembly has two holes which will engage guide pins and rectangular shaped holes. Assemble one nut end of a worm screw clamp into one of these rectangular holes.
- Page 83 Section 3: Meter maintenance Maintenance and Troubleshooting Manual April 2022 00809-0100-3818 Grasp the clamped band shroud assembly by opposing edges and spread the opening of the circular shape and place over the body OD at a machined shroud channel. Position the shroud end with the guide pin holes and worm screw clamp nuts on the same side of the meter which has the guide pins.
- Page 84 Maintenance and Troubleshooting Manual Section 3: Meter maintenance 00809-0100-3818 April 2022 Loosely tighten the bolts to hold the top shroud in place. Insert the 5/16 inch washer inside of the top shroud (Item D. in ) and Figure 3-28 hold it in place until you insert the 5/16 inch hex head bolt and washer into the end of the top shroud.
- Page 85 Sealing the transmitter electronics enclosure Security seals protect the integrity of the meter metrology and prevent tampering with electronics. The following sections detail how to properly seal the Rosemount 3818 LNG Liquid Ultrasonic Flow Meter after commissioning. The security seal wires are commercially available.
- Page 86 Maintenance and Troubleshooting Manual Section 3: Meter maintenance 00809-0100-3818 April 2022 Procedure Rotate the end cap clockwise fully closing and compressing the end cap seal. Install the Security latch using a 3 mm Allen wrench. Install the security seal wire into and through one of the two holes in the end cap. Choose holes that minimize counterclockwise rotation of the end cap when the security wire is taut (maximum wire diameter .078 inch;...
- Page 87 Section 3: Meter maintenance Maintenance and Troubleshooting Manual April 2022 00809-0100-3818 Sealing the Bracket/Cover and Base electronics enclosure...
- Page 88 Conversion factors per units of measurement The following table includes conversion factors for many of the Metric and U.S. Customary units of measure used with Rosemount 3818 LNG Liquid Ultrasonic Flow Meters and MeterLink. Table A-1 Conversion factors per units of measurement...
- Page 89 Appendix A: Conversion factors Maintenance and Troubleshooting Manual April 2022 00809-0100-3818 K Factor conversions A.2.1 K-Factor and inverse K-Factor Equation A-1 Frequency volumetric flow rate K-Factor FreqQ FullScale KFactor --------------------------------------------------------- - MaxFreq )3600s hr § Equation A-2 Frequency volumetric flow rate inverse K-Factor MaxFreq ) 3600s hr §...
- Page 90 Rosemount 3810 Series Ultrasonic Flow Meter Drawings List of Engineering Drawings This appendix contains the following engineering drawing(s) for the ultrasonic meter: DMC-004936 Rosemount 3818 LNG Liquid Ultrasonic Flow Meter System Wiring Diagram Rosemount™ 3810 Series Ultrasonic Flow Meter Drawings...
- Page 91 Engineering Drawings Maintenance and Troubleshooting Manual April 2022 00809-0100-3818 Rosemount™ 3810 Series Ultrasonic Flow Meter Drawings...
- Page 92 EXPLOSION PROOF HAZARDOUS LOCATION CLASS GROUP NON-HAZARDOUS LOCATION io 1 1B Ex d TRANSMITTER HAZARDOUS LOCATION ENCLOSURE !EXPLOSION-PROOF SEAL I EXPLOSION-PROOF WIRING 3810 SERIES ELECTRONICS RJ45 CONNECTIONS ASSEMBLY 1 &�FIELD PROVIDED) (PER LOCAL CODE) & ---< _____________ ---! ---------------- --t: - �: :�...
- Page 93 HAZARDOUS LOCATION CLASS I , GROUP C OR D NON-HAZARDOUS LOCATION EXPLOSION PROOF HAZARDOUS LOCATION Ex TRANSMITTER I EXPLOSION-PROOF SEAL EXPLOSION-PROOF WIRING ENCLOSURE SERIES ELECTRONICS 3810 FIELD PROVIDED) � PER LOCAL CODE) ASSEMBLY i &/4¥ (OPTIONAL MODULES) � & --- RS485 : 'p /N W30381 XDD22 --- PORT B (SLOT 1) OR - : 100 SERIES PORT C (SLOT 2)
- Page 94 NOTES: THE 3410 SERIES METER STANDARD ENCLOSURE OPTION HAS RJ45 SOCKET NUMBERING AND T568B WIRING FOR STANDARD PATCH FOR THE U.L. U.S. MARK INVESTIGATION, THE DEVICE COMPLIES ONE AVAILABLE SLOT FOR A SINGLE 1/0 MODULE. CABLING. ETHERNET PORTS AUTOMATICALLY DETECT DIRECT PC OR HUB TO THE FOLLOWING STANDARDS FOR USE IN THE UNITED STATES: RETROFIT ENCLOSURE OPTION HAS TWO AVAILABLE SLOTS FOR CONNECTION.
- Page 95 NOTES: 3810 SERIES ELECTRONICS EXTERNAL CONNECTIONS EYJ _14V 4-20MA TRANSMITTER � ANALOG INPUT SINK CONFIG > I _ � r-----------, __ __ A_ l + _ ____ > -� � EXT 24V GND IN SINK CONFIG, ANALOG INPUTS MUST BE CONNECTED AT THE BOTTOM OF THE LOOP.
- Page 96 Maintenance and Troubleshooting Manual Index April 2022 00809-0100-3818 Appendix C: Index Electronics is out of nominal operating range ....15 Manual index Electronics Temperature is out of range ......15 Ethernet Connections ............29 Ethernet connections ............29 Acquisition Module ..............
- Page 97 Index Maintenance and Troubleshooting Manual April 2022 00809-0100-3818 Routine Maintenance .............. 3 Archive log collection ............5 No power to the unit ............. 17 Maintenance log collection ........... 3 Trend maintenance log collection ......4 One or more of the chords is not indicating a reading ............
- Page 98 2022 Emerson. All rights reserved. Emerson Terms and Conditions of Sale are available upon request. The Emerson logo is a trademark and service mark of Emerson Electric Co. Rosemount is a mark of one of the Emerson family of companies. All other marks are the property...
Need help?
Do you have a question about the Rosemount 3818 and is the answer not in the manual?
Questions and answers