Table of Contents
Advertisement
Quick Links
2162i-3_Manuals 8/22/17 9:23 AM Page 1
195' Laser Distance Meter w/Angle Sensor
Model No. LDM195
Instruction Manual
Congratulations on your choice of this Laser Distance Meter. We suggest
you read this instruction manual thoroughly before using the instrument
and save this instruction manual for future use.
This is a Class II laser tool and is manufactured to comply with CRF 21,
parts 1040.10 and 1040.11 as well as international safety rule IEC 285.
The laser also complies with EMC Test according to EN61000-6-3;
2001+A11:2004, EN 6100-6-1:2011, EN 6100-4-2, EN 61000-4-3, EN
60825, FCC Test according to PART 15.
©2017 Johnson Level & Tool
1
Advertisement
Table of Contents

Subscribe to Our Youtube Channel
Related Manuals for Johnson LDM195


Summary of Contents for Johnson LDM195
- Page 1 1040.10 and 1040.11 as well as international safety rule IEC 285. The laser also complies with EMC Test according to EN61000-6-3; 2001+A11:2004, EN 6100-6-1:2011, EN 6100-4-2, EN 61000-4-3, EN 60825, FCC Test according to PART 15. ©2017 Johnson Level & Tool...
-
Page 2: Table Of Contents
12. Product Warranty 5. Location of Parts/Components 13. Warranty Registration 6. Battery Installation 14. Accessories 7. Operating Instructions 1. Kit Contents Description Qty. Laser Distance Meter “AAA” Alkaline Batteries Wrist Strap Soft-Sided Pouch Quick Start Guide ©2017 Johnson Level & Tool... -
Page 3: Features And Functions
– Part 1: Performance of handheld laser distance meters.” This standard is used to calculate accuracy under varying ambient lighting conditions. For more detailed test results, see the Technical Specifications section of this operator’s manual. ©2017 Johnson Level & Tool... -
Page 4: Safety Instructions
• Do not attempt to repair or disassemble the laser tool. If unqualified persons attempt to repair this tool, warranty will be void. • Use only original Johnson ® parts and accessories purchased from your Johnson ® ® authorized dealer. Use of non-Johnson parts and accessories will void warranty. -
Page 5: Location/Content
6. Ambient Light – The tool is being used in too bright of an environment to operate properly. QR Code: Use a smartphone to scan the QR code to be taken directly to Johnson Level & Tool’s Operator’s Manual Page. ©2017 Johnson Level & Tool... -
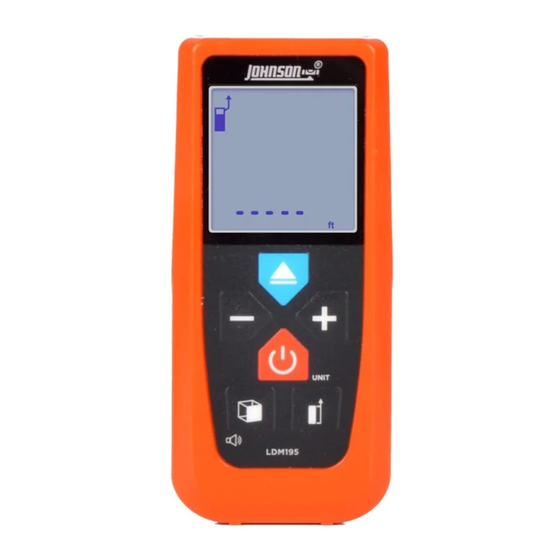
Page 6: Location Of Parts/Components
• Adjust the Press for: measurement • Area measurement reference • Volume measurement • 2-Point Pythagoras measurement • 1-Point Pythagoras measurement Laser Receiving Window Press and hold for: • Sound (High, Low, Off) Laser Emitted Window ©2017 Johnson Level & Tool... - Page 7 2162i-3_Manuals 8/22/17 9:23 AM Page 7 LCD Screen Not all features found on the LCD screen are found in every Johnson Level & Tool Laser Distance Meter. See the notes below for further information. 1. Measurement Reference Position 8. Minimum Display 2.
-
Page 8: Battery Installation
Notes: • Use only alkaline batteries. • Remove the batteries when storing the instrument for an extended time (more than 3 months) to avoid damage to the tool should the batteries deteriorate. ©2017 Johnson Level & Tool... -
Page 9: Operating Instructions
Automatic Shutoff Laser will turn off after remaining idle for 2 minutes. Press the button to re-enable the laser. Unit will turn off after remaining idle for 5 minutes. ©2017 Johnson Level & Tool... - Page 10 LCD screen for the Area, Volume, 1-Point Pythagoras and 2-Point Pythagoras measuring modes. When in the stake-out mode, the main display will have a flashing symbol and will read 0.00, with the hundredths decimal place flashing. ©2017 Johnson Level & Tool...
- Page 11 OR after taking a measurement, press the button repeatedly to scroll through the various units of measurement. Note: The screen will only display feet and meters in a decimal format in Area or Volume modes. ©2017 Johnson Level & Tool...
- Page 12 To select the desired position, press the button. The laser indicator icon at the top left of the LCD screen will display the selected position. Front of Unit Zero Back of Unit Zero Reference Position Reference Position ©2017 Johnson Level & Tool...
- Page 13 4. Press the button or button to pause the measurement. The laser will turn off. 5. To exit the continuous mode and return to the single length measurement mode, press the button while the tool is paused. ©2017 Johnson Level & Tool...
- Page 14 The laser will turn off. 6. Press the button again to take your next Area measurement. ©2017 Johnson Level & Tool...
- Page 15 The laser will turn off. 8. Press the button again to take your next Volume measurement. ©2017 Johnson Level & Tool...
- Page 16 Laser Distance Meter so that the laser dot is on the selected target to measure the length of the hypotenuse (represented by “C” in the figure above). 3. Keep your position stable and press the button. The hypotenuse length measurement will appear above the main display. ©2017 Johnson Level & Tool...
- Page 17 1. Press the button 4 times until the 1-Point Pythagoras mode icon ( ) displays near the top left of the LCD screen and the current value for the angle is displayed as XX.X°. ©2017 Johnson Level & Tool...
- Page 18 To use the Stake-out mode: 1. Set your desired unit of measurement and measurement reference position, as described earlier in this manual. ©2017 Johnson Level & Tool...
- Page 19 8. A + or – symbol will flash on the main display to guide you forward or backward, respectively, to the first stake-out point. As you approach the stake-out point, the middle number on the LCD ©2017 Johnson Level & Tool...
- Page 20 6 times until the Digital Level mode icon ( ) displays at the left of the LCD screen. 2. The angle will show in the main display and will update continuously as you move the Laser Distance Meter. ©2017 Johnson Level & Tool...
- Page 21 3. Complete your second measurement. The second measurement will appear above the main display, and the difference of the two measurements will appear in the main display. 4. Repeat step 3 above as necessary to subtract further measurements. ©2017 Johnson Level & Tool...
- Page 22 “CAL 2” will appear on the screen followed by “OK.” 9. Lay the Laser Distance Meter down so that the laser beam is facing away from you and the screen is facing the sky. ©2017 Johnson Level & Tool...
- Page 23 12. Press the button. “CAL 4” will appear on the screen followed by “OK.” 13. The Laser Distance Meter will power down, and calibration of the angle sensor will be complete. ©2017 Johnson Level & Tool...
-
Page 24: Tips From The Pros
• When making Pythagoras measurements, make sure that you hold the tool as flat as possible during your second measurement for the most accurate measurements. The beam should hit perpendicular to the object you are measuring. ©2017 Johnson Level & Tool... -
Page 25: Care And Handling
•Keep the laser unit dry and clean, especially the laser output window. Remove any moisture or dirt with a soft, dry cloth. •Do not use harsh chemicals, strong detergents or cleaning solvents to clean the unit. ©2017 Johnson Level & Tool... -
Page 26: Troubleshooting Guide
Turns off after a short Batteries depleted Change the batteries time Flashing or beeping Laser is beyond leveling Place on surface within range 4° of level Laser is out of Perform calibration calibration check; calibrate laser if needed ©2017 Johnson Level & Tool... -
Page 27: Technical Specifications
Operating Modes Length (Single or Continuous), Area, Volume, 2-Point Pythagoras, 1-Point Pythagoras, Digital Level, Stakeout Units ft, in, m, 1/8″, 1/16″, 1/32″ Power Supply 2 “AAA” alkaline batteries (included) Battery Life Minimum 10 hours/10,000 measurements ©2017 Johnson Level & Tool... - Page 28 **Per ISO16331-1, unfavorable conditions are designed to simulate bright sunlight and give an approximate indication of the working range of the tool outdoors on a bright, sunny day. Overcast or darker days will offer a longer working range. ©2017 Johnson Level & Tool...
-
Page 29: Product Warranty
2162i-3_Manuals 8/22/17 9:24 AM Page 29 12. Product Warranty Johnson Level & Tool offers a two year limited warranty on each of its products. You can obtain a copy of the limited warranty for a Johnson Level & Tool product by contacting Johnson Level & Tool's Customer Service Department, as provided below, or by visiting our web site at www.johnsonlevel.com. -
Page 30: Warranty Registration
NO WARRANTY. If you need any assistance in locating any accessories, please contact our Customer Service Department. In the U.S., contact Johnson Level & Tool’s Customer Service Department at 888-9-LEVELS. In Canada, contact Johnson Level & Tool’s Customer Service Department at 800-346-6682.
Need help?
Do you have a question about the LDM195 and is the answer not in the manual?
Questions and answers