Subscribe to Our Youtube Channel
Summary of Contents for Oru Kayak Beach LT Sport
- Page 1 SCAN AND WATCH ON YOUR PHONE Assembly Guide (Pages 1-12) Disassembly Guide (Pages 13-17) Read this entire Assembly Watch the instruction video: IMPORTANT Guide before assembling www.orukayak.com/assembly/beachltsport your Oru Kayak. SERVICE@ORUKAYAK.COM...
- Page 2 Step 1: Open the Oru Kayak box The box contains all the components needed for assembly and includes space to store gear—such as our 4-piece paddle. Loosen and slide off the two loops that go around box. Set shoulder strap aside (you won’t need it while kayaking).
- Page 3 Connect the floorboards to the skin and provide a track for mounting accessories an the crossbar. Stern (back) bulkhead: Provides structural rigidity. Spare parts kit: Extra hardware for repairs and upkeep. ORU KAYAK | BEACH LT SPORT KAYAK ASSEMBLY GUIDE...
- Page 4 Step 2: Unfold the box Pull Hold the two folds at the orange NOTE The double-walled corrugated poly- stickers. Pull as propylene that Oru Kayaks are made indicated in the illustration to from will naturally show marks and open. The skin will be stiff. scratches from use over time.
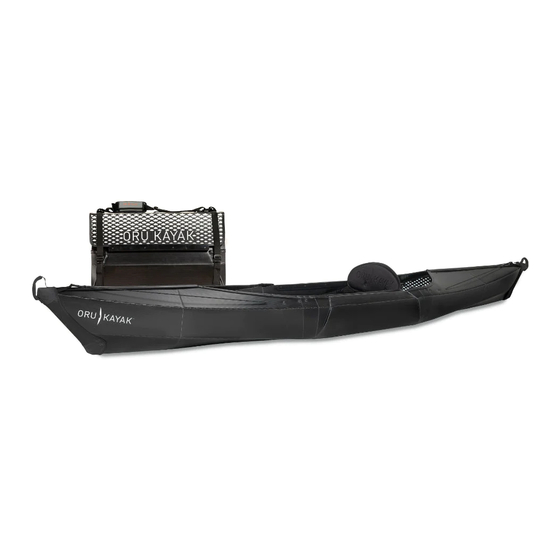
- Page 5 The box becomes the hull and deck of the kayak. Several key parts are permanently Parts: Hull/deck attached to the hull/deck. The bow (front) and stern (back) of the Oru Kayak are different, so pay attention to orientation throughout the assembly process.
- Page 6 Step 3: Attach the footrest STERN Fold in flaps on sides of cockpit. Pull footrest and bulkhead into hull. Clip footrest to adjustable footrest straps as shown. Footrest WWW.ORUKAYAK.COM...
- Page 7 ORU KAYAK | BEACH LT SPORT KAYAK ASSEMBLY GUIDE...
- Page 8 Step 5: Slide on front zipper channels The zipper channels seal the deck of the kayak. Holding the bow of the kayak, begin to guide the Apply downward zipper channel onto the pressure and push deck trim (see tip). Do not forward with your force the zipper on as it may hands while sliding...
- Page 9 < c o b u l k h e a d c h a n n e l s ORU KAYAK | BEACH LT SPORT KAYAK ASSEMBLY GUIDE...
- Page 10 Step 7: Slide on rear zipper channels Holding the stern of the kayak, begin to guide the zipper channel onto the deck trim (see tip). Do not force the zipper on as it may cause correct incorrect damage to the kayak. Continue until both zippers s c r e w are on the stern of the kayak.
- Page 11 floorboard into channels. Press center of floorboard down and push floorboard into channels (floorboard may not sit flat until the next step). CROSS SECTION VIEW FLOORBOARD FLOORBOARD CHANNELS PUSH DOWN ORU KAYAK | BEACH LT SPORT KAYAK ASSEMBLY GUIDE...
- Page 12 Step 9: Install the seat Insert the bottom of seat column into slot of seat column plate on floorboard. Clip seat back straps into buckles on carrying handles. Connect the two clips to the cord loops on the back end of CLOSE UP Pull plate in the direction of the floorboard channel.
- Page 13 To adjust its distance Decklines are buckled from you, tighten or loosen adjustable to the fairings and straps. tightened. Congratulations! Your Oru Kayak is ready for the water. WWW.ORUKAYAK.COM ORU KAYAK | BEACH LT SPORT...
- Page 14 Some water may collect inside the plastic corrugated flutes. To let it drain, stand the assembled kayak vertically for about 10 minutes. Read this entire Assembly Watch the instruction video: IMPORTANT Guide before assembling www.orukayak.com/assembly/beachltsport your Oru Kayak. SERVICE@ORUKAYAK.COM WWW.ORUKAYAK.COM...
- Page 15 Disassembling the Oru Kayak is basically a reversal of the assembly, however there are a few tricks. Follow these simple directions to learn how to pack your Oru Kayak back into its box quickly and easily. Remove all three zippers from the...
- Page 16 Back on land: Folding your Oru Kayak into its box PROFILE VIEW DO NOT HOLD BUNGEE TO REMOVE FLORBOARD Lift up on floorboard to remove. If Fold either bow or stern inward like an rubber trim sticks in channels, try accordion.
- Page 17 Back on land: Folding your Oru Kayak into its box Push the black arrow towards the black Place footrest, bulkheads and zippers into folded boat, target, and the orange arrow towards followed by other loose components, such as the the orange target until box is formed.
- Page 18 Back on land: Folding your Oru Kayak into its box MAKE SURE THE PLATE IS IN THE CORRECT ORIENTATION BEFORE TIGHTENING THE STRAPS Place the floorboard over the top of the box, inserting the long sides into the rails. Place and tighten the shoulder strap loops over the box.
- Page 19 WE ARE HERE TO HELP For product or assembly questions contact us: service@orukayak.com (415) 630-3717 © 2023 ORU KAYAK, INC. ALL RIGHTS RESERVED 0116...


Need help?
Do you have a question about the Beach LT Sport and is the answer not in the manual?
Questions and answers