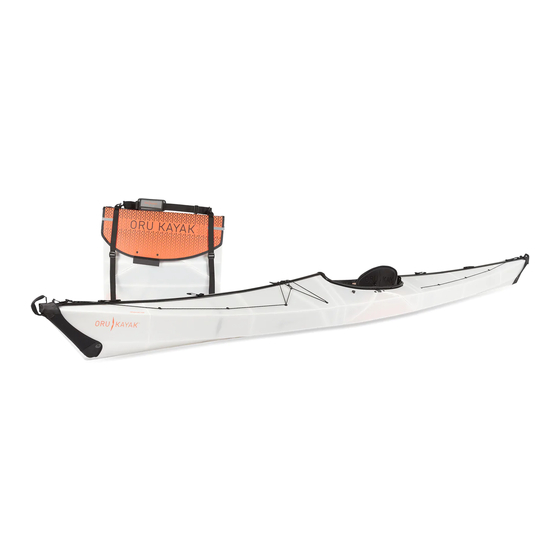
Oru Kayak COAST XT Assembly And Disassembly Manual
Hide thumbs
Also See for COAST XT:
- Assembly manual (16 pages) ,
- Owner's manual (16 pages) ,
- Assembly manual (21 pages)
Summary of Contents for Oru Kayak COAST XT
- Page 1 SCAN AND WATCH ON YOUR PHONE Assembly Guide (Pages 1-13) Disassembly Guide (Pages 14-20) Read this entire Assembly Watch the instruction video: IMPORTANT Guide before assembling www.orukayak.com/assembly/coastxt your Oru Kayak. SERVICE@ORUKAYAK.COM...
- Page 2 Unclip and lift the lid off. This will become the kayak’s floorboard. Remove the loose kayak components packed into the box. See page 2 for a list of the loose components. Additional components are permanently attached to the hull/deck. ORU KAYAK | COAST XT ASSEMBLY GUIDE...
-
Page 3: Getting Familiar
Getting Familiar assembly components Stern (back) bulkhead: Provides structural rigidity. Shoulder strap: Used to carry the kayak when in box form. Stow out of the way while Cockpit (large) bulkhead: kayaking. Provides structural rigidity. Bulkhead channels: Attached to the inner hull. Used to hold the Floorboard: Reinforces the two bulkheads in securely. - Page 4 As long as the hull is not punctured, there is pushing down the inverted nothing to worry about. Think of them like folds, creating a bowl shape. marks and scratches on thick leather boots. ORU KAYAK | COAST XT ASSEMBLY GUIDE...
- Page 5 The box becomes the hull and deck of the kayak. Several key parts are permanently Parts: Hull/deck attached to the hull/deck. The bow (front) and stern (back) of the Oru Kayak are different, so pay attention to orientation throughout the assembly process.
- Page 6 The box lid becomes the floorboard. The floorboard is a crucial part of Parts: Floorboard the Oru Kayak assembly; it locks into the cockpit at the coaming, adding structure, and holds the seat pad and backrest. Cockpit handles: Lock into the coaming and pro-...
- Page 7 Step 3: Insert the floorboard The floorboard adds structure to the cockpit area. The floorboard handles lock into the coaming (this is around the rim of the cockpit) to hold the floorboard in place. Make sure that the floorboard backrest plate Prop the kayak on its side, and After locking in both sides and is on the stern side of the kayak.
- Page 8 Unhook the bow bulkhead from the gray ring strap and insert into the bulkhead channel. Make sure the grey strap is on the upper side of the bulkhead. Insert the cockpit and stern bulkheads. INCORRECT CORRECT (front) ORU KAYAK | COAST XT ASSEMBLY GUIDE...
- Page 9 Step 5: Buckle the tension strap Use the tension strap to help close the kayak. The tension strap is located inside the hull underneath the bow coaming latch. UNDER DECK Connect the buckle and tighten until the two incorrect halves of the coaming are touching.
- Page 10 Continue until all three zippers are on the bow of the kayak. Check to make sure each zipper channel is Close properly installed. after zipper installation Close the bow coaming latch. (front) correct incorrect ORU KAYAK | COAST XT ASSEMBLY GUIDE...
- Page 11 Step 7: Attach the rear seat column Closing the back of the kayak is STERN similar to closing the front (step 6). (back) CLOSE-UP You’ll also install the backrest column, How the backrest which supports the rear cockpit area. DO NOT CLOSE column will look once LATCH YET this step is complete.
- Page 12 Close the rear coaming latch behind the seat column. CLOSE-UP Close the rear latch behind the seat column. Make sure (front) BOTH screws are still inside the slots. ORU KAYAK | COAST XT ASSEMBLY GUIDE...
- Page 13 Step 9: Add the finishing touches STERN (back) Just a few more things to get your Oru Kayak ready for the water! Using the foam block attached to the end straps, plug the small opening on the bow and stern of the kayak.
-
Page 14: Final Adjustments
Both cockpit the rear of the coaming, while handles are locked seated in a normal position. onto the coaming. Congratulations! Your Oru Kayak is ready for the water. ORU KAYAK | COAST XT ASSEMBLY GUIDE... - Page 15 Some water may collect inside the plastic corrugated flutes. To let it drain, stand the assembled kayak vertically for about 10 minutes. Read this entire Assembly Watch the instruction video: IMPORTANT Guide before assembling www.orukayak.com/assembly/coastxt your Oru Kayak. SERVICE@ORUKAYAK.COM WWW.ORUKAYAK.COM...
- Page 16 Disassembling the Oru Kayak is basically a reversal of the assembly, however there are a few tricks. Follow these simple directions to learn how to pack your Oru Kayak back into its box quickly and easily. Moving from bow to stern, unclip the...
- Page 17 Back on land: Folding your Oru Kayak into its box Remove the floorboard by lifting up The bow bulkhead stays in the kayak.Hook it onto the from the center sides on the rubber gray ring strap as shown. This keeps the bulkhead and trim indicated in the illlustration above.
- Page 18 Back on land: Folding your Oru Kayak into its box Fold one end inward, compressing it like Push the black arrow towards the black an accordion (you can start with the bow target, and the orange arrow towards or stern). It may help to push inward the orange target until box is formed.
- Page 19 Back on land: Folding your Oru Kayak into its box Place the floorboard over the top Clip and loosely tighten the center grey of the box. Connect and tighten the grey strap. straps on either side. Stash loose components throughout Place and tighten the the box, making sure that they’re...
- Page 20 WE ARE HERE TO HELP For product or assembly questions contact us: service@orukayak.com (415) 630-3717...


Need help?
Do you have a question about the COAST XT and is the answer not in the manual?
Questions and answers