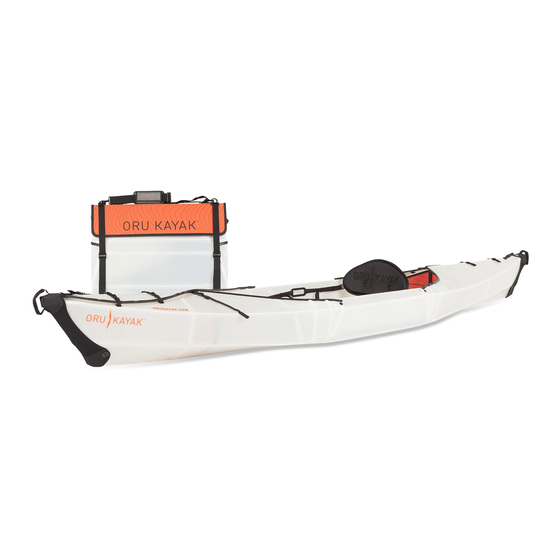
Oru Kayak BEACH LT Assembly Manual
Hide thumbs
Also See for BEACH LT:
- Assembly manual (20 pages) ,
- Assembly and disassembly manual (16 pages) ,
- Owner's manual (16 pages)
Advertisement
Quick Links
Download this manual
See also:
Assembly Manual
THE BEACH LT
Assembly Guide
Deck
BOW
(front)
Handle
Bow
fairing
US PATENT NO. 8,316,788 OTHER PATENTS PENDING
HOW TO GET
Read this entire Assembly Guide
STARTED
before assembling your Oru Kayak.
Carrying
handles
Footrest
Floorboard
Bow
bulkhead
(inside)
Watch the instruction video:
www.orukayak.com/pages/assembly
Backrest
Seat
Reinforcing
pad
rod
Stern
bulkhead
Cockpit
Seat
column
WE'RE HERE TO HELP!
If you have questions, email us at service@orukayak.com
Be patient! With practice your assembly
time will get to 10 minutes or less.
Deck
STERN
buckles
(back)
Handle
Stern
fairing
WWW.ORUKAYAK.COM
1
Advertisement

Summary of Contents for Oru Kayak BEACH LT
- Page 1 US PATENT NO. 8,316,788 OTHER PATENTS PENDING HOW TO GET Read this entire Assembly Guide Watch the instruction video: Be patient! With practice your assembly STARTED before assembling your Oru Kayak. www.orukayak.com/pages/assembly time will get to 10 minutes or less. WWW.ORUKAYAK.COM...
- Page 2 Remove the loose kayak components packed into the box. See page 3 for a list of loose components. Additional components are permanently attached to the hull/deck. The box becomes the kayak’s hull and deck. ORU KAYAK | BEACH LT KAYAK ASSEMBLY GUIDE...
- Page 3 Parts: Loose components Shoulder strap: Used to carry Floorboard: Reinforces Stern (back) bulkhead: the kayak when in box form. Stow kayak bottom and holds Provides structural rigidity. under back deck while kayaking. the seat. Backrest: Includes the seat column Seat pad: Tucks under the Spare parts kit: Extra hardware and adjustable backrest.
- Page 4 Pop the hull flat with your hands as you extend it, pushing down the inverted folds, creating a bowl shape. PROFILE VIEW PUSH DOWN SIDES POP UP TO CREATE BOWL SHAPE ORU KAYAK | BEACH LT KAYAK ASSEMBLY GUIDE...
- Page 5 The box becomes the hull and deck of the kayak. Several key parts are permanently Parts: Hull/deck attached to the hull/deck. The bow (front) and stern (back) of the Oru Kayak are different, so pay attention to orientation throughout the assembly process.
- Page 6 Step 3: Attach the footrest STERN Fold in flaps on sides of cockpit. Pull footrest and bulkhead into hull. Clip footrest to adjustable footrest straps as shown. Footrest ORU KAYAK | BEACH LT KAYAK ASSEMBLY GUIDE...
- Page 7 Step 4: Close the front of the kayak Make sure the ends s c r e w ( b e are inverted. h i n d v e l c r Fully tighten the end ( f r o n strap at bow.
- Page 8 Step 7. Attach velcro to top of bulkhead as shown, like in Step 4. Stretch rear fairing over stern, and clip small buckle onto last deck strap and tighten. Tighten stern straps. ORU KAYAK | BEACH LT KAYAK ASSEMBLY GUIDE...
- Page 9 Step 6: Insert the floorboard Orient floorboard relative STERN STERN to hull as shown (seat back FLOORBOARD CHANNELS plate towards stern). Bend floorboard upward as shown below. Place edges of the floorboard into channels. Press center of floorboard down and push floorboard into channels (floorboard may not sit flat until the next step).
-
Page 10: Step 7: Install The Seat
Clip seat back straps into buckles on carrying handles. Place seat pad under bungee on floorboard. CLOSE-UP Pull plate in the direction of the arrow to insert column. ORU KAYAK | BEACH LT KAYAK ASSEMBLY GUIDE... -
Page 11: Final Adjustments
The footrest should keep your legs comfortably bent, with your knees splayed outward. To adjust its Congratulations! distance from you, tighten or loosen Your Oru Kayak is ready adjustable straps. for the water. WWW.ORUKAYAK.COM... - Page 12 Disassembling the Oru Kayak is basically a reversal of the assembly, however there are a few tricks. Follow these simple directions to learn how to pack your Oru Kayak back into its box quickly and easily. Bring male strap from one handle to Moving from bow to stern, unbuckle Lift up on floorboard to remove.


Need help?
Do you have a question about the BEACH LT and is the answer not in the manual?
Questions and answers