Daikin RXYSQ8TMY1B Installation And Operation Manual
System air conditioner
Hide thumbs
Also See for RXYSQ8TMY1B:
- Installer and user manual (72 pages) ,
- Installer and user manual (144 pages)

Related Manuals for Daikin RXYSQ8TMY1B


Summary of Contents for Daikin RXYSQ8TMY1B
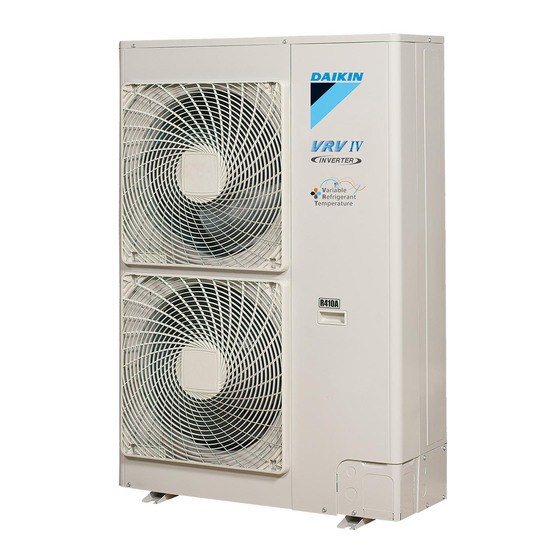
- Page 1 Installation and operation manual VRV IV-S system air conditioner RXYSQ8TMY1B Installation and operation manual RXYSQ10TMY1B English VRV IV-S system air conditioner RXYSQ12TMY1B...
- Page 2 (mm) — ≥100 A, B, C — ≥100 ≥100 ≥100 B, E — ≥100 ≥1000 ≤500 A, B, C, E — ≥150 ≥150 ≥150 ≥1000 ≤500 — ≥500 D, E — ≥1000 ≥1000 ≤500 B, D — ≥100 ≥1000 B, D, E <H ≤½H ≥250...
- Page 3 2P406921-1A...
- Page 4 2P406921-1A...
-
Page 5: Table Of Contents
Table of Contents 6.1.4 To access mode 1 or 2 ..........20 Table of Contents 6.1.5 To use mode 1 ............. 20 6.1.6 To use mode 2 ............. 21 6.1.7 Mode 1 (and default situation): Monitoring settings ..21 6.1.8 Mode 2: Field settings.......... -
Page 6: About The Documentation
▪ A subset of the latest technical data is available on the regional Target audience Daikin website (publicly accessible). Authorised installers + end users ▪ The full set of latest technical data is available on the Daikin extranet (authentication required). INFORMATION This appliance is intended to be used by expert or trained users in shops, in light industry and on farms, or for commercial use by lay persons. -
Page 7: About The Units And Options
–5°C for 5 days or longer, with relative humidity VRV direct expansion (DX) indoor unit levels exceeding 95%, we recommend to apply a Daikin User interface (dedicated depending on indoor unit type) range specifically designed for such application and/or to BP box (required to connect Residential Air (RA) or Sky Air contact your dealer for further advice. -
Page 8: Refrigerant Piping Material
4 Preparation ▪ Foreign materials inside pipes (including oils for fabrication) must In case the required pipe sizes (inch sizes) are not available, it is be ≤30 mg/10 m. also allowed to use other diameters (mm sizes), taken the following into account: 4.2.2 Refrigerant piping material ▪... -
Page 9: To Select Refrigerant Branch Kits
5 Installation Indoor unit capacity Piping outer diameter size (mm) Preparing electrical wiring index Gas pipe Liquid pipe 63~140 15.9 4.3.1 Safety device requirements 19.1 The power supply must be protected with the required safety 22.2 devices, i.e. a main switch, a slow blow fuse on each phase and an earth leakage protector in accordance with the applicable legislation. -
Page 10: Mounting The Outdoor Unit
5 Installation NOTICE Mounting the outdoor unit If drain holes of the outdoor unit are covered by a mounting base or by floor surface, raise the unit to provide a free 5.2.1 To provide the installation structure space of more than 150 mm under the outdoor unit. Prepare 4 sets of anchor bolts, nuts and washers (field supply) as follows: 4×... -
Page 11: Using The Stop Valve And Service Port
5 Installation 5.3.1 Using the stop valve and service port To handle the stop valve ▪ Make sure to keep all stop valves open during operation. ▪ The stop valve is factory closed. To handle the service port To open the stop valve ▪... -
Page 12: To Connect The Refrigerant Piping To The Outdoor Unit
5 Installation 3 Recover gas and oil from the pinched piping by using a 3 If you have chosen the downwards piping route: recovery unit. ▪ Drill (a, 4×) and remove the knockout hole (b). ▪ Cut out the slits (c) with a metal saw. CAUTION 4×... -
Page 13: Checking The Refrigerant Piping
5 Installation Method 1: Before power ON Possibility 3: To the side Possibility 4: Downwards If the system has not yet been powered on, no special action is required to perform the leak test and the vacuum drying. Method 2: After power ON If the system has already been powered on, activate setting [2‑21] (refer to "6.1.4 ... -
Page 14: Checking Refrigerant Piping: Setup
5 Installation The system is ready for use if there is no pressure decrease within 5.4.3 Checking refrigerant piping: Setup 24 hours. If there is, check for and repair leaks. p < p > 5.4.5 To perform vacuum drying To remove all moisture from the system, proceed as follows: 1 Evacuate the system for at least 2 hours to a target vacuum of –... -
Page 15: Charging Refrigerant
5 Installation 5.6.2 To determine the additional refrigerant Charging refrigerant amount 5.6.1 Precautions when charging refrigerant INFORMATION For final charge adjustment in a test laboratory, contact WARNING your dealer. ▪ Only use R410A as refrigerant. Other substances may cause explosions and accidents. Formula: ▪... -
Page 16: Error Codes When Charging Refrigerant
5 Installation Then INFORMATION Too much refrigerant is Recover refrigerant. ▪ When a malfunction is detected during the procedure charged (e.g., in case of closed stop valve), a malfunction code Disconnect the manifold from will be displayed. In that case, refer to "5.6.4 ... -
Page 17: Connecting The Electrical Wiring
5 Installation NOTICE 5.7.3 Guidelines when connecting the electrical wiring In Europe, the greenhouse gas emissions of the total refrigerant charge in the system (expressed as tonnes Tightening torques -equivalent) is used to determine the maintenance In case of RXYSQ8: intervals. -
Page 18: Finishing The Outdoor Unit Installation
6 Configuration 8 HP 10+12 HP Connecting to the When cables are routed from the unit, a frame protection sleeve for the conduits (PG insertions) can be inserted at the knockout hole. When you do not use a wire conduit, protect the wires with vinyl tubes to prevent the edge of the knockout hole from (A1P) -
Page 19: Making Field Settings
6 Configuration 8 HP 10+12 HP Making field settings 6.1.1 About making field settings To configure the heat pump system, you must give input to the outdoor unit's main PCB (A1P). This involves the following field setting components: ▪ Push buttons to give input to the PCB TEST: C/H SELECT ▪... -
Page 20: To Access Mode 1 Or 2
6 Configuration Default situation (H1P OFF) Description Mode 1 (H1P flashing) H1P H2P H3P H4P H5P H6P H7P Mode 2 (H1P ON) Mode 2 Press BS1. BS1 [5 s] Press BS1 for at least 5 s. (H1P ON) INFORMATION Setting 8 If you get confused in the middle of the process, press BS1 (in mode 2) to return to the default situation. -
Page 21: To Use Mode 2
6 Configuration Action Button/display Action Button/display BS2 [X×] BS3 [1×] Select setting 10. Select value 4 (= 8°C). ("X×" depends on the setting a: Display the current value. that you want to select.) b: Change to 4. ("X×" BS2 [X×] BS3 [1×] Display the value of setting BS3 [1×]... - Page 22 6 Configuration Value / Description Setting Value / Description Shows the status of power consumption limitation operation. [1‑1] Unit is currently not operating under low noise restrictions. Shows the status Unit is currently operating under low of low noise Unit is currently not operating under power noise restrictions.
-
Page 23: Mode 2: Field Settings
6 Configuration Setting Value / Description Setting Value / Description [1‑17] When the latest malfunction codes were reset by [1‑40] For more information, see setting [2‑81]. accident on an indoor unit user interface, they Shows the latest Shows the current can be checked again through this monitoring malfunction code. - Page 24 6 Configuration Setting Value Description (= binary) [2‑21] 0 (default) Deactivated. Refrigerant recovery/vacuuming mode. (= binary 1) (default) Activated. In order to achieve a free pathway to reclaim refrigerant out of the system or to remove residual (= binary 2) To stop the refrigerant recovery/vacuuming substances or to vacuum the system it is necessary to mode, push BS1 (in case of RXYSQ8) or BS3...
-
Page 25: To Connect The Pc Configurator To The Outdoor Unit
7 Commissioning Setting Value Description (= binary) [2‑32] 0 (default) Function not active. Forced, all time, power consumption limitation (= binary 1) (default) operation (no external control adaptor is required to Follows [2‑30] setting. perform power consumption limitation). (= binary 2) If the system always needs to be running under power Follows [2‑31] setting. -
Page 26: Checklist During Commissioning
7 Commissioning Field wiring Checklist during commissioning Be sure that the field wiring has been carried out To perform a test run. according to the instructions described in the chapter "5.7 Connecting the electrical wiring" on page according to the wiring diagrams and according to the 7.3.1 About test run applicable legislation. -
Page 27: To Perform A Test Run (7-Segments Display)
8 Troubleshooting INFORMATION Completion Description Abnormal Indication of malfunction code on the During the test operation, it is not possible to stop the unit completion 7‑segment display. operation from a user interface. To abort the operation, press BS3. The unit will stop after ±30 seconds. Refer to "7.3.4 Correcting after abnormal completion of the test run" on page 27... -
Page 28: Error Codes: Overview
8 Troubleshooting 8.1.1 Error codes: Overview In case of RXYSQ8: Main code Cause Solution ▪ The stop valve of an outdoor unit is left closed. ▪ Open the stop valve on both the gas and liquid side. ▪ Refrigerant overcharge ▪... - Page 29 8 Troubleshooting Main code Cause Solution ▪ The stop valve of an outdoor unit is left closed. ▪ Open the stop valve on both the gas and liquid side. ▪ The piping and wiring of the specified indoor unit are not ▪...
-
Page 30: Technical Data
Open stop valves. run) Technical data A subset of the latest technical data is available on the regional Daikin website (publicly accessible). The full set of latest technical data is available on the Daikin extranet (authentication required). Service space: Outdoor unit In case of RXYSQ8: •... -
Page 31: Piping Diagram: Outdoor Unit
9 Technical data a,b,c,d,e Minimum service space between the unit and obstacles A, B, C, D and E Maximum distance between the unit and the edge of obstacle E, in the direction of obstacle B Maximum distance between the unit and the edge of obstacle E, in the direction of obstacle D Height of the unit Height of obstacles B and D Seal the bottom of the installation frame to prevent discharged air from flowing back to the suction side through the bottom of the unit. -
Page 32: Wiring Diagram: Outdoor Unit
9 Technical data RXYSQ10+12 S1NPH S1NPL S1PH R21T INV M1C Stop valve (gas) R21T Thermistor (discharge) Stop valve (liquid) Thermistor (suction) Filter (6×) Thermistor (heat exchanger liquid pipe) Subcool heat exchanger Thermistor (liquid pipe) Heat sink PCB Thermistor (subcool heat exchanger) Pressure regulating valve Thermistor (heat exchanger de-icer) Heat exchanger... - Page 33 9 Technical data Refer to the installation manual for how to use the BS1~BS3 Q1RP Reverse phase protector switches. R2, R3 Resistor When operating, do not short-circuit protective device S1PH. Resistor (current sensor) (A4P) (A5P) Colours (see below). Resistor (current limiting) Thermistor (air) Symbols: Thermistor (suction 1)
-
Page 34: For The User
10 About the system Q1LD Leakage detection circuit (A1P) S1PH High pressure switch Q1RP Phase reversal detect circuit (A1P) SEG1~SEG3 7-segment display (A1P) Thermistor (air) Current sensor R21T Thermistor (discharge) Power module (A3P) (A4P) (A5P) Thermistor (suction) Power module (A3P) Thermistor (heat exchanger liquid pipe) X1A, X2A Connector (M1F) -
Page 35: Operating The System
12 Operation To avoid condensation and water dripping out of the unit. If Heating operation the temperature or the humidity is beyond these conditions, Fan only operation safety devices may be put in action and the air conditioner may not operate. 2 Press the ON/OFF button on the user interface. -
Page 36: Setting The Master User Interface
13 Maintenance and service 2 Press the operation mode selector button of the controller that Cooling Heating you wish to designate as the master user interface. ▪ When operating continuously at horizontal air flow direction. Result: Designation is completed. This user interface is ▪... -
Page 37: After-Sales Service And Warranty
14 Troubleshooting NOTICE Troubleshooting In Europe, the greenhouse gas emissions of the total If one of the following malfunctions occur, take the measures shown refrigerant charge in the system (expressed as tonnes below and contact your dealer. -equivalent) is used to determine the maintenance intervals. -
Page 38: Error Codes: Overview
14 Troubleshooting Malfunction Measure Main code Contents The system operates ▪ Check if air inlet or outlet of outdoor or Electronic expansion valve malfunction (outdoor) but cooling or heating indoor unit is not blocked by obstacles. Discharge temperature malfunction (outdoor) is insufficient. -
Page 39: Symptom: The System Does Not Operate
14 Troubleshooting 14.2.1 Symptom: The system does not operate 14.2.7 Symptom: The user interface display reads "U4" or "U5" and stops, but then ▪ The air conditioner does not start immediately after the ON/OFF restarts after a few minutes button on the user interface is pressed. If the operation lamp lights, the system is in normal condition. - Page 40 15 Relocation 14.2.15 Symptom: The compressor in the outdoor unit does not stop after a short heating operation This is to prevent refrigerant from remaining in the compressor. The unit will stop after 5 to 10 minutes. 14.2.16 Symptom: The inside of an outdoor unit is warm even when the unit has stopped This is because the crankcase heater is warming the compressor so that the compressor can start smoothly.
- Page 44 4P400263-1F 2017.02...
Need help?
Do you have a question about the RXYSQ8TMY1B and is the answer not in the manual?
Questions and answers