Table of Contents
Advertisement
Advertisement
Chapters
Table of Contents

Related Manuals for SPM intellinova parallel MB INS MB 4V


Summary of Contents for SPM intellinova parallel MB INS MB 4V
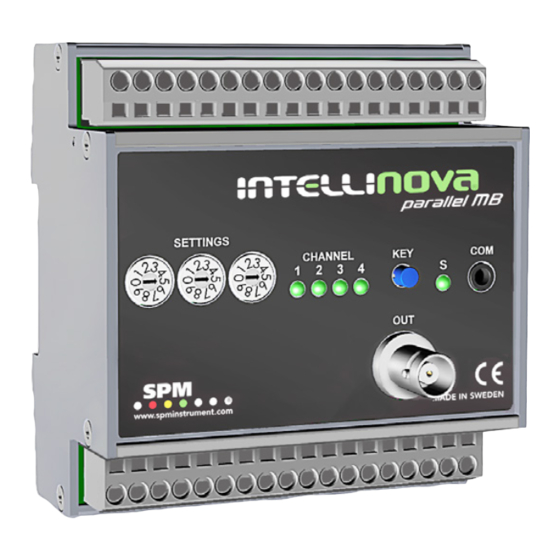
- Page 1 Installation and Operation Instructions INS MB 4V...
- Page 2 Trademarks Airius, CondID, Condmaster, DuoTech, EVAM, HD ENV, Intellinova, Leonova, Leonova Diamond, Leonova Emerald, SPM and SPM HD are trademarks of SPM Instrument AB. All other trademarks are the property of their respective owners. Patent www.spminstrument.com/patents © Copyright SPM Instrument AB. ISO 9001 certified.
-
Page 3: Table Of Contents
Installation and Operation Instructions Contents Safety Arrangements ..........2 Functional Test ............10 Installation Precautions ..........2 Test Procedure ............10 Extended Functional Test ........10 Introduction ............... 3 Technical Overview ............ 3 Offline Configuration Software ........ 11 Mechanical Installation ..........3 Channel Configuration .......... -
Page 4: Safety Arrangements
IEC symbols as well as local requirements, rules and regulations. In case of doubt the local management should be consulted. SPM will not be responsible for any accident caused Rotating parts Protective earth by persons not observing these Safety Arrangements. -
Page 5: Introduction
Installation Procedure DIN rail mounting Introduction The unit can respond to commands that: The purpose of this document is to provide the user with information about how to install and operate the Intel- • configures the operation of the unit linova Parallel unit. -
Page 6: Electrical Installation
Installation Procedure Electrical Installation Electrical Connections Make the external connections in the following order: 0V /+24 Vdc Voltage supply, 15 - 36 Vdc • Connect a functional earth to GND. • Connect the vibration transducers using a shielded Used for proximity switch of type PNP RPMXpupd twisted pair cable to the VIB unit for channel 1, 2, or NPN... -
Page 7: Operating Instructions
This 4 pole connector is used to connect a PC to the unit • SETTINGS = 998: Used for test of DIO. by using the communication cable SPM 15484. The SPM • SETTINGS = 999: To be used when the firmware of software PRO230 is used in these cases: the unit should be upgraded. -
Page 8: Measurements
• SPM HDm/HDc per revolution is constant which implies that the sampling • SPM LR/HR HD frequency varies when the RPM varies. The unit also measures a time waveform and calculates All measured parameters and symptoms are also stored a frequency spectrum from this. The spectrum is used... -
Page 9: Alarm
There are two ways to bring the unit back into a normal The vibration parameters (ACC, VEL and DISP) and the state when an alarm has been generated. SPM parameters (HDm/HDc, LR/HR) can generate an alarm based on two alarm levels (red/yellow) defined Auto reset by the user. -
Page 10: Digital Inputs / Outputs And Rpm Inputs
Digital Inputs / Outputs and RPM Inputs Digital Inputs / Outputs and RPM Inputs The unit has 6 independent DIO (Digital Inputs / Outputs) Transfer characteristics for Digital Inputs: that the user can select to use as either an input or as Positive-going threshold voltage: typ 8 V, max 10 V an output. -
Page 11: Configuration For Offline Mode
PC connected to the unit with communica- tion cable (SPM 15484) connected to COM on the front Troubleshooting panel. With the selection switches in position 999, the If the unit is not operating correctly, first check that it unit enters a state where it can receive new firmware. -
Page 12: Functional Test
Functional Test Functional Test The recommended functional test after installation is Ch.2 Ch.3 done by simulating an alarm. Connect a transducer to one of the VIB channels on the unit. The functional test Ch.4 17093 Ch.1 is normally done in offline mode where the transducer vibration is simulated by hand. -
Page 13: Offline Configuration Software
SETTINGS on the front panel of the unit. Up to 100 different configurations can be created. The configuration file is transferred from a PC to the unit by using the communication cable SPM 15484. 1) Start the software and select INSMB4V (type of Parallel unit). To see help text, mark a parameter and press F1. - Page 14 Software GENERAL SETTINGS (B) The following parameters can be set for the measuring unit: Type of alarm: No delay: An alarm will be generated when one measurement result has exceeded the alarm level when No delay is selected. Time based: An alarm will be generated when a measurement result has exceeded the alarm level during a time interval greater than the time given by the parameter Alarm delay.
-
Page 15: Channel Configuration
Software Channel Configuration (D) Select the channel to be configured (1- 4 ). ASSIGNMENT (E) Three assignments can be configured for each channel. Select Assignment tab and click on the parameters to select settings. Measurement Technique: Inactive: No measurement is performed for this assignment. Acceleration: The measurement uses acceleration as amplitude unit. - Page 16 Software DO Alarm Red A: Configures a DIO (1- 6) as Digital Output. The output is activated if there is an alarm on Alarm Red A or Alarm A CMA. Possible values are 0 - 6. The value 0 disables the activation of a Digital Output. DO Alarm Yellow A: Configures a DIO (1- 6) as Digital Output.
- Page 17 Software Spectrum Lines: The number of lines used in the spectrum. The more lines the better the resolution of the spectrum, but the time of the measurement is proportional to the number of lines. Orders: This value sets the upper limit of the spectrum when Type of sampling = Order tracking.
- Page 18 TRANSDUCER AND DIO/RPM (G) DIO/RPM Input: Configures a DIO (1-6) as a Digital Input and let this signal controls the measurement. A high (low) signal enables (disables) the measurement. Possible values are 0 - 6 where Input = 0 enables the measurement all the time. RPM Low Limit: RPM Low Limit is a parameter used to run measurements only when the RPM >...
-
Page 19: Save The Configuration File
1) Connect a PC to the unit by using a USB to UART cable (SPM 15484) connected to the COM port on the front panel of the Parallel unit. This requires the PC to have the correct drivers installed. See document 72093 B "Installing drivers for cable 15484". -
Page 20: Upgrade Of Firmware
Use document 72093 if the drivers need to be installed. Connect the USB to UART cable to a USB port of the PC and to the COM port of the SPM Measuring unit. Connect 24 Vdc to the SPM Measuring unit. - Page 21 Follow these steps in order to upgrade the firmware for the DSP. The firmware for the DSP consists of two files, one binary file and one text file. Make sure you have the correct drivers installed on a PC in order to use the USB to UART cable (SPM 15484). Read document 72093 B if the drivers need to be installed.
-
Page 22: Technical Specifications
This product must be disposed as electronic waste and is marked with a crossed-out wheeled bin symbol in order to prevent it being discarded with household waste. When once the life cycle of the product is over You can return it to Your local SPM representative for correct treatment, or dispose it together with your other electronic waste. -
Page 23: Application Example - Pumps
Application Example - Pumps APPLICATION EXAMPLE − Pumps Intellinova Pump Solution In a typical motor-pump assembly, the Intellinova Parallel MB unit measures vibration levels on four positions in paral- lel, delivering readings to PLC or other control systems. The readings transferred from the monitoring unit reflect the current condition of the equipment. -
Page 24: Measuring Assignments Overview
Application Example - Pumps Measuring Assignments Overview Measuring Assignments per Channel and Extracted Symptoms This is an overview of how the measuring assignments and symptoms set up looks like per channel for the Intellinova Pump Solution. Channels 1 and 2 measure the motor bearings (non drive end and drive end respectively) and is set up with identical measuring assignments;... -
Page 25: Measuring Assignments For Offline Mode
Application Example - Pumps Measuring Assignments for Offline Mode These pre-programmed settings are found in the file Config_INSMB4V_Pump.txt (provided by your sales representa- tive) and can be modified when needed. On a general note, the settings to the left in the software PRO230 are default settings and look the same for all meas- uring assignments and symptoms in the Intellinova Pump Solution on the following pages. - Page 26 Application Example - Pumps Channels 1 (Motor NDE) and 2 (Motor DE) - Measuring assignment 1, Overall vibration and Symptom 1: Unbalance In the Intellinova Pump Solution example described on the following pages, a separate RPM pulse via a speed sensor is used together with Order Tracking for optimal accuracy and analysis capabilities.
- Page 27 Application Example - Pumps Channels 1 (Motor NDE) and 2 (Motor DE) - Measuring assignment 1, Symptom 2: Alignment condition For Symptom 2, Alignment condition, two symptom bands ranging from 1.9 to 2.1 and 2.9 to 3.1 orders (i.e. one band around 2X and the other around 3X) has been set.
- Page 28 Application Example - Pumps Channels 1 (Motor NDE) and 2 (Motor DE) - Measuring assignment 2: Overall acceleration (e.g. electrical faults) On Channels 1 and 2, measuring assignment 2, the general measuring technique has been set to Acceleration with 6400 lines resolution and 500 orders with a low frequency limit set to 2 Hz. (The maximum number of lines is 6400 due to a limitation of memory size when using Modbus.) Order Tracking has been selected, i.e.
- Page 29 Application Example - Pumps Channels 1 (Motor NDE) and 2 (Motor DE) - Measuring assignment 3, HD Real Peak and Symptom 1: Bearing condition (BPFO+BPFI+BS) On Channels 1 and 2, measuring assignment 3, the measuring technique has been set to HD ENV with 1600 lines resolution and 100 orders and 0 Hz as a low frequency limit.
- Page 30 Application Example - Pumps Channel 3 (Pump bearing) - Measuring assignment 1, Overall vibration and Symptom 1: Unbalance On Channel 3, measuring assignment 1, the general measuring technique has been set to Velocity with 1600 lines resolution and 100 orders with a low frequency limit set to 2 Hz. Order Tracking has been selected, i.e. a fixed RPM is not used.
- Page 31 Application Example - Pumps Channel 3 (Pump bearing) - Measuring assignment 1, Symptom 2: Alignment condition For Symptom 2, Alignment condition, two symptom bands ranging from 1.9 to 2.1 and 2.9 to 3.1 orders (i.e. one band around 2X and the other around 3X) has been set. This will result in a sum of the two bands. –...
- Page 32 Application Example - Pumps Channel 3 (Pump bearing) - Measuring assignment 2, HD Real Peak and Symptom 1: Bearing condition (BPFO+BPFI+BS) On Channel 3, measuring assignment 2, the measuring technique has been set to HD ENV with 1600 lines resolution and 100 orders and 0 Hz as a low frequency limit.
- Page 33 Application Example - Pumps Channel 4 (Pump volute) - Measuring assignment 1, Overall vibration and Symptom 1: Unbalance On Channel 4, measuring assignment 1, the general measuring technique has been set to Velocity with 1600 lines resolution and 100 orders with a low frequency limit set to 2 Hz. Order Tracking has been selected, i.e. a fixed RPM is not used.
- Page 34 Application Example - Pumps Channel 4 (Pump volute) - Measuring assignment 1, Symptom 2: Alignment condition For Symptom 2, Alignment condition, two symptom bands ranging from 1.9 to 2.1 and 2.9 to 3.1 orders (i.e. one band around 2X and the other around 3X) has been set. This will result in a sum of the two bands. Intellinova Parallel INS MB 4V –...
- Page 35 Application Example - Pumps Channel 4 (Pump volute) - Measuring assignment 1, Symptom 3: Impeller condition For Symptom 3, impeller condition, a symptom band ranging from 4.9 to 5.1 orders (a band around 5X) has been set, assuming that the pump have 5 vanes on the impeller. NOTE: If the pump has a different number of vanes, set a band around that number instead (e.g.
- Page 36 Application Example - Pumps Channel 4 (Pump volute) - Measuring assignment 2, Overall acceleration: Symptom 1: Non synchronous signals (e.g. cavitation) This image shows both the overall acceleration setting and the setting for symptom 1: non-synchronous signals (e.g. cavitation). Acceleration has been selected as measuring technique, Order Tracking has been selected, together with 6400 line resolution with 500 orders (2 Hz as low frequency limit).
-
Page 37: Modbus Register For Measuring Results
Application Example - Pumps Modbus Register for Measuring Results *Register numbers represent the CMA results. Register data are two 16 bit registers to be interpreted as float CDAB. This is a list of the Modbus register values for the results. –... -
Page 38: Extracting Time Signals And Spectrums
Application Example - Pumps Extracting Time Signals and Spectrums using an external program These steps should be followed when extracting time signals or spectrums from the INSMB4V unit using an external program. The INSMB4V unit is a Modbus slave and the external program represents a Modbus master. NOTE: For a channel with 2 or 3 measuring assignments, only the result from the latest assignment will be saved. -
Page 39: Measuring Assignments For Online Mode
Application Example - Pumps Example: Extracting a time signal from the latest measuring assignment on Channel 1. It is assumed that a configuration of the measuring as- signments already has been made according to step 1 on the preceding page. Then: •... -
Page 40: Appendix A - Register Specification
Appendix A APPENDIX A – Register Specification for Intellinova Parallel MB INSMB4V This document provides information about the registers used by the 4 channel vibration measuring unit INSMB4V. The intention is that this document should be used when a MODBUS master should configure the measuring unit and read the measured results. -
Page 41: Overview Of Registers
Appendix A Overview of Registers Table Name, Register Name Description Type Number Discrete Output I/O 1-6 RW To write the state of I/O 1-6 Coils, Read-Write Discrete Input 10 001-10006 I/O 1-6 RO To read the state of I/O 1-6 Contacts, Read-Only 30997... -
Page 42: Specification: Discrete Output Coils
Appendix A Specification: Discrete Output Coils These coils are of type Read-Write and have an address offset = 1. The data defines the state of the I/O port 1-6. "1" activates a high side switch in the hardware that drives the output high. Coil Bits Name... -
Page 43: Specification: Analog Input Registers Channel 1-4
Appendix A Specification: Analog Input Registers Channel 1-4 Registers 31007-31102 stores the results from the latest measurement made on VIB channel 1. Registers 31103-31198 stores the results from the latest measurement made on VIB channel 2. Registers 31199-31294 stores the results from the latest measurement made on VIB channel 3. Registers 31295-31390 stores the results from the latest measurement made on VIB channel 4. - Page 44 Appendix A 31 051- 31 147- 31 243- 31 339- FLOAT Ass B2 CMA CMA of second result from assignment 2 31 052 31 148 31 244 31 340 CDAB 31 053- 31 149- 31 245- 31 341- FLOAT RPM Min 2 The min value of RPM from assignment 2 31 054 31 150 31 246...
-
Page 45: Specification Of Status Register
Appendix A Specification of Status Registers The four registers 31009, 31105, 31201 and 31297 shows the status for ch1, ch2, ch3 and ch4. The tables below translates each bit for register Status 1. Name Description ON/OFF Channel is active TLT Error DSP error DSP Time Out Time out between Host processor and DSP... -
Page 46: Overview: Analog Output Holding Registers
Appendix A Overview: Analog Output Holding Registers Registers 40001-40006 are shared by all channels and register 40009-41296 are divided equally between channels 1-4. The address offset is 40001. Register Data Quantity Name Number Adresses 40 001 Alarm Type 40 002 Alarm condition 40 003 Auto reset... -
Page 47: Specification: Analog Output Holding Registers Common Registers
Appendix A Specification: Analog Output Holding Registers Common Registers These registers are used by all channels,1,2,3, and 4. This means that the alarm conditions must be the same for all channels. Register Type Bits Name Description Number 40001 Unsigned Alarm type Type of delay: 0: No delay 1: Delay based on time... -
Page 48: Specification: Analog Output Holding Registers Ch1-4
Appendix A Specification: Analog Output Holding Registers Ch1-4. Assignment 1 for ch 1 is defined by registers 40019-40112, assignment 2 is defined by registers 40113-40206 and assignment 3 is defined by registers 40207-40300. Assignment 1 for ch 2 is defined by registers 40341-40434, assignment 2 is defined by registers 40435-40528 and assignment 3 is defined by registers 40529-40622. - Page 49 Appendix A 40 038 40 360 40 682 41 004 Unsigned Orders No. of orders to use for Order based measure- ment 40 039 40 361 40 683 41 005 Unsigned S Band From 1 The lowest band selected for symptom 1 40 040 40 362 40 684 41 006 Unsigned S Band From 2 The lowest band selected for symptom 2 40 041 40 363...
- Page 50 Appendix A 40 093- 40 415- 40 737- 41 059- FLOAT S Band Alarm 1 The alarm limit used for symptom 1 40 094 40 416 40 738 41 060 CDAB 40 095- 40 417- 40 739- 41 061- FLOAT S Band Alarm 2 The alarm limit used for symptom 2 40 096 40 418 40 740 41 062...
- Page 51 Appendix A 40 136 40 458 40 780 41 102 Unsigned S Band To 1 The highest band selected for symptom 1 40 137 40 459 40 781 41 103 Unsigned S Band To 2 The highest band selected for symptom 2 40 138 40 460 40 782 41 104 Unsigned S Band To 3 The highest band selected for symptom 3 40 139- 40 461-...
- Page 52 Appendix A 40 193- 40 515- 40 837- 41 159- FLOAT CMA S Band The alarm limit used for the CMA value of 40 194 40 516 40 838 41 160 CDAB Alarm 1 symptom 1 40 195- 40 517- 40 839- 41 161- FLOAT CMA S Band The alarm limit used for the CMA value of 40 196 40 518 40 840...
- Page 53 Appendix A 40 235- 40 557- 40 879- 41 201- FLOAT S Band high 1 The high limit of Band 1 40 236 40 558 40 880 41 202 CDAB 40 237- 40 559- 40 881- 41 203- FLOAT S Band low 2 The low limit of Band 2 40 238 40 560 40 882 41 204 CDAB 40 239-...
- Page 54 Appendix A 40 293 40 615 40 937 41 259 Unsigned I/O Alarm Red A The I/O port to use for the red alarm on the first measurement (A) 40 294 40 616 40 938 41 260 Unsigned I/O Alarm B The I/O port to use for the red and yellow alarm on the second measurement (B) 40 295 40 617...
-
Page 55: Terminology
Appendix A Terminology Name Description Cumulative Moving Average, CMA is used to smooth out short-term fluctuations and highlight long-term trends. An integer value >=1 defined by the user is used to adjust how fast CMA reponds to a change of the input signal. HDm/HDc Similar to dBm/dBc but the measurement of HDm/HDc has a better performance for lower RPM since it uses order tracking. - Page 56 Intellinova Parallel INS MB 4V – 54 – 72123 B...
Need help?
Do you have a question about the intellinova parallel MB INS MB 4V and is the answer not in the manual?
Questions and answers