Table of Contents
Advertisement
Quick Links
Advertisement
Chapters
Table of Contents

Subscribe to Our Youtube Channel
Related Manuals for SPM leonova emerald


Summary of Contents for SPM leonova emerald
- Page 1 P O RTA B L E E F F I C I E N C Y...
- Page 3 Measurement techniques always included RPM, temperature, ISO 2372 vibration and stethoscope Shock pulse measurement SPM HD, SPM dBm/dBc, SPM HR/LR, SPM LR/HR HD and SPM Spectrum Vibration mesurement ISO 10816 vibration, HD ENV, EVAM vibration analysis, FFT with symptoms Rotor balancing Single plane balancing 71971 B 2018.01...
-
Page 4: Safety Notes
When the life cycle of the product is over you can return it to your local SPM representative for proper management, or dispose of it together with your other electronic waste. -
Page 5: Table Of Contents
General instrument functions Contents Leonova Emerald ............... 3 ® Instrument overview ............... 4 Charge the battery pack ............5 Start / Check battery status ........... 6 About Leonova ............... 6 Navigation ................7 Defining shortcut keys and menu options ......8 Reset .................. - Page 6 General instrument functions...
-
Page 7: Leonova Emerald
Condmaster Ruby. ® Leonova Emerald is always programmed for the meas- 14661 uring techniques described in chapter C. Other diag- nostic and analytic functions, for shock pulse measure- ment, vibration measurement and rotor balancing, are user selected. -
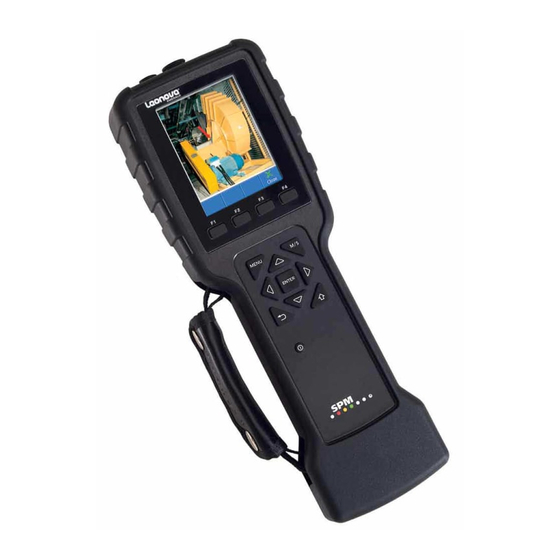
Page 8: Instrument Overview
8 pin Lemo connector RPM: Input for RPM/temp probe, NPN/PNP sensors incl. 12 VDC power supply and stroboscope control, SPM: Shock pulse transducer input , mini coax 5 pin Lemo connector Strap holders Communication port, mini USB Headphones / headset, 3.5 mm stereo mini plug... -
Page 9: Charge The Battery Pack
SPM 16644 Leonova can be connected to 100 - 240 VAC via an optional battery adapter, SPM 16644, when using i.g. long time recording. Replace the battery pack in Le- onova with the battery adapter and connect it to the AC adapter. -
Page 10: Start / Check Battery Status
Start / Check battery status Leonova is started with the ON/OFF key. The display will shut down when not used within 10 minutes (de- fault setting) and the Leonova goes to “sleep mode”. By pressing the ON/OFF key the Leonova immedi- ately will go to “sleep mode”. -
Page 11: Navigation
Navigation The Leonova main screen is divided into three areas: • the menu bar (1) • the display window (2) • the function bar (3). The function bar shows actions controlled by the function keys F1 to F4. The functionality of the keys F1 to F4 can be changed to your personal settings (see next side). -
Page 12: Defining Shortcut Keys And Menu Options
Defining shortcut keys and menu options The functionality of the keys F1 to F4 can be modified to personal shortcuts. These settings apply to all measurement modes. • Open a measurement function and press MENU. • Press the MENU key and hold down for 3 seconds to enter the ‘Modify mode’ (1). • Mark a line in the list with UP/DOWN and open the shortcut key list (2) with F1. -
Page 13: Reset
The calibration reminder icon (1) in the upper right cor- ner of the display shows when the Leonova is used for the recommended period and is to be sent to a by SPM authorized service establishment in your local area. -
Page 14: Instrument Settings
Instrument settings The seven files in the ‘Settings’ window contain the general instrument settings. With a new Leonova, the first task is to check the available functions and to adjust the instrument. Press SHIFT+ F3 to open the instrument settings window, or press the MENU key and select ‘Settings’... -
Page 15: General Settings
‘Possible to determine rpm from spectrum’ makes it possible to get the rpm by setting out a marker in the spectrum. ‘Default FFT calculation for SPM HD’ is normally selected. If turned off it affects all SPM HD and LR/HR HD assignments. A:11 General instrument functions... - Page 16 This selection (1) affects the measure- ment window. ‘Measuring point name . .’ repeats the name on a separate line. Settings for the ‘Measure All’ function: Show ‘Measure All’ on separate line, show ‘Measure All’ information dialog and open summary view after ‘Measure All’...
-
Page 17: Set Date / Time
Display setting. You can change the backlight brightness (1). In- crease or decrease with LEFT/RIGHT arrow keys. You can name your instrument (2). The name ap- pears when communicating with the computer. If you have not named the instrument the instru- ment serial number will be displayed. -
Page 18: Register Transducers
Transducer type SPM 40000/42000/44000 is added automati- cally in the register and can not be edited or deleted. The instru- ment can also work with SPM DuoTech transducers and any other transducer of IEPE (integrated electronic piezoelectric) type with voltage output. Transducers of not IEPE type which do not require power supply, like velocimeters, can also be used. -
Page 19: Default Transducers
Default transducers Default transducers for shock pulse and vibration measuring techniques are set up via the transducer register. Default transducer is the active transducer when ‘Portable’ transducer is selected under ‘Measuring point data’. Press SHIFT+F3 to open ‘Settings’. Select ‘Transducers’ and press F1 (OK) to open the transducer register (1). -
Page 20: User Defined Transducers
User defined transducers Other types than vibration transducers can be used, e.g. amp clamp, pressure and flow sensors, that connects to the VIB input. These are set up in the transducer register as ‘User defined’ transduc- ers. To register a user defined transducer, open ‘Set- tings’... -
Page 21: Edit Text And Numbers
Edit text and numbers Change TAB (1) = SHIFT + LEFT/RIGHT Change character line (2) = UP/DOWN Capitals = hold down SHIFT Delete = press F4 Confirm = press ENTER Select tab (1) with SHIFT + LEFT/RIGHT ar- row keys. The tabs corresponds to a set of numbers or alphabetical letters. -
Page 22: Select Language
English is always included. If an additional language is desired , please contact your lo- cal SPM representative. Change font, size and style The ‘Fonts’ menu under ‘MENU/Settings’ allows you to make individual changes of font, style and size for any of the listed alternatives (2). -
Page 23: Create Measurement Files
Create measurement files The file ‘Create default settings’ (1) under ‘Set- tings’ is very important. It creates measurement files for all measuring techniques and places them under the measuring technique windows. You cannot use Leonova as a stand-alone meas- uring instrument without these files. The installation is simple: Press MENU and open ‘Settings’. -
Page 24: Order Functions
Order functions After buying Leonova Emerald, optional func- tions can be ordered from your SPM supplier. You will receive the text file Leonova.txt. It is coded to the instrument’s license and also contains a running package number. The files have to be loaded in package number order. -
Page 25: Maintenance And Repair
Maintenance and repair Replacement of the protection foil, wrist wrap and and exchange of battery pack are the only repair actions allowed. All other repair actionsare not allowed. Send the instrument to a by SPM authorized service establishment in your local area. -
Page 26: Communication With The Pc
Communication with the PC Leonova connects to the PC via the USB cable CAB 94. Leonova communicates with • Leonova Service Program. • Condmaster Ruby ® Place both programs into the same folder on your To start communication, press SHIFT+ F1 to open the communication mode, or select ‘Communica- tion’... -
Page 27: Upgrade Leonova Software
To load a new or updated language file, select ‘Transfer language file to instrument’. Language files translated for an older software version may cause some text elements in the pro- gram to fall back to english language. Please contact your local SPM representative for an updated language file (*.llf). -
Page 28: Safety Copies Of Leonova Files
Safety copies of Leonova files The Leonova Service program is also used to make safety copies of all measurement files saved in Leonova, and to reload these files to Leonova when needed. Leonova safety copies must have the extension ‘lsc’; the rest of the file name is your choice. -
Page 29: Reload Safety Copies Of Leonova Files
Reload safety copies of Leonova files To reload a safety copy, • Connect Leonova to the PC. • Open ‘Communication’ on the instru- ment. • Start the Leonova Service program on the PC. • Select ‘Reload safety copy’. • Select the file to be loaded, click OPEN. • Select ‘Reload all files’ or ‘Reload single file’. ‘All files’ will erase the present files on Leonova. Continue with YES when you get the warning. -
Page 30: File Management In Leonova
File management in Leonova The ‘File’ menu contains all user created measurement files, with one exception. The file ‘Communication’ (1) is a system file which cannot be renamed or deleted. The default files for single measurement functions remain on their function menu unless you save them as a user created file under another name. -
Page 31: List Of Icons
SPM HD measurement. 1. Go to main function SPEED. 2. A speed measurement. SPM LR/HR HD measurement. 1. Go to main function SPM. 2. SPM dBm/dBc and LR/HR measurement. SPM Spectrum measurement. Go to main function VIBRATION. Transducer Line Test. -
Page 32: Technical Specifications
SPM input Housing: ABS / PC / TPE Shock pulse channels: 1 Protection class: IP65 Measuring techniqes: SPM HD, dBm/dBc, LR/HR and LR/HR HD Dimensions: 306 x 108 x 71 mm Transducer line test: TLQ test (12.4” x 4.3” x 2.8”) - Page 33 CODE A to D, evaluated yellow/red green-yellow -red. LUB no. for oil film condition, COND no. for surface condition. Shock pulse method SPM HD Expert Additional function to: HDm/HDc, LR/HR SPM Spectrum Output quantity: Time signal HD, SPM HD Additional function to:...
- Page 34 Vibration severity ISO 2372 Vibration analysis, EVAM / FFT with symptoms Frequency limit, Measurement quantities: velocity, RMS value in mm/s lower: 0 (DC) to 200 Hz over 10 to 1000 Hz Frequency limit, upper: 8 to 20 000 Hz (EVAM) Evaluation table 8 to 10 000 Hz (FFT) selection:...
- Page 35 General measurement functions Contents Leonova measurement functions ..........3 Measuring modes ..............3 Transducer Line Quality, TLQ ..........4 Measurement with default files ..........5 Measurement with edited default files ........6 Single measurement user files ..........7 Multi-measurement user files ..........8 Recording ................
- Page 36 General measurement functions...
-
Page 37: Leonova Measurement Functions
For each measurement, the user can input a comment as text or voice recording. Measuring modes Leonova is primarily designed as a data logger. Measuring rounds, complete with all input data for evaluated measurements, are downloaded from a PC running the SPM software Condmaster ® Ruby. -
Page 38: Transducer Line Quality, Tlq
Transducer Line Quality, TLQ The instrument can be set up to perform a transducer line quality test (TLQ) before measurement. Testing the quality of signal transmission between transducer and instrument is essential because, in a poor transducer line, part of the signal will be lost. This in turn means that measuring results will be lower than they should be. -
Page 39: Measurement With Default Files
Measurement with default files Measurement with default files is used for a ‘once only’ check, where you do not need to save the measuring result. Default files are available for all measuring techniques and are activated with the menu option ‘Create default settings’ under MENU >... -
Page 40: Measurement With Edited Default Files
‘Variable speed’. To the right is an example showing the default settings for SPM HD measurement (1), all of which can be edited. In the second screen shot (2), shaft diameter and RPM have been input, and the meas- uring time set to equal 10 revolutions. -
Page 41: Single Measurement User Files
Single measurement user files When closing a default file with the ‘Save as file’ option (1) you will be prompted to input a file name via the keyboard window (2). The file will then be accessible from the FILE window (3). The file thus saved keeps both the edited measur- ing point data and the measuring results. -
Page 42: Multi-Measurement User Files
Multi-measurement user files Further measuring techniques can be added to a single measurement user file after it has been saved under a name and appears in the FILE window. Press ENTER to open the file. Press the MENU key and select ‘Add technique’ (1). This opens the ‘Add technique’... -
Page 43: Recording
Leonova: • a shock pulse transducer on the SPM input • one vibration transducer on the vib input • a tachometer or temperature probe on the ta-... -
Page 44: Measuring Rounds From Condmaster
Measuring rounds from Condmaster For efficient, systematic condition monitoring, Le- onova is used as a data logger. Measuring points are set up in Condmaster and downloaded to Leonova, complete with all input data for any or all of the supported measuring techniques. For instructions, see the ‘Working with Condmaster Ruby’... - Page 45 The function ’Download all round data’ under Data Transfer > Settings in Condmaster is activated by default and means that all measuring rounds and their measuring points for the current database is downloaded to the instrument, but without meas- urement results. This function is the basis for the functions ’Add downloaded measuring point’...
- Page 46 TIP: When standing in a measuring round, you can press SHIFT+F4 to jump to the default transducer setting (12) which can be useful if you need to change default transducer for a measuring point. TIP: When standing on a measuring point, you can press MENU and select ’View details’...
-
Page 47: Measuring Rounds For Condid
Measuring rounds for CondID CondID is a contact free memory tag used for measuring point recognition. It is hung on the adapter cap or strapped in a suitable place on the machine. It should not be mounted flat against a metal surface. -
Page 48: The Measuring Sequence
The measuring sequence Measuring with Leonova, especially data logging with downloaded, fully configured files, is very easy. Default files Files configured in Condmaster 1 Select a file (technique menu). 1 Select a file (FILE menu). 2 Open the file. 2 Open the file and select a measuring point. •... -
Page 49: Measurement Window Before Measuring
Measurement window before measuring The measurement window has three parts, the result field (A), the measuring point field (B) and the function bar (C). Their contents differ, depending on the type of measurement file and measuring technique used. The figure below shows a downloaded round with the dBm/dBc technique active, before pushing the MEAS key. -
Page 50: Measurement Window Before Saving
Measurement window before saving The measurement is started by connecting the transducer and pressing the MEASURE/SAVE (M/S) key, or selecting the ‘Measure all’ command (press function key F1). The measuring result (1) is displayed in the measurement field (A) and the status is shown by a larger status icon (2) on top of the alternatives. -
Page 51: The 'Measure All' Function
The ‘Measure all’ function Under all measuring points in Leonova, the ‘Measure all’ command appears above the list of measuring assignments (1). The purpose of this function is to speed up the execution of measuring rounds. All types of assignments under a measuring point are measured simultaneously with exception of RPM measurements, user defined measurements, assignments triggered by RPM and assignments... - Page 52 Press F1 ’Measure all’ to start measuring. You will be prompted to connect transducers and/or input manual data. When a RPM result is saved the value will be transferred to the subsequent measurement points under the same component. If a measuring point under the component has a different ’Max RPM’...
-
Page 53: Conditional Measurements
HDm reading was above a user defined limit. If an SPM HD measuring assignment has a condition associated with it, the hint ‘FFT on limit >=...’ (1) is displayed. This condition means that a full SPM HD... -
Page 54: Comments
Comments The MENU option ‘Set comment’ (1) is open for all types of measurements. Comments are made up of a ‘standard comment’ (2) and an optional free text (3) of up to four lines. The present date and time are set automatically in the field ‘From date/time’... -
Page 55: Graphics Window
Graphics window The graphics window shows measuring results as dots (1) against a neutral scale or, in case of evalu- ated measuring results, a condition scale (2). Alarm limits defined in Condmaster are marked by thin horizontal lines (3). The type of measuring result (4) is selected in the measuring result window. Up to 100 measuring results can be downloaded with a measuring round from Condmaster. -
Page 56: Measuring Result Window
If a measur- ing point has an image associated with it, the image can be viewed in Leonova Emerald (1). Images are accessed from the measurement window. With the measuring point name marked (2), press the F4 key (‘View image’) (3). -
Page 57: Live Spectrum Window
Live spectrum window The live spectrum window (1) shows a continuously updated spectrum with 200 lines, irrespective of other settings. The window will come up before measuring with the vibration measuring techniques and rotor balancing. This function is activated MENU > ‘Settings’ > ‘Gen- eral settings’... -
Page 58: Spectrum Window
Spectrum window Below the spectrum field (A) are functions (B) which are reached using the instrument function keys in combination with the SHIFT key. The spectrum diagram is marked with the (displayed) range (1) in Hz, CPM or Orders, depending on the default setting made under ‘General settings’. -
Page 59: Spectrum Functions
Spectrum functions Regarding display and available functions, there is no difference between a vibration spectrum and an SPM spectrum. The spectrum type is recognised from the measurement unit and the amplitude unit. Zoom To zoom in on the X axis of the spectrum, press the F1 key (‘Zoom’) (1) > F1 (‘Zoom X’) (2) . This zooms the display around the center of the current view. - Page 60 The purpose of a spectrum is to reveal line patterns as- sociated with machine or bearing faults. Characteristic for many fault patterns is the presence of ‘multiples’ or ‘harmonics’, which means that the line (or group of lines) is repeated two, three or more times further up in the spectrum.
- Page 61 The F1 (‘Measuring result’) key opens a window with further options for the spectrum window; use the UP/ DOWN arrow keys to select a symptom (1) for display, and the function keys F1 (‘Previous result’) and F2 (‘Next result’) to toggle between measuring results. ‘Symptoms’...
- Page 62 The effect of a logarithmic Y-scale is illustrated to the right, using a downloaded vibration spectrum. The amplitude scale of a spectrum is automatically scaled to accommodate the largest spectrum line (1). Thus, a dominant line will make most others invisible, which is desirable, because the lines containing very little energy are insignificant for the evaluation of ma- chine condition.
-
Page 63: Highlighted Symptoms In The Spectrum
Highlighted symptoms in the spectrum The following examples show different options on the ‘Settings’ menu and their effect on the spec- trum display. A. Symptoms are not marked in the spectrum. B. The symptom name is shown (1). The symptom line is marked with a red dashed line (2) if a match is found in the spectrum. - Page 64 The previous page illustrated the three basic alternatives on the ‘Settings’ menu with single line symp- toms. Below are examples of multi-line symptoms. D. Same as B, but containing the first harmonic at BPFI plus three harmonics, altogether four possible matches (5). In this example, the match found by Leonova agrees with the obvious peaks in the spectrum: all dashed lines are on top of the largest lines (5).
-
Page 65: Multi-Line Symptoms With Harmonics
Multi-line symptoms with harmonics The symptom register in Condmaster contains a number of symptoms searching for groups of lines. These are of three kinds: harmonics of a single frequency line side bands to a single frequency line harmonics of a side band pattern. Note that ‘harmonics’... - Page 66 Harmonics of a side band pattern tend to put a lot of highlighters into the spectrum, which can be confusing. There is also a strong possibility that the multiples of the basic pattern overlap. In the symptom shown below (H, I), the number of side bands has therefore been reduced to two on either side of the center line.
-
Page 67: Waterfall Diagram
Waterfall diagram The waterfall diagram is a three dimensional display of up to 99 vibration spectra. The different readings are displayed along the Z coordinate, with the latest reading in the front. To display a waterfall diagram, press the F3 key (‘Spec- trum’) in the measurement window. -
Page 68: Phase Spectrum
Phase spectrum If a time signal is measured together with a tachometer pulse, a phase spectrum can be displayed. To view a phase spectrum, go to the Spectrum window and press MENU > ‘Phase spectrum’ (1). The blue cursor (3) is displayed by default. It can be removed with F2 (‘Cursor’) >... -
Page 69: The Time Signal
The time signal For vibration and SPM HD measurements, the time signal can be saved. It can be seen directly after measuring and before saving, or by calling up any stored measurement for the active measuring point. The measuring unit (1) is always the signal unit. The diagram is scaled peak to peak (Y axis) and shows the total sample time (2) along the X axis. - Page 70 To zoom in on a time range, press the F1 key (‘Zoom’) (1) > F1 (‘Zoom X’). This zooms the display around the center of the current view. To zoom sideways while in zoom mode, press SHIFT + F1 (zoom left) or F2 (zoom right).
-
Page 71: Determine Rpm From Spectrum
Determine RPM from spectrum It is possible to determine rpm from a vibration spec- trum when the measurement is performed without specifying the rpm. To activate this function, go to MENU > ‘Settings’ > ‘General Settings’ > ‘File’ tab (1) and mark ‘Possible to determine rpm from spectrum’... -
Page 72: Hd Order Tracking
HD Order Tracking HD Order tracking is an optional Leonova function primarily used for SPM HD and vibration analysis on variable speed machines. The method uses multiples of rotational speed (orders), rather than absolute frequency (Hz). The number of orders to be shown is input by the user. Leonova will then automatically set the sampling frequency to an exact multiple of the measured rpm. - Page 73 Measurement techniques always included Contents Measurement techniques always included ......3 RPM measurement ..............4 RPM measurement with default file ........5 Temperature measurement ........... 7 Temperature measurement with default file ......8 User defined (manual input) ..........9 User defined (manual input) with default file ......9 Vibration severity measurement ..........
- Page 74 Measurement techniques always included...
-
Page 75: Measurement Techniques Always Included
• Temperature measurement, User defined (manual input) • Stethoscope (available function under Speed, Shock pulse, Vibration, Temperature) These measurement techniques and the equipment needed to use them are described in this chap- ter with the exception of the SPM HDm/HDc and LR/HR technique described in Chapter D. Measuring points containing the free techniques can be downloaded from Condmaster Ruby, fully configured and ready for measurement. When the default files under the technique windows are used, the analog measurements and the vibration measurement normally require a configuration under ‘Measuring point data’. -
Page 76: Rpm Measurement
RPM measurement The SPM laser tachometer/IR temperature probe TTP 10 is used for both optical and contact RPM measurement. It is connected to the transducer input marked RPM on Leonova. A blue LED indicator on the Tachometer and Temperature probe TTP10 lights when reflected ligth hits the sensor. Input for tachometer/tem- perature probe TTP10 Reflecting tape TTP 10 5–... -
Page 77: Rpm Measurement With Default File
RPM measurement with default file Please note: to evaluate bearing condition and to make sense of a vibration spectrum, one has to know the rpm of the shaft. This type of RPM measurement is made as part of the shock pulse or vibration measurement, where the RPM technique is automatically included when the point is configured for ‘variable speed’. - Page 78 Contact measurement For contact measurement, you place the contact adapter over the lens and fix a contact centre or a wheel. The shaft in the adapter has a reflecting surface, and each revolution sends one light reflex to the counter. The contact centre is pressed firmly into the cavity at the centre of the shaft, and the probe is aligned with the shaft’s centre line.
-
Page 79: Temperature Measurement
Temperature measurement The SPM laser tachometer/IR temperature probe Input for tachometer/tem- TTP 10 is used for temperature measurements in perature probe TTP10 the range of –20 to +300 °C (–4 to +572 °F). Meas- uring accuracy is ± 2.5° C. The probe has an infrared sensor that allows you to accurately measure the temperature of a surface without having to come in contact with it. -
Page 80: Temperature Measurement With Default File
‘User defined’ window (1). There are no settings under ‘Measuring point data’. The result is displayed with a decimal, but please note that the accuracy of the SPM laser tachometer/IR temperature probe is ± 2.5 °C. The change from °C to °F is made under ‘General settings’ (2) in the SETTINGS win- dow. -
Page 81: User Defined (Manual Input)
User defined (manual input) During a measuring round, a reference value of preferred quantity can be saved in rela- tion to the other measuring values. Leonova Emerald is missing the option for analog signals, but there is a possibility to manually input a user defined measuring value such as current, flow, pressure, etc. -
Page 82: Vibration Severity Measurement
Vibration severity measurement Vibration severity measurement according to ISO 2372 is a broad band measurement over the frequency range 10 to 1000 Hz. It returns the RMS value of vibration velocity in mm/s (or inch/s). This value is representative of the energy contents of machine vibration, and thus of the destructive forces acting on the machine. It is still widely regarded as a good and easy to obtain indicator of general machine condition. -
Page 83: Definition Of Machine Classes According To Iso 2372
Definition of machine classes according to ISO 2372 The following text is a quotation from ISO 2372 (1974, E, page 6, Annex A). This ISO Recommenda- tion has also been published as British Standard (BS 4675, part I). A similar vibration classification of industrial machinery can be found in VDI 2056. -
Page 84: Measuring Points For Vibration
To get comparable results, the measuring points should be clearly marked, so that the measurements can always be taken in the same spots and important, at the same speed. SPM vibration transducers can be used Transducer with magnet • as a hand-held probe, with or without the probe tip attached. -
Page 85: Measuring Point Data For Iso 2372
Measuring point data for ISO 2372 The only measuring point data that should be edited are ‘Direction’ and ‘Class’ (1). Press SHIFT+ F3 to open ‘Measuring point data’. For both, the alternatives are selected from lists after marking the line and pressing F1 ‘Edit’. The selected measuring direction appears as measuring point name in the measurement window (2). The selected machine class effects the evaluation of the measuring result (3). -
Page 86: Using The Stethoscope Function
ENTER key. Adjust the amplifica- tion (7) with the LEFT/RIGHT arrow keys. The ‘High frequency mode’ is always activated when using SPM 40000 and 42000 transducers of type 42000 and 44000. Vibration transduc- transducers ers are working in the audiable frequency range and ‘High frequency mode’ (6) can not be used. - Page 87 Input data for SPM dBm/dBc ..........20 Measuring SPM dBm/dBc ............. 22 Using the earphones ............23 The LR/HR and SPM LR/HR HD techniques ......24 Input data for LR/HR and LR/HR HD ........25 Accumulation and compensation ......... 26 LR/HR values and CODE ............
- Page 88 Shock pulse measurement...
-
Page 89: Shock Pulse Techniques
The basic principles for LR/HR and LR/HR HD are the same; however LR/HR HD utilizes the SPM HD algorithms for time TYPE 3 signals and spectrums. Both methods are most advantageous for RPMs above 500. -
Page 90: Rules For Spm Measuring Points
Rules for SPM measuring points The rules for the selection of SPM measuring points have a very practical purpose. We are trying to catch low energy signals which are getting weaker the farther they travel and the more they are bounced about inside a piece of metal. - Page 91 When a measuring point cannot conform to the rules (because an ideal spot cannot be reached), make allowance for a weaker signal. If you use SPM LR/HR, you have a COMP no. to compensate for weak signals, but must still try to find a good point.
-
Page 92: Examples Of Spm Measuring Points
Examples of SPM measuring points The following pages show measuring point s and possible adapter or transducer installations. How to install measuring equipment is described in the SPM installation manual. Through hole for long adapter A measuring point beneath a fan cover (1) can be reached with a long adapter, through a hole in the cover. - Page 93 Multiple bearings in one housing If there are several bearings in the same housing, they are normally treated as a single bearing. In the bearing arrangement for a vertical pump (4), it is not possible to distinguish between the shock pulses from the paired bearings in point 1.
-
Page 94: Equipment For Shock Pulse Measurement
Equipment for shock pulse measurement Handheld transducers Two types of handheld transducers are available for shock pulse measurement with Leonova: • Shock pulse transducer with quick connector, TRA79, for use with permanently installed TRA79 measuring adapters. Shock pulse transducer with quick connector • Shock pulse transducer with probe, TRA78. Permanently installed transducers Permanently installed transducers can be used in narrow spaces or when the bearing cannot be reached directly. - Page 95 Equipment for shock pulse measurement Headphones The headphones allow you to listen to the shock pulse pattern and is helpful for verifying and tracing the shock EAR12 pulse sources. Three types of earphones are available: Headphones • Headphone in ear defenders, EAR12, headset, with with fixed cable.
-
Page 96: Transducer With Quick Connector
The choice of transducer type depends on how the measuring point is prepared. For systematic shock pulse monitoring, SPM recommends the use of installed adapters and the quick connect transducer wherever possible. All three types of shock pulse transducers are connected to Leonova’s ‘SPM’... -
Page 97: Permanently Installed Transducers/Terminal
Use a measuring cable to connect Leonova to the terminal. The terminal cabinet, SPM 14318, can receive up to 16 coaxial cables from shock pulse and vibration transducers. The cabinet is made of stainless steel and has protection class IP66. -
Page 98: Shock Pulse Transducer With Probe
The only part likely to wear out is the rubber sleeve for the probe tip. It is made of chloroprene rubber (neoprene) and tolerates 110° C (230° F). Spare sleeves have part number 13108. SPM 13108 Neoprene, 110° C (230° F) D:12 Shock pulse measurement... -
Page 99: The Spm Hd Measuring Technique
The SPM HD measuring technique Life time The SPM HD measuring technique is a refinement of the original dBm/dBc measuring technique (see page D:18), which has been successfully applied for more than 40 years. It is well suited for industrial condition monitoring, because it works with few, easy to understand in- and output data and with ‘reasonable accuracy’. -
Page 100: Normalized Condition Readings
Normalized condition readings Absolute scale (shock value) HDi = Initial value of a bearing Normalized scale HDc = Carpet value (weak pulses) (condition) HDm = Maximum value (strong pulses) HDn = Unit for normalized shock level dBsv = Unit for absolute shock level The absolute shock pulse level of a bearing, measured in dBsv (decibel shock value), is both a function of rolling velocity and of bearing condition. -
Page 101: Input Data For Spm Hd
Measuring points for the SPM techniques are normally set up in Condmaster and then downloaded to Leonova. However, it is possible to open the Leonova default file in the SPM window (1) and configurate all measuring parameters. Select ‘SPM HD’ and open with ENTER. - Page 102 When using ‘Post trigger’, input a value (HDsv) under ‘Trigger level’. In the above example (5), Leonova will initiate an SPM HD measurement and wait for the signal’s HDsv level to reach 25 before it starts a complete measurement including time signal and FFT. Make sure you input a viable trigger level; if the level is never reached, the measurement must be aborted manually.
-
Page 103: Transducer Line Quality
Under ‘Delay time’, you can specify a number of seconds during which Leonova will delay the start of measurement. This setting is optional. Acquisition time The ‘Acquisition time’ is automatically updated when parameters are changed that affect the time. Transducer line quality Transducer line quality test, TLQ From the measurement window, the instrument can be set up to perform a transducer line quality test... -
Page 104: Measuring Spm Hd
Measuring SPM HD When the MEASURE/SAVE (M/S) key is pressed, Leonova samples the transducer signal for two seconds. A preliminary result is displayed in the measurement window. The HDm shown is the amplitude value of the strongest shock pulse registered during the measuring time. -
Page 105: The Dbm/Dbc Measuring Technique
The original SPM dBm/dBc measuring technique has been successfully applied for over 40 years and continues to be widely used. Like its successor the SPM HD measuring technique, dBm/dBc is well suited for industrial condition monitoring and requires only few, easy to understand in- and output data. -
Page 106: Input Data For Spm Dbm/Dbc
Measuring points for the SPM techniques are normally set up in Condmaster and then downloaded to Leonova. However, it is possible to open the Leonova default file in the SPM window and configurate all measuring parameters. Select ‘dBm/dBc’ and open with ENTER. - Page 107 An SPM spectrum measurement can be carried out along with the dBm/dBc measurement. It is measured in addition to the ordinary shock values. Mark the ‘SPM Spectrum’ row (4). Press ENTER and set ‘SPM Spectrum’ to ‘Yes’. Settings for SPM Spectrum are described on page D:33.
-
Page 108: Measuring Spm Dbm/Dbc
Measuring SPM dBm/dBc From the measurement window, the instrument can be set up to perform a transducer quality line test (TLQ) before measurement. Press the ENTER key to enable or disable the TLQ test (1). TLQ (Transducer Line Quality) is described on page D:17. -
Page 109: Using The Earphones
Earphone listening does not work with the LR/HR and SPM HD technique. The measuring threshold is changed with the UP/DOWN arrow keys on the Leonova keypad. -
Page 110: The Lr/Hr And Spm Lr/Hr Hd Techniques
To increase accuracy, the mean diameter of the bearing is used, the SPM TYPE no. is input to define bearing geometry, and the COMP no. to calibrate the individual measuring points. -
Page 111: Input Data For Lr/Hr And Lr/Hr Hd
In roller bearings, there is line contact, which means that the area under pressure, where the shock pulses occur, is much larger. For SPM purposes, bearings are grouped into 8 different types, each with a TYPE number 1 through 8. The types are described in the table above. -
Page 112: Accumulation And Compensation
COMP (compensation number) is used to calibrate the measuring point, normally to compensate for a somewhat weaker signal from a measuring point that does not quite comply with the SPM rules. To find the correct COMP no., use the LUBMASTER function in Condmaster ®... -
Page 113: Lr/Hr Values And Code
LR/HR values and CODE For LR/HR values, the measuring unit is dBsv, i.e. these values are measured on the absolute shock pulse scale and do not, by themselves, express operating condition. The term delta value simply means the difference between LR and HR. The operating condition of the bearing is expressed by the CODE letter, the LUB no., and the COND. -
Page 114: The Lub Number
The LUB number Full The most important influence on the lubrication service life of a bearing is the lubricant film between the load carrying rolling elements and the raceway. By preventing or inhibiting metallic contact bet ween the loaded bearing par t s, the Boundary lubricant film reduces the local peak stress lubrication... -
Page 115: The Cond Number And Error Codes
The COND number and error codes The COND No. (condition number) is displayed with CODE B, C, and D, i.e. for all bearings with reduced or bad condition. It indicates the degree of surface deterioration or damage in the rolling interface. Large (visible) surface damage typically leads to a very marked increase in the bearing’s LR readings and a high delta value. -
Page 116: Input Data For Lr/Hr And Lr/Hr Hd
Input data for LR/HR and LR/HR HD Measuring points for the SPM techniques are normally set up in Condmaster and then downloaded to Leonova. However, it is possible to open the Leonova default file in the SPM window and configurate all measuring parameters. - Page 117 An SPM spectrum measurement can be carried out along with the LR/HR measurement. It is measured in addition to the ordinary shock values. Mark the ‘SPM Spectrum’ row (10). Press ENTER and set ‘SPM Spectrum’ to ‘Yes’. Settings for SPM Spectrum are described on page D:33.
-
Page 118: Measuring Lr/Hr And Lr/Hr Hd
COND graphs will not be shown for unnormalized readings. When using the LR /HR HD technique, the produced ‘SPM Spectrum HD’ and ‘Time signal HD’ are shown by pressing the function keys (6). Save the result by pressing the MEASURE/SAVE (M/S) key, or measure again with SHIFT + M/S. -
Page 119: Measuring An Spm Spectrum
Measuring an SPM Spectrum An SPM spectrum measurement can be carried out along with either SPM dBm/dBc or SPM LR/HR. It is measured in addition to the ordinary shock values. Please note that the spectrum has a secondary role in bearing condition evaluation. The primary measure for bearing condition is the evaluated shock pulse measurement. -
Page 120: Editing Spectrum Data
Editing spectrum data An SPM Spec trum is based on the amplitude modulation of a high frequency signal. It shows periodic pulses as frequency lines. Thus, if the signal contains a strong pulse that is repeated at one second intervals, there will be a high amplitude line at 1 Hz. - Page 121 SPM spectrum type One unit for amplitude in an SPM Spectrum (6) is SD (Shock Distribution unit), where each spectrum is scaled so that the total RMS value of all spectrum lines = 100 SD = the RMS value of the time record.
- Page 122 D:36 Shock pulse measurement...
- Page 123 Vibration measurement Contents Vibration analysis techniques ..........3 Measuring points for vibration ..........4 Measuring point configuration, ISO 10816 ......5 Guide for machine classification ..........7 Data for ISO 10816 part 2 ............8 Data for ISO 10816 part 3 ............9 Data for ISO 10816 part 4 ............
- Page 124 Vibration measurement...
-
Page 125: Vibration Analysis Techniques
Vibration analysis techniques Leonova can be programmed with the following vibration measurement techniques with either limited or unlimited use. ISO 10816 is the measuring technique based on the ISO standard with this number. ISO 10816 consists of several parts, each stating measurement conditions and a table of limit values for a defined machine type. -
Page 126: Measuring Points For Vibration
RMS value can be quite sufficient to accurately establish machine condition. To get comparable results, measuring points should be clearly marked, so that the measurements can always be taken in the same spots. SPM vibration transducers can be used • as a hand-held probe, with or without the probe tip attached. Not recommended above 1000 Hz. -
Page 127: Measuring Point Configuration, Iso 10816
Measuring point configuration, ISO 10816 Measuring points for ISO 10816, EVAM and FFT with symptoms are normally set up in Condmaster and then downloaded to Leonova. However, it is possible to open the Leonova default file in the vibration window (1) and configure all measuring parameters. Please note that most of the settings become locked once the measurement has been made. - Page 128 To evaluate a spectrum, you need to know the RPM of the shaft at the time of vibration measurement. Mark ‘Variable speed´ (1). This forces a speed meas- urement before you can measure the vibration. ‘Time signal unit ‘(2) can be ACC, VEL or DISP. On the line ‘Save’ (3) you determine the type of measuring results you want. There are five alterna- tives. ‘Time signal (FFT calculated)’ saves the time signal and calculates the FFT. ‘Full spectrum’...
-
Page 129: Guide For Machine Classification
Guide for machine classification Machine condition evaluation according to the ISO 10816 standard requires a correct classification of the monitored machine. So far, ISO 10816 consists of six parts. Part 1 contains general guide lines. Parts 2 to 6 describe 5 different machine types. Most of these have sub divisions, each with its own set of limit values defining acceptable and unacceptable vibration levels. -
Page 130: Data For Iso 10816 Part 2
Data for ISO 10816 part 2 ‘Part’ refers to a sub division of the ISO standard. So far, parts 2 to 6 have been published. Marking a part number displays the definition of the machine type treated in the part. In case the machine you want to monitor is a ‘large land-based steam turbine generator set in excess of 50 MW’, part 2 is your obvious choice. -
Page 131: Data For Iso 10816 Part 3
Data for ISO 10816 part 3 Part 3 treats most of the common industrial machines. They are divided into 4 groups: Group 1 Large machines with rated power above 300 kW and not more than 50 MW; electrical machines with shaft height above 315 mm. Group 2 Medium machines with rated power above 15 kW up to and including 300 kW;... -
Page 132: Data For Iso 10816 Part 4
Data for ISO 10816 part 4 Part 4 is limited to ‘Gas turbine driven sets excluding aircraft derivates’. The standard also states a power output of at least 3 MW. For this part, input the RPM of the turbine. This does not affect the vibration limit values but the upper frequency limit of the measure- ment, up to 5000 Hz for a turbine speed of 20000 RPM. -
Page 133: Data For Iso 10816 Part 6
Data for ISO 10816 part 6 Part 6 is for ‘Reciprocating machines with power rating above 100 kW’. For this type of machinery, the standard provides 7 tables with limit values. Depending on the vibration level when the machine is new and in good condition, the user is supposed to select one of these tables as a norm for the machine. -
Page 134: Measurement Results, Iso 10816
Measurement results, ISO 10816 Depending on the part of the standard and the machine group, ISO 10816 gives limit values for displacement (DISP) and either velocity (VEL) or acceleration (ACC). Leonova automatically adjusts the measurement quan- tity display to the selected part and group In this case, Leonova will display the evalu- ated result in DISP, VEL and ACC, because all three parameters are returned when Part 6 is selected. -
Page 135: Making A Vibration Assignment
Making a vibration assignment A proper measuring point for FFT with symptoms or EVAM has to be made in Condmaster using the Condition Manager. In Leonova, you can set up an vibration assign- ment, returning a set of condition parameters and single spectrum measured in accordance with the parameters you input under ‘Measuring point data’. -
Page 136: Defining The Assignment
Defining the assignment To evaluate a spectrum, you need to know the RPM of the shaft at the time of vibration measurement. Mark ‘Variable speed´ (1). This forces a speed measurement before you can measure the vibration. With ‘Measuring point data’ you can edit the meas- uring parameters. Open with SHIFT+F3 and mark the lines in the configuration window one by one with the UP/DOWN keys. Open them with F1, ‘Edit’. - Page 137 Window To compensate for the leakage effect introduced by the FFT process, a window function is usually applied. The user should choose the appropriate window (1) function for the specific application. If the windowing is not applied correctly, errors may be introduced in the FFT effecting amplitude, frequency or even the overall shape of the spectrum.
- Page 138 FFT type Four different FFT types FFT types (1) can be selected: ‘Linear spectrum’ consists of RMS values on a linear scale. Each value is the equivalent of the RMS value of a sinusoidal signal of the correspondent frequency. If the spectrum unit is velocity, v, the amplitude scale is accordingly: v ‘Amplitude spectrum’...
- Page 139 Enveloping filter Enveloping is a technique used to detect low energy vibration typically caused by gear and bearing damage. This type of damage tends to modulate the amplitude of high frequency vibration, e. g. at the natural frequency of the transducer. To suppress all vibration in the lower frequency ranges, a high pass (HP) filter is set at 1000 or 2000 Hz (1). To suppress vibrations in both the lower and...
- Page 140 Zoom centre and zoom factor True zoom (1) is selected to get a high resolu- tion around a selected ‘centre frequency’. This frequency must be within the selected frequency range. Thus, to zoom in on 600 Hz, the minimum range is 0 to 1000 Hz. The zoom factor can be set to 2, 4, 8, 16, 32 or 64.
-
Page 141: Measurement Results
Measurement results Press the M/S key to measure or F1 ‘Measure all’ for a measurement in a round. If the rpm assignment is set up with ‘Pseudo Tac’ in Condmaster, this will automatically be acti- vated and indicated together with the rpm (1). The ‘Pseudo Tac’ function is described in the CondmasterUser Guide. - Page 142 ‘Peak’ and ‘Peak to peak’ values are displayed in the selected time signal unit. Press F2 to see the full scale graphics where you can re-scale the axis, set comments etc. (see part B of this manual). Change graph by pressing F3 in the graphics window. Pressing F1 (Previous) and F2 (Next) toggles between the different graphs.
-
Page 143: Making Hd Env Assignments
Making HD ENV assignments HD ENV is an ideal complement to conventional vibration techniques. Capable of detecting at a very early stage such machine problems which are generally difficult to find in good time with non-enveloping techniques, for example bearing damages and gear damage, the method utilizes cleverly engineered algorithms for digital signal processing to obtain optimal data for trending purposes. -
Page 144: Defining The Assignment
Defining the assignment With ‘Measuring point data’ you can edit the meas- uring parameters. Open with SHIFT+F3 and mark the lines in the configuration window one by one with the UP/DOWN keys. Open them with F1, ‘Edit’. Variable speed The alternative ‘Variable speed’ (1) implies that the vibration measurement is preceded by a measurement of the rpm. - Page 145 Enveloping filter (Hz) To detect damages or anomalies in different stages, a number of predefined high pass and band pass filters are available. The band pass filters are named filter 1- 4. Filter 1 and 2 are normally used for special applications and filter 3 and 4 for gear and bearing damage.
-
Page 146: Measurement Results
Measurement results Press the M/S key to measure or F1 ‘Measure all’ for a measurement in a round. If the rpm assignment is set up with ‘Pseudo Tach’ in Condmaster, this will automatically be activated and indicated together with the rpm (1). The ‘Pseudo Tach’ function is described in the Condmaster User Guide. - Page 147 Press F3 to see the HD ENV Spectrum (1). This is useful to determine where a possible bearing damage is located. It is also useful for trending purposes (applying symptom and band values). The spectrum is displayed in HDeu or HDeuE when an enhancement factor is used. Pressing F4 (2) toggles between Hz, CPM and, if rpm is measured, orders. Press F4 to see the HD ENV Time Signal (3). This is extremely useful to locate where in the bearing a possible damage is located.
-
Page 148: Motor Current Analysis
Motor current analysis Motor current analysis can be performed with the EVAM vibration analysis technique using a current clamp (e.g. Fluke i1000s) or a permanently installed current tranformer connected to the VIB input. BNC adapter This feature is used for troubleshooting, primarily Current clamp 93487 (Fluke i1000s) on electrical motors with at least 70% workload. NOTE: It is important to follow safety precau- CAB 97IS tions and that the measurement is performed... - Page 149 To start measurement, open an existing measure- ment under ‘File’ or make a new EVAM assign- ment. Assignments can be set up in Condmaster for downloading in measuring rounds. Select the EVAM technique and press ENTER to make a new assignment. Press SHIFT+ F3 to open ‘Measuring point data’.
- Page 150 E:28 Vibration measurement...
- Page 151 Rotor balancing Contents Balancing methods ..............3 Balancing equipment ............. 4 General settings ..............5 Default transducer for balancing measurement ..... 6 Unbalance ................7 Measuring unbalance ............. 8 Four run method ..............9 Two run method ..............9 Transducer selection and speed measurement ....10 Run without trial weight ............11 Trial weight calculation ............
- Page 152 Rotor balancing...
-
Page 153: Balancing Methods
It requires time synchronised vibration measurement (trigger pulse supplied by a pulse from the SPM tachometer probe or a proximity switch) to find the relative phase angle between the two vibration measurements. -
Page 154: Balancing Equipment
10 meter cable CAB83. For the 2-run methods, a trigger pulse is needed which is either supplied by a proximity switch or by the SPM tachometer probe TTP10. The laser dot from the tachometer probe is directed towards a piece of reflecting tape pasted on the shaft. -
Page 155: General Settings
General settings To make general settings for the balancing func- tion, press the MENU key and select ‘Settings’ > ‘General settings’, then use the F2 key to select the ‘Balancing’ tab. Your selection under ‘Counter rotational degrees’ affects the way the angles are displayed while balancing. -
Page 156: Default Transducer For Balancing Measurement
Default transducer for balancing measurement The ‘Registration of vibration transducers’ proce- dure is described in Part A of this manual. Before starting vibration measurements, make sure that the vibration transducer you are using with your Leonova is properly registered, configured and selected. -
Page 157: Unbalance
Unbalance A rotor is unbalanced when the centre of its mass does not co-incide with the shaft centre. Position? This condition can be described as the rotor having a ‘heavy spot’ somewhere along its circumference. If we know the position and weight of this heavy spot, we can reduce it by taking away mass or, more often, put a counterweight on Counter... -
Page 158: Measuring Unbalance
Measuring unbalance Unbalance causes excessive vibration. However, excessive vibration can have any number of other causes. Thus, before attempting to balance a rotor, we must first check that there is in fact an unbalance problem and make sure that other vibration causes, such as loose parts and misalignment, are eliminated. -
Page 159: Four Run Method
Four run method Using four runs, three of them with the same trial weight fixed first at 0°, then at 120° and 240° along the rotor circumference, is the traditional balancing method. It is important to run the machine at the same speed at all measurements. -
Page 160: Transducer Selection And Speed Measurement
Transducer selection and speed measurement The balancing procedure is menu guided. Select the method, then simply follow the instructions on the instrument screen. The first steps are common for all methods. Start with selection of transducer. The transducer selected under ‘Transducer register’ will be displayed as default. -
Page 161: Run Without Trial Weight
Run without trial weight Set the frequency range for the spectrum to ‘Automatic’. Leonova will calculate the suitable range from the RPM data up to approx. 5x. If the machine is running at low speed < 600 RPM, the frequency range should be set to 500 or 1000 Hz to save time during measuring. -
Page 162: Trial Weight Calculation
Trial weight calculation The trial weight must be large enough to create an unbalance but not so heavy as to create dangerous vibrations. To edit the test weight, press the F3 function key (‘Edit test weight’) and use Leonova to calculate a suitable weight (1). -
Page 163: Run(S) With Trial Weight
Run(s) with trial weight The position where the trial weight is attached automatically becomes the 0° position on the rotor. All angles are given with this point as a reference. For the 4-run method, you first measure V with the trial weight at 0°, then V with the weight at 120°... -
Page 164: Display Of Results
Display of results The calculation results are the mass of the balancing weight and the angle defining the 0° position where it has to be attached. The display shows the direction of rotation and the position of 90°. On the side of the display (1) there is a row of function keys that allow you to select alternatives to adding mass at the indicated spot (see next page). -
Page 165: Alternatives For Balancing Weights
Alternatives for balancing weights Leonova calculates a number of alternatives for correcting the unbalance: Graphical check of calculation results. Split the correction mass: Input the number of rotor partitions to distribute the correction mass between two of them. Radial displacement: Input the change in radial distance to recalculate the weight. -
Page 166: Trial Run And Log
Trial run and log After balancing weight application, a trial run can be made to measure vibration after balancing. If balancing was successful, the vibration at 1X should be considerably lower. The information in the ‘Applied balancing weight’ window is optional. It will appear in the balancing log file. -
Page 167: Finishing The Balancing Job
Finish the balancing job To close and save a balancing job, press BACK (1). The display shows three alternatives (2): • ‘Save changes and close’ - after entering a file name (3), this function saves the balancing work in a file which will be stored in the ‘File’ menu (4), see below. -
Page 168: Create Report
Create report To print out or save a balancing report, do the following: • Connect Leonova to the PC. • Start the Leonova Service Program and select ‘Balancing report’ (1). • Select a balancing file saved under the ‘FILE’ menu and press OK. •... -
Page 169: Iso Balancing Standard 1940-1
ISO balancing standard 1940-1 Determination of permissible residual unbalance The recommendations are given based on experi- ence concerning the balance quality requirements of rigid rotors, according to type, mass and service speed. There are three methods used to determine the permissible residual unbalance (U • Empirical quality grades derived from long term practical experience from a large number... - Page 170 F:20 Rotor balancing...
Need help?
Do you have a question about the leonova emerald and is the answer not in the manual?
Questions and answers