Advertisement
Advertisement

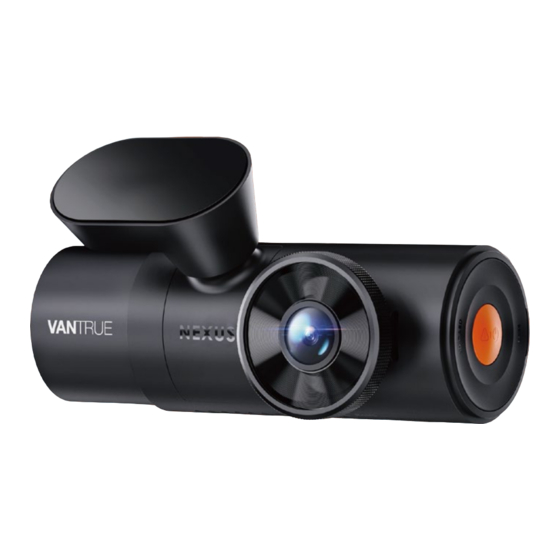
Related Manuals for Vantrue Nexus 4 Pro


Summary of Contents for Vantrue Nexus 4 Pro
- Page 1 3-Channel Voice Controlled Smart Dash Cam User Manual Nexus 4 Pro (N4 Pro)
- Page 2 Hey, find us here: www.vantrue.net/contact facebook.com/vantrue.live...
-
Page 3: Table Of Contents
CONTENTS What’s in the box? Camera Overview Installation Basic Operation Specifications Warnings Warranty & Support... -
Page 4: What's In The Box
G. Electrostatic H. Crowbar I. Dust-free Cloth Stickers*2 3-Channel Voice Controlled Smart Dash Cam Quick User Guide Nexus 4 Pro (N4 Pro) J. Warning Stickers K. 3M Adhesive L. User Guide Stickers*2 Optional Accessory M. CPL Filter N. Wireless Remote... -
Page 5: Camera Overview
2. Camera Overview VTE22L1577 1. Front Camera 2. 3.19" IPS screen 3. Infrared Lights for Cabin Camera 4. Cabin Camera 5. TYPE-C Port for Connecting Rear Camera Cable or Transferring Data 6. Serial Number 7. TYPE-C Port for Charging 8. Memory Card Slot 9. - Page 6 KEYS AND FUNCTIONS No. Key Instruction In the power-on state, long press to turn off the camera; in the power-off state, short press to turn on the camera. In the recording interface, short press to turn on emergency recording and snapshot.
- Page 7 option or file and long press to scroll through the options or files below. When playing a file, short press to pop up a menu for deleting files. During video recording, long press to turn on/off Wi-Fi; In the menu setting and file browsing interface, short press to return to the previous interface.
-
Page 8: Installation
S for privacy recording Number E for event recording 3. Installation 3.1 Inserting a Memory Card (Recommended: Vantrue high-speed microSD card). You need to push the memory card(Memory card capacity: 32GB -512GB, card speed requirements: U3/ Class10/A2) into the slot with your fingernail (in the direction shown) until you hear a "click"... - Page 9 Format SD Card Format SD Card Format SD Card Format successful REMINDER: • The dash cam has certain requirements for the card speed of the memory card. It requires a U3/Class10/ A2 memory card. If the card speed is not fast, there may be problems such as missing files, frequent error reporting by the memory card, and abnormal video files.
- Page 10 3.2.2 Car Charger Installation Connect one end of the car charger to the car cigarette lighter and the other end to the Type C port on the front camera mount. Start the ignition, waiting for the dash cam to start. 3.2.3 Power on the Dash Cam to Select the Installation Location Before installing the N4 Pro front camera, please turn it...
- Page 11 the protective film from No.2. Remove the 3M tape from the mount, then fix the mount and camera on the electrostatics stickers. 3.2.5 Front Camera Installation Remove the protective film from the mount, then fix the mount and camera on the electrostatics stickers. 3.2.6 Rear Camera Installation Please select the installation position on the rear windshield.
- Page 12 Please scan the QR code for the relevant version below to download the app and install it. Search for the "Vantrue" app in App Store or Google Play Store to find the app and then download and install it on your phone.
- Page 13 3.4 Wi-Fi Connection The camera's Wi-Fi will automatically turn on for 10 minutes when the N4 Pro dash cam is turned on, and the Wi-Fi will automatically turn off after 10 minutes of no operation. Users can re-enable the camera's Wi-Fi through shortcut keys, voice control or go to the menu to set these 3 ways.
- Page 14 Note: Before connecting to the camera's Wi-Fi, please check • if the phone's Wi-Fi function is on. The initial password for this device is only used for • initial login. In order to prevent potential security risks, please be sure to change the initial password after the initial login to prevent others from logging into your device without authorization or other adverse consequences.
- Page 15 3.5 APP Connection Camera Setting Mileage Statistics Camera Correction Full-screen Icon Auxiliary Line Microphone ON/OFF Stop Recording Icon Switching Front, Cabin and Rear Displays Snapshot Album After entering the APP real-time preview, you can do the following operations. Video preview: After the APP connects to the recorder successfully, the recorder enters the real-time preview page, click the full screen button or cell phone horizontal playback, the real-time...
- Page 16 APP, please refer to 4.2.12 content description for details. 3.6 APP Upgrade Open "Vantrue" App, connect the camera Wi-Fi, go to "Settings> About", click "Detect new version", the App will automatically detect whether the App version is the latest version.
-
Page 17: Basic Operation
4. Basic Operation 4.1 Menu Settings The N4 Pro dash cam has 3 function menus, which are: record setup, system set up, and files. You can set your dash cam according to your requirements with these function setting. Press the button, pause the video first, then press button to enter the menu settings. - Page 18 1080P+1080P 30FPS; 1080P+720P 30FPS; 720P+720P 30FPS Front Recording: 3840x2160P 30FPS; 2560x1440P 30FPS; 1920x1080P 30FPS; 1280x720P 30FPS -Loop Recording: Default setting is 1 min. You can choose the options among 1/3/5 min and OFF. -IR LEDs: The default setting is Auto. You can set it to auto/off/ on.
- Page 19 -Stamp: Enable or disable the watermark stamp on video and photos. The watermark stamp includes time and date label, VANTRUE label, license plate number, GPS location information, and speed label. All enabled by default. -Time Lapse: The default value is disabled. You can choose to enable 1FPS/5FPS/10FPS/15FPS.
- Page 20 Wi-Fi mode is 5G by default. Wi-Fi information displays the Wi-Fi name and Wi-Fi password. -Voice Control: The default sensitivity is Standard. Voice commands can be recognized after the option is turned on. You can choose options such as low sensitivity/high sensitivity/standard/off.
- Page 21 50Hz or 60Hz frequency according to different regions. -System Info: Check the current model, firmware version, and the Vantrue official website. -Certification Info: You can view the certification information of N4 Pro dash cam. -Default Settings: Reset the device back to factory settings.
- Page 22 and private mode video. The file name format of Loop Recording video is: 20300128_140933_0008_N_A.MP4; the file name format of Parking Mode video is: 20300128_140833_0007_P_A.MP4; the file name format of Time-Lapse video is: 20300128_140733_0006_T_A.MP4; the file name format of Time-Lapse video is: 20300128_140633_0005_S_A.MP4 -Photo: Photos files.
- Page 23 Note: • The normal operation of the loop recording function is very dependent on the speed of the memory card, so please format the memory card regularly to avoid problems such as excessive memory card files and card aging that affect the normal loop recording. •...
- Page 24 pictures during the locking recording period. After the emergency recording is finished, the video will be automatically saved in the emergency video folder and the photo will be saved in the photo folder. 2160P+1080P+1080P 30FPS 00:00:37 14:25:35 06-01-2023 MP/H Note: •...
- Page 25 2160P+1080P+1080P 30FPS 00:00:37 14:25:35 06-01-2023 MP/H Low-light Night Vision Off 2160P+1080P+1080P 30FPS 00:00:37 14:25:35 06-01-2023 MP/H Low-light Night Vision On 4.2.4 Motion Detection Area The detection range of the front camera and rear camera can be set on the N4 Pro dash cam, and the set range can be adjusted up and down as well as left and right.
- Page 26 • Please use Vantrue hardwire kit for ACC hardwire, ACC hardwire kit from other brands may not work. If the dash cam is in an extremely hot environment, •...
- Page 27 mode from being overwritten in a loop, please check and save the required files in time to prevent loss. Collision Detection When collision detection is enabled, the icon will be displayed on the recording interface, indicating that the dash cam is currently in collision detection mode. The sensitivity of the collision detection has 1 to 5 levels of sensitivity can be adjusted.
- Page 28 Motion Detection When the motion detection is turned on, the icon will be displayed on the recording interface, indicating that the dash cam is currently in motion detection mode. You can go to "Motion Detection Area" in the menu settings to set the detection area. 2160P+1080P+1080P 30FPS 00:00:37 14:25:35...
- Page 29 2160P+1080P+1080P 30FPS 00:00:37 14:25:35 06-01-2023 MP/H If no movement is detected after 5 minutes of recording, there will be a icon that appears in the center of the screen. The resolution of all current video will be automatically switched to 1080P 15FPS or 720P 15FPS for recording, and the recording duration will be determined according to the currently set loop recording duration.
- Page 30 2160P+1080P+1080P 30FPS 00:00:37 14:25:35 06-01-2023 MP/H In low frame rate recording mode, a icon is displayed in the center of the screen to indicate that the low frame rate recording parking mode has been entered. [Normal Recording Time = Low Framerate Recording Time (Sec) x Recording Frame Rate FPS/Low Framerate Option] (Time should be converted into seconds) Note:...
- Page 31 Note: • The privacy file will be saved in the Normal folder with the "S" character added to the file name. For example: 20300128_140633_0006_S_A.MP4; • If loop recording is turned off, privacy mode cannot be started. • Privacy mode cannot be started if the G-sensor function is turned off.
- Page 32 4.2.8 Voice Control You can control the camera with voice command, such as take photo, video start, turn on/off Wi-Fi, lock the video, etc. Currently supported languages are English, Japanese, Russian, and Chinese. For more detailed voice commands, please go to System Settings > Voice Content to view them.
- Page 33 Wi-Fi of the camera, and open the automatic time correction function in Vantrue APP, so the camera will correct the time zone of the camera according to the time zone of your phone.
- Page 34 Note: GPS automatic time correction needs to set the correct time zone, you can refer to the representative cities of each time zone. 4.2.11 Viewing and Deleting Video/Photos a.Viewing files on the Camera After clicking "Files," enter any folder, and after opening the video folder, you can press the button to select the next file, or press the...
- Page 35 b. Viewing files on a Computer Connect the included TYPE-C USB data cable to the camera and the computer. After the connection is successful, the icon will appear on the display of the camera to transfer data, and then you can view the video files in the computer folder.
- Page 36 4.2.12 N4 Pro Dash Cam Firmware Upgrade Upgrade method 1: Upgrade via file Go to VANTRUE website to download the latest N4 Pro dashcam firmware, copy the firmware file to the root directory of the memory card, then insert the memory...
- Page 37 Upgraded Files Upgrade method 2: OTA upgrade OTA (Over the Air) Firmware Update After opening the APP, if you receive an update reminder of the dashcam software, please confirm the upgrade, and then it will jump to the OTA upgrade interface, and then upgrade according to the APP guidelines.
- Page 38 - 35 -...
-
Page 39: Specifications
5. Specifications The specifications of this product may change without prior notice due to product improvements. Model N4 Pro Novatek high-performance Chips processor Image Sensor Sony CMOS Sensor G-sensor 3-Axis G-sensor Screen 3.19” IPS Screen Wi-Fi Built-in 2.4GHz&5GHz Camera Angle Front: 158°... - Page 40 720P+720P 30FPS Single front recording mode: 3840x2160P 30FPS; 2560x1440P 30FPS; 1920x1080P 30FPS; 1280x720P 30FPS Built-in microphone and speaker Audio Memory Storage External: 32GB-512GB Micro SD Card, U3, A2 Class 10 (not included in the package) Type C USB Port Power Source Built-in super capacitor Video File Format Supply voltage...
-
Page 41: Warnings
• Firmware upgrade will be carried out from time to time to further improve the product, please pay attention to the official notice of VANTRUE according to the specific upgrade. This product can record and save images of vehicle •... -
Page 42: Warranty & Support
Please use this product within the scope of the law. 7. Warranty & Support Warranty The VANTRUE® N4 Pro Dash Cam comes with a full 12 months warranty. If you register your product on our official site (www.vantrue.net/register), you can extend the warranty to 18 months.
Need help?
Do you have a question about the Nexus 4 Pro and is the answer not in the manual?
Questions and answers