Table of Contents
Advertisement
Quick Links
Advertisement
Table of Contents
Troubleshooting

Related Manuals for Tuttnauer TIVA2


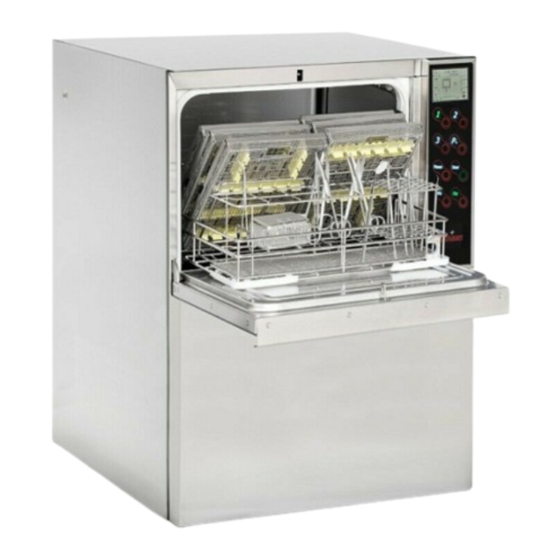
Summary of Contents for Tuttnauer TIVA2
- Page 1 WASHER DISINFECTOR TIVA2 TIVA2 - H INSTRUCTIONS FOR USE Original instructions Code MAN205-0717001EN - Rev. 08 Before starting to operate with Edit. 02-2023 the washer disinfector, read Language: English these instructions for use Firmware version: 00B03...
- Page 2 Tuttnauer Europe b.v. Hoeksteen 11, 4815 PR P.O.B. 7191, 4800 GD Breda - The Netherlands Tel. +31 (0) 765 423 510 - Fax +31 (0) 765 423 540 E-mail: info@tuttnauer.nl - Web: www.tuttnauer.com Models covered by the manual: TIVA2 | TIVA2-H...
-
Page 3: Table Of Contents
Index 1 Symbols used in the manual ....4 6.4 Starting the machine..... . 27 2 Presentation . -
Page 4: Symbols Used In The Manual
Operative Instructions 1 Symbols used in the manual WARNING! The manufacturer also declines any and all liability for failure to comply Actions of particular importance or of potential risk and with the safety and prevention regulations danger are highlighted in the manual with a symbol provided by the legislation and the provisions whose meaning is set out below. -
Page 5: Field Of Application
Operative Instructions - The TT model is the classic model of washer - baby bottles and teats; disinfector with small-sized product bowls, which - ward end utensils such as kidney dishes, bowls. can be positioned on any piece of furniture capable 2.1.2 Intended users of withstanding its weight, common within a dental Specialized personnel capable of working in a CSSD,... -
Page 6: Warranty
Operative Instructions Ö IMPORTANT NOTE! The purchaser will only Symbol Description be able to enforce its warranty rights if it For the disposal of the machine has complied with any additional conditions please refer to chapter "Equipment concerning the warranty service, also Disposal". -
Page 7: Product Analysis
Operative Instructions All disputes arising from or in connection with these Before proceeding with the various operations, the Terms shall be judged exclusively pursuant to the above listed operators, must have carefully read and Italian laws, without giving effect to its conflicts of become familiar with this manual. -
Page 8: Technical Data
Operative Instructions 2.6 Technical data • Process requirements for the various stages of the process. Description The main factors for good inlet water quality in relation 595 mm 595 mm Width to the effectiveness of washing are: 23.4" 23.4" HARDNESS Depth with 520 mm 520 mm... -
Page 9: Main Components Of The Machines
Operative Instructions 2.6.1 Main components of the machines Fig. 2.1 Fig. 2.2 TT model UC model 1) Upper door with tempered glass or stainless steel in the corresponding version. 2) Internal chamber. 3) Lower drawer door with lock. 4) Upper door opening handle. 5) Detergent tanks for detergent, rinse aid and/or neutralizing product. -
Page 10: Pictograms Specification
Operative Instructions 2.6.2 Pictograms specification Each device is equipped with hazard pictograms. The following table shows the symbols used: Symbol Description Hot parts Electrical shock Ground mass Fig. 3c Equipotential Emergency door release 2.7 Accessories The machine leaves the factory without any accessory or basket. -
Page 11: Safety And Prevention
Operative Instructions Fig. 3i Fig. 3f Fig. 3l - 3a: Standard basket with holder for handpieces with integrated filter. Fig. 3g - 3b: Holder with 12 positions for handpieces with integrated filter. - 3c: Insert for small trays/cassettes. - 3d: Insert for large cassettes. - 3e: Standard basket for washing various instruments. -
Page 12: General Warnings
Operative Instructions awkward use of the machine remains high. Distraction, cable and the water flexible hoses. carelessness and too much confidence are often cause • Do not install the machine in the same room where of injuries; as well as tiredness and sleepiness. It is, patients are housed. -
Page 13: Maintenance Service Personnel Obligations
Operative Instructions • Do not change, for any reason, the characteristics of • It is strictly forbidden to remove or tamper with the the appliance, its installation specifications and the safety devices. parameters set. • The machine maintenance must only be performed •... - Page 14 Operative Instructions - Handle the packaged machine only with forklift truck or pallet trucks with forks (Fig. 4.1). - Remove the “hat” container, extracting it from the top (Fig. 4.2). - Handle the machine with appropriate trolley. Lock the machine on the trolley with a sturdy belt (Fig. 4.3) Do not lift the machine by grasping it from the protruding points, such as the control panel.
-
Page 15: Storage
Operative Instructions If the machine is to be moved, it is advisable to keep the Before machine positioning make sure that: packaging for any other relocation. - All the components needed for installation and proper use of the machine were installed: main switch, water If this is not provided, dispose of the packaging supply taps, drain and anything else needed. -
Page 16: Stand-Alone Installation
Operative Instructions without exchange of air with the room environment. machine (not provided). - The socket must be accessible after the machine 5.2 Stand-Alone Installation installation. This facilitates verification of the electrical If the machine is positioned isolated with respect to a safety, e.g. -
Page 17: Water Connection
Operative Instructions - The electrical connection must be carried out in The quality of the water used must be compatible with compliance with current technical regulations. the manufacturing materials of the machine, with the - Make sure that the primary voltage reading chemicals and with the process needs in the various corresponds to the voltage indicated on the machine stages of the procedure. -
Page 18: Models With Built-In Water Softener
Operative Instructions Cold Deionized water water* water Min. 5°C 45°C 5°C temperature 41°F 113°F 41°F Max. 20°C 70°C 20°C temperature 68°F 158°F 68°F Recommended 300 kPa 300 kPa 300 kPa flow pressure 43 PSIG 43 PSIG 43 PSIG Min. flow 200 kPa 200 kPa 200 kPa... -
Page 19: Regeneration Salt
Operative Instructions Hardness in The salt must be introduced through the chamber Setting French degrees Regeneration outlet inside the tank (4 Fig. 9). To introduce the salt, parameter [°fH] unscrew the cap (anti-clockwise) and fill the tank with 36-40 Value 6 every 6 cycles salt funnel, paying attention not to pour salt outside the bowl then close the tank with the cap. -
Page 20: Connection Of The Drain Trap
Operative Instructions 5.5 Connection of the drain trap - The hoses may be hung up using the accompanying hose holder. The machine is equipped with a built-in drain trap which must be mandatorily connected to the drain Ö system of the building. IMPORTANT NOTE! The manufacturer is not liable in case of environmental pollution due The user must carry out periodic maintenance of the... -
Page 21: Chemicals
Operative Instructions 5.7 Chemicals the relative central pin inside the chamber. The washer disinfector adopts as standard a detergent dosing pump (neutral or alkaline detergent is recommended). - On request, the TT model can be equipped with a second pump for dosing the neutralizer or rinse aid. - On request, the UC model can be equipped with a second pump for dosing the neutralizing agent and a third pump for dosing the rinse aid. -
Page 22: Refill Procedure
Operative Instructions 5) Close the front door with the key. For the UC model: 1) Prepare a new tank with the chemical. 2) Open lower compartment door with the key. 3) Remove the suction lance from the tank to be replaced. -
Page 23: Using The Machine
Rinse aid Deconex 64 Neutradry 6) After running 3-4 washing tests, clean the water Manufacturer: Tuttnauer filters placed in the lower compartment of the Detergent machine (Fig. 9). T-Clean Alkaline Detergent 7) Check that the drain trap does not show water leaks... -
Page 24: Before Use
Operative Instructions 2) Remove the basket if inserted, in order to have full 2) Move the key as shown in the figure to unlock the visibility of the washing chamber. door. 3) Press and hold the button corresponding to the 3) Upon the door unlock take out the key. -
Page 25: Summary Of The Basket Loading Operations
Operative Instructions - Make sure that the instruments do not come out of - When arranging the load, make sure that the spray the containers. arms are not blocked by the load itself. - Make sure that the instruments do not fall of the - After treatment, the transmission instruments basket or inserts and do not hang from the grid bars. -
Page 26: Treatment Of Dental Instruments
Operative Instructions 6.2.4 Treatment of dental instruments use chemicals during the last rinse. - Rinse the hollow instruments after the application and check that the deionized water passage is free WARNING! Insert only instruments before the automatic treatment. suitable automatic treatment - Insert the hollow instruments into the rinse bar, washer... -
Page 27: Starting The Machine
Operative Instructions Selecting the program To select the programs available, use key P1, P2, P3 or P+ (to select programs from 4 to 40) on the control panel (Fig. 17). 6.4.2 Starting the program WARNING! Always follow the indicated procedures. Inattentive and frivolous use of electrical devices may lead to risks for the operator. -
Page 28: Program End
Operative Instructions stable for the holding time. The cleaning liquid is Check the results at the end of the cleaning process. automatically introduced before the start of the The instruments must be completely clean and dry. holding time. Ö Rinse IMPORTANT NOTE! Hollow instruments with Rinse is carried out with cold water, if the machine is a small internal diameter must be dried... -
Page 29: Control Panel
Operative Instructions 7 Control Panel Description of the control panel (Fig. 17): 1) P1 The control panel consists of 8 keys and a 3.5 inch LCD STD: select program 1; display. All keys, except key "3", are multi-function, SPC: "1" character for the custom password; depending on the action being performed in a specified SPC: navigate upward in the menu;... -
Page 30: Display
Operative Instructions 7.2 Display differ from each other by more than 2°C (36°F); 10) Time for which the device should maintain the set The LCD display shows the status of the machine. temperature (see 12); The images show the various phases and the current 11) Phase of the program;... - Page 31 Operative Instructions Ö IMPORTANT NOTE! The door must be tightly 3) Optional: once the program is selected, the screen closed until you hear the classic closing for selecting the user will appear. Press the key P1 «click», otherwise the program will not start. or P2 on the control panel to navigate upward and forward in the user list.
-
Page 32: Program 2 Standard
Operative Instructions 7.2.4 Program 2 STANDARD Phase 3 8) At the end of the prewash phase, the water is Phase 1 automatically discharged. 5) The machine starts the automatic work cycle and discharges any residual water present in the chamber. Fig. - Page 33 Operative Instructions 11) When the water reaches the 35°C (95°F), the 14) Rinse phase begins: the machine will rise the water peristaltic pump 1 will dose the detergent. temperature to the presetted value and will keep it for the presetted time. Fig.
- Page 34 Operative Instructions Phase 8 17) Self-loading of deionized water. During the self- loading phase the chamber will be filled. Fig. 20.20 Phase 9 20) At the end of the disinfection phase, the water is Fig. 20.18 automatically discharged. 18) Rinse phase begins: the machine will rinse the instruments while checking the conductivity of the water.
-
Page 35: Alarm Messages
Operative Instructions Ö 22) End of the «STANDARD» cycle. Open the door and IMPORTANT NOTE! If the RESET button is remove the basket. pressed during the wash cycle, the program is interrupted and an alarm is displayed with the message «No disinfection stop - user». Press RESET to return to initial display. -
Page 36: Settings
Operative Instructions 7.2.9 USB key management When the USB key is hooked up in the machine, the following message appears after a few seconds: Fig. 22.2 The menu consists of items that, when selected, lights Fig. 23.1 When the USB key is removed from the machine, after a few seconds the following message appears. -
Page 37: Expiring Passwords
Operative Instructions Ö IMPORTANT NOTE! The software comes with a free one week (7 days) trial period, at the end of the trial period you must contact your dealer or distributor to enter the activation code to continue using the software. If you have the software, please refer to the user manual for more information regarding the use. -
Page 38: Lan Network Communication Via Rs232
Operative Instructions and boiler, the RS232 port is always available. one disinfection phases, this code is reset whenever a disinfection phase starts. 9.2.1 LAN network communication via RS232 • SPRYR.B, SPRYR.1, SPRYR.2, SPRYR.3, SPRYR.4, The following data are transmitted every second from SPRYR.5, SPRYR.A - Spray arm rotation monitoring: the micro board (RS232 connector) to the modem that The value of rotations per minute of the spray arm is... -
Page 39: Maintenance
Operative Instructions 4) Remove the excess paper. Switch-off and switch-on WARNING! Periodic maintenance is carried the machine. The printer is now ready. out by the technician under guarantee only if the uilizer has correctly and regularly carried out all ordinary maintenance operations and if the utilizer has filled out and kept up-to- date the Maintenance Logbook. -
Page 40: Routine Maintenance
Operative Instructions 11.2 Routine maintenance 2) Loosen and remove both spray arms. 3) Rinse the spray arms thoroughly. Routine maintenance operations are performed by 4) Reassemble and tighten in position the spray arms. the user and includes all those jobs needed to keep the machine clean and functioning. -
Page 41: Special Maintenance
Operative Instructions WARNING! It is mandatory to replace machine, as well as observe what the manufacturer of the prefilter and the HEPA H14 filter as these products recommends. indicated in the Maintenance Logbook. In When disposing of a washer disinfector, it is necessary case of intensive use of the machine it is to remember that it can still be contaminated by recommended to increase the frequency of... -
Page 42: Annexes
Operative Instructions 12 Annexes 12.1 Menu Parameter Table Factory Parameter Name Description Default GENERAL Turns the buzzer on or off at the end of End cycle buzzer 0=OFF 1=ON a cycle Warning alarm Turns the buzzer on or off when an 0=OFF 1=ON buzzer... - Page 43 Operative Instructions Factory Parameter Name Description Default Resuming mode after an alarm or machine switch-off during the cycle. If 0= PHASE at 0, the program restarts from the last RESTART phase in which the unscheduled stop CYCLE Resuming mode 2= STANDBY 1= CYCLE occurred.
- Page 44 Operative Instructions Factory Parameter Name Description Default Product 3 Enables or disables the product 3 0=OFF 1=ON flowmeter flowmeter REGENERATION Water hardness French degrees of water. 25°fH (°fH) 1°fH = 10 PPM CaCO CONDUCTIVITY PROBE Enables or disables the conductivity Probe activation 0=OFF 1=ON...
-
Page 45: Menu Structure
Operative Instructions 12.2 Menu structure S����-�� ���� (����� ��� �� �������) P���� P�� (5 �.) �� ����� �� ��� ���� ���� G������ End cycle buzzer Display language Warning alarm buzzer Printer language Bu�ons noise Program bu�on 1 Device 1 Program bu�on 2 Device 2 Program bu�on 3 Demi water enable... -
Page 46: Procedure For Password Change
Operative Instructions 12.3 Procedure for password change D��� O��� P���� S���� (3 �.) P���� D��� �� ���� Select User Y�� User Blocked? N� P���� D��� �� ���� Press Start to confirm P���� D��� �� ���� Enter old password P���� D��� ��... -
Page 47: Procedure For User Password Setup For The Super User
Operative Instructions 12.4 Procedure for user password setup for the super user S����-�� ���� (����� ��� �� �������) P���� P�� (5 �.) P���� D��� Insert Super User �� ���� password (max 3 a�empts) N� valid? Y�� See password change Y�� is expired or procedure first access? -
Page 48: Procedure For Super User Password Change
Operative Instructions 12.5 Procedure for super user password change S����-�� ���� D��� O��� (����� ��� �� �������) P���� P�� (5 �.) P���� D��� Insert Super User �� ���� password (max 3 a�empts) Y�� Password See password change expired? procedure N� P����... -
Page 49: Alarm Table
Operative Instructions 12.6 Alarm Table ALARM DESCRIPTION ACTION 1- Press RESET EEPROM ALARM Firmware installed successfully. 2- Install new dataset A blackout occurred during cycle BLACKOUT Press RESET execution and the program was stopped. The door is open or unlocked. Press RESET DOOR OPEN Close the door. - Page 50 Operative Instructions ALARM DESCRIPTION ACTION Press RESET AIR T.LIMIT A too high air temperature was detected. If it persists, call the technician. A too high temperature was detected Press RESET PHASE T. LIMIT during the current phase. If it persists, call the technician. Chamber probe PT1000-1 (work) might Press RESET PROBE 1 BROKEN...
-
Page 51: Warnings Table
Operative Instructions 12.7 Warnings Table WARNING TYPE DESCRIPTION ACTION LIQUID RESERVE Product 1 is in reserve or may be empty. Add the product 1 PRODUCT 1 LIQUID RESERVE Product 2 is in reserve or may be empty. Add the product 2 PRODUCT 2 LIQUID RESERVE Product 3 is in reserve or may be empty. -
Page 52: Fuses
Operative Instructions 12.9 Fuses FUSES OF THE MACHINES 2FU3 2FU4 2FU5 2FU6 2FU7 5x20 5x20 5x20 5x20 5x20 230V 1N~ 50 HZ T6.3A T6.3A T3.15A 5x20 5x20 5x20 5x20 5x20 200V 1N~ 50-60 HZ T6.3A T6.3A T3.15A 5x20 5x20 5x20 5x20 5x20 220V 3~ 60 HZ... - Page 53 Operative Instructions Example Managed by Byte Type Description Unit the machine Byte Value VDP1 Doser quantity 1 VDP2 Doser quantity 2 VDP3 Doser quantity 3 VDP4 Doser quantity 4 VDP5 Doser quantity 5 Cold water quantity liters Hot water quantity liters Deionized water quantity liters...
- Page 54 Operative Instructions Example Managed by Byte Type Description Unit the machine Byte Value SPRYR.3 Spray arm 3 rotation monitoring SPRYR.4 Spray arm 4 rotation monitoring SPRYR.5 Spray arm 5 rotation monitoring Spray arm at the top of the chamber SPRYR.A rotation monitoring CHPRS Chamber pressure...
- Page 55 Operative Instructions 0002 2°C ERR: ALARM 0000 ……… No alarm …….. 0001 0099 Alarm 1 Alarm 99 CYC: COUNTER PROGRAMS EXECUTED 000000 ……… 0 programs executed …….. programs executed 000001 999999 1 program executed 999999 programs executed 000002 2 programs executed REMT: PROGRAM REMAINING TIME 0000 ………...
- Page 56 Operative Instructions Notes...
- Page 57 Operative Instructions Notes...
- Page 58 Operative Instructions Notes...
- Page 59 Operative Instructions...
- Page 60 Tuttnauer Europe b.v. Hoeksteen 11, 4815 PR P.O.B. 7191, 4800 GD Breda The Netherlands Tel. +31 (0) 765 423 510 - Fax +31 (0) 765 423 540 E-mail: info@tuttnauer.nl - Web: www.tuttnauer.com...
Need help?
Do you have a question about the TIVA2 and is the answer not in the manual?
Questions and answers