Advertisement
Quick Links
4621.2812EDT
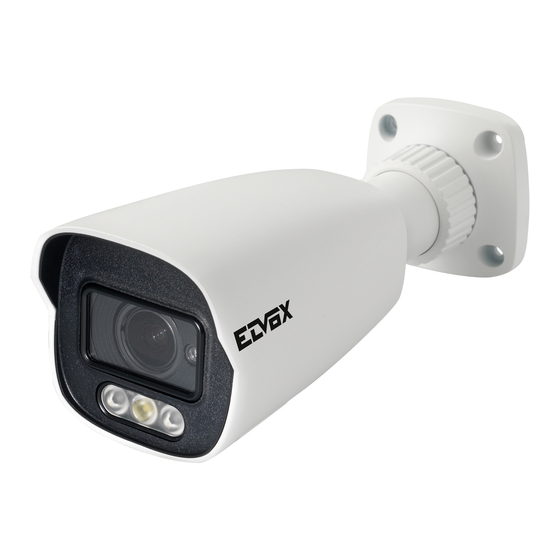
Telecamera Bullet IP a colori Day & Night, sensore CMOS 1/2,7", risoluzione 5
Mpx (2592×1944), obiettivo varifocale motorizzato 2,8-12 mm, filtro IR meccanico,
H.265S Multistream, alimentazione PoE o 12 Vdc, slot SD CARD, IR 50-70 m,
Audio IN/OUT, funzioni AV, H-WDR, HLC, BLC, ROI, 3DNR, Mask, Motion, DC-Iris,
SmartIR, RTSP, protocollo ONVIF, grado di protezione IP66.
Dimensioni: 81x81x218 mm. Peso 680 g.
Contenuto della confezione
Una volta ricevuto il dispositivo, controllare gli accessori indicati di seguito. Le illu-
strazioni sotto riportate hanno solo funzione di riferimento. Far riferimento all'appa-
recchiatura in dotazione.
Telecamera
Istruzioni per l'uso
Camera
Quick and start guide
Introduzione
Questa telecamera IP (abbreviato in IP-CAM) è stata progettata per fornire soluzioni
TVCC ad elevate prestazioni. Adotta chip di elaborazione video allo stato dell'arte.
Utilizza le tecnologie più avanzate, di codifica e decodifica video ed è conforme al
protocollo TCP/IP, SoC (System on Chip) per assicurare la stabilità e l'affidabilità del
sistema. I manuali completi e i software CVM.exe, Iptool.exe e Diskcalculator.exe
sono disponibili nella scheda prodotto consultabile nel sito www.vimar.com.
Connessioni
Di seguito sono riportate le principali connessioni della telecamera.
1
Cavo di rete / Network cable
Cavo microfono /
2
Microphone cable
Cavo cuffie /
3
Headphone cable
Ingresso/uscita allarmi /
4
Alarm input/output
Cavo alimentazione /
5
Power cable
Slot micro SD card /
6
Micro SD card slot
7
Reset
Installazione
Prima di iniziare, assicurarsi che la parete o il soffitto siano sufficientemente solidi
per sopportare tre volte il peso della telecamera. Installare e utilizzare la telecamera
in ambiente asciutto. Si consiglia di riposizionare il coperchio inferiore entro 4 ore
dalla sua rimozione. La procedura di montaggio è la seguente:
1) Praticare i fori per le viti e per il cavo sulla parete utilizzando la dima di foratura.
2) Passare i cavi e collegare il cavo di alimentazione e il cavo di rete.
3) Fissare la base di montaggio della telecamera alla parete con le viti, come
descritto di seguito.
4) Regolazione della staffa. Prima della regolazione, visualizzare l'immagine della
telecamera su un monitor e quindi allentare le viti di fissaggio per regolare l'an-
golo di visuale della telecamera. Fissare quindi le viti.
1 - 2
48,08 mm
48,08 mm
49401833A0 00 2207
Dima di foratura
Drill template
Camera
Quick start guide
CD
Drill template
Rubber plug
48.08mm
48.08mm
② Route and connect the cables .
③ Secure the mounting base with camera to the wall with the screws
3
provided.
Ø4,6 mm
④ Bracket adjustment. Before adjustment, preview the image of the
camera on a monitor and then loosen the fixed ring to adjust the view
angle of the camera.
Fixed Ring
360° Rotation
IP Bullet Day&Night colour camera, CMOS 1/2.7" sensor, 5 Mpx (2592×1944) reso-
lution, 2.8-12 mm motorized varifocal lens, mechanic IR filter, H.265S Multistream,
PoE or 12 Vdc supply, SD CARD slot, IR 50-70 m, Audio IN/OUT, Intelligent Video
Analysis, H-WDR, HLC, BLC, ROI, 3DNR, Mask, Motion, DC-Iris, SmartIR, RTSP
functions, ONVIF protocol, IP66 protection degree. Dimensions: 81x81x218 mm.
Weight 680 g.
Package content
After you receive your device, please check the following accessories. The pictures
here are for reference only.
Viti
Screws & spiles
4 tapping screws
Introduction
1 machine screw
This IP-camera (short for IP-CAM) is designed for high performance CCTV solu-
tions. It adopts state of the art video processing chips. It utilizes most advanced
technologies, such as video encoding and decoding technology, complies with the
× 4
Plastic plug
TCP/IP protocol, SoC (System on chip), etc to ensure this system more stable and
reliable. Complete manuals and CVM.exe, Iptool.exe e Diskcalculator.exe software are
available to download in the Product info sheet section of www.vimar.com website.
Connections
Here below the main connections of the camera.
1
3
4
5
6
7
Installation
Before start, please make sure that the wall or ceiling is strong enough to withstand
3 times the weight of the camera. Please install and use thecamera in the dry envi-
ronment. You'd better install bottom cover less than 4 hours after removing it. The
mounting steps are as follows:
1) Drill the screw holes and the cable hole on the wall according to the drill template.
2) Route the cables and connect the power cable and video cable.
∅4.6
3) Secure the mounting base with camera to the wall with screws as shown below.
4) Bracket adjustment. Before adjustment, preview the image of the camera on a
monitor and then loosen the fixed screw to adjust the view angle of the camera.
After that, tighten the fixed screws.
4
⑥ Install the cover back to the camera and fix it firmly with the
Anello di fissaggio/
screws. (Note that the cover should not be installed unevenly.)
Fixed ring
5
Network Connection
Gommino
Rubber plug
Rubber plug
● Access the camera through IP-Tool
IPC
IT
EN
① Make sure that the camera and the PC are well connected via LAN.
② Find the IP-Tool from the CD and then install it in the computer.
After that, run the IP-Tool as shown below.
360° Pan
Immediate Refresh
90° Tilt
Device Name Device Type
name
Cappuccio impermeabile
Camera
Quick start guide
Water-proof Cap
CD
Drill template
DC12V
2
3
Insert a micro
SD card
Cover
Rotazione/Rotation 360°
Inclinazione/Tilt
90°
Switch
Network Cable
Network Cable
Computer
Router
36063 Marostica VI - Italy
Device Network Search
Product Model
IP Address
Http Port
Data Port
Subnet
Modify Network Parameter
IPC
unknown
192.168.226.201
80
9008
255.255.
4 tapping screws
Gommino
1 machine screw
Rubber plug
× 4
Rubber plug
Plastic plug
3
4
5
1
2
6
3
7
4
5
6
7
above table to show the ne
Modify the IP address and
network address is in the s
computer. Please modify t
to the practical situation.
Modify
Mac Ad
IP Addr
Subnet
Gatewa
Brandeggio/Pan
360°
For example, the IP addre
IP address of the camera sh
gateway shall be changed to
enter the password of the a
modify the settings.
The default password
④ Double-click the camer
MENU
IP address in the address b
Then follow directions to
⑤ Enter the username and
Viale Vicenza, 14
The default username i
www.vimar.com
About
Advertisement

Related Manuals for Vimar ELVOX 4621.2812EDT


Summary of Contents for Vimar ELVOX 4621.2812EDT
- Page 1 I manuali completi e i software CVM.exe, Iptool.exe e Diskcalculator.exe reliable. Complete manuals and CVM.exe, Iptool.exe e Diskcalculator.exe software are sono disponibili nella scheda prodotto consultabile nel sito www.vimar.com. available to download in the Product info sheet section of www.vimar.com website. Connessioni Connections Di seguito sono riportate le principali connessioni della telecamera.
- Page 2 Assicurarsi che la telecamera e il PC siano connessi alla LAN. 1) Make sure that the camera and the PC are well connected to the LAN. Eseguire il download di IP-Tool dalla sezione prodotto del sito www.vimar.com e 2) download IP-Tool Product info sheet section of www.vimar.com website and then installarlo sul computer.
- Page 3 12 Vdc - 900 mA / PoE Other Consumi/Consumptions 11 W Dimensioni/Dimensions (mm) 81 x 81 x 218 Peso/Weight (g) Note RTSP, multi-stream, Staffa inclusa / Bracket included Viale Vicenza, 14 36063 Marostica VI - Italy www.vimar.com 49401833A0 00 2207...
- Page 4 L’Interessato al momento della richiesta di access to its system when requesting help from the Vimar Support Centre, so that the related intervento al Centro Assistenza Vimar, per poter consentire le attività di assistenza, deve fornire support can be provided.
Need help?
Do you have a question about the ELVOX 4621.2812EDT and is the answer not in the manual?
Questions and answers