Advertisement
Quick Links
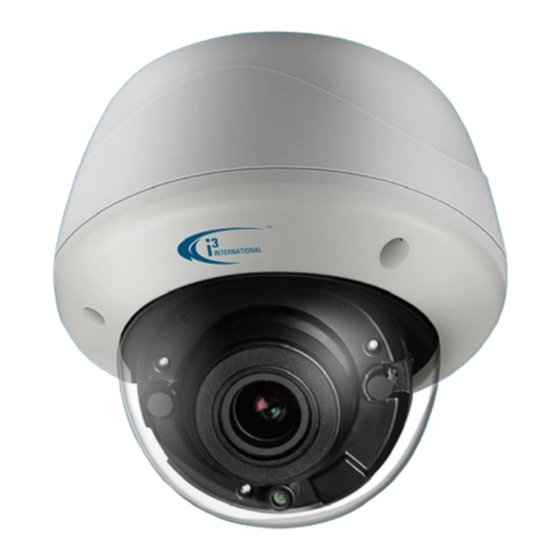
2MP Outdoor IR HD Analog Dome w/ Motorized Lens
Thank you for purchasing i3 International's Am57 High Definition indoor/
outdoor analog dome camera. Your camera is equipped with a motorized vari-
focal 2.8-12mm @ F1.2 lens. The lens can be controlled through cameras'
built-in OSD menu via SRX-Pro Server/VPC, or through i3 encoders and
standalone HVRs (Veo16p).
SAFETY
When installing your Am57 camera be sure to avoid:
•
excessive heat, such as direct sunlight or heating appliances
contaminants such as dust and smoke
•
strong magnetic fields
•
moisture and humidity
•
•
areas with mechanical vibrations
•
fluorescent lamps or objects that reflect light and unstable light sources
•
temperatures below -40°C (-40°F) and above 60°C (140°F)
CLEANING & SERVICING
For maximum optical clarity, the camera dome or lens must remain clean.
Use a soft, dry cloth to remove finger prints or dust from the dome cover.
Use a blower to remove dust from the lens.
•
Do not use volatile solvents such as alcohol, benzene, or thinners, as they may
•
damage the surface finishes.
To avoid electrical shock and to preserve the product warranty, DO NOT
•
disassemble the camera. Refer servicing to qualified personnel only.
PACKAGE CONTENTS
Ensure that the items received match those listed on the order form and the
packing slip. In addition to this manual and a fully assembled camera, the dome
camera packing box includes:
A.
Surface Mount template x1
B.
Isolated power adapter x1
C.
Service monitor cable x1
D.
Security Torx bit x1
Lens Direction
GUIDE PATTERN
A
B
HIGH DEFINITION ANALOG VIDEO SUPPORT
Your Am57 camera supports both the standard composite analog video stream
(CVBS, 720x480) and a high-definition TVI video stream (HD-TVI = 2MP). Both
streams are supported simultaneously as long as the on-board dip switch is set to
CVBS position.
IMPORTANT: In order to use high-definition video, your Am57 camera must
be connected to i3's video encoder or standalone DVR. To record camera's
HD-TVI stream (2MP) to SRX-Pro Server, connect the camera's gray BNC cable
connector (labeled 2MP) to i3's encoder or standalone DVR. If connecting directly
to the HVR's BNC panel, use the black BNC cable connector (720x480).
SERVICE MONITOR OUTPUT
To use the service monitor to adjust zoom and focus for the motorized varifocal
lens during installation, use the 2-pin connector on the camera board to connect
the service monitor. Set the WDR/CVBS dip-switch to CVBS (True WDR will be
disabled). If using HD-TVI video output, make sure to return the dip-switch to WDR
position before completing the installation.
CVBS SPOT MONITOR OUTPUT
To use the CVBS stream for the spot monitor output, set the WDR/CVBS dip-switch
to CVBS, then connect the camera's black BNC cable (labeled 720x480) directly to
the spot monitor.
Note: True WDR and OSD menu are not available in CVBS mode.
E.
Plastic Anchor x3
F.
Round Head Screw (Tapping Type) x3
G.
Waterproof tape x3
Waterproof tape
e Waterproof tape
pe Waterproof ta
f tape Waterproo
oof tape Waterpr
proof tape Water
C
D
E
F
User Manual
DIMENSIONS AND DEFINITIONS
2
1
13
Long screws (pre-installed) for attaching camera module to the back box
1.
(x3, silver. Use provided security torx bit).
Motorized 2.7-13.5mm lens. See LENS ADJUSTMENT section for more
2.
information.
IR board.
3.
CVBS standard-format analog video connector (4CIF = 720x480). Can
4.
be connected directly to the BNC board on the i3's HVR units or to a spot
monitor.
TVI High-definition analog video connector (2MP. 1920x1080 = 1080P).
5.
To use high-definition analog stream (2MP), the camera must be
connected to i3's encoder or standalone DVR.
G
Power connector (DC12V / AC24V). Connect Isolated
6.
Not in use.
7.
Screws attaching camera bubble to the camera module (x3, silver. Use
8.
provided security torx bit).
Dome bubble.
9.
Camera's back box. Compatible with i3's DB60 Goose-neck bracket. Can
10.
also be used for pendant mount installations.
Side conduit hole (3/4").
11.
Remove plug to route power and video cables through the side opening.
Use the plug for the top conduit hole in that scenario.
When using outdoors, sealant must be used to maintain the IP67 status.
12.
Top conduit hole (3/4"). Can also be used for pendant mount installations.
When using outdoors, sealant must be used to maintain the IP67 status.
Mounting holes, partially drilled, x6 (complete drilling the holes prior to
13.
installation).
Scan this QR code or visit
com
for Annexxus Configuration Tool (ACT)
installation and additional documentation.
Contact our Technical Support team at:
1.877.877.7241 or
com
if you have any questions or concerns
regarding camera installation or if you require
software services or support.
Am57
1
Ø147mm (
10
11
12
Ø99.94mm (3.93")
ftp.i3international.
support@i3international.
ACT Download &
Documentation
Rev. 221109
4
5
6
7
8
9
5¾
")
Advertisement

Related Manuals for i3 International Am57


Summary of Contents for i3 International Am57
- Page 1 Screws attaching camera bubble to the camera module (x3, silver. Use provided security torx bit). Your Am57 camera supports both the standard composite analog video stream Dome bubble. (CVBS, 720x480) and a high-definition TVI video stream (HD-TVI = 2MP). Both Camera’s back box.
-
Page 2: Disassembly And Installation
To power the camera, chose one of the options below: module. Use the isolated power adapter provided with the camera (24VAC to 12VDC) Use a third party individual transformer (24 VAC) to provide power to each Am57 Adjust camera view and complete the installation separately. -
Page 3: Lens Adjustment
Repeat Steps 1-6 of the ADJUST ZOOM/FOCUS via HR16/HR16v2 section. Add HR16/HR16v2 to SRX-Pro Server’s IP camera tab. In IP Camera tab, expand HR16/HR16v2 item to see all inputs. Assign Am57 input to SRX-Pro Server video channel in Ch. In. drop-down menu. -
Page 4: Camera Osd Menu
USER MANUAL Am57 Analog Dome Camera CALLING UP OSD via VIDEO PILOT CLIENT (v7 and up). MENU > VIDEO OUT Video Out options allow setting the camera to NTSC (default) or PAL video format. Repeat Steps 1-5 of the ADJUST ZOOM/FOCUS via VIDEO PILOT CLIENT (incl. - Page 5 USER MANUAL Am57 Analog Dome Camera MENU > SETUP > WHITE BALANCE • DEFAULT: Select DEFAULT to reset SMART D-ZOOM settings to factory defaults. Set White Balance to ATW, AWC or MANUAL. • NEG IMAGE: Set the NEG IMAGE to ON to show a negative of the camera’s video •...