Table of Contents
Advertisement
Quick Links
Advertisement
Table of Contents

Related Manuals for Ledj LEDJ377


Summary of Contents for Ledj LEDJ377
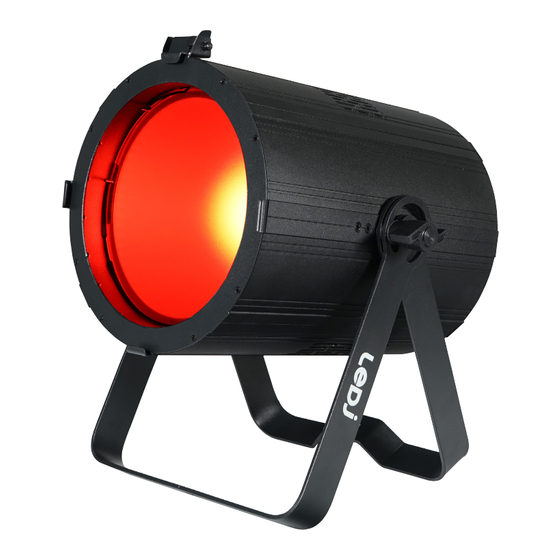
- Page 1 200W COB RGBAL Par User Manual Order code: LEDJ377...
-
Page 2: Safety Advice
Safety advice WARNING FOR YOUR OWN SAFETY, PLEASE READ THIS USER MANUAL CAREFULLY BEFORE YOUR INITIAL START-UP! • Before your initial start-up, please make sure that there is no damage caused during transportation. • Should there be any damage, consult your dealer and do not use the equipment. •... - Page 3 Product overview & technical specifications 200W COB RGBAL Par The LEDJ 200W COB RGBAL Par is a powerful lighting fixture with a COB LED for high-output wash and seamless colour mixing. It features a high CRI for accurate colour representation, an 80°...
-
Page 4: Technical Specifications
Technical specifications MENU DOWN ENTER 200W COB RGBAL Par POWER INPUT: POWER OUTPUT: 100-240V~ 100-240V~ 10A 50/60Hz www.prolight.co.uk 50/60Hz FUSE: T3.15A 250V POWER CONSUMPTION: 205W ta..40°C 07 - Fuse T3.15A 250V 01 - OLED display 08 - 5-Pin DMX input In the box: 1 x fixture, 02 - Function buttons 1 x 25°... - Page 5 Operating instructions Main Menu Sub Menu Options/Values (Default Settings in BOLD) DMX Address 001-512 2 Channel 5 Channel 7 Channel Channel 8 Channel 9 Channel 13 Channel Linear DMX Address Square Law Dimmer Curve Inv SQ Law S Curve 900Hz, 1000Hz, 1200Hz, 1500Hz, 2500Hz, 4000Hz, 5000Hz, 10kHz, LED Refresh 15kHz, 20kHz Blackout...
-
Page 6: Dmx Mode
Operating instructions DMX mode: 3 channel mode: 2 channel mode: Channel Value Function Channel Value Function 000-255 Colour macros (see page 10) 000-009 No function 000-031 LED off 010-017 1800K 032-063 LED on 018-025 1850K 064-095 Strobe (slow-fast) 026-033 1900K 096-127 LED on 034-041... - Page 7 Operating instructions 9 channel mode: 13 channel mode: Channel Value Function Channel Value Function 000-255 Red dimmer (0-100%) 000-255 Red dimmer (0-100%) 000-255 Green dimmer (0-100%) 000-255 Green dimmer (0-100%) 000-255 Blue dimmer (0-100%) 000-255 Blue dimmer (0-100%) 000-255 Amber dimmer (0-100%) 000-255 Amber dimmer (0-100%) 000-255 Lime dimmer (0-100%) 000-255 Lime dimmer (0-100%)
- Page 8 Operating instructions 13 channel mode (cont): Channel Value Function 000-255 3200K 000-255 4400K Colour 8 (cont.) 000-255 5600K temperature presets 000-255 7200K 000-255 10000K 000-051 No function 052-102 Colour temperature presets (CH8 value 000-255) 103-153 Colour change mode 154-204 Colour fade mode 205-255 Sound active mode 000-042 Colour Change 1/Colour fade 1 043-084 Colour Change 2/Colour fade 3...
- Page 9 Operating instructions Colour Chart: Menu DMX Values Colour Temperature Green Blue Amber Lime Colour 1 001-004 Colour 2 005-008 Colour 3 009-012 Colour 4 013-016 Colour 5 017-020 Colour 6 021-024 Colour 7 025-028 Colour 8 029-032 Colour 9 033-036 Colour 10 037-040 Colour 11...
- Page 10 Operating instructions Colour Chart (cont): Menu DMX Values Colour Temperature Green Blue Amber Lime Colour 39 153-156 Colour 40 157-160 Colour 41 161-164 Colour 42 165-168 Colour 43 169-172 Colour 44 173-176 Colour 45 177-180 Colour 46 181-184 Colour 47 185-188 Colour 48 189-192...
-
Page 11: Dmx Setup
DMX setup Setting the DMX address: The DMX mode enables the use of a universal DMX controller. Each fixture requires a “start address” from 1- 512. A fixture requiring one or more channels for control begins to read the data on the channel indicated by the start address. -
Page 12: Line Termination
DMX setup Notice: Be sure to follow the diagrams below when making your own cables. Pin Configuration Do not connect the cables shield conductor to the ground lug or 3-Pin 5-Pin allow the shield conductor to come in contact with the XLRs Pin 1 - Ground outer casing. -
Page 13: Power Linking
Multiple fixture power linking Power linking: This fixture provides power linking via the power output on the rear allowing multiple units to be connected together. The maximum number of fixtures that can be connected is 12 fixtures @ 240V or 6 fixtures @ 120V (including the first fixture). After the maximum number of fixtures are connected a new power run will need to be started. -
Page 14: Weee Notice
WEEE notice Correct Disposal of this Product (Waste Electrical & Electronic Equipment) (Applicable in the European Union and other European countries with separate collection systems) This marking shown on the product or its literature, indicates that it should not be disposed with other household wastes at the end of its working life.
Need help?
Do you have a question about the LEDJ377 and is the answer not in the manual?
Questions and answers