Table of Contents
Advertisement
Quick Links
Advertisement
Table of Contents

Subscribe to Our Youtube Channel
Related Manuals for AEG KEE542260M


Summary of Contents for AEG KEE542260M
- Page 1 EN User Manual | Oven KEE542260M...
-
Page 2: Table Of Contents
FOR PERFECT RESULTS Thank you for choosing this AEG product. We have created it to give you impeccable performance for many years, with innovative technologies that help make life simpler – features you might not find on ordinary appliances. Please spend a few minutes reading to get the very best from it. -
Page 3: Safety Information
SAFETY INFORMATION Before the installation and use of the appliance, carefully read the supplied instructions. The manufacturer is not responsible for any injuries or damage that are the result of incorrect installation or usage. Always keep the instructions in a safe and accessible location for future reference. -
Page 4: Safety Instructions
similar accommodation where such use does not exceed (average) domestic usage levels. • Only a qualified person must install this appliance and replace the cable. • Do not use the appliance before installing it in the built-in structure. • Disconnect the appliance from the power supply before carrying out any maintenance. - Page 5 • Before mounting the appliance, check if • Do not use multi-plug adapters and the appliance door opens without restraint. extension cables. • The appliance is equipped with an electric • Make sure not to cause damage to the cooling system. It must be operated with mains plug and to the mains cable.
- Page 6 • Do not use the appliance as a work • Before maintenance, deactivate the surface or as a storage surface. appliance and disconnect the mains plug • Open the appliance door carefully. The from the mains socket. use of ingredients with alcohol can cause •...
-
Page 7: Product Description
• Contact your municipal authority for • Remove the door catch to prevent children information on how to dispose of the or pets from becoming trapped in the appliance. appliance. • Disconnect the appliance from the mains supply. • Cut off the mains electrical cable close to the appliance and dispose of it. -
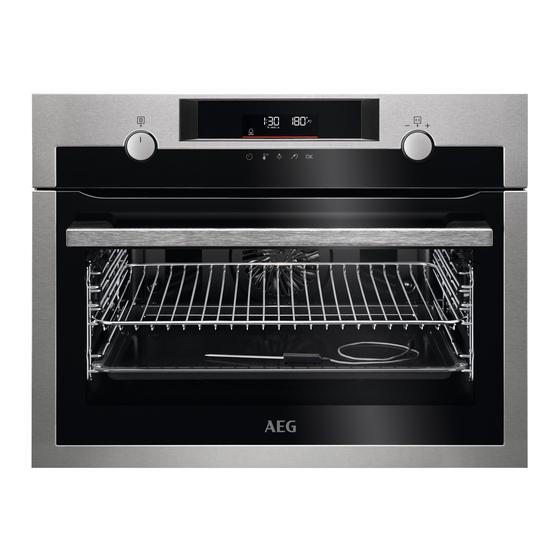
Page 8: Control Panel
Food sensor To measure the temperature inside food. 4. CONTROL PANEL 4.1 Retractable knobs To use the appliance press the knob. The knob comes out. 4.2 Control panel overview Fast Heat Timer Light Food Sensor Confirm setting Press Turn the knob Select a heating function to turn on the appliance. -
Page 9: Before First Use
Food sensor indicator 5. BEFORE FIRST USE WARNING! Refer to Safety chapters. 5.1 Initial cleaning Before the first use, clean the empty appliance and set the time: 00:00 Set the time. Press 6. DAILY USE WARNING! Refer to Safety chapters. 6.1 How to set: Heating functions Step 1 Turn the knob for the heating functions and select a heating function. - Page 10 Heating function Application To make convenience food (e.g., french fries, potato wedges or spring rolls) crispy. Frozen Foods To bake pizza. To make intensive browning and a crispy bottom. Pizza Function To bake cakes with crispy bottom and to preserve food. Bottom Heat To defrost food (vegetables and fruit).
- Page 11 For some of the dishes you can also cook The degree to which a dish is cooked: with: • Food Sensor • Rare • Medium • Well done Step 1 Step 2 Step 3 Step 4 Enter the menu. Select Assisted Cooking. Select the dish.
- Page 12 Dish Weight Shelf level / Accessory Fillet, rare (slow cook‐ ing) 1; baking tray Fillet, medium (slow 0,5 - 1.5 kg; 5 - 6 Use your favourite spices or simply salt and fresh groun‐ cooking) cm thick pieces ded pepper. Fry the meat for a few minutes on a hot pan. Insert to the appliance.
- Page 13 Dish Weight Shelf level / Accessory Meat loaf 1 kg 1; wire shelf Use your favourite spices. Whole fish, grilled 0.5 - 1 kg per fish 1; baking tray Fill the fish with butter and use your favourite spices and herbs.
-
Page 14: Clock Functions
Dish Weight Shelf level / Accessory Baguette / Ciabatta / 0.8 kg 1; baking tray lined with baking paper White bread More time needed for white bread. All grain / rye / dark 1 kg 1; baking tray lined with baking paper / wire bread all grain in loaf shelf 7. -
Page 15: Using The Accessories
How to set: Minute minder Step 1 Step 2 Step 3 The display shows: 0:00 Set the Minute minder Press: Press: Timer starts counting down immediately. How to set: Cooking time Step 1 Step 2 Step 3 Step 4 The display shows: 0:00 Choose a heating... - Page 16 Wire shelf: Push the shelf between the guide bars of the shelf support and make sure that the feet point down. Baking tray: Push the tray between the guide bars of the shelf support. 8.2 Food Sensor Food Sensor - measures the temperature inside the food. There are two temperatures to be set: The oven temperature.
-
Page 17: Additional Functions
Insert the tip of Food Sensor into the centre of meat, Insert the tip of Food Sensor exactly in the centre of the fish, in the thickest part if possible. Make sure that at casserole. Food Sensor should be stabilized in one place least 3/4 of Food Sensor is inside of the dish. -
Page 18: Hints And Tips
9.2 Automatic switch-off For safety reasons the appliance turns off after some time, if a heating function works (°C) and you do not change any settings. 250 - maximum The Automatic switch-off does not work with the functions: Light, Food sensor, Time (°C) Delay. -
Page 19: Care And Cleaning
Ramekins Pizza pan Baking dish Flan base tin Ceramic Dark, non-reflective Dark, non-reflective Dark, non-reflective 8 cm diameter, 5 28 cm diameter 26 cm diameter 28 cm diameter cm height 10.4 Cooking tables for test institutes Information for test institutes Tests according to IEC 60350-1. - Page 20 Clean the cavity after each use. Fat accumulation or other residue may cause fire. Do not store the food in the appliance for longer than 20 minutes. Dry the cavity only with a microfibre cloth after each use. Everyday Use Clean all accessories after each use and let them dry.
-
Page 21: Troubleshooting
Top lamp Step 1 Turn the glass cover to remove it. Step 2 Clean the glass cover. Step 3 Replace the lamp with a suitable 300 °C heat-resistant lamp. Step 4 Install the glass cover. 12. TROUBLESHOOTING WARNING! Refer to Safety chapters. 12.1 What to do if... -
Page 22: Energy Efficiency
Serial number (S.N.) ......... 13. ENERGY EFFICIENCY 13.1 Product Information and Product Information Sheet Supplier's name Model identification KEE542260M 944005015 Energy Efficiency Index 80.8 Energy efficiency class Energy consumption with a standard load, conventional mode 0.89 kWh/cycle Energy consumption with a standard load, fan-forced mode 0.59 kWh/cycle... -
Page 23: Menu Structure
13.2 Energy saving the residual heat. You can use that heat to keep the food warm. When the cooking duration is longer than 30 min, reduce the appliance temperature to The appliance has features which help minimum 3 - 10 min before the end of you save energy during everyday cooking. -
Page 24: Environmental Concerns
Settings Time of day Change Display brightness 1 - 5 Key tones 1 - Beep Buzzer volume 1 - 4 2 - Click 3 - Sound off Food Sensor Action 1 - Alarm and Uptimer On / Off stop 2 - Alarm Light On / Off Fast Heat Up... - Page 28 867380253-A-062023...
Need help?
Do you have a question about the KEE542260M and is the answer not in the manual?
Questions and answers