
Related Manuals for Primera Bravo Bravo


Summary of Contents for Primera Bravo Bravo
- Page 1 100303-510141-(04) Automated Optical Disc Duplication & Printing System 2002 All rights reserved.
- Page 2 NO USER-SERVICEABLE PARTS INSIDE. REFER SERVICING TO QUALIFIED SERVICE PERSONNEL. OPERATE THE UNIT WITH ONLY THE PROPER ELECTRICAL SPECIFICATIONS AS LABELED ON THE PRINTER AND AC ADAPTER. CAUTION! THIS PRODUCT CONTAINS A LASER DIODE OF A HIGHER CLASS THAN 1. TO ENSURE CONTINUED SAFETY, DO NOT REMOVE ANY COVERS OR ATTEMPT TO GAIN ACCESS TO THE INSIDE OF THIS PRODUCT.
-
Page 3: Table Of Contents
Step 6: Installing the Software Suite...12 Step 7: Publishing Discs ...12 Section 3: Creating Discs ...17 A. Setting up the Publisher’s Printer Driver ...17 B. Using SureThing ...23 C. Using Other Graphics Programs ...25 D. Using PrimoDVD to Create Your Discs...26 E. -
Page 5: Section 1: Getting Started
Section 1: Getting Started THANK YOU… ...for purchasing the Bravo perfect all-in-one solution for producing professional looking CD-R and DVD-R discs. A wide variety of disc formats are supported, including audio CDs, Video CDs, data discs and more. Operation is simple and completely automatic once a job has been started. -
Page 6: Unpacking And Inspection
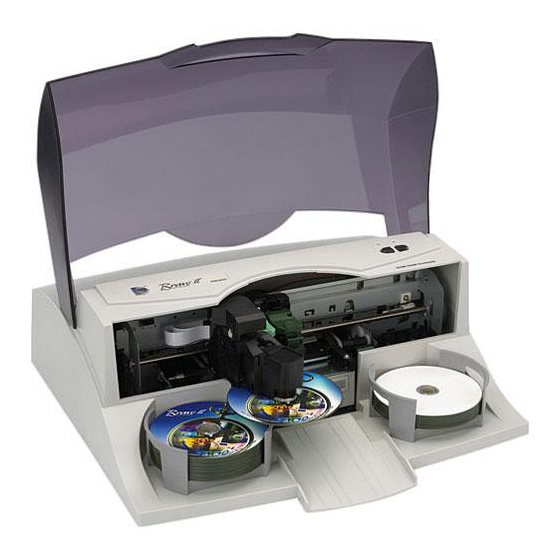
B. UNPACKING AND INSPECTION While unpacking your Publisher, inspect the carton to ensure that no damage has occurred during shipping. Make sure that all supplied accessories are included with your unit. The following items should be included: • Optical Disc Publisher •... - Page 7 The Robotic Disc Transporter moves discs from the Input Bin, to a CD/DVD Recorder, to the printer, and finally to the Output Bin. The CD/DVD Recorder is automatically loaded and unloaded by the Publisher’s Robotic Disc Transporter. The Recorder Tray Button manually opens or closes the Recorder Tray.
-
Page 8: System Requirements
Rear Panel This illustration shows the input ports found on the rear panel of the Publisher: IEEE 1394 FireWire Port The FireWire (IEEE 1394) Port receives data that is to be passed on to the recording drive. The USB Interface is connected to an open USB port on your PC with a standard USB cable, included with your Publisher. -
Page 9: Overview Of Operation
OVERVIEW OF OPERATION Your new Publisher is an automated, precision device intended for continuous-duty publishing of discs. The following is a description of the complete process of duplicating and printing a CD/DVD job on your Publisher: 1. Up to 25 blank discs may be loaded at one time into the Input Bin. - Page 10 The Robotic Disc Transporter will lift the disc out of the Recorder Tray. The Recorder Tray will close, and the Printer Tray will open. The Robotic Disc Transporter will lower the disc into the Printer Tray, and the Printer Tray will then automatically close.
- Page 11 8. Print time varies according to which print mode has been selected (section 3-A). In most cases, print time takes no more than 2 minutes. After printing the first disc, the Publisher's Printer Disc Tray opens automatically. The Robotic Disc Transporter moves the finished disc to the Output Bin.
-
Page 12: Section 2: Hardware And Software Set-Up
Section 2: Hardware and Software Set-Up This section will describe the step-by-step process of setting up your Publisher. This includes information on how to load the supplies (ink and disc media) necessary to start producing discs. QUICKSTART INSTALLER The Installer Disc has a QuickStart menu that will guide you through the process of setting up your duplicator. -
Page 13: Step 2: Loading Media
CD/DVD media. Refer to Section 3 for further printer driver information. Due to the wide variety of printable-surface CD/DVD media, you may find that certain brands of discs provide higher print quality than others. -
Page 14: Step 3: Installing Ink Cartridges
• Load the Input Bin of the Publisher) with 25 blank discs and place the bins on the mounting pegs. Step 3: Installing Ink Cartridges • Press the Ink Cartridge Button Cartridge Carrier to the load position and open the ink cartridge covers •... -
Page 15: Step 5: Connecting The Usb Cable
INDEX Step 5: Connecting the USB Cable Connect the Publisher to your PC with your beige USB Cable. After a few moments, Windows will tell you it has found new hardware and is looking for software to install it. Hardware and Software Set-Up 11... -
Page 16: Step 6: Installing The Software Suite
Select "Install the software automatically" and click Next. You may see a notice like the one shown here stating that the Optical Disc has not passed Windows Logo Testing. Click Install Anyway to continue installing the printer driver for your Publisher. Step 6: Installing the Software Suite... - Page 17 A. Launch PrimoDVD 2.0 Primo DVD 2.0 can be launched from your Start menu. If you have more than one recordable drive installed on your PC, the following screen will appear when you launch Primo: Clicking the Open/Close button will help you identify the drive installed in your Publisher.
- Page 18 The following is a tutorial on creating a basic disc design: 1. Click New... 2. Select CD Color Printer under Label Products and click Next. 3. Click Browse to look through the many built-in backgrounds included with SureThing, or click Clear if you would like to import your own background or design.
- Page 19 4. Check Use Smart Designs to browse through different built-in designs. Deselect this option if you would like to create your own layout. When finished, click Next. 5. Click Finish. You should now see your basic layout. Simply double click on text boxes to modify the standard text with your information.
- Page 20 Right click in the Data Job Window and select Add Files or Folders. Select the information you wish to be recorded on your disc. D. Once you have selected the content of the disc, you will need to select the label you designed. Check the Print check box, and click the <…>...
-
Page 21: Section 3: Creating Discs
The default settings of the Publisher printer driver will fit most printing needs. Please refer to the following steps to change or verify your printer driver options: 1. Click the Start button. For Windows 2000 point to Settings and click on Printers. -
Page 22: Color Matching
NOTE: Most applications allow you to change these same printer driver options from their "Print" and/or "Printer Setup" screens. This means that you don't have to go back to the main printer setup window each time you want to change a setting or option in the printer driver. -
Page 23: Centering Test Print
1mm. Inner Diameter Centering Test Print NOTE: Your printer comes from the factory pre-calibrated to print the image in the center of the CD. You can use this adjustment if you need to fine-tune this location. - Page 24 Publisher is powered ON and that it is connected to your computer. 2. Click on the Centering Properties Test Print button. The printer will begin printing the calibration test print. When the print is complete, rotate disc 180º and put the disc back in the repeat step 2 using the same disc.
-
Page 25: Ink Levels And Cartridge Maintenance
Select this button to display the current ink levels as well as options for cleaning and changing cartridges. Select Clean button to send a simple test pattern to the printer. Be sure to have a disc in the Bravo’s cover closed. The test pattern, shown below, purges ink through nozzles of your ink cartridge to clear any blockages. -
Page 26: Alignment Calibration
Alignment Calibration The Alignment Calibration allows you you create a test print that will provide you with values to configure your printer for Bi-Di- Printing and to align the color and black cartridges for Color+Black printing. If Bi-Di Printing is enabled, or if you use... -
Page 27: Using Surething
The On-Line Help section will provide complete instructions on all the features in this package. The following is a tutorial on creating a basic disc design: 1. Click New... 2. Select CD Color Printer under Label Products and click Next. Creating Discs 23... - Page 28 3. Click Browse to look through the many built-in backgrounds included with SureThing, or click Clear if you would like to import your own background or design. Click Next. 4. Check Use Smart Designs to browse through different built-in designs. Deselect this option if you would like to create your own layout.
-
Page 29: Using Other Graphics Programs
(*.PRN) from any application. Your Publisher will support two types of PrimoDVD 2.0: • *.STD - SureThing CD Labeler • *.PRN - Print files created through the Publisher Printer Driver INDEX print files Creating Discs 25... -
Page 30: Prn Files
Windows Control Panel, Printers where you will be able to select File from your list of available printer ports. This will enable the driver to print to a PRN file from any application. - Page 31 Operating Screens To keep things simple, there is really only one main operating screen you'll need to know about in order to run the PrimoDVD Software. It is called the it looks like this: Drive Status Window Job Set-Up Window Job Status Window Under this window there are several adjustable-size windows...
- Page 32 • Job Status is made in the Job Status Window at the lower left side of the main Application list displays the status of each job, including the number of discs copied and the number remaining. This window may be hidden by clicking on the Show Job List Panel under the View menu.
-
Page 33: Using Kiosk Mode
Rejects can be identified in the stack because they will not be printed in the same manner as successfully recorded discs. Primera Technology offers an optional Kiosk Mode Kit that contains a third output bin to collect the discs. -
Page 34: Copying An Audio Disc
table and attaches just under the front lip of the Bravo. This kit is available through your reseller. Kiosk mode is enabled as follows: 1. In PrimoDVD 2.0 click Robotics then Options from the main menu. 2. In the Options dialog box, check the option labeled Enable Kiosk Mode. - Page 35 2. Insert the master disc into your PC's CD drive. In the drive list on the left of the screen, select the PC's CD drive by clicking on it. Press F4 or, click the Disc Explorer button. 3. The Disc Explorer Window will be displayed. Check in the Disc Explorer that the source disc is correctly read.
- Page 36 INDEX Also in the Image Job dialog box, check the box labeled Print if you have a printer installed and wish to print a print image onto each disc after it has been recorded. There are two types of files supported: *.prn files...
-
Page 37: Section 4: Interpreting The Publisher's Indicator Lights
Disc Transporter to load a disc Waiting for a cartridge to be installed and the lid to be closed. (See section 2-A). The printer tray or ink cartridge carrier has stalled. Press the Ink button to retry the operation. The Publisher has a cartridge problem. -
Page 38: Section 5: Maintenance And Troubleshooting
Publisher's outside case and trays. This type of cleaner is very effective on inks that may accumulate on the printer tray. Stronger cleaning solutions are NOT recommended because they may damage the paint and plastic materials from which the parts are manufactured. -
Page 39: Software Test
C. SOFTWARE TEST This will confirm that the hardware, software and your PC are all communicating properly with each other properly. Follow the procedures listed on the following pages. 1. Launch the software from your Windows Desktop or program menu. The main appear. - Page 40 3. In the drop-down menu, go to Services. 4. Click on Check Communications. You will see a dialog box stating, "Communication OK. System Idle." If you do not see this, make sure that all cables are connected securely. 5. Click OK to get back to the main screen. 6.
-
Page 41: Recording Errors
D. RECORDING ERRORS If discs are not being recorded properly or are not passing verification, you will want to consult the error log. This is available in PrimoDVD by clicking View, selecting the option to Show At Top or Show at Right from the drop-down Menu. - Page 42 INDEX Click Tools, Options and check the box labeled Enable Burn Proof. This option enables the drive to slow down its recording speed to match the data. Click Robotics, Options and deselect Record and Print Simultaneously. This will cause your jobs to take longer, but will free more computer resources for recording.
-
Page 43: Cleaning The Ink Cartridges
E. CLEANING THE INK CARTRIDGES It may be necessary to clean the ink cartridge nozzles if the printer portion of your Publisher does not seen to be laying down ink evenly or if you suspect an cartridge nozzle has become slightly dried out or clogged. Refer to section 3-A for more information on performing a clean function through the Publisher's printer driver. -
Page 44: Section 6: Technical Specifications
Section 6: Technical Model Configurations Printing Method Printing Resolution Ink Types Media Types Maximum print width Minimum System Disc Capacity Recordable Formats Operating Systems Interface Power Requirement Weight Dimensions Certifications Safety Warranty 40 Technical Specifications INDEX Specifications Optical Disc Publisher CD-R Publisher DVD-R Publisher Ink-Jet... -
Page 45: Index
Output Bin ...2, 3, 7, 34 Overview of Operation ...5 Paper Size ...18 Power Input...4 PrimoDVD Software...1, 26, 30, 39 Print Files...25 Printer Driver Software...12, 26 PRN Files ...26, 32 Reject Area ...3, 6, 29 Resolution...18, 40 Specifications ...40 STD File ...16, 26, 32 System Requirements ...4... - Page 48 Printed in the United States of America P/N 510141...
Need help?
Do you have a question about the Bravo Bravo and is the answer not in the manual?
Questions and answers