Primera Bravo User Manual
Automated optical disc duplication & printing system
Hide thumbs
Also See for Bravo:
- User manual (44 pages) ,
- User manual (48 pages) ,
- User manual (48 pages)

Related Manuals for Primera Bravo


Summary of Contents for Primera Bravo
- Page 1 111803-510701-(02) Automated Optical Disc Duplication & Printing System 2003 All rights reserved.
- Page 2 Notices: The information in this document is subject to change without notice. NO WARRANTY OF ANY KIND IS MADE WITH REGARD TO THIS MATERIAL, INCLUDING, BUT NOT LIMITED TO, THE IMPLIED WARRANTIES OF MERCHANTABILITY AND FITNESS FOR A PARTICULAR PURPOSE. No liability is assumed for errors contained herein or for incidental or consequential damages in connection with the furnishing, performance, or use of this material.
-
Page 3: Table Of Contents
A. Cleaning the Publisher ..............32 B. Performing a Robotic Self-Test ............32 C. Software Test..................33 D. Write Test Failure................33 E. Bravo Not Accessible................34 Cleaning the Ink Cartridges ............34 G. Clearing a Media Jam...............34 H. Technical Support................34 Section 6: Technical Specifications .............35... - Page 4 INDEX...
-
Page 5: Section 1: Getting Started
NOTE ON TERMS AND CONVENTIONS: From this point forward, the following terms and conventions will apply: The Bravo Disc Publisher will be abbreviated simply as the Publisher. Optical discs, which can include many different types of discs including CD-Rs, CD-RWs, DVD-Rs and more are all referred to as CDs or discs. -
Page 6: Unpacking And Inspection
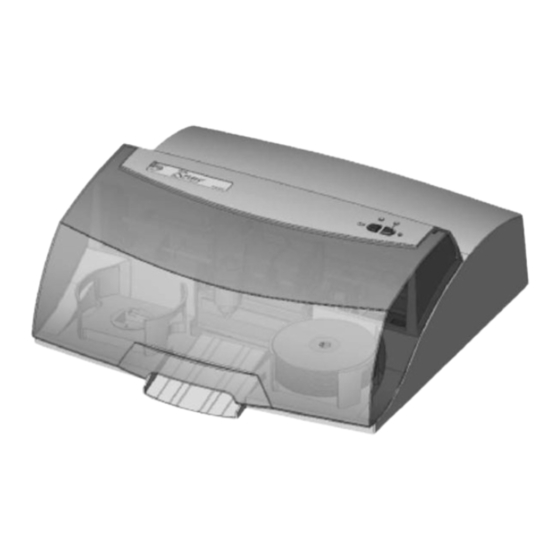
INDEX B. UNPACKING AND INSPECTION While unpacking your Publisher, inspect the carton to ensure that no damage has occurred during shipping. Make sure that all supplied accessories are included with your unit. The following items should be included: • Optical Disc Publisher •... - Page 7 INDEX The Robotic Disc Transporter moves discs from the Input Bin, to a CD/DVD Recorder, to the printer, and finally to the Output Bin. The CD/DVD Recorder is automatically loaded and unloaded by the Publisher’s Robotic Disc Transporter. The Recorder Tray Button manually opens or closes the Recorder Tray.
-
Page 8: System Requirements
Free hard drive space of at least 2 GB (up to 6 GB for DVD) • Available USB and FireWire Ports • Do not connect the Bravo to any USB hubs or the USB port on your keyboard. It should be connected directly to an on- board USB port. •... -
Page 9: Overview Of Operation
INDEX OVERVIEW OF OPERATION Your new Publisher is an automated, precision device intended for continuous-duty publishing of discs. The following is a description of the complete process of duplicating and printing a CD/DVD job on your Publisher: 1. Up to 25 blank discs may be loaded at one time into the Input Bin. - Page 10 INDEX 4. The Recorder Tray then automatically shuts. Through software control, you can perform a test on each disc before recording. If a disc does not pass (meaning that all or part of that disc is not recordable), the Robotic Disc Transporter picks it out of the CD Tray and sends it to the...
-
Page 11: Output Bin
INDEX 8. Print time varies according to which print mode has been selected (section 3-A). In most cases, print time takes no more than 2 minutes. After printing the first disc, the Publisher's Printer Disc Tray opens automatically. The Robotic Disc Transporter moves the finished disc to the Output Bin. -
Page 12: Section 2: Software And Hardware Set-Up
Once the installation has completed, click Quit. You have successfully installed all the necessary software! The next section will describe how to connect the Bravo to your Mac. 8 Software and Hardware Set-Up... -
Page 13: Hardware Setup
INDEX B. HARDWARE SETUP Bravo connects to your Mac in just 5 easy steps. To connect your new disc publisher, please do the following: Be sure you have removed the packing tape and cardboard insert prior to applying power. Step 1: Applying Power •... - Page 14 INDEX Refer to the following steps when loading discs in to the Publisher: • Open the front cover of the Publisher • The Publisher will automatically position the cartridge carrier and Robotic Disc Transporter to the center position allowing for easy access to the bins. •...
-
Page 15: Step 3: Installing Ink Cartridges
INDEX Step 3: Installing Ink Cartridges • Press the Ink Cartridge Button to move the Ink Cartridge Carrier to the load position and open the ink cartridge covers • Remove each ink cartridge from its packaging • Slowly remove the tape covering the cartridge's print head, being careful to avoid damaging the barcode label on the underside of... -
Page 16: Step 4: Connecting The Firewire Cable
INDEX Step 4: Connecting the FireWire Cable The black IEEE 1394 FireWire cable carries the data that will be sent to the recorder when producing discs. Connect the 6 Pin FireWire cable included with your Publisher. Connect the other end to the FireWire board's output port on your computer. Step 5: Connecting the USB Cable Connect the Publisher to your computer with the beige USB Cable. -
Page 17: Configuration Utility
INDEX CONFIGURATION UTILITY The Configuration Utility is a program that installs with your Bravo software. This utility allows you to monitor levels, maintain and calibrate ink cartridges and align printing on the disc. The Configuration Utility can be launched from the Print Center in OSX by doing the following: 1. -
Page 18: Clean Cartridge
Clicking the Clean Cartridge button will cause the bravo to pick a disc and place in into the printer tray. The Bravo will then print a simple pattern that will flush ink through the nozzles. -
Page 19: Alignment Calibration Print
Printer Driver described in section 3-C of this manual. Make certain you have discs and ink installed in your Bravo prior to pressing this button. Once pressed, the Bravo will load a disc and print the following pattern: 8 10... - Page 20 Make sure the Bravo has discs and ink cartidges installed, and it is connected and ready to receive a print job, and then click the Yes button. The Bravo will pick a disc and print a scale of numbers on it. You will be prompted...
- Page 21 INDEX Once the print has finished, you will see the following dialog box: Look at the finished alignment disc and pick the numbers that come closest to lining up with one another. For instance, on the disc shown in this manual, the vertical alignment is -6 and the horizontal alignment is -9.
-
Page 22: Section 3: Creating Discs
INDEX Section 3: Creating Discs There are two main components to creating discs, printing and recording. Discus program will aid you in designing the printing for your discs. Discribe 5.1 will allow you to master the data and automate the recording and printing of your discs. - Page 23 INDEX Canvas Paint Photo Creating Discs 19...
- Page 24 INDEX or PICT file formats. The options on the left-hand side of the screen will allow you to crop, flip the image both horizontally and vertically, rotate 90 both clockwise and counter-clockwise, and resize the image. You can simply grab and drag the image to relocate it on your design. 7.
-
Page 25: Using Discribe 5.1
INDEX Settings from the Copies and Pages pull down menu. This will allow you to select the printer setting you wish for your print. These settings are described in detail in section 3-C of this manual. B. USING DISCRIBE Now that you have a label designed, lets take a look at how to create the data you want recorded to the disc. - Page 26 INDEX 2. This offers a quick selection of the most frequently used job types. More types are available in the main application. For this tutorial select we will be making an Audio CD. Click the Audio CD button. You will now see the Audio Job Window.
- Page 27 INDEX Note: AIFF Files will need to be in a specific format in order for Discribe accept them. Please be sure that your hard disk has enough space for the converted files and that the files adhere to the following guidelines: •...
- Page 28 Write ... button. It is important to use the Robot Write Disc instead of Write Disc if you want the Bravo to automatically load and unload discs. You will be presented with a Write Options window. The Robot Write Options window contains choices for the following: •...
- Page 29 If you do not already have a graphic you would like to print, click this button to launch Discus, the disc graphic design application included with your Bravo software. See section 3-A in this manual for more information on designing your disc.
- Page 30 This is helpful in avoiding recording failures, but may slow recording times. 5. Click Start to begin recording. The Bravo will automatically print and record your discs! Further detailed information for Discribe can be found in the Discribe User’s Guide.
-
Page 31: Printer Options
INDEX C. PRINTER OPTIONS The following section will examine the printer driver settings that affect the print quality of your discs. While the default settings will fit most printing needs, it is a good idea to familiarize yourself with these settings to optimize your print quality. - Page 32 INDEX Print Settings Click Print Setup to see the driver window and all of its settings. You will want click the Copies and Pages button and select Publisher Settings option in the drop-down menu to see the full pane and access all the printer driver settings.
- Page 33 Click on this Check box to enable PrimaColor color matching. The PrimaColor profiles were written specifically for the Bravo to give a precise color match when attempting to print photographic images. If you are using a third-party color management system, disable PrimaColor.
- Page 34 10% of being empty, and the LEDs on the top will flash in unison. If you press one of the Cartridge button on the top of the Bravo it will continue to print, but you will want to closely monitor the discs that print.
-
Page 35: Section 4: Interpreting The Publisher's Indicator Lights
INDEX Section 4: Interpreting the Publisher's Indicator Lights The Power and Busy LED indicator lights located on the top of the Publisher can tell you a lot about what is happening inside the Publisher. To accurately interpret what it means when these lights are on, off, or flashing, please refer to the following: Ink Cartridge Power LED... -
Page 36: Section 5: Maintenance And Troubleshooting
INDEX Section 5: Maintenance and Troubleshooting The Publisher is designed to operate for extended periods of time with very little attention. In fact, no regular maintenance is recommended other than cleaning the outside case. NOTE: Do NOT attempt to oil or grease the Publisher's Robotic Arm shaft or other components. -
Page 37: Software Test
5. You can select where you want discs to go during the test and the number of times to repeat the test. Click Start. The Bravo will perform your test. D. WRITE TEST FAILURE The write test simulates writing data to the CD by exactly duplicating the write process while holding the recorder's write laser in the off state. -
Page 38: Bravo Not Accessible
E. BRAVO NOT ACCESSIBLE If the Bravo or its recorder are not "seen" by the system, make sure that the proper software is loading in the System Folder. Items to double check are the USB (USB manager V1.2 or higher) and FireWire (FireWire V2.1 or higher) drivers... -
Page 39: Section 6: Technical Specifications
INDEX Section 6: Technical Specifications Model Optical Disc Publisher Configurations CD-R Publisher DVD-R Publisher Printing Method Ink-Jet Printing Resolution 2400 x 1200 dpi, 1200 x 1200 dpi, 1200 x 600 dpi, 600 x 600 dpi Ink Types Dual Cartridges: One 3-color (CMY) cartridge, and one Black Monochrome (K) Media Types... -
Page 40: Index
Index Audio Job, Running .................22 CD Tray....................... 6 Centering Test Print .................16 Configuration Utility.............13, 14, 29, 30 Connections, Rear Panel................4 Controls, Front Panel .................2 Discribe ...........4, 8, 18, 20, 21, 22, 23, 26, 27, 33 Discus..................18, 20, 25, 27 Enable Low Ink Warning ................30 Identifying the Parts ..................2 Ink Levels and Cartridge Maintenance ..........13 Ink Saturation ...................29... - Page 44 Printed in the United States of America P/N 510701...
Need help?
Do you have a question about the Bravo and is the answer not in the manual?
Questions and answers