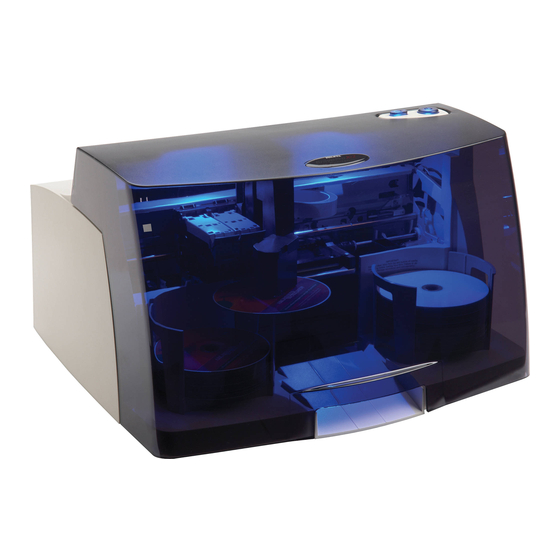
Primera Bravo II User Manual
Automated optical disc duplication & printing system
Hide thumbs
Also See for Bravo II:
- User manual (68 pages) ,
- Calibration instructions (4 pages) ,
- Operator's manual (2 pages)

Related Manuals for Primera Bravo II


Summary of Contents for Primera Bravo II
- Page 1 082206-510873-(08) DISC PUBLISHER Automated Optical Disc Automated Optical Disc Duplication & Printing System Duplication & Printing System © 2006 All rights reserved.
- Page 2 Notices: The information in this document is subject to change without notice. NO WARRANTY OF ANY KIND IS MADE WITH REGARD TO THIS MATERIAL, INCLUDING, BUT NOT LIMITED TO, THE IMPLIED WARRANTIES OF MERCHANTABILITY AND FITNESS FOR A PARTICULAR PURPOSE. No liability is assumed for errors contained herein or for incidental or consequential damages in connection with the furnishing, performance, or use of this material.
-
Page 3: Table Of Contents
INDEX Table of Contents Section 1: Getting Started ................1 A. Choosing a Good Location ..............1 B. Unpacking and Inspection..............2 C. Identifying the Parts ................2 D. PC System Requirements..............4 E. MAC System Requirements ..............4 Overview of Operation ..............5 Section 2: Hardware and Software Set-Up ..........8 A. -
Page 5: Section 1: Getting Started
INDEX Section 1: Getting Started THANK YOU… ...for purchasing the Bravo Disc Publisher. Bravo is the perfect all-in-one solution for producing professional looking CD-R and DVD-R discs. A wide variety of disc formats are supported, including audio CDs, Video CDs, data discs and more. -
Page 6: Unpacking And Inspection
INDEX B. UNPACKING AND INSPECTION While unpacking your Publisher, inspect the carton to ensure that no damage has occurred during shipping. Make sure that all supplied accessories are included with your unit. The following items should be included: • Optical Disc Publisher •... - Page 7 INDEX The Robotic Disc Transporter moves discs from the Input Bin, to a CD/DVD Recorder, to the printer, and finally to the Output Bin. The CD/DVD Recorder is automatically loaded and unloaded by the Publisher’s Robotic Disc Transporter. The Recorder Tray Button manually opens or closes the Recorder Tray.
-
Page 8: Pc System Requirements
INDEX Rear Panel This illustration shows the input ports found on the rear panel of the Publisher: USB 2.0 Port Power Input Port The USB 2.0 Interface is connected to an open USB 2.0 port on your PC with the USB 2.0 cable, included with your Publisher. Power Input Port connects to the included 100V~240V 12V switching power supply. -
Page 9: Overview Of Operation
INDEX • Free hard drive space of at least 2 GB (up to 6 GB for DVD) • Available USB 2.0 Port • Do not connect the Bravo to any USB hubs or the USB port on your keyboard. It should be connected directly to an on- board USB 2.0 port. - Page 10 INDEX 4. The Recorder Tray then automatically shuts. Robotic Disc Transporter will automatically check the Input Bin to make certain that only one disc was picked. Through software control, you can perform a test on each disc before recording. If a disc does not pass (meaning that all or part of that disc is not recordable), the Robotic Disc Transporter picks it out of the CD Tray...
- Page 11 INDEX 8. Print time varies according to which print mode has been selected (section 3-A). In most cases, print time takes no more than 2 minutes. After printing the first disc, the Publisher's Printer Disc Tray opens automatically. The Robotic Disc Transporter moves the finished disc to the Output Bin.
-
Page 12: Section 2: Hardware And Software Set-Up
INDEX Section 2: Hardware and Software Set-Up This section will describe the step-by-step process of setting up your Publisher. This includes information on how to load the supplies (ink and disc media) necessary to start producing discs. A. INSTALLING THE PC SOFTWARE The Installer Disc has a QuickStart menu that will guide you through the process of setting up your Publisher. -
Page 13: Hardware Setup
Due to the wide variety of printable-surface CD/DVD media, you may find that certain brands of discs provide higher print quality than others. For maximum print quality, use CD/DVD media authorized by Primera. Hardware and Software Set-Up 9... - Page 14 INDEX Refer to the following steps when loading discs in to the Publisher: • Open the front cover of the Publisher • The Publisher will automatically position the cartridge carrier and Robotic Disc Transporter to the center position allowing for easy access to the bins. •...
-
Page 15: Step 3: Installing Ink Cartridges
INDEX Step 3: Installing Ink Cartridges • Press the Ink Cartridge Button to move the Ink Cartridge Carrier to the load position and open the ink cartridge covers • Remove each ink cartridge from its packaging • Slowly remove the tape covering the cartridge's print head, being careful to avoid damaging the barcode label on the underside of... - Page 16 INDEX If you are using Windows, after a few moments a found new hardware wizard will appear. Select "Install the software automatically" and click Next. Make sure that you have your installation disc in a drive on your computer. You may see a notice like the one shown below stating that the device has not passed Windows Logo Testing.
- Page 17 INDEX 1. Open the Printer Setup Utility located in the Applications - Utilities folder. 2. Click Add. Select the Disc Publisher II from the list of available printers. Click Add again. Hardware and Software Set-Up 13...
-
Page 18: Section 3: Creating Discs On A Pc
INDEX Section 3: Creating Discs on a PC There are two main components to creating discs, printing and burning. SureThing CD Labeler is used to design the printing on your discs. PrimoDVD 2.1 controls the recording and allows you to select the image to be printed to your discs. Both applications will be described in detail in this section. -
Page 19: Paper Size
INDEX NOTE: Most applications allow you to change these same printer driver options from their "Print" and/or "Printer Setup" screens. This means that you don't have to go back to the main printer setup window each time you want to change a setting or option in the printer driver. -
Page 20: Ink Saturation
INDEX Select PrimaColor to enable color-matching profiles written specifically for the Publisher by Candela Color Management System. This setting automatically adjusts the color of your image according to predetermined printer profiles and default system profiles. This results in a very precise color match when attempting to print photographic images. - Page 21 INDEX normally use for your publishing because different brands of discs may vary slightly in size. Also, verify that the Publisher is powered ON and that it is connected to your computer. 2. Click on the Centering Properties Test Print button. The printer will begin printing the calibration test print.
-
Page 22: Enable Ink Low Warning
INDEX Enable Ink Low Warning This setting lets you enable or disable the warning from the printer to tell you when the ink cartridges are getting low. Ink Levels and Cartridge Maintenance Select this button to display the current ink levels as well as options for cleaning and changing cartridges. -
Page 23: Disc Output Location
INDEX If the Yellow, Magenta, Cyan or Black diagonal lines printed on the disc show breaks, repeat the cleaning procedure. If nozzles still appear to be clogged, remove the cartridge and gently wipe the nozzle area sideways with a clean water-dampened cloth. -
Page 24: Using Surething
INDEX Enable Bi-di Printing When enabled the Bravo will print bi-directional for faster printing. The default is uni-directional printing. When you enable bi-directional printing, you should perform the Alignment Calibration described later in this section. Please note that the calibration is stored on your computer, so if you move to a new computer you must repeat the calibration. - Page 25 INDEX 1. Click New... 2. Select Disc Publisher / AutoPrinter under Label Products and click Next. 3. Click Browse to look through the many built-in backgrounds included with SureThing, or click Clear if you would like to import your own background or design. Click Next.
-
Page 26: Using Other Graphics Programs
INDEX 4. Check Use Smart Designs to browse through different built-in designs. Deselect this option if you would like to create your own layout. When finished, click Next. 5. Click Finish. You should now see your basic layout. Simply double click on text boxes to modify the standard text with your information. -
Page 27: Using Primodvd To Create Your Discs
INDEX Your Publisher will support two types of print files PrimoDVD 2.1: • *.STD - SureThing CD Labeler • *.PRN - Print files created through the Publisher Printer Driver *.STD files As described earlier, these are files created in SureThing CD Labeler. - Page 28 INDEX Operating Screens To keep things simple, there is really only one main operating screen you'll need to know about in order to run the PrimoDVD Software. It is called the Application Window it looks like this: Drive Status Window Job Set-Up Window Job Status...
- Page 29 INDEX • Job Status Window. As each Job Panel is formed, an entry is made in the Job Status Window at the lower left side of the main Application Window. When jobs are started, this list displays the status of each job, including the number of discs copied and the number remaining.
-
Page 30: Using Kiosk Mode
Rejects can be identified in the stack because they will not be printed in the same manner as successfully recorded discs. Primera Technology offers an optional Kiosk Mode Kit that contains a third output bin to... -
Page 31: Copying A Cd Or Dvd
INDEX collect the discs. This optional bin hangs off of the edge of a table and attaches just under the front lip of the Bravo. This kit is available through your reseller. Kiosk mode is enabled as follows: 1. In PrimoDVD 2.1 click Robotics then Options from the main menu. - Page 32 INDEX Primo Global Image format (*.gi) in a temporary location on your computer. Primo uses this temporary file to make all subsequent copies that are requested. The master disc is read only once to create the initial temporary GI file. Disc to Disc copy is Recommended for all CD or DVD types (Audio CD, Data CD, Software Install Disc, Video CD, DVD, DVD-ROM, etc.).
- Page 33 INDEX Step 6 - Check the box next to "Make a temporary image on hard drive and copy from there". This is recommended for all hardware configurations. Failure to check this box may cause a high number of rejected discs. Step 7 - Click on the red Record button Step 1 Step 7...
-
Page 34: Section 4: Creating Discs On A Mac
INDEX Section 4: Creating Discs on a Mac There are two main components to duplicating disc, printing and recording. You can use any graphics application to design your label for printing. Discribe 5.2 will allow you to master the data and automate the recording and printing of your discs. -
Page 35: Printing Only
INDEX 3. Place your image or design your graphics on the new layer. Use the template as a guide for image and graphics placement. 4. Before you print or save your image in another format, either hide the template layer or delete the template layer. The circular shape and center cut out should not beprinted. - Page 36 INDEX 2. Click the Audio CD button. You will now see the Audio Job Pane. 3. Add your audio tracks by dragging AIFF, MP3, WAV, Sound Designer II (SDII) files or tracks to the window. You can drag one or multiple files to the window in any combination.
- Page 37 INDEX Note: AIFF Files will need to be in a specific format in order for Discribe to accept them. Please be sure that your hard disk has enough space for the converted files and that the files adhere to the following guidelines: Stereo •...
- Page 38 INDEX 5. You may preview audio tracks by selecting the desired track and clicking the Play button. If you are satisfied with the content of your audio project, you are ready to write the disc. If you are still in the Discribe Audio Picker window then click the OK button to return to the main interface.
- Page 39 An optional Kiosk Kit is available from your Primera reseller that contains a custom output bin to catch the finished discs as they leave the Bravo. b. Click the Print Image on Discs button to enable printing.
- Page 40 INDEX Print Settings will launch the Printer Driver settings when clicked. These settings are described in detail in section 4-E of this manual. Set Print disc before recording/ Record disc before printing. Record disc before printing is recommended for most jobs to avoid printing on discs that do not burn properly.
- Page 41 INDEX C.2 Data 1. Double click the Discribe Icon to launch the program. You will see a splash screen followed by Discribe's Quick Start Menu. 2. Click the Data CD button. You will now see the Data Job Pane. Discribe defaults to a Mac HFS format, if you want the disc to be read on a Windows format PC, you will need to select ISO/9660 as your job type from the drop-down list.
- Page 42 INDEX Add your files and folders by dragging them to the window. You can drag one or multiple files to the window in any combination. 3. Click the Data… button to view all the files that have been added to your current project. You can add files by clicking the Add...
- Page 43 An optional Kiosk Kit is available from your Primera reseller that contains a custom output bin to catch the finished discs as they leave the Bravo. b. Click the Print Image on Discs button to enable printing.
- Page 44 INDEX Also set the option to select a paper size as described in Section 4-E of this manual. Print Settings will launch the Printer Driver settings when clicked. These settings are described in detail in Section 4-E of this manual. Set Print disc before recording/Record disc before printing.
- Page 45 INDEX 1. Double click the Discribe Icon to launch the program. You will see a splash screen followed by Discribe's Quick Start Menu. 2. Click the Copy a CD/DVD button. 3. Place your master disc in your Bravo's drive 4. Select the drive in your Bravo as the source drive. (Skip to Step 7 to copy a disc with out making a physical image) 5.
- Page 46 INDEX Primera reseller that contains a custom output bin to catch the finished discs as they leave the Bravo. b. Click the Print Image on Discs button to enable printing. This will enable other buttons in this pane. Press the Choose Image button to select an image to print.
- Page 47 INDEX Print Settings will launch the Printer Driver settings when clicked. These settings are described in detail in Section 4-E of this manual. Set Print disc before recording/Record disc before printing. Record disc before printing is recommended for most jobs to avoid printing on discs that do not burn properly.
- Page 48 INDEX copies of each of the five discs, load two blanks followed by the original, then two more blanks followed by the next original and so forth. Originals Blanks NOTE: If you plan to use Kiosk mode, you could load blanks and originals in both bins, doubling the amount of discs you can copy.
-
Page 49: Queueing Jobs
INDEX This will launch the Streaming Print Center where you can queue the individual images for printing. Click Design Image if you wish to design labels in Discus. If you already have the images you wish to print, drag them into the queue area or click Add. - Page 50 INDEX 3. You will be prompted to save the job. Click Save. 4. Name your job. Click Save. Once you have saved your job, you will see the Job Details Pane. 46 Creating Discs on a Mac...
- Page 51 INDEX 6. If you would like to print an image on the disc, check the Print Image on Discs box to enable printing. This will enable other buttons in this pane. • Press the Choose Image button to select an image to print.
- Page 52 INDEX 8. Return to Discribes’ main menu by clicking on the Discribe pane, bringing it to the foreground. Repeat the steps above for each individual job to be queued. 9. Once all the jobs have been queued, review the job queue settings window before starting the jobs.
-
Page 53: Printer Options
INDEX E. PRINTER OPTIONS The following section will examine the printer driver settings that affect the print quality of your discs. While the default settings will fit most printing needs, it is a good idea to familiarize yourself with these settings to optimize your print quality. - Page 54 INDEX Print Settings Click Print Setup to see the driver window and all of its settings. You will want click the Copies and Pages button and select Publisher Settings option in the drop-down menu to see the full pane and access all the printer driver settings. The following is a description of the printer driver settings: •...
- Page 55 This allows you to place blank discs in both the input and output bins doubling your capacity. An optional Kiosk Kit is available from your Primera reseller that contains a custom output bin to catch the finished discs as they leave the Bravo.
- Page 56 INDEX are using. For the discs that Primera sells, use the following guide for Inner Diameter: − 38.3 mm for Primera's Tuff-Coat CDR − 24.9 mm for the Hockey Rink Disc, Business Card Disc and 80mm CD • Outer Margin The Outer Margin refers to where the printing will cut off around the outer edge of your disc.
-
Page 57: Configuration Utility
INDEX F. CONFIGURATION UTILITY The Configuration Utility is a program that installs with your Bravo software. This utility allows you to monitor ink levels, maintain and calibrate ink cartridges and align printing on the disc. The Configuration Utility can be launched from the Print Center in OSX by doing the following: 1. -
Page 58: Clean Cartridge
INDEX You will see both the Color and Monochrome Ink Levels are displayed. The Color Ink Level represents the lowest color in your cartridge. For instance, if your cartridge has 80% cyan 50% yellow and 65% magenta ink remaining, the level reported would be 50%. -
Page 59: Image Alignment
INDEX Alignment Calibration Print Clicking this button will print a test disc that will provide a scale by which to calibrate the Color Ink Cartridge to the Monochrome Ink Cartridge. This is crucial when selecting the Black and Color Ink Cartridge setting in the Printer Driver as described in Section 4-E of this manual. - Page 60 INDEX If you do not know the direction and distance to move the image in order to center it on your disc, you can opt to print centering test print. Make sure the Bravo has discs and ink cartridges installed, and it is connected and ready to receive a print job, and then click the Yes button.
- Page 61 INDEX Once the print has finished, you will see the following dialog box: Look at the finished alignment disc and pick the numbers that come closest to lining up with one another. For instance, on the disc shown in this manual, the vertical alignment is 2 and the horizontal alignment is -3.
-
Page 62: Section 5: Interpreting The Publisher's Indicator Lights
INDEX Section 5: Interpreting the Publisher's Indicator Lights The Power and Busy LED indicator lights located on the top of the Publisher can tell you a lot about what is happening inside the Publisher. To accurately interpret what it means when these lights are on, off, or flashing, please refer to the following: Ink Cartridge Power LED... -
Page 63: Section 6: Maintenance And Troubleshooting
INDEX Section 6: Maintenance and Troubleshooting The Publisher is designed to operate for extended periods of time with very little attention. In fact, no regular maintenance is recommended other than cleaning the outside case. NOTE: Do NOT attempt to oil or grease the Publisher's Robotic Arm shaft or other components. -
Page 64: Pc Software Test
INDEX C. PC SOFTWARE TEST This will confirm that the hardware, software and your PC are all communicating properly with each other properly. Follow the procedures listed on the following pages. 1. Launch the software from your Windows Desktop or program menu. -
Page 65: Mac Software Test
INDEX 5. Click OK to get back to the main screen. Click on Robotics again. 7. Select Manual Movements. 8. Load at least 4-5 discs into the Input Bin. 9. Click on Start Test. The robotic arm will move through its entire sequence automatically. -
Page 66: Cleaning The Ink Cartridges
INDEX E. CLEANING THE INK CARTRIDGES It may be necessary to clean the ink cartridge nozzles if you notice reduced print quality, or if you suspect an cartridge nozzle has become slightly dried out or clogged. If you are having print quality problems, follow the steps below: 1. -
Page 67: Section 7: Technical Specifications
INDEX Section 7: Technical Specifications Model Optical Disc Publisher Configurations CD-R Publisher DVD-R Publisher Printing Method Ink-Jet Printing Resolution 4800 x 1200 dpi, 2400 x 1200 dpi, 1200 x 1200 dpi, 600 x 600 dpi Ink Types Dual Cartridges: One 3-color (CMY) cartridge, and one Black Monochrome (K) Media Types... - Page 68 INDEX Weight 18 lbs. (8.2kg) Dimensions 17.8"W x 7.25"H x 16"D (455mmW x 184mmH x406mmD) Certifications Emissions: FCC Class B, CE Safety UL, UL-C, CE Warranty One year return-to-depot 64 Technical Specifications...
-
Page 69: Index
Index Activity Log..................24, 25 Algebraic....................15 Alignment Calibration ..............15, 20 Application Window ..............24, 25, 60 Audio Job, Running ................27, 31 Cartridge Type ..................15 CD Tray....................... 6 Centering Test Print ................16, 56 Color Matching..................15 Connections, Rear Panel................4 Controls, Front Panel .................2 Disc Output Location ................19 Drive Status Window ................24 Enable Ink Low Warning ................18 Identifying the Parts ..................2... - Page 72 Printed in the United States of America P/N 510873...
Need help?
Do you have a question about the Bravo II and is the answer not in the manual?
Questions and answers