Table of Contents
Advertisement
Quick Links
Advertisement
Table of Contents

Related Manuals for Daikin VRV IV HXY080A8V1B


Summary of Contents for Daikin VRV IV HXY080A8V1B
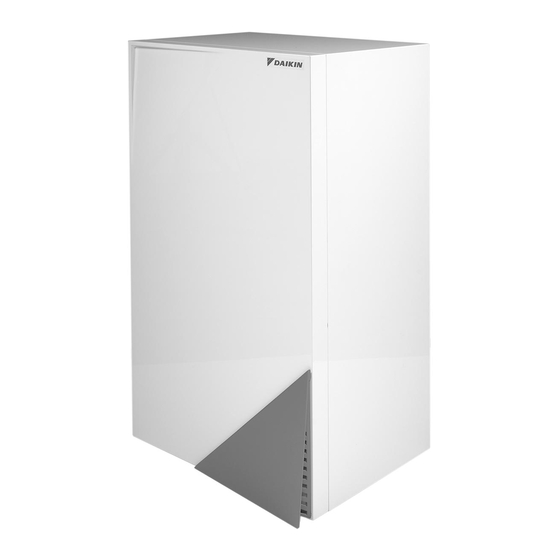
- Page 1 INSTALLATION AND OPERATION MANUAL System indoor unit HXY080A8V1B HXY125A8V1B...
- Page 2 3P402254-6...
-
Page 3: Table Of Contents
Installation and HXY080A8V1B VRV IV System indoor unit operation manual HXY125A8V1B Content 9. Installing the optional EKBUHAA(6V3/6W1) heater kit .... 26 Page 10. Hand-over to the user .............. 26 1. About the documentation ............2 11. Operation of the unit ..............27 1.1. -
Page 4: About The Documentation
CAUTION Latest revisions of the supplied documentation may be available on Wear adequate personal protective equipment (protective the regional Daikin website or via your dealer. gloves, safety glasses,…) when installing, maintaining or servicing the system. General safety precautions... -
Page 5: Installation Site
2.2.2. Installation site 2.2.4. Water Provide sufficient space around the unit for servicing and air NOTICE circulation. Make sure water quality complies with EU directive Make sure the installation site withstands the unit’s weight and 98/83 EC. vibration. Make sure the area is well ventilated. -
Page 6: Meaning Of Used Items
Field supply: The installation/operation manual indoor unit is located in the upper Equipment not made by Daikin that can be combined with the part of the box. Follow the procedure below to remove the other product according to the instructions in the accompanying accessories. -
Page 7: About The Units And Options
For installation instructions, see the installation manual of the room thermostat. This installation manual concerns VRV IV indoor unit air to water inverter heat pump units of the Daikin HXY080/125 series. NOTICE These units are intended for indoor installation and aimed for An additional 230 V AC power supply is required for the commercial and public buildings. -
Page 8: Possible Combinations Of Indoor Unit And Outdoor Unit
Highest comfort and efficiency. The smart room thermostat 5.2. Setting up the space heating/cooling system functionality can decrease or increase the desired leaving water The Daikin heat pump system supplies leaving water to heat emitters temperature based actual room temperature in one or more rooms. -
Page 9: Using An Auxiliary Heat Source
Bypass valve (field supply) NOTICE Make sure the auxiliary boiler and its integration in the system complies with applicable legislation. Daikin is NOT responsible for incorrect or unsafe situations in the auxiliary boiler system. HXY080+125A8V1B Installation and operation manual VRV IV System indoor unit 4P405267-1B –... -
Page 10: Preparing Water Circuit
6.2. Preparing water circuit 6.2.1. Selection of the type of heat emitters The selection of the heat emitter is the choice of the end customer. The choice of the heat emitter will define the needed water temperature from the unit. Based on the needed water temperature for the heat emitters, following range can be defined: Low temperature (heating leaving water temperature range from... -
Page 11: Water Circuit Requirements
6.2.2. Water circuit requirements Never use Zn-coated parts in the water circuit. Because the unit's internal water circuit uses copper piping, excessive Use the indoor unit only in a closed water system. corrosion may occur. Using the system in an open water system will lead to excessive corrosion. -
Page 12: Changing The Pre-Pressure Of The Expansion Vessel
Minimum water volume Example: Maximum water volume and expansion vessel pre- pressure Check that the total water volume in the installation is minimum 20 liter, the internal water volume of the indoor unit NOT included. Installation Water volume height ≤ 280 l >280 l INFORMATION difference... -
Page 13: Preparing Electrical Wiring
6.3. Preparing electrical wiring 6.3.2. Overview of electrical connections on the indoor unit The following illustration shows the required field wiring. 6.3.1. About preparing electrical wiring INFORMATION WARNING The following illustration is an example and may NOT Establish proper earthing. Do NOT earth the unit to a ... -
Page 14: Installation
Installation Before installing, first read the instructions of previous chapter. INFORMATION Installation shall be done by an installer, the choice of materials and installation shall comply with the applicable legislation. In Europe the EN378 is the applicable standard that shall be used. 7.1. -
Page 15: Connecting The Water Piping
For details concerning vacuuming and operating the unit during 7.2.3. To fill the water circuit vacuuming, see installation manual of outdoor unit. Connect the water supply hose to the drain and fill valve. For details concerning piping sizes and refnet selection, see installation manual of the outdoor unit. -
Page 16: Connecting The Electrical Wiring
7.3. Connecting the electrical wiring 7.3.2. System overview of field wiring Field wiring consists power supply, indoor-outdoor 7.3.1. Precautions on electrical wiring work communication (= transmission F1F2) wiring, wiring of the user interface (=P1P2), wiring for connection of options and field supply WARNING: Electrical Installation accessories. - Page 17 Fix the wallplate of the user interface to the frontplate of the unit. For installation of the frontplate, see "7.4.1. To fix the user interface cover to the indoor unit" on page X801M a Low voltage cable bundle (see "6.3.2. Overview of electrical connections on the indoor unit"...
-
Page 18: Finishing The Indoor Unit Installation
Fixation of the user interface to the wall in case of installation as 7.4. Finishing the indoor unit installation room thermostat 7.4.1. To fix the user interface cover to the indoor unit Cut off a 2 wire conductor. Make sure that the front panel is removed from the indoor unit. Fix the wallplate of the user interface to the wall. -
Page 19: Commissioning
Commissioning NOTICE Operating the system with closed valves will damage the NOTICE pump! It is important that all information in this chapter is read Once all checks are fulfilled, the unit must be closed, only then can sequentially by the installer and that the system is the unit be powered on. -
Page 20: Detailed Description
Repeat step through to change other field settings as By default no level is defined so all buttons and functions are required. operable. The actual permission level is determined by field setting. For When finished, press the button to exit FIELD SET MODE. permission level 2, set field setting [0-00] to 2, for permission level 3, set field setting [0-00] to 3. - Page 21 Operation example: Schedule timer based on temperature set Operation example: Schedule timer based on ON/OFF instruction. points. When setback function (refer to "[2] Automatic setback function" on When setback function (refer to "[2] Automatic setback function" on page 19) is enabled, the setback operation will have priority over the page 19) is enabled, the setback operation will have priority over the scheduled action in the schedule timer if ON instruction is active.
- Page 22 [3-02] Set point at low ambient temperature (Lo_Ti): the target outgoing water temperature when the outdoor temperature equals or drops below the low ambient temperature (Lo_A). 21°C Note that the Lo_Ti value should be higher than Hi_Ti, as for colder outdoor temperatures (i.e.
- Page 23 [8-02] Emergency operation. [C] Leaving water temperature limits In case of emergency, heating can be provided by the heater kit, [C-00] Maximum leaving water set point in heating operation. not by hydrobox. Emergency mode can be activated by setting [C-01] Minimum leaving water set point in heating operation.
-
Page 24: Field Setting List For Installation Manual
8.4. Field setting list for Installation Manual Installer setting at variance with default value First Second Default code code Setting name Date Value Date Value value Range Step Unit Remote control setup User permission level. — Room temperature compensation value. –5~5 °C Not applicable. - Page 25 Installer setting at variance with default value First Second Default code code Setting name Date Value Date Value value Range Step Unit Option setup Not applicable. Do not change the default value. — — — Not applicable. Do not change the default value. —...
-
Page 26: Final Check And Test Run
8.5. Final check and test run Temperature read-out mode On the user interface, the actual temperatures can be displayed. 8.5.1. Final check Push and hold the button for 5 seconds. Before switching on the unit, read the following: The leaving water temperature is displayed (icons When the complete installation and all necessary settings have ... -
Page 27: Service And Maintenance
8.6. Service and maintenance 8.6.2. Malfunction codes list Malfunction In order to ensure optimal operation of the unit, a number of checks code Failure cause Corrective action and inspections on the unit and the field wiring have to be carried out Failure of writing memory Contact your local dealer. -
Page 28: Installing The Optional Ekbuhaa(6V3/6W1) Heater Kit
Installing the optional 10. Hand-over to the user EKBUHAA(6V3/6W1) heater kit Once the test run is finished and the unit operates properly, please make sure the following is clear for the user: The heater kit option can be installed to assist the heat pump during Fill in the installer setting table (see chapter 10) with the actual ... -
Page 29: Operation Of The Unit
11. Operation of the unit 11.3. Operating the unit Please read chapter 1 and 2 first before consulting this chapter. CAUTION Do not rinse the unit. This may cause electric shock or WARNING fire. Before operating the unit, be sure the installation has been ... -
Page 30: Name And Function Of Buttons And Icons
11.3.2. Name and function of buttons and icons Permission 6 22 Master Slave level 2 level 3 Operation ON/OFF Setting the leaving water temperature — Setting the room temperature Weather dependent set point operation — ON/OFF Setting the clock — —... -
Page 31: Setting Up The Controller
28 TIME ADJUST BUTTONS The purpose of each operation and how the configuration is done, is These multi-purpose buttons are used to adjust the clock, to explained below. toggle between temperatures (water inlet/outlet temperature of Room temperature control the unit, outdoor ambient temperature, actual room temperature) and in schedule timer programming mode. - Page 32 Leaving water temperature control (default) INFORMATION In this mode, heating will be activated as required by the water When using room temperature control, space heating temperature set point. The set point can be set manually, through the operation based on room temperature will have priority schedule timer or weather dependent (automatic).
-
Page 33: Other Operation Modes
Field settings define the parameters for the weather dependent The setback function is configured through field settings. Refer to the operation of the unit. Refer to the chapter "8.3. Field settings" on chapter "8.3. Field settings" on page 17 for a detailed description how page 17 for a detailed description how to set one or more field to set one or more field settings. -
Page 34: Schedule Timer Operation
11.3.8. Schedule timer operation Operation example: Schedule timer based on temperature set points In schedule timer operation, the installation is controlled by the schedule timer. The actions programmed in the schedule timer will be When setback function is enabled, the setback operation will have executed automatically. -
Page 35: Programming And Consulting The Schedule Timer
Operation example: Schedule timer based on ON/OFF instruction 11.3.10. Programming and consulting the schedule timer When setback function is enabled, the setback operation will have Getting started priority over the scheduled action in the schedule timer if ON Programming the schedule timer is flexible (you can add, remove or instruction is active. - Page 36 Programming Programming space cooling is carried out as follows: Programming space cooling INFORMATION Returning to previous steps in the programming procedure without saving modified settings is done by pressing the button. Press the button to enter the programming/consulting mode. Select the operation mode you would like to program by means of the buttons.
- Page 37 Programming space heating Programming space heating is carried out as follows: INFORMATION Returning to previous steps in the programming procedure without saving modified settings is done by pressing the button. Press the button to enter the programming/consulting mode. Select the operation mode you would like to program by means of the buttons.
- Page 38 Consulting programmed actions Deleting one or more programmed actions Consulting space heating/cooling actions Deleting one or more programmed actions is done at the same time as storing the programmed actions. Consulting space cooling heating or space heating is carried out as follows.
-
Page 39: Operating The Optional Demand Pcb
11.3.11. Operating the optional demand PCB 11.4.1. Procedure An optional PCB EKRP1AHTA can be connected to the unit and be To change one or more field settings, proceed as follows. used to remotely control the unit There are 3 inputs that allow ... -
Page 40: Field Setting List For Operation Manual
11.5. Field setting list for Operation Manual Installer setting at variance with default value First Second Default code code Setting name Date Value Date Value value Range Step Unit Remote control setup — Installation related setting –5~5 °C Installation related setting Not applicable. - Page 41 Installer setting at variance with default value First Second Default code code Setting name Date Value Date Value value Range Step Unit Option setup Not applicable. Do not change the default value. — — — Not applicable. Do not change the default value. —...
-
Page 42: Maintenance
This maintenance should be a b c carried out by your local Daikin technician (see installation manual). The only maintenance which may be required by the operator is: Keeping the user interface clean by means of a soft damp cloth. -
Page 43: Wiring Diagram
14.2. Wiring diagram 1~50Hz 220-240 VAC power supply Q1DI -t° -t° -t° -t° X14A:1 2 X8A:1 2 X30A:1 X4A:1 X17A:1 2 X12A:1 2 X18A:1 2 X16A:1 2 3 Cooling / heating output: F1F2 communication: max 0.3A, 230V AC see outdoor unit for X1A:1 more details X27A:(L) 1... -
Page 44: Electrical Components Box
14.3. Electrical components box Heating operation 20/16 -7/-8 -20/X a Outdoor Ta (°CDB/WB) b Indoor (LWC°C) c Warming up zone d Normal operation range 14.5. ESP curve 95.0 90.0 85.0 80.0 75.0 70.0 65.0 a A1P: main PCB 60.0 b A3P: control PCB 55.0 c A4P: optional demand PCB 50.0... -
Page 45: Technical Specifications Table
14.6. Technical specifications table 14.7. Electrical specifications table HXY080A8V1B HXY125A8V1B HXY080A8V1B HXY125A8V1B Nominal cooling capacity Power supply • Heating • Phase • Cooling 12.5 • Frequency Casing • Voltage 220~240 • Colour White Current • Material Pre-coated sheetmetal • Running current Dimensions •... - Page 48 4P405267-1B 2016.02...
Need help?
Do you have a question about the VRV IV HXY080A8V1B and is the answer not in the manual?
Questions and answers