
Subscribe to Our Youtube Channel
Related Manuals for ClimateMaster HE Series


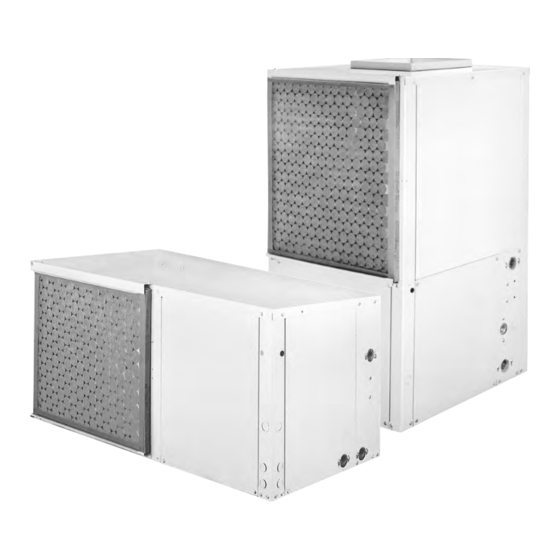
Summary of Contents for ClimateMaster HE Series
- Page 1 HE/VE Series Horizontal & Vertical Series Water Source Heat Pumps Installation, Operation, & Maintenance Instructions...
-
Page 2: Table Of Contents
TABLE OF CONTENTS Page General Information Inspection Introduction Storage Unit Protection Pre-Installation Horizontal Units Location and Access Vertical Units location and Access Installation Installation of Supply and Return Piping Condensate Piping Hanging and Mounting a Horizontal Unit Sound Attenuation for Horizontal Units Installing a Vertical Unit Sound Attenuation for Vertical Units Electrical Wiring... -
Page 3: General Information
NOTE: It is the any of the system components. Remove any dirt found on responsibility of the purchaser to file all necessary these components. claims with the carrier. Notify the ClimateMaster Traffic Department of all damage within fifteen (15) days of shipment. Pre-Installation... -
Page 4: Horizontal Units Location And Access
Horizontal Units Location and Access Horizontal Units are typically installed above a false All refrigerant discharged from this unit must be ceiling or in a ceiling plenum. Refer to Figure 1 below recovered without exception. Technicians must follow for an illustration of a typical installation. Install units industry accepted guidelines and all local, state and with adequate clearance to allow maintenance and federal statutes for the recovery and disposal of... -
Page 5: Vertical Units Location And Access
Conform to the following guidelines when selecting unit 3. Provide a duct slot for filter replacement if a return location. duct is used. 1. Provide adequate clearance for filter replacement 4. Do not obstruct the space beneath the unit with and drain pan cleaning. -
Page 6: Installation
Do not bend or kink supply lines or hoses. Regulations. Optional pressure-rated hose assemblies designed specifically for use with ClimateMaster units are Installation of Supply and Return Piping available. Similar hoses can be obtained from alternate Follow these piping guidelines. -
Page 7: Hanging And Mounting A Horizontal Unit
Figure 5 illustrates a typical trap and vent used with Follow clearance guidelines described in the Location HE/VE Heat Pumps. Design the length of the trap and Access section of this manual. Provide adequate (water-seal) based upon the amount of positive or clearance within the plenum for filter removal in all four directions. -
Page 8: Installing A Vertical Unit
Installing a Vertical Unit Figure 7 - Vertical Sound Attenuation Vertical units are typically installed on the floor or on shelves designed to support the weight of the unit. Install the unit on a piece of rubber, neoprene or other mounting pad material for sound isolation. -
Page 9: Operating Limits
Operating Limits 3. When using 100% outside air as a source of ventilation, a 40º F DB minimum and a 78° F WB Environment -This unit is designed for INDOOR maximum are acceptable, but the cabinet may sweat INSTALLATION ONLY. during hot weather. -
Page 10: Closed Loop Earth Coupled Applications
CLOSED LOOP EARTH COUPLED APPLICATIONS Introduction When multiple pipes are laid in a trench, space pipes properly and backfill carefully to avoid disturbing the CAUTION spacing of the pipes in the trench. The following instructions represent industry accepted installation practices for Closed Loop Earth Coupled Vertical Applications Heat Pump Systems. -
Page 11: Building Entry
Pier and Beam (crawl space) Building Entry New and Retrofit Construction: Bury the pipe beneath the Seal and protect the entry point of the earth coupling into footing and between piers to the point that it is directly the building as shown in Figures 8-11 below. below the point of entry into the building. -
Page 12: Loop Testing
Horizontal Systems: Test individual loops as installed. Test entire system when all loops are assembled. Do not use calcium chloride in ClimateMaster units. Vertical U-Bends and Pool Loop systems: Test Vertical The use of calcium chloride voids the equipment U-bends and pond loop assemblies prior to installation warranty. -
Page 13: Start-Up Preparation
Adjust the make-up water 1) Plumb the unit to the water tank as described in the replacement rate to equal the rate of bleed. ClimateMaster Geo-Thermal Heat Pump Manual Volume 3. 7. Refill the system and add trisodium phosphate in a proportion of approximately one pound per 150 2) Fill the system with water. -
Page 14: System Checkout
SYSTEM CHECKOUT When the installation is complete and the system is cleaned and flushed, follow the System Checkout procedure outlined below. 1. Voltage: Ensure that voltage is within the 12. Standby Pump: Verify that the standby pump is utilization range specifications of the unit properly installed and in operating condition. -
Page 15: Unit Start-Up
UNIT START-UP Use the procedure outlined below to initiate proper unit start-up: Allow five (5) minutes between tests for pressure to WARNING equalize. When the disconnect switch is closed, high voltage is Turn thermostat to lowest setting and set present in some areas of the electrical panel. Exercise thermostat switch to "HEAT"... -
Page 16: Maintenance
Part #69197308 ClimateMaster works continually to improve its products. As a result, the design and specifications of each product at the time of order may be changed without notice and may not be as described herein. Please contact ClimateMaster’s Customer Service Department at 1-405-745-6000 for specific information on the current design and specifications.
Need help?
Do you have a question about the HE Series and is the answer not in the manual?
Questions and answers