
Subscribe to Our Youtube Channel
Related Manuals for Nilfisk-Advance AERO 26-2L PC


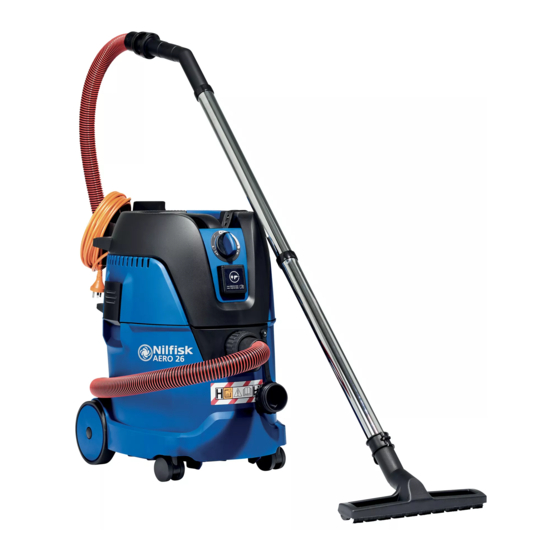
Summary of Contents for Nilfisk-Advance AERO 26-2L PC
-
Page 1: Frontpage
AERO 26-2L PC, AERO 26-2M PC, AERO 26-W2M PC, AERO 21-0H PC, AERO 26-2H PC, AERO 26-W2H PC SERVICE MANUAL SM AERO vers. 1 January 2022... -
Page 2: Table Of Contents
Contents Frontpage…………………………………………………………………………………..……….. Contents…………………………………………………………………………………….……….. A. Safety/Preface……………..……………………………………………………...…………….. B. Technical specifications………………………………………………………………...……. 4-11 C. Construction…………………………………………………………………………………….. Overview all models………………………………………………………………………… Overview of different motor heads………………………………………………………… Overview of different containers………………………………………………………….. D. Service……………………………………………………………………………………….…... 1. Motor head……………………………………………………………………………….. Overview of the motor head……………………………………………………… Disassembling/assembling of the cover………………………………………… 5-16 2. Air guide plate……………………………………………………………………………. Overview and disassembly/assembly of the air guide plate……………………... - Page 3 Preface / Safety instructions Preface This repair manual contains a detailed description of the main repair work for wet and dry cleaners of the Nilfisk-ALTO AERO Series. Repair work requires a suitable testing workplace with the necessary power supply. ...
- Page 4 Technical data AERO 26-2L PC AERO 26-2L PC EU AERO 26-2L PC CH AERO 26-2L PC AU/NZ Basic specs 220-240V 50/60HZ 220-240V 50/60HZ 220-240V 50/60HZ Item number: 107420040 107420041 107420042 Airflow with included hose 33,5 33,5 33,5 Airflow machine only Ø50x1000...
- Page 5 Technical data AERO 26-2M PC EU AERO 26-2M PC AERO 26-2M PC AERO 26-2M PC AERO 26-2M PC 220-240V 220-240V Basic specs 50/60HZ 110V 50/60HZ 50/60HZ 120V 50/60HZ Item number: 107420043 107420044 107420045 107420046 Airflow with included hose l/s 33,5 33,5 Airflow machine only Ø50x1000 (marketing)
- Page 6 Technical data AERO 26-W2M PC AERO 26-W2M AERO 26-W2M PC AERO 26-W2M AERO 26-W2M PC EU AU/NZ PC CH PC US 220-240V 220-240V Basic specs 50/60HZ 220-240V 50/60HZ 50/60HZ 120V 50/60HZ Item number: 107420047 107420048 107420049 107420050 Airflow with included hose l/s 33,5 33,5 33,5...
- Page 7 Technical data AERO 21-0H PC AERO 21-0H PC EU Basic specs 220-240V 50/60HZ Item number: 107420062 Airflow with included hose Airflow machine only Ø50x1000 (marketing) 3600 Vacuum mbar Power Piec 1000 Power Max 1250 Sound pressure level @1m dB(A) Working sound level @3m dB(A) Container volume Container type...
- Page 8 Technical data AERO 26-2H PC AERO 26-2H PC EU AERO 26-2H PC GB Basic specs 220-240V 50/60HZ 110V 50/60HZ Item number: 107420051 107420052 Airflow with included hose Airflow machine only Ø50x1000 (marketing) 3700 3600 Vacuum mbar Power Piec 1200 1000 Power Max 1500 1250...
- Page 9 Technical data AERO 26-2H PC AERO 26-2H PC GB AERO 26-2H PC US Basic specs 220-240V 50/60HZ 120V 50/60HZ Item number: 107420053 107420054 Airflow with included hose Airflow machine only Ø50x1000 (marketing) 3700 3600 Vacuum mbar Power Piec 1200 1000 Power Max 1500 Sound pressure level @1m...
- Page 10 Technical data AERO 26-W2H PC AERO 26-W2H PC EU AERO 26-W2H PC AU/NZ Basic specs 220-240V 50/60HZ 220-240V 50/60HZ Item number: 107420055 107420056 Airflow with included hose Airflow machine only Ø50x1000 (marketing) 3700 3700 Vacuum mbar Power Piec 1200 1200 Power Max 1500 1500...
- Page 11 Technical data AERO 26-W2H PC AERO 26-W2H PC CH AERO 26-W2H PC US Basic specs 220-240V 50/60HZ 120V 50/60HZ Item number: 107420057 107420058 Airflow with included hose Airflow machine only Ø50x1000 (marketing) 3700 3600 Vacuum mbar Power Piec 1200 1000 Power Max 1500 Sound pressure level @1m...
-
Page 12: Construction
Construction All AERO models: AERO 26-2L PC AERO 26-2L PC AERO 26-2L PC AERO 26-2L PC AU/NZ 220-240V 220-240V 50/60HZ 50/60HZ 220-240V 50/60HZ 107420040 107420041 107420042 AERO 26-2M PC EU AERO 26-2M PC AERO 26-2M PC AERO 26-2M PC AERO 26-2M PC US... -
Page 13: Overview Of Different Motor Heads
Construction Models: All Overview of different types of motor heads On/ off & variable speed Tool socket Filter cleaning Resettable fuse (5 amp.) - ONLY for AU/NZ 26-2L PC 26-2M PC 26-W2H PC 21-0H PC A 5 amp. thermal fuse for the power outlet socket is installed in the AU/ NZ models. -
Page 14: Overview Of Different Containers
Construction Models: All Overview of different types of containers Inlet Castor wheels Inlet plug Container 26-L,M & H PC Container 21-0H PC 14/33 SM AERO vers. 1 January 2022... -
Page 15: Service
Service Models: All Overview of the motor head Description: This is a general over- view of how the motor heads will look* like from the above. * Please expect some minor difference be- tween the models. 21-0H PC 26 L, M & H Disassembling/assembling of the cover Position of screws—Torque 2 Nm Pull gently outwards in the black plastic, just over the... - Page 16 Service Models: L, M & H Disassembling/assembling of the cover Position of screws—Torque 2 26 L, M & H Pull gently outward in the black plastic, just over the inlet Lift gently in the cover. 26 L, M & H 16/33 SM AERO vers.
-
Page 17: Air Guide Plate
Service Models: 21-0H Air guide plate Overview and disassembly/assembly of the air guide plate Wire to motor unit Power supply cable Push & Clean extender arm ON/IOFF switch Position for screws Screws for cable relief PCBA Buzzer sound Pressure switch Torque for screws pos. - Page 18 Service Models: 26-2L, 26-2M, 26-2H, 26-W2H Power cable ON/OFF switch Wire to motor unit Push & Clean extender arm Position of screws Screws for cable relief PCBA Plug for air connec- tion. Capacitor—noise reduction Do NOT use this picture as an electrical connection guide.
-
Page 19: Bottom Plate
Service Models: All Bottom plate Overview and disassembly/assembly of the bottom plate Motor unit Push & Clean system Motor unit wires Gaskets Container locks All models Anti-static connection pin Anti-static model 19/33 SM AERO vers. 1 January 2022... -
Page 20: Filter Plate
Service Models: L & M Class filter Filter plate Overview and disassembly/assembly of the filter plate Filter tension Rotate and lift to remove. Filter Deflector plate Hole for airflow Remove filter 20/33 SM AERO vers. 1 January 2022... - Page 21 Service Models: H-Class filter Tool for H-filter Hexagon for toll Tool for filter posi- tioned on filter Deflector plate Filter Hole for airflow Rotate and lift filter ele- ment to remove. Filter gasket Float—same on all models 21/33 SM AERO vers. 1 January 2022...
-
Page 22: Container
Service Models: All Container Overview and disassembly/assembly of the container Castor wheels Pull to remove. Back wheels Squeeze the inner part to remove 22/33 SM AERO vers. 1 January 2022... -
Page 23: Resettable Fuse (Au/Nz)
Service Models: UA & NZ Pos. 1 Resettable fuse Pos. 2 Socket outlet AERO for AU/NZ with resettable fuse An external power tool can be connected to the socket outlet. The socket has a 5 Amp thermal fuse to protect the machine against overload. If the power consumption gets too high the thermal fuse activates and cut off the power on the socket outlet. -
Page 24: Calibration Of Pressure Switch
Service Calibration of Pressure Switch Calibration is needed when a new the PCBA is installed in a machine. First loosen the 2 screws for the handle and remove the handle. Remove the head cover from the machine Terminal ”G” on PCBA Install the air restrictor w/ manometer (pos. - Page 25 Service Calibration of Pressure Switch With the test equipment installed on the machine—start the motor. (Turn start/stop switch to pos. ”I”) Adjust the opening plate (see pic below) on the air restrictor until you reach the specified mBar pressure (read value on manometer) for the machine you are testing. Mbar specifica- tions for various models are listed below.
- Page 26 Service Calibration of Pressure Switch Let the motor run for min. 3 minutes. Check on the manometer after 3 minutes that you still measure the specified Mbar, ad- just the air restrictor if needed. (See calibration specs (mbar) on previous page) Push and hold the calibration switch for 10 sec.
-
Page 27: Tools
Tools Special tools Torx screw driver T25 Torx screw driver T10 Hobby knife or similar Cable cutter for solid cables Manometer setting tool P/N 40434 Air restrictor setting tool P/N 62480 Callibration switch P/N 107416579 27/33 SM AERO vers. 1 January 2022... -
Page 28: Wiring
Wiring Model: AERO 26-2L_230V—106425218 28/33 SM AERO vers. 1 January 2022... -
Page 29: Model: Aero 26-2L_230V Au/Nz
Wiring Model: AERO 26-2L_230V AU/NZ—106425212 29/33 SM AERO vers. 1 January 2022... - Page 30 Wiring Model: AERO 26-2M/H—106425217 30/33 SM AERO vers. 1 January 2022...
-
Page 31: Model: Aero 26-2M/H_120V Us
Wiring Model: AERO 26-2M/H_120V US—106425219 31/33 SM AERO vers. 1 January 2022... -
Page 32: Model: Aero 26-W1 M/H Au/Nz
Wiring Model: AERO 26-W1 M/H AU/NZ—106425215 32/33 SM AERO vers. 1 January 2022... -
Page 33: Model: Aero 0H
Wiring Model: AERO 0H—6425220 33/33 SM AERO vers. 1 January 2022...
Need help?
Do you have a question about the AERO 26-2L PC and is the answer not in the manual?
Questions and answers