Table of Contents

Subscribe to Our Youtube Channel
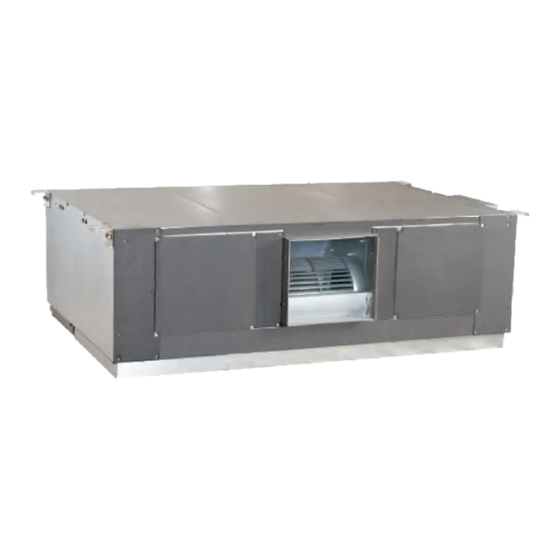
Related Manuals for Fisher FSL-850B-H-3F


Summary of Contents for Fisher FSL-850B-H-3F
- Page 1 Installation and Operation Manual Operation Manual of The Ducted Split Type Air-Conditioning Units FSL-850B-H-3F FSOL-850B-3F Please read this manual carefully before using this product and keep it properly for future reference.
- Page 2 The installation should be carried out by the qualified service technicians. FISHER will not be responsible for the personal injury or property damage resulting from improper installation and adjustment, unnecessary maintenance and those do not follow the instructions in this manual.
-
Page 3: Table Of Contents
CONTENTS 1 SAFETY PRECAUTIONS ....................1 1.1 Safety notice ......................1 1.2 Power supply demand ....................1 2 DISPLAYING PART ......................2 2.1 LCD Display of Wired Controller................2 2.2 Instruction to LCD Display ..................3 3 BUTTONS ..........................4 3.1 Silk Screen of Buttons ....................4 3.2 Instruction to Function of Buttons ................4 4 INSTALLATION OF WIRED CONTROLLER AND PROJECT DEBUGGING .....5 4.1 Installation of Wired Controller ..................5 5 INSTRUCTION TO OPERATION ..................6... - Page 4 9 WEEKLY TIMER FUNCTION ..................23 9.1 7DP - Seven days programmer (Accessory not supplied) ........23 9.2 Install the weekly timer function ................25 10 INSTALLATION INSTRUCTION.................26 10.1 Selection proper installation location ..............26 10.2 Install the indoor unit .....................26 10.3 Install the outdoor unit ...................31 10.4 Electric wiring ......................35 11 TRIAL RUN AND INSTALLATION CHECKING ............37 11.1 Trial run ........................37...
-
Page 5: Safety Precautions
1 SAFETY PRECAUTIONS 1.1 Safety notice Before using the appliance, read this manual thoroughly and operate under its direction. “WARNING” and “ATTENTION” have the following meanings in these instructions: WARNING This mark indicates procedures, which if improperly performed, might lead to the death or serious injury of the users. -
Page 6: Displaying Part
7)The temperature of refrigerant circuit will be high, please keep the interconnection cable away from the copper tube. 2 DISPLAYING PART Fig.2.1 Outline of wired controller 2.1 LCD Display of Wired Controller Fig.2.2 LCD display... -
Page 7: Instruction To Lcd Display
Quiet state(two types: quiet and auto quiet) There is not Master and CO2 functions for E series ducted type unit and A2 ducted type and cassette type units Table 2.1 “*” There is no this function for these units: FSL-850B-H-3F 、FSOL-850B-3F . -
Page 8: Buttons
3 BUTTONS 3.1 Silk Screen of Buttons Fig. 3.1 Silk screen of buttons 3.2 Instruction to Function of Buttons Description Function of Button (1)Function selection and canceling; Enter/cancel (2)Press it for 5s to enquiry the outdoor ambient temperature. (1)Running temperature setting of indoor unit, range :16 ~ 30 ℃ ▲... -
Page 9: Installation Of Wired Controller And Project Debugging
4 INSTALLATION OF WIRED CONTROLLER AND PROJECT DEBUGGING 4.1 Installation of Wired Controller Fig.4.1: Sketch for Installation of Wired Controller Socket’s base Soleplate of Front panel of Screw Description box installed Screw M4X25 controller controller ST2.2X6.5 in the wall Fig.4.1: Sketch for Installation of Wired Controller. Pay attention to the following items during installation of wired controller: 1. -
Page 10: Instruction To Operation
5 INSTRUCTION TO OPERATION 5.1 On/Off Press On/Off button to turn on the unit. Repress this button to turn off the unit. Note: The state shown in Fig.5.1 indicates off state of the unit after energization. The state shown in Fig.5.2 indicates on state of the unit after energization. Fig.5.1 Off state of the unit Fig.5.2 On state of the unit 5.2 Mode Setting... -
Page 11: Fan Speed Setting
Under on/off state of the unit, press Fan button, fan speed of indoor unit will change as below: As shown in Fig.5.4 Fig.5.4 (Indoor unit about FSL-850B-H-3F 、FSOL-850B-3F can only run at high fan speed mode and fan speed can’t be modified by wired controller.) 5.5 Swing Control Function Under on state of unit, press Function button till the unit enters swing control function and then press “Enter/cancel”... -
Page 12: Timer Setting
press Enter/cancel button to cancel swing control function. Swing control function setting is shown in Fig 5.5 There is no this function for this unit. Fig.5.5 5.6 Timer Setting Under on state of the unit, press Timer button to set timer off of the unit. Under off state of the unit, press Timer button to set timer on of the unit in the same way. -
Page 13: Air Exchange Setting
Fig.5.6 Timer setting under on state of the unit Timer range: 0.5-24hr. Every press of▲ or ▼ button will make setting time increased or decreased by 0.5hr.If press either of them continuously, setting time will automatically increase/ decrease by 0.5hr every 0.5s. -
Page 14: Sleep Setting
9――The unit continuously runs for 60min, and fresh air valve runs for 54 min. 10――The unit continuously runs for 60min, and fresh air valve always runs. Turn off air function: During Air function, press Function button into Air function. In this case, air mark is blinking, and then press Enter/cancel button to turn off this function. -
Page 15: Turbo Function Setting
Fig.5.8 Sleep setting Sleep off is default after power failure and then power recovery. There is not sleep function in fan and auto mode. Note: In cooling and dry mode, if the unit with sleep function has run for 1 hour, the preset temperature will be increased by 1 ℃... -
Page 16: Save Function Setting
Fig.5.9 Turbo Function Setting Note: 1. Turbo function will be turned off after power failure and then recovery. In dry, fan and auto mode, turbo function can not be set and turbo mark won’t be displayed. 2. Turbo function will be automatically canceled after setting of quiet function. 5.10 Save Function Setting Energy Saving Function: Energy saving result that the air conditioner runs in smaller temperature range is realized by setting lower limited value of setting temperature in cooing or dry mode and upper... -
Page 17: E-Heater Setting
Fig.5.10 Energy Saving Setting Note : 1.In Auto running mode with save function on, the unit will be forcibly changed to corresponding mode. After setting of save, sleep function will be canceled. 2. In save mode, if Function button is pressed or there is not any operation within 5s after the last button operation, the system will quit from save function setting and current data won’t be memorized. -
Page 18: Blow Function Setting
Fig. 5.11 Auxiliary Electric Heating Function Setting Note: E-heater can not be set in cooling, dry and fan mode, E-heater mark won’t be displayed. The setting is shown in Fig.5.11. There is not E-heater for A2 and cassette unit. 5.12 Blow Function Setting Blow function: After the unit is turned off, water in evaporator of indoor unit will be automatically evaporated to avoid mildew. -
Page 19: Quiet Function Setting
Fig.5.12 Blow function setting Note: 1.After setting dry function, turn off the unit by pressing On/Off button or remote controller, indoor fan will run at low fan speed for 10 min. (BLOW shows).Meanwhile, if dry function is canceled indoor fan will be turned off directly. 2.There is not BLOW function in fan or heating mode. -
Page 20: Debugging Functions
Fig.5.13 Quiet function setting Note: 1. During quiet function, fan speed is un-adjustable. 2. When turning on auto quiet function, the unit will enter quiet running state according to temperature difference between room temperature and setting temperature. In this case, fan speed is adjustable. -
Page 21: Other Functions
location) ③ Return air inlet temperature sensor shall be selected for cooling, dry and fan modes and wired controller temperature sensor (03 is displayed at timer displayed location) shall be selected for heating and auto modes. 5.14.2 Three Grades of Speed for Indoor Fan In debugging mode, press Mode button to adjust the temperature displayed location displaying 01 and press ▲... -
Page 22: Error Display
will also show after plugging in the card. 2. The unit can not be controlled by button operation after plugging out the card. 5.15.4 Enquiry of Outdoor Ambient Temperature Under on or off state of the unit, press Enter/Cancel button for 5s, outdoor ambient temperature will be displayed at temperature displaying area after a sound of click .Pressing any button, this enquiry state will quit. - Page 23 Ambient sensor malfunction on Displayer(or LED board) Auxiliary electric heating malfunction C5** Wire jumper cap malfunction Arc protection Creepage protection “*” There is no this function for these units :FSL-850B-H-3F、FSOL-850B-3F , “**” There is no this function for these units :FSL-850B-H-3F 、FSOL-850B-3F ,...
-
Page 24: Names And Functions Of Remote Control Buttons
7 NAMES AND FUNCTIONS OF REMOTE CONTROL BUTTONS Notes: This remote control is universal .It could be used for many units. Some buttons which are not available in this unit will not be described below. 7.1“ON/OFF” button After powering the unit, when the unit is off state, press the “ON/OFF” button to start the unit. AND when the unit is on state, press the button ,it will be off. -
Page 25: Fan" Button
Press the “FAN” button to set fan speed. The AUTO FAN 、 LOW 、 MID 、 HIGH could be selected. (Indoor unit about FSL-850B-H-3F 、FSOL-850B-3F can only run at high fan speed mode and fan speed can’t be modified by wired controller.) -
Page 26: Temp" Button
under original status. 7.12“Temp” button * There is no this function for this unit. If press this key, the main unit will click, but it also runs under original status. 7.13“HEALTH |SAVE” button * There is no this function for this unit. If press this key, the main unit will click, but it also runs under original status. -
Page 27: Weekly Timer Function
1s.The bell will ring if the main unit receives effect signal. “*” There is no this function for these units :FSL-850B-H-3F 、 FSOL-850B-3F 9 WEEKLY TIMER FUNCTION 9.1 7DP - Seven days programmer (Accessory not supplied) Centralized Control and Week Timer Functions: The centralized controller and the weekly timer are integrated in the same wire controller. - Page 28 Composition of programmer wall week Unit dispaly Clock display Single/group display Confirm button Timer week display Increase button Timer display Decrease button Timer state display Cacel/delete button Timer time period display Singe/group button Timer ON/OFF time display Timer/time button Unit on display ON/OFF button Unit off display Note:...
-
Page 29: Install The Weekly Timer Function
9.2 Install the weekly timer function ◆ A pit or a hole in the suitable position of the wall should be reserved for the connection signal cables. ◆ The connection wire between indoor unit and controller can be laid in the pit with 1# PVC pipe for direct installation (Figure 10.5). -
Page 30: Installation Instruction
10 INSTALLATION INSTRUCTION The installation must accord with local regulation, and must be carried out by the professionals. Never carry out the work by yourself without the help of professionals. And don’t supply power, until all the work is finished according to the user’s manual. 10.1 Selection proper installation location 1) Selection the proper location for indoor unit ◆... - Page 31 Fig. 10.1 Indoor unit installation position and dimension Table 10.1 Outlines and dimension of the unit Unit: mm Model FSL-850B-H-3F 1560 1194 1194 2) Main body of the indoor unit The indoor unit should be installed horizontally and the demand of installation space is shown in Fig. 10.2. To install an indoor unit needs 4 hanging rods, and each hanging rod should at least withstand four times of the unit’s weight.
- Page 32 3) Drain hose For easy drainage of the condensation water, the should be installed with a downward gradient. To avoid the condensation, the connection pipe joint should be insulated with thermal insulation material. A water seal should be employed as shown in Fig. 10.3 and the height of the water seal could be determined by the pressure of the drain hose.
- Page 33 6) Connection of the signal wire ◆ Open the electrical box; ◆ Plug the wire through the PVC pipe; ◆ Plug the wire onto the four-nail sea; ◆ Tighten the wire; ◆ The max length between controller and the PCB board is 20m. 7) Setting of Double Indoor Room Sensors This series of ducted air-conditioning unit has two indoor room sensors.
- Page 34 Fuse Model code Indoor T5AL 250V 46010013 FSL-850B-H-3F Outdoor T3.15AL 250V 46010014 FSOL-850B-3F 10) Adjust the tightness of the belt of the fan unit (Be Suit For 30KW) The rotation of the fan is achieved by the transmission of the belt. The velocity and stability of the fan is associated with the tightness of the belt and the tightness should be adjusted after a period of time.
-
Page 35: Install The Outdoor Unit
10.3 Install the outdoor unit 1) Outline and dimension of the outdoor unit Model A(mm) B(mm) C(mm) FSL-850B-H-3F FSOL-850B-3F 1290 1160... - Page 36 2) Installation position Schematic for the installation of the outdoor unit Schematic for the installation of the outdoor unit...
- Page 37 Crane way schematic When removing the outdoor unit, two ropes are needed to hang the unit along the four ways. In order to avoid the excursion, the angle between the ropes should be less than 40 degree. Please use M12 to tight the support fundus. 3) Refrigerant pipe connection Note:Do not loosen the cap of the pipes when connecting the pipes between the indoor unit and the outdoor unit.
- Page 38 Size of Fitting Pipe Max. Height Additional (mm) Difference Refrigerant to be Max. Pipe between Model Filled (For Extra Length (m) Indoor Unit Length of Pipe) Liquid and Outdoor Gas Pipe (Standard Pipe Pipe Unit(m) Length 7.5m) FSL-850B-H-3F 110g/m FSOL-850B-3F...
-
Page 39: Electric Wiring
10.3 Table.10.3 Power cord standard and air switch recommending table Air Switch Earthing Permit Min section Model Power Supply section(mm2) (mm2) FSL-850B-H-3F 380-415V 3N~ 50Hz H05VV-F5G1.5 H05VV-F5G1.5 FSOL-850B-3F 380-415V 3N~ 50Hz H05RN-F5G10.0 H05RN-F5G10.0... - Page 40 FSL-850B-H-3F FSOL-850B-3F Fig.10.11 wiring schematic of the outdoor unit and indoor unit * The power cord must be copper inside, while the working temp. can not be over its standard one. * If the total length of the power cord is over 15m, please increase the size by certain degree.
-
Page 41: Trial Run And Installation Checking
1. Connect the power supply or change 2.The electricity leakage switch two random phase Ducted air is switching off for the leakage of 2. Contact the service center of FISHER conditioning unit electricity from the air conditioner 3. Contact the dealer can not start-up units 4. -
Page 42: Care And Maintenance
7. Change room sensor 7. Poor performance of room sensor Note: Check the previous items, please contact the nearest service center of FISHER and depict the air conditioner model and its symptom if the problem cannot be solved. 12 CARE AND MAINTENANCE To ptimize the life of the air-conditioning unit, check and maintain the unit regularly with specialized person. -
Page 43: Appendix
Attention: When you perform leakage test, please do not charge oxygen or acetylene into the system, use nitrogen gas or the refrigerant instead. Service If there is any problem with FISHER ducted air-conditioning units, please contact the local service center or FISHER . - Page 44 DISPOSAL : Do not dispose this product as unsorted municipal waste. Collection of such waste separately for special treatment is necessary. 66129906994...
Need help?
Do you have a question about the FSL-850B-H-3F and is the answer not in the manual?
Questions and answers