Table of Contents
Advertisement
Quick Links
Advertisement
Table of Contents

Subscribe to Our Youtube Channel
Related Manuals for LEGRAND Middle Atlantic Nexsys


Summary of Contents for LEGRAND Middle Atlantic Nexsys
- Page 1 Compact PDU User Manual 100-00061 Rev A...
- Page 2 All other brand names or marks are used for identification purposes and are trademarks of their respective owners. All patents are protected under existing designations. Other patents pending. Legrand AV Inc. Brands: Chief | Da-Lite | Middle Atlantic Products | Projecta | Sanus | Vaddio ©2023 | Legrand AV, Inc.
-
Page 3: Table Of Contents
Specifications for MOV Surge Models Summary Hardware Features Physical (Two Outlet Models) Physical (Six Outlet Models) Specifications for Series Surge Protection Models Summary Hardware Features Physical (Two Outlet Models) Physical (Six Outlet Models) Warranty ©2023 | Legrand AV, Inc. All rights reserved. -
Page 4: Important Safety Instructions
The wide blade or the third prong is provided for your safety. If the provided plug does not fit into your outlet, consult an electrician for replacement of the obsolete outlet. ©2023 | Legrand AV, Inc. All rights reserved. - Page 5 (e.g. use of power strips). Disconnect Device (Pluggable Equipment): The socket-outlet shall be installed near the equipment and shall be easily accessible. When using electrical products, basic precautions should always be followed, including the following: ©2023 | Legrand AV, Inc. All rights reserved.
-
Page 6: Instructions De Sécurité Importantes
Une remarque est utilisée pour mettre en évidence les procédures REMARQUE relatives à l'installation, au fonctionnement ou à l'entretien du produit. CONSERVEZ Ce manuel contient des instructions importantes à suivre lors de l’installation et de la maintenance du produit. INSTRUCTIONS ©2023 | Legrand AV, Inc. All rights reserved. - Page 7 à un électricien pour remplacer la prise obsolète. L'appareil ne doit pas être exposé à des éclaboussures et aucun AVERTISSEMENT objet rempli de liquide, comme des vases, ne doit être placé sur l'appareil. ©2023 | Legrand AV, Inc. All rights reserved.
- Page 8 (Tma) spécifiée par le constructeur. Réduction Air accréditives: Installation de l'équipement dans un rack doit être telle que la quantité de flux d'air nécessaire au bon fonctionnement de l'équipement ne soit pas compromise. viii ©2023 | Legrand AV, Inc. All rights reserved.
-
Page 9: Regulatory Compliance
Regulatory Compliance Federal Communications Commission (FCC) Statement Any changes or modifications not expressly approved by the party CAUTION responsible for compliance could void the user's authority to operate the equipment. ©2023 | Legrand AV, Inc. All rights reserved. -
Page 10: Conformité Réglementaire
Consult the dealer or an experienced radio/TV technician for help. Conformité Réglementaire Déclaration de conformité de la Federal Communications Commission (FCC) Les changements ou modifications non expressément approuvés par le ATTENTION fabricant peuvent annuler le droit de l'utilisateur à utiliser l'équipement. ©2023 | Legrand AV, Inc. All rights reserved. -
Page 11: Industry Canada (Ic)
ICES-003 Class B Notice. This Class B digital apparatus complies with Canadian ICES-003. Industrie Canada (IC) ICES-003 Avis NMB-003, Classe B. Cet appareil numérique de la classe B est conforme à la norme NMB-003 du Canada. ©2023 | Legrand AV, Inc. All rights reserved. -
Page 12: Waste Electrical And Electronic Equipment (Weee) Directive
à une utilisation efficace des ressources naturelles. Pour plus d'informations sur les lieux de recyclage de vos équipements usagés, veuillez contacter votre mairie ou votre service de collecte des ordures ménagères. ©2023 | Legrand AV, Inc. All rights reserved. -
Page 13: Supplied Components And Hardware
After carefully opening all product packaging, identify the supplied components and hardware shown. If any pieces are missing or damaged, please report it immediately to Technical Support at av.middleatlantic.techsupport@legrand.com or (866) 977-3901. Keep the original packaging in a safe place for future use. -
Page 14: Required Tools
NEXSYS Series Compact PDU User Manual Required Tools Required Tools #2 Phillips Screwdriver WARNING Use tools with caution and follow all safety protocols. Utiliser des outils avec prudence et suivre tous les protocoles de AVERTISSEMENT sécurité. ©2023 | Legrand AV, Inc. All rights reserved. -
Page 15: Introduction
Installation is shown using a 2 outlet Compact PDU unit into the slot on a BGR enclosure's rackrail bracket. The installation is similar for attaching 6 outlet Compact PDU units into slot openings on rackrail brackets in other compatible enclosure models. ©2023 | Legrand AV, Inc. All rights reserved. - Page 16 3. Use a #2 Phillips screwdriver and tighten the (2x) mounting clip screws (A) until the clip (B) is securely fixed in your desired position along the rackrail bracket. ©2023 | Legrand AV, Inc. All rights reserved.
- Page 17 De par sa conception, le clip sécurise votre PDU avec une force ATTENTION considérable et retirer l’unité du clip peut finir par rayer un peu de peinture sur la surface du produit. ©2023 | Legrand AV, Inc. All rights reserved.
- Page 18 6. Use the power cord (F) to connect your Compact PDU from the AC input into an outlet on an appropriately rated receptacle. ©2023 | Legrand AV, Inc. All rights reserved.
-
Page 19: Mounting Your Compact Pdu On 10" Lever Lock Plates
2. Use screwdriver, (4x) Lever Lock mounting screws (J) though the mounting brackets (H) on your Compact PDU unit (D), through holes on your 10" Lever Lock plate and into (4x) flange nuts (K) as shown. ©2023 | Legrand AV, Inc. All rights reserved. - Page 20 An isolated 10" Lever Lock plate shown with a Compact PDU unit NOTE for clarity. 3. If you removed your 10" Lever Lock plate to mount your PDX unit, refer to the instructions provided with your plate and re-install it now. ©2023 | Legrand AV, Inc. All rights reserved.
-
Page 21: Removing Your Compact Pdu From The Mounting Clip (If Applicable)
De par sa conception, le clip sécurise votre PDU avec une force ATTENTION considérable et retirer l’unité du clip peut finir par rayer un peu de peinture sur la surface du produit. ©2023 | Legrand AV, Inc. All rights reserved. - Page 22 1. Use a flat head screwdriver and wedge the tip between the side of the mounting clip and against your PDU. 2. Carefully pry the clip away from your PDU while removing the unit. ©2023 | Legrand AV, Inc. All rights reserved.
-
Page 23: Feature Set
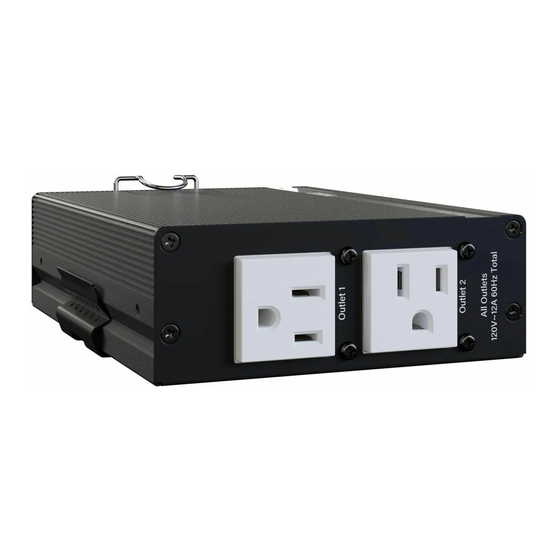
Surge and Voltage indicators signal the different PDU protection statuses. For more information, see LED Protection Indicators, on page B. Input Circuit Breaker Located next to the AC input, the input circuit breaker trips when the load exceeds the PDU power rating. ©2023 | Legrand AV, Inc. All rights reserved. - Page 24 When contact is opened, voltage protection is enabled. When contact is closed, voltage protection is disabled. H. External Grounding and Bonding Stud For connecting an external ground wire to bond the chassis. J. Outlets Surge protected outlets. ©2023 | Legrand AV, Inc. All rights reserved.
-
Page 25: Led Protection Indicators
LED Protection Indicators Surge Protection LED State Description Protected. Normal state. First stage failed. Not protected. Voltage Protection LED State Description Voltage protection enabled. Under voltage. Over voltage. Voltage protection is off. ©2023 | Legrand AV, Inc. All rights reserved. -
Page 26: Specifications
Input Power Cord 2’ (0.60M) 2’ (0.60M) 2’ (0.60M) 2’ (0.60M) Certifications UL 62368, UL 1449, FCC Class B, ICES 7 Hardware Features Model PDX-215C, PDX-220C, PDX-615C, and PDX-620C Surge Protection Multi-Stage MOV ©2023 | Legrand AV, Inc. All rights reserved. -
Page 27: Physical (Two Outlet Models)
PDX-215C PDX-220C Dimensions 4.65” (118mm) x 1.735” (44mm) x 6.5” (165mm) (Width x Height x Depth) Product Weight 2.21 lb. (1 kg) Shipping Weight 3.53 lb. (1.6 kg) 3.75 lb. (1.7 kg) ©2023 | Legrand AV, Inc. All rights reserved. -
Page 28: Physical (Six Outlet Models)
Power Distribution www.legrandav.com/policies/warranty_information. Specifications for Series Surge Protection Models Summary Model PDX-215C-SP PDX-220C-SP PDX-615C-SP PDX-620C-SP Nominal Voltage 120VAC Voltage Range Minimum: 80VAC, Maximum: 140VAC Frequency 60 Hz Maximum Peak Load Rated Load ©2023 | Legrand AV, Inc. All rights reserved. -
Page 29: Hardware Features
6000 Volts (1.2 x 50µS Pulse, Industry Standard Combination Wave Per Surge Voltage IEEE C62.41) Maximum Applied Unlimited (Due to Inherent Current Limiting) Surge Current Maximum Applied Unlimited (Due to Inherent Current Limiting) Surge Energy EMI Filter, Differential 40dB@100kHz 50dB@100kHz Mode ©2023 | Legrand AV, Inc. All rights reserved. -
Page 30: Physical (Two Outlet Models)
PDX-615C-SP PDX-620C-SP Dimensions 8.15” (207mm) x 1.735” (44mm) x 7” (178mm) (Width x Height x Depth) Product Weight 4.19 lb. (1.9 kg) Shipping Weight 6.62 lb. (3 kg) 6.84 lb. (3.1 kg) ©2023 | Legrand AV, Inc. All rights reserved. - Page 31 NEXSYS Series Compact PDU User Manual Specifications Warranty Model PDX-215C-SP, PDX-220C-SP, PDX-615C-SP, and PDX-620C-SP Twelve Years Limited Series Surge Module For warranty information, refer to www.legrandav.com/policies/warranty_information. ©2023 | Legrand AV, Inc. All rights reserved.
-
Page 32: Warranty
Legrand | AV Headquarters 6436 City West Parkway Eden Prairie, MN, 55344, USA At Legrand AV Inc. we are always listening. Your comments are welcome. Legrand AV is an ISO 9001 and ISO 14001 Registered Company. ©2023 | Legrand AV,...
Need help?
Do you have a question about the Middle Atlantic Nexsys and is the answer not in the manual?
Questions and answers