Advertisement
Quick Links
Advertisement

Related Manuals for iHome iHRV7


Summary of Contents for iHome iHRV7
- Page 1 Owner’s Guide Model iHRV7...
- Page 2 C O N T E N T S Check out our helpful setup videos Safety Instructions..........1 Product Overview..........2-7 For support content and the latest digital version of this manual scan Setting Up............8-9 the QR code below or visit ihomeclean.com How to Use............10-13 Maintenance............14-18 Troubleshooting..........19-20 FCC Info..............21...
- Page 3 S A F E T Y I N S T R U C T I O N S Before using this product, please read the following safety instructions and follow all safety precautions. Any operation inconsistent with this instruction manual may cause damage to this product. Warnings: •...
- Page 4 I N T H E B O X Description Quantity iHome Autovac Halo iHome Auto Empty Base Power Cable 2-in-1 Dustbin/Mop Tank Powermop attachment Remote Control Dust Bag User Manual Mop Pad HEPA Filter Side Brush Brush Cleaning Tool...
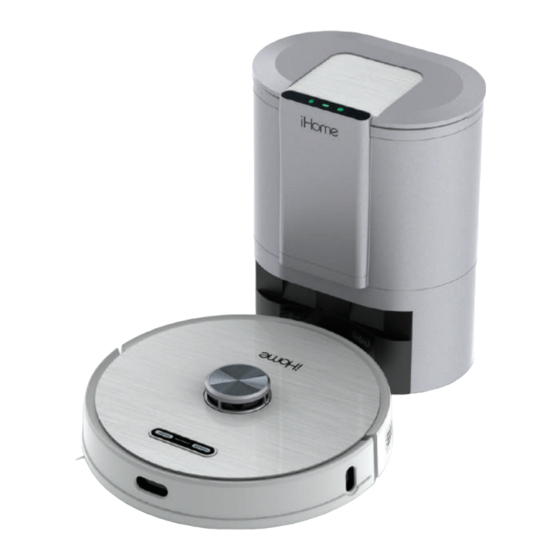
- Page 5 P R O D U C T O V E R V I E W BOTTOM Laser module Omnidirectional wheel Side brush FRONT Cliff detect sensor POWER button/ Left wheel HOME button Infrared sensors Rolling-brush Right wheel 2-in-1 Dustbin/Mop tank REAR Charging contacts Bin release button...
- Page 6 D U S T B I N O V E R V I E W Dust bin latch Water fill cap Bin release button Dust collection port Filter mesh bracket Mop pad Primary Filter Filter Mesh HEPA Filter Charging contacts Mop attachment Dust collection port...
- Page 7 A U T O E M P T Y B A S E O V E R V I E W TOP/FRONT BOTTOM/REAR Dust collection duct cover Cover LED display panel Air outlet Power interface Charging contact points Dust collector port NOTE: One dustbag already pre-installed in Dust bag handle...
- Page 8 A U T O V A C L E D I N D I C A T O R S POWER Button • Hold to turn on/off • Press to start/pause cleaning HOME Button • Press to return to Auto Empty Base for recharging LED Indicator/Network Configuration •...
- Page 9 A U T O E M P T Y B A S E L E D I N D I C A T O R S Status Indicator •Solid green light: Collecting dust • Flashing red light: Fan overheating/fan error/cover not closed Power Indicator •...
- Page 10 About your Auto Empty Base The Auto Empty Base is designed to automatically empty and charge the iHome Autovac Halo. Plug the power cable into the back panel of the Base and plug the other end in a functioning wall outlet. Place on a flat, hard surface at least 2.5 inches away from the wall. Ensure that there is a clear space in front and both sides so that your Autovac Halo can return to Base to re-charge and empty.
- Page 11 HOME hold the POWER button until the indicator turns blue. You will hear a welcome message. NOTE: Voice prompt volume can be adjusted later in the iHome Clean App or muted using the remote control. Step 2 Press the HOME button to pair Halo to your Auto Empty Base. Halo will navigate and dock to the base.
- Page 12 1: Download the iHome Clean App The iHome Autovac Halo is designed to automatically and Search “iHome Clean” in the App Store or use the QR code below: intelligently clean your home. Halo uses advanced laser scanning technology and multiple sensors to form a navigational map so that Halo can avoid obstructions and cliffs.
- Page 13 Go to Wi-Fi settings on your device and select “Autovac Halo” Open the iHome Clean App, select “Add device” and select Halo Re-open the iHome Clean App & wait for the connection to complete Press & hold POWER & HOME simultaneously for 5 seconds to enter network config mode...
- Page 14 First Cleaning and Home Mapping After the first Auto-clean cycle Halo will create a virtual map of your home, viewable in the iHome Clean app. Using that map you can define Areas and set Virtual Boundaries. Those Areas and Boundaries can then be used in any of your cleaning cycles and schedules (eg avoid the “Baby Room”...
- Page 15 U S I N G T H E R E M O T E C O N T R O L NOTE: Home Button 1: It is recommended to point the remote to the front of the Halo for best results. Manual Navigation 2: The remote control range is 10-20 feet.
- Page 16 figure below. NOTES • To avoid carpet while mopping, set up virtual boundaries within the iHome Clean App • To avoid leakage, install the mop attachment onto the dustbin before filling with water •...
- Page 17 Your Halo is designed to be used regularly. As with most floor care devices, regular use may cause build-up around brushes, in debris compartments and near filters. We recommend performing regular maintenance, as outlined in the following pages, to keep your iHome Autovac Halo running at optimal performance.
- Page 18 M A I N T A I N I N G T H E D U S T B I N / W A T E R T A N K Press the dust bin release button and remove the dust bin. Open the dust bin and empty contents.
- Page 19 S I D E B R U S H M A I N T E N A N C E Use a Philips screwdriver to unscrew the side brush screw and remove the side brush. Remove dirt and debris and reinstall using Philips screwdriver. NOTE: It is recommended to replace the side brush every 3-6 months depending on use.
- Page 20 A U T O E M P T Y B A S E M A I N T E N A N C E Auto Empty Base Dust Bag The Auto Empty Base will indicate when the dust bag is full on the smart LED display panel (Dust bag indicator will be green). Discard of dust bag once full and replace dust bag with a new one.
- Page 21 A U T O V A C H A L O T R O U B L E S H O O T PROBLEM SOLUTION Unable to power on Please charge before use. This is commonly caused due to low battery. Unable to start cleaning Please charge before use.
- Page 22 A U T O E M P T Y B A S E T R O U B L E S H O O T INDICATOR DEFINITION SOLUTION • Fan error 1. Frequent dust collection leads to fan overheating protection or fan •...
- Page 23 F C C S T A T E M E N T This device complies with Part 15 of the FCC Rules. Operation is subject to the following two conditions: (1) This device may not cause harmful interference, and (2) This device must accept any interference received, including interference that may cause undesired operation.
Need help?
Do you have a question about the iHRV7 and is the answer not in the manual?
Questions and answers