
Subscribe to Our Youtube Channel
Related Manuals for iHome AUTO VAC ECLIPSE PRO


Summary of Contents for iHome AUTO VAC ECLIPSE PRO
- Page 1 A U T O V A C E C L I P S E P R O For support content and the latest digital copy of this manual, scan the QR code above or visit iHomeclean.com Owner’s Guide Model iHRV11Y...
-
Page 2: Table Of Contents
AUTOVAC Indicators Auto Base Indicators 8 - 10 Setting Up The Auto Empty Base Setting Up The AUTOVAC Using the iHome Clean App Using Your AUTOVAC Using The Remote Main Brush Maintenance Maintaining the Dustbin and Filters Side Brush and Sensor Maintenance... -
Page 3: Safety
SAFETY Before using this product, please read the following safety instructions and follow all safety precautions. Any operation inconsistent with this instruction manual may cause damage to this product. WARNING – To reduce the risk of fire, electric shock, or injury: •... -
Page 4: In The Box
IN THE BOX 1 : Auto Empty Base 4: Power Cable 7: Cleaning Tool 2: Autovac Eclipse Pro 5: Remote 8 : Extra Side Brush 3: Extra Dust Bag 6: Extra HEPA Filter 9: Parking Plate Questions? Contact Customer Service Web/Email: iHomeclean.com Phone: 877-370-4580... -
Page 5: Product Overview
PRODUCT OVERVIEW FRONT BOTTOM BACK 1 : WiFi Indicator 4: Infrared Sensors 7: Detection Sensors 10: Main Brush 13: Bin Release Button 2: Home Button 5: Omnidirectional Wheel 8: Right Wheel 1 1 : Dustbin 14: Dust Collection Port 3: Power Button 6: Side Brush 9: Left Wheel 12: Charging Contacts... -
Page 6: Dustbin Overview
DUSTBIN OVERVIEW 1: Filter Door Latch 3: Dust Collection Port 5: HEPA Filter 2: Bin Release Button 4: Screen Filter 6: Charging Contacts... -
Page 7: Auto Empty Base Overview
AUTO EMPTY BASE OVERVIEW NOTE: One dustbag is already pre-installed in the Auto Empty Base. Dustbag may appear to be “deflated”. This is normal. The Dustbag handle must be fully lowered as shown in order for debris to enter properly. 1 : Cover 4: LED Display Panel 7: Dust Bag... -
Page 8: Autovac Indicators
AUTOVAC INDICATORS POWER BUTTON POWER/HOME LED STATES • Hold to turn on/off. • Flashing blue light: Powering on/configuring network/upgrading firmware. • • Press to start/pause cleaning. Solid blue light: Powered on/normal working state. • Flashing yellow light: Low battery/recharging. • Flashing green light: Charging. -
Page 9: Auto Base Indicators
AUTO BASE INDICATORS DUST BAG STATUS • Light off: Functioning Normally. • Solid white light: Dust bag is full/dust duct is blocked. • Flashing red light: Dust bag is not installed/dust bag is not installed correctly. ROBOT CHARGING STATUS • Flashing green light: Charging •... - Page 10 SETTING UP YOUR AUTOVAC The following pages outline the complete setup process. For your convenience we created a step-by-step video to help guide you through setup. Please scan the QR code to access the video and other support content.
-
Page 11: Setting Up The Auto Empty Base
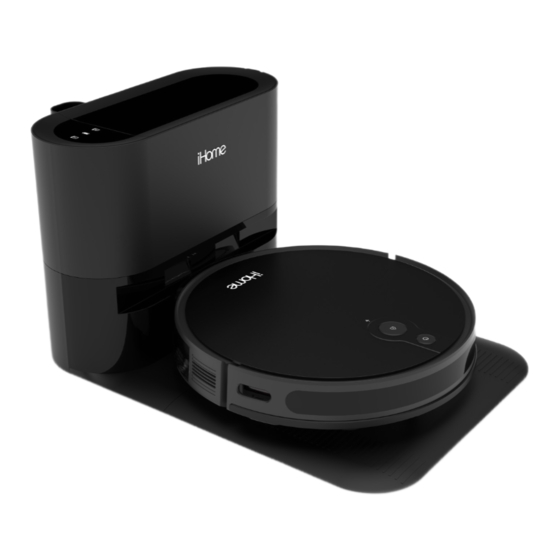
SETTING UP THE AUTO EMPTY BASE ABOUT YOUR AUTO EMPTY BASE The Auto Empty Base is designed to automatically empty and charge the iHome AUTOVAC. Ensure that there is a clear space in front and both sides so that your AUTOVAC can return to Base to re-charge and empty. - Page 12 SETTING UP THE AUTO EMPTY BASE Plug the power cable into the back panel of the Auto Empty base. Wind extra cable Conveniently store parts and remote control as shown. slack around the cord management system. 1: Remote. 2: Extra HEPA Filter 3: Cleaning Tool. 4: Extra Side Brush.
-
Page 13: Setting Up The Autovac
Allow Eclipse Pro to fully charge (up to 5 hours) before first use. The indicators on your robot will turn solid green when fully charged. NOTE: Dust collection may activate during initial docking. Do not be alarmed. Dust collection frequency can be adjusted later in the iHome Clean App. -
Page 14: Using The Ihome Clean App
Eclipse to Wi-Fi . The app will let you manage Eclipse from anywhere, set cleaning schedules, view cleaning history, access support and more! The iHome Clean app provides an easy step by step guide to get your Eclipse Pro connected to Wi-Fi. Here is a checklist of what you’ll need before getting started: •... -
Page 15: Using Your Autovac
Auto Empty Base to empty the dustbin and re-charge Manual Control - Using the navigational D-Pad on the remote control (or in the iHome Clean App) you can manually control where the Eclipse Pro goes to clean. -
Page 16: Using The Remote
USING THE REMOTE Home Button (return to charge) Manual Navigation Directional Keys Start/Pause Button (Starts an Auto Clean Cycle OR pause/resume an existing cleaning cycle) Mute Robot Audio Notifications Spot Clean Hyperdrive 10 - 20 FT Suction Power Adjustment NOTE: 1: It is recommended to point the remote to the front of the Eclipse Pro for best results. -
Page 17: Main Brush Maintenance
MAIN BRUSH MAINTENANCE Your Eclipse Pro is designed to be used regularly. As with most floor care devices, regular use may cause build-up around brushes, in debris compartments and near filters. We recommend performing regular maintenance, as outlined in the following pages, to keep your Autovac Eclipse Pro running at optimal performance. -
Page 18: Maintaining The Dustbin And Filters
MAINTAINING THE DUSTBIN AND FILTERS Press the dustbin release button and remove the dustbin. Clean the inside of the dustbin thoroughly with a dry cloth. Remove the primary filter and HEPA filter, wipe down the surface with a dry cloth or use the cleaning tool. Rinse the primary filter with water and let dry completely before using. -
Page 19: Side Brush And Sensor Maintenance
SIDE BRUSH AND SENSOR MAINTENANCE 1: Use a Philips screwdriver to unscrew the side brush screw and remove the side brush. 2: Remove dirt and debris and reinstall using Philips screwdriver. NOTE: It is recommended to replace the side brush every 6-12 months depending on use. Questions? Contact Customer Service Web/Email: iHomeclean.com Phone: 877-370-4580... -
Page 20: Auto Empty Base Maintenance
AUTO EMPTY BASE MAINTENANCE AUTO EMPTY BASE DUST BAG The Auto Empty Base will indicate when the dust bag is full on the smart LED display panel (Dust bag indicator will be white). Discard dust bag once full and replace dust bag with a new one. Full dust bag NOTE: Extend the dust bag handle to seal the debris hole. -
Page 21: Autovac Eclipse Pro Troubleshoot
AUTOVAC ECLIPSE PRO TROUBLESHOOT PROBLEM SOLUTION Unable to power on Please charge before use. This is commonly caused due to low battery. Unable to start cleaning Please charge before use. This is commonly caused due to low battery. Unable to return to Auto Empty Base •... -
Page 22: Auto Empty Base Troubleshoot
AUTO EMPTY BASE TROUBLESHOOT INDICATOR DEFINITION SOLUTION • Fan error 1. Frequent dust collection leads to fan overheating protection or fan • Overheating malfunction. It is recommended to try to collect dust after 30 minutes; • The cover is not closed properly 2.
Need help?
Do you have a question about the AUTO VAC ECLIPSE PRO and is the answer not in the manual?
Questions and answers